
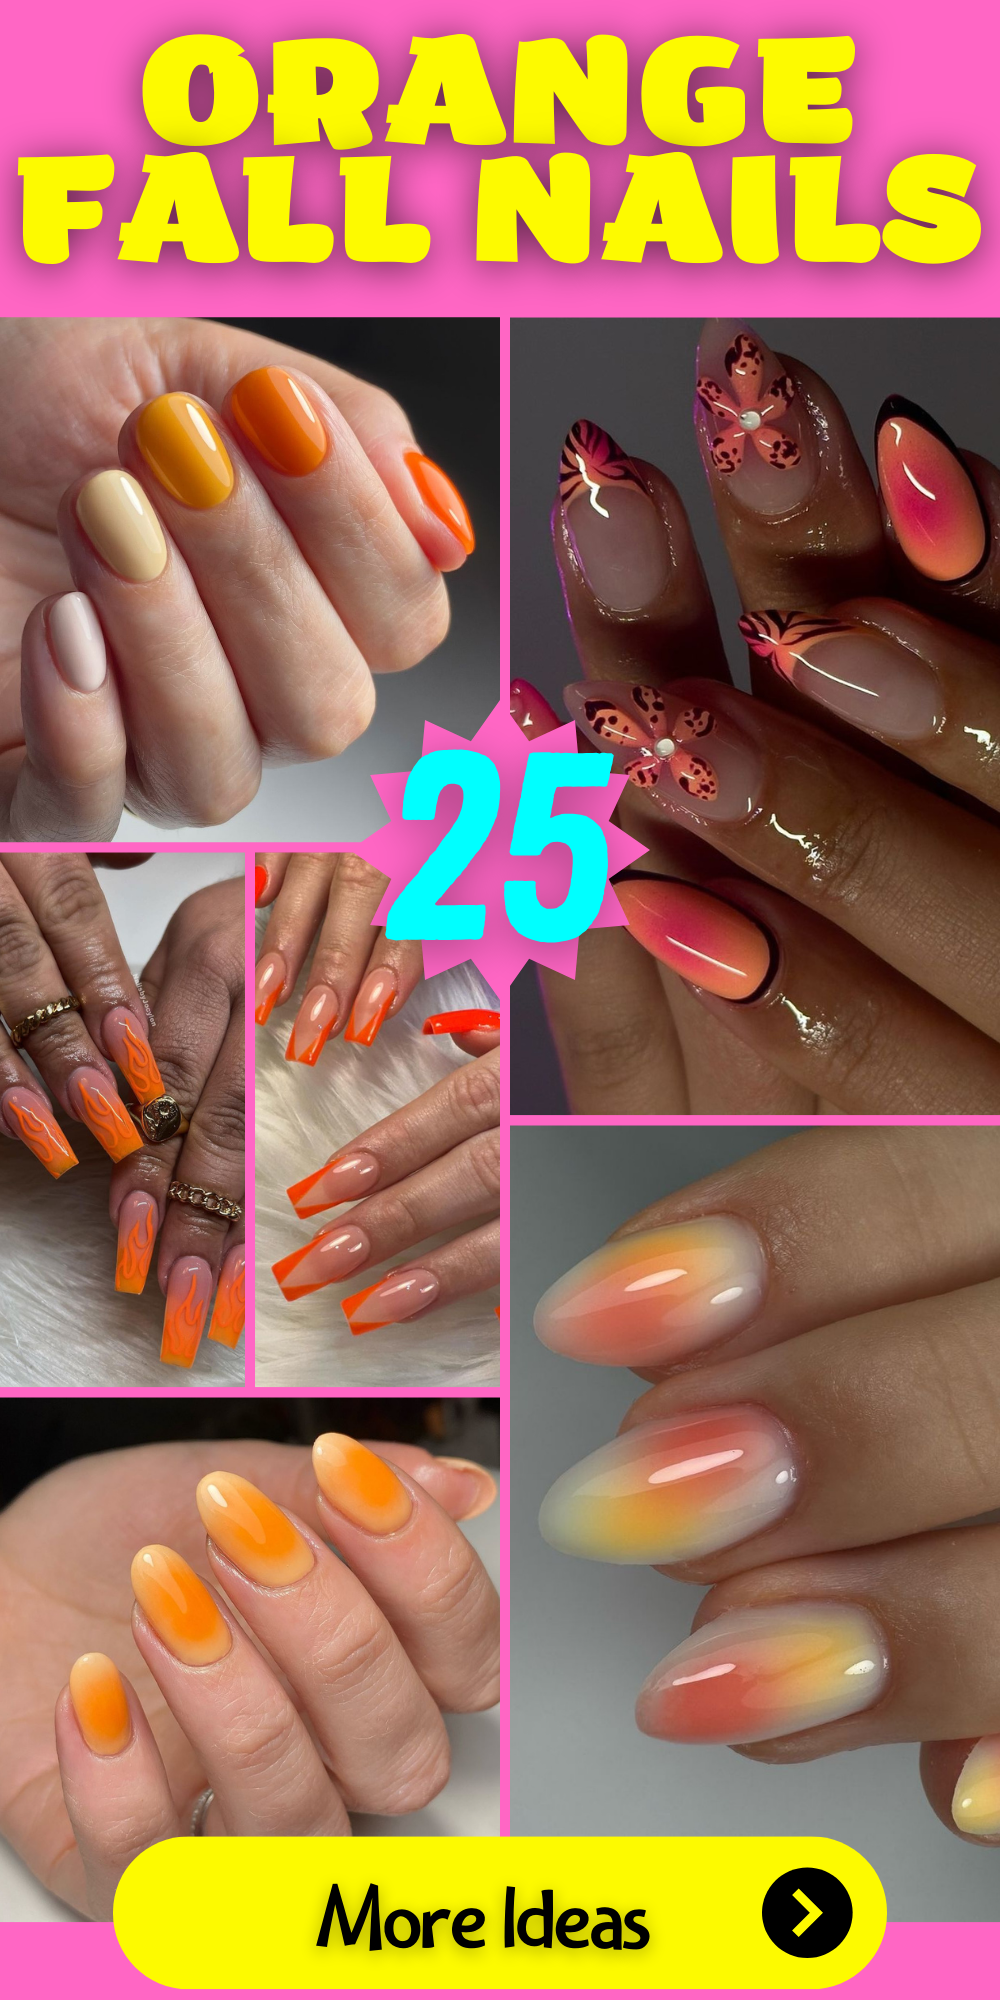
Fall is here, and it’s the perfect time to experiment with bold and vibrant nail designs. Orange, with its warm and festive hues, is a standout choice for the season. Whether you’re a fan of classic shades or looking to try something new, we’ve got you covered. In this article, we’ll explore stunning orange fall nails designs that will have you ready to embrace the autumn spirit. From glitter accents to gel short almond shapes, get ready for a nail transformation!
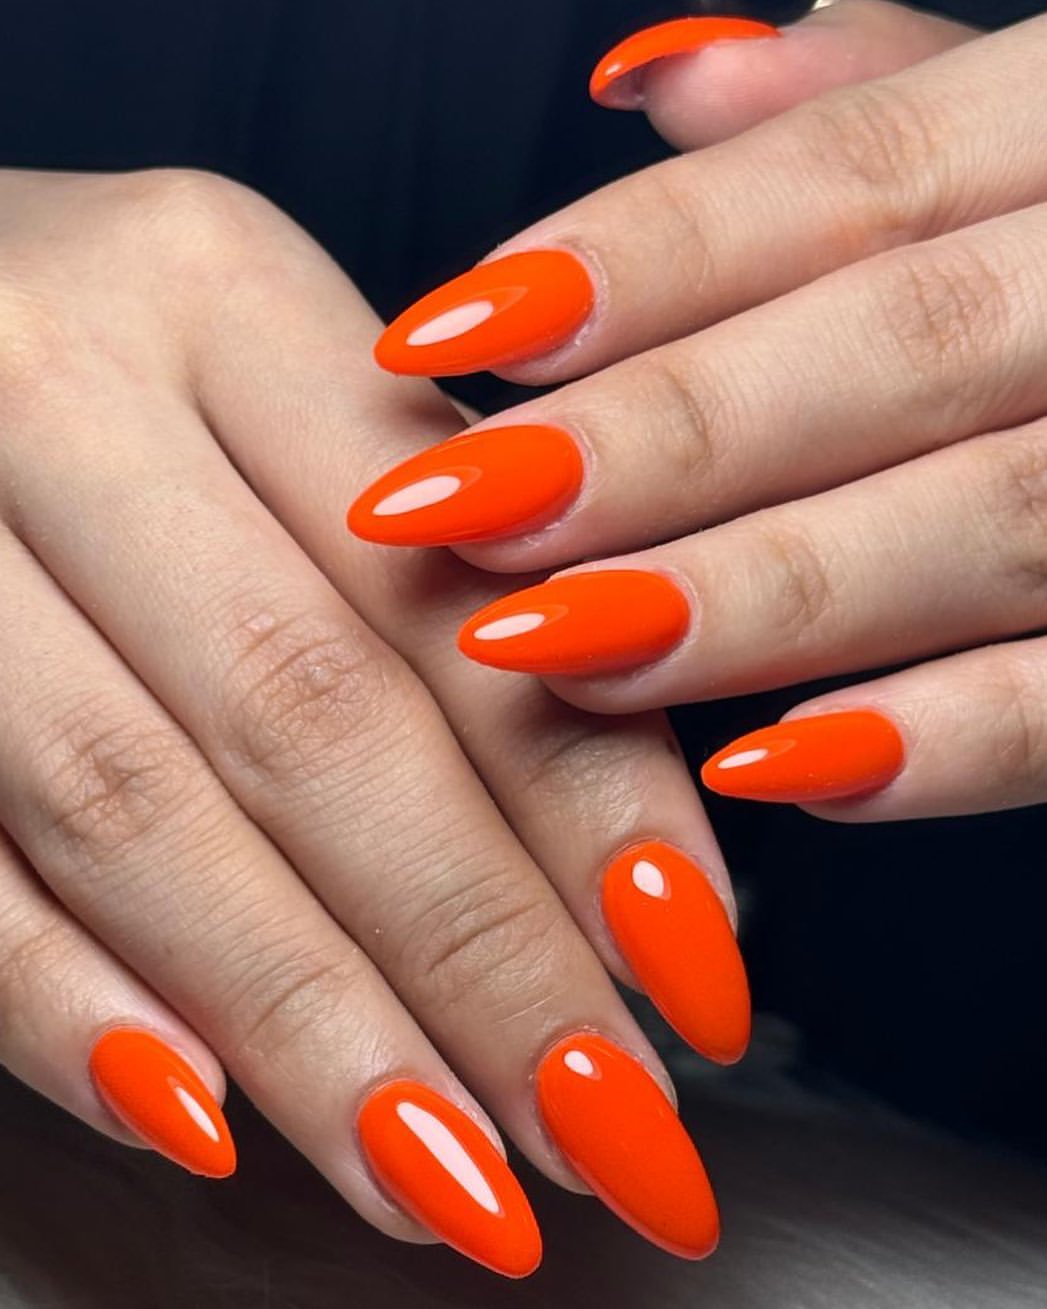
Vibrant Stiletto Orange Nails
Orange stiletto nails are the epitome of boldness and elegance. The sharp, pointed tips create a fierce look that’s perfect for making a statement. This design uses a bright, neon orange that catches the light beautifully, giving your nails a stunning glow. The high-gloss finish enhances the vibrant color, making it even more eye-catching.
-
- Neon orange nail polish (Brand: Essie “Tangerine Tease”)
- Gel polish top coat (Brand: OPI GelColor)
- Stiletto nail tips (Brand: Kiara Sky)
- UV/LED lamp (Brand: SUNUV)
Steps to Create at Home:
-
- Start by applying the stiletto nail tips using a strong nail glue.
- Apply a base coat and cure under the UV/LED lamp.
- Apply two coats of neon orange polish, curing each layer.
- Finish with a gel top coat and cure for a high-gloss finish.
- Cleanse the nails with an alcohol wipe to remove any tacky residue.
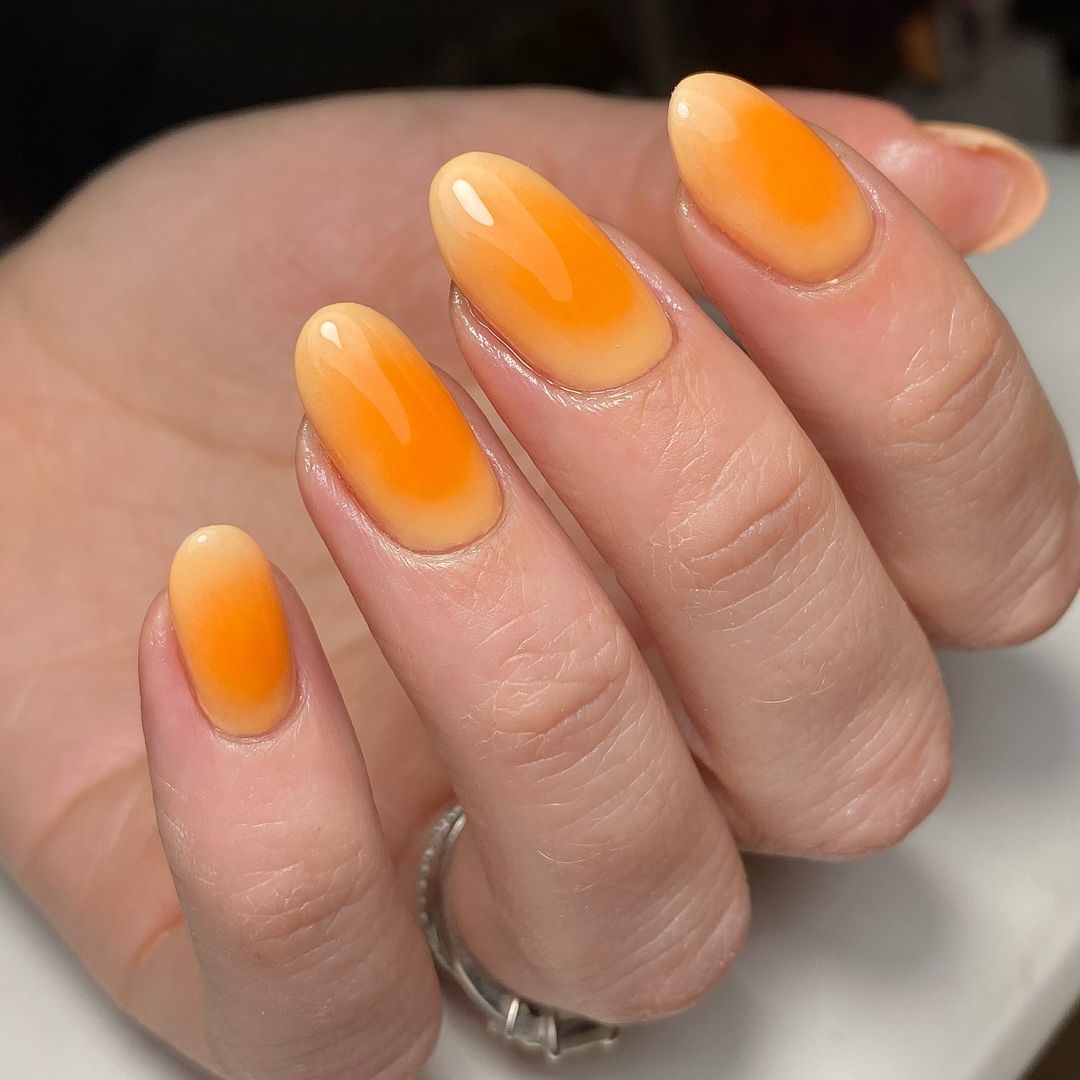
Subtle Gradient Orange Almond Nails
For a more subdued yet elegant look, these gradient orange almond nails are perfect. The gradient effect transitions from a soft peach at the base to a richer burnt orange at the tips, creating a sophisticated ombre look. The almond shape adds a touch of femininity and grace, making these nails suitable for both casual and formal occasions.
-
- Peach nail polish (Brand: Zoya “Persephone”)
- Burnt orange nail polish (Brand: China Glaze “Life Preserved”)
- Gel polish top coat (Brand: Gelish)
- Gradient sponge (Brand: Beauty Secrets)
Steps to Create at Home:
-
- Apply a base coat and cure under a UV/LED lamp.
- Paint the nails with the peach polish and cure.
- Use a gradient sponge to dab burnt orange polish onto the tips, blending it upwards.
- Cure the gradient layer under the UV/LED lamp.
- Apply a gel top coat and cure for a smooth finish.
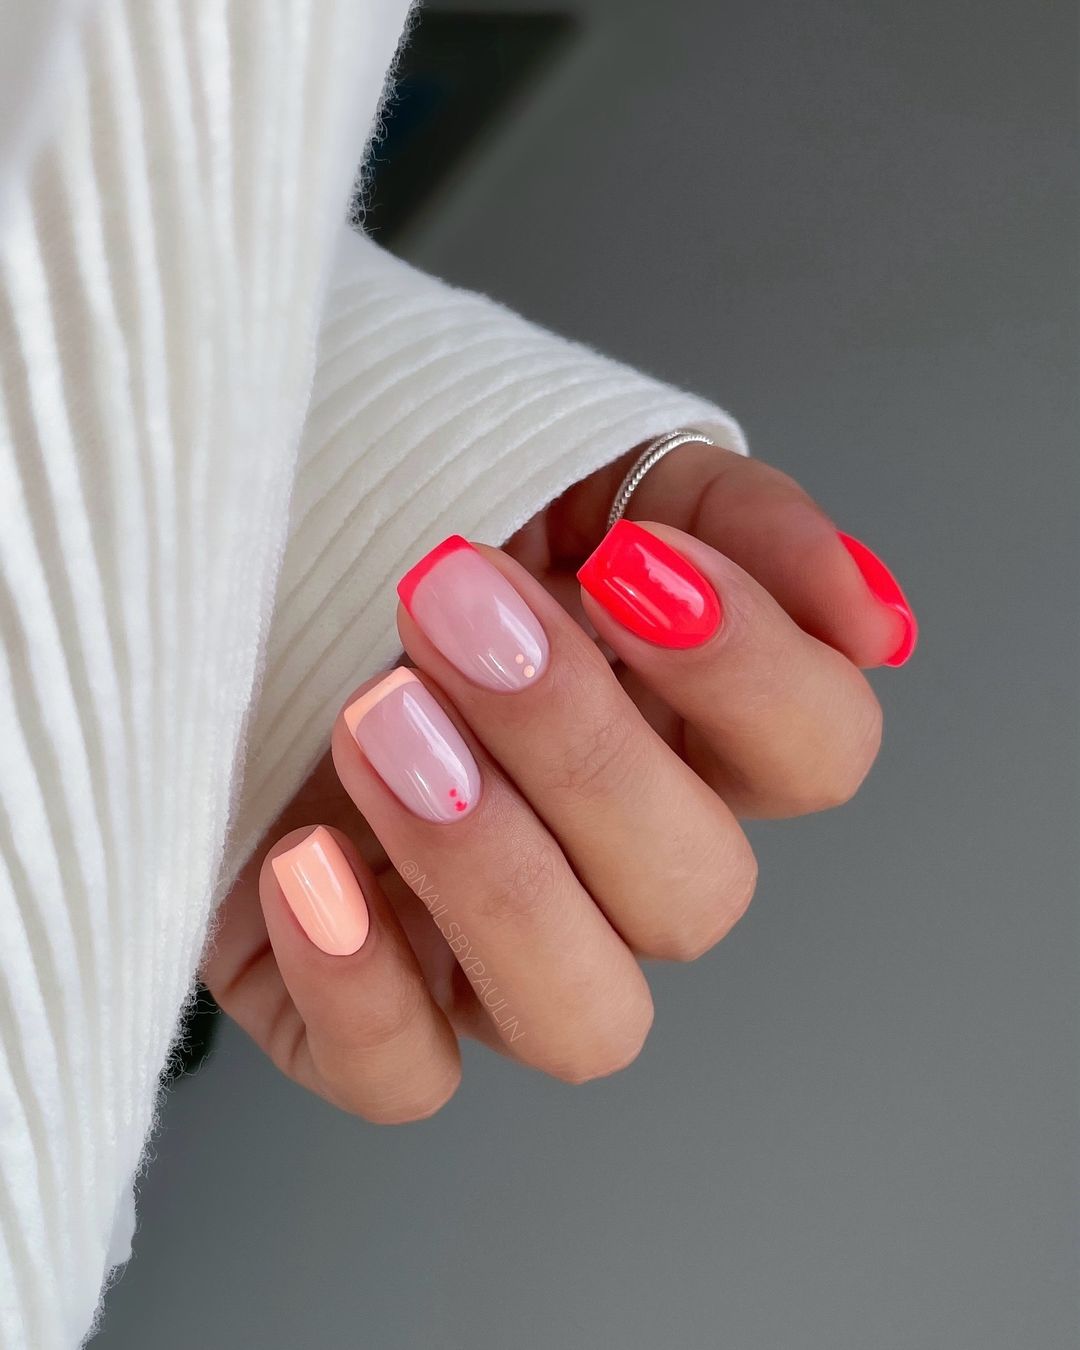
Chic Short Square Nails with Orange Accents
Short square nails can be just as chic and stylish as their longer counterparts. This design features a mix of glossy orange and natural nails with neon orange French tips. The contrast between the bright orange and the natural nail creates a modern and playful look, perfect for anyone who prefers a shorter nail length.
-
- Neon orange nail polish (Brand: Sally Hansen “Sun-kissed”)
- Clear base coat (Brand: Orly)
- French tip guides (Brand: Kiss)
- Gel polish top coat (Brand: CND Shellac)
Steps to Create at Home:
-
- Apply a clear base coat to all nails and cure under the UV/LED lamp.
- Use French tip guides to mark the tips of the natural nails.
- Paint the tips with neon orange polish and carefully remove the guides.
- Apply two coats of neon orange polish on the other nails and cure each layer.
- Finish with a gel top coat and cure for a long-lasting shine.
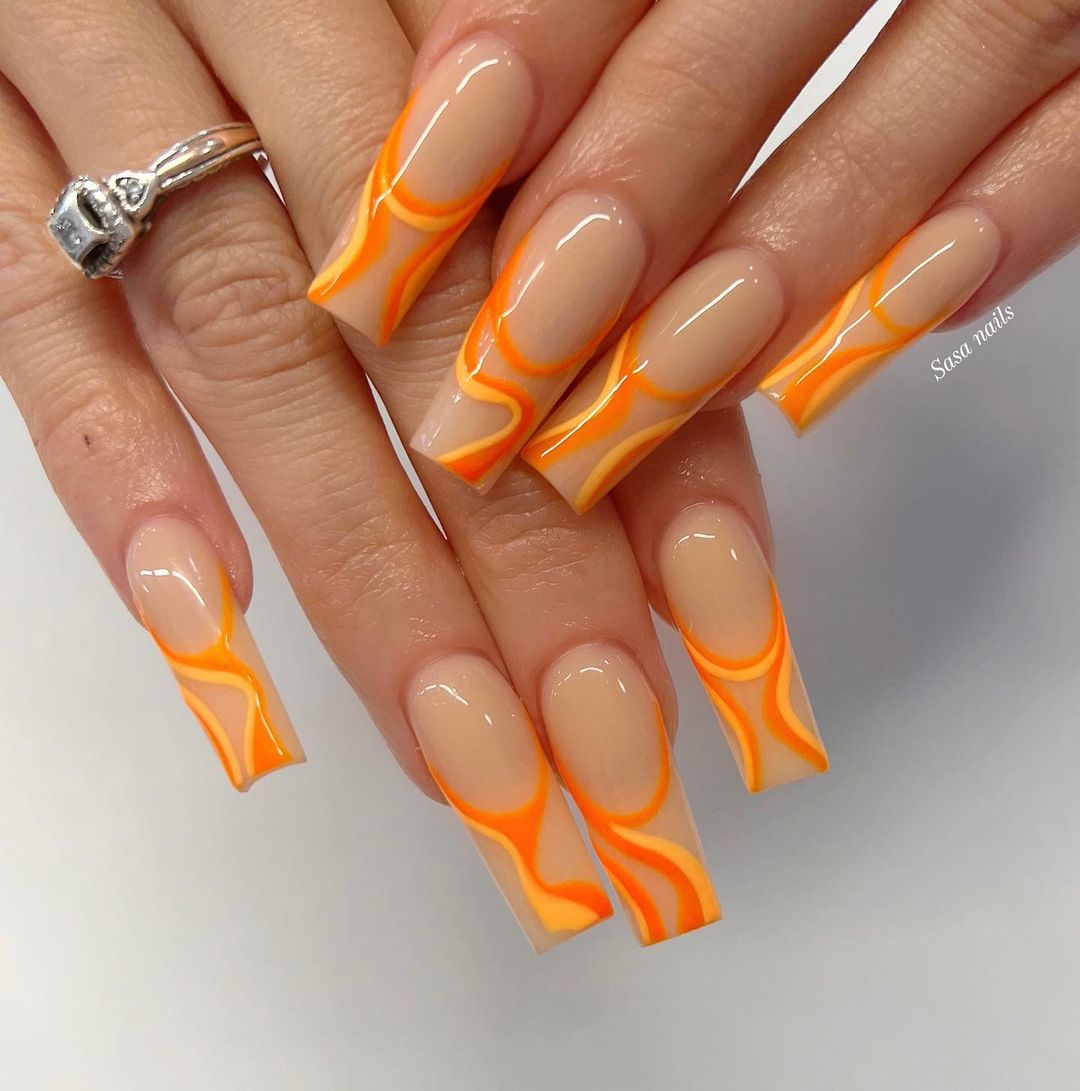
Fiery Wave Coffin Nails
The fiery wave coffin nails design is a blend of modern artistry and autumnal vibrancy. These nails feature a nude base with bold orange and yellow swirls that mimic flames, creating a dynamic and eye-catching look. The coffin shape enhances the visual impact of the design, offering a perfect canvas for the intricate patterns. The glossy finish adds a sophisticated touch, making these nails suitable for both everyday wear and special occasions.
-
- Nude base polish (Brand: OPI “Put it in Neutral”)
- Bright orange polish (Brand: Essie “Tangerine Tease”)
- Yellow polish (Brand: Sally Hansen “Mellow Yellow”)
- Fine detail brush (Brand: Beetles Nail Art Brushes)
- Gel polish top coat (Brand: CND Shellac)
Steps to Create at Home:
-
- Apply a nude base coat and cure under a UV/LED lamp.
- Using a fine detail brush, paint the orange and yellow swirls onto the nails, creating a flame-like effect.
- Cure each layer under the UV/LED lamp to set the design.
- Apply a gel top coat for a high-gloss finish and cure once more.
- Cleanse the nails with an alcohol wipe to remove any tacky residue.
Save Pin
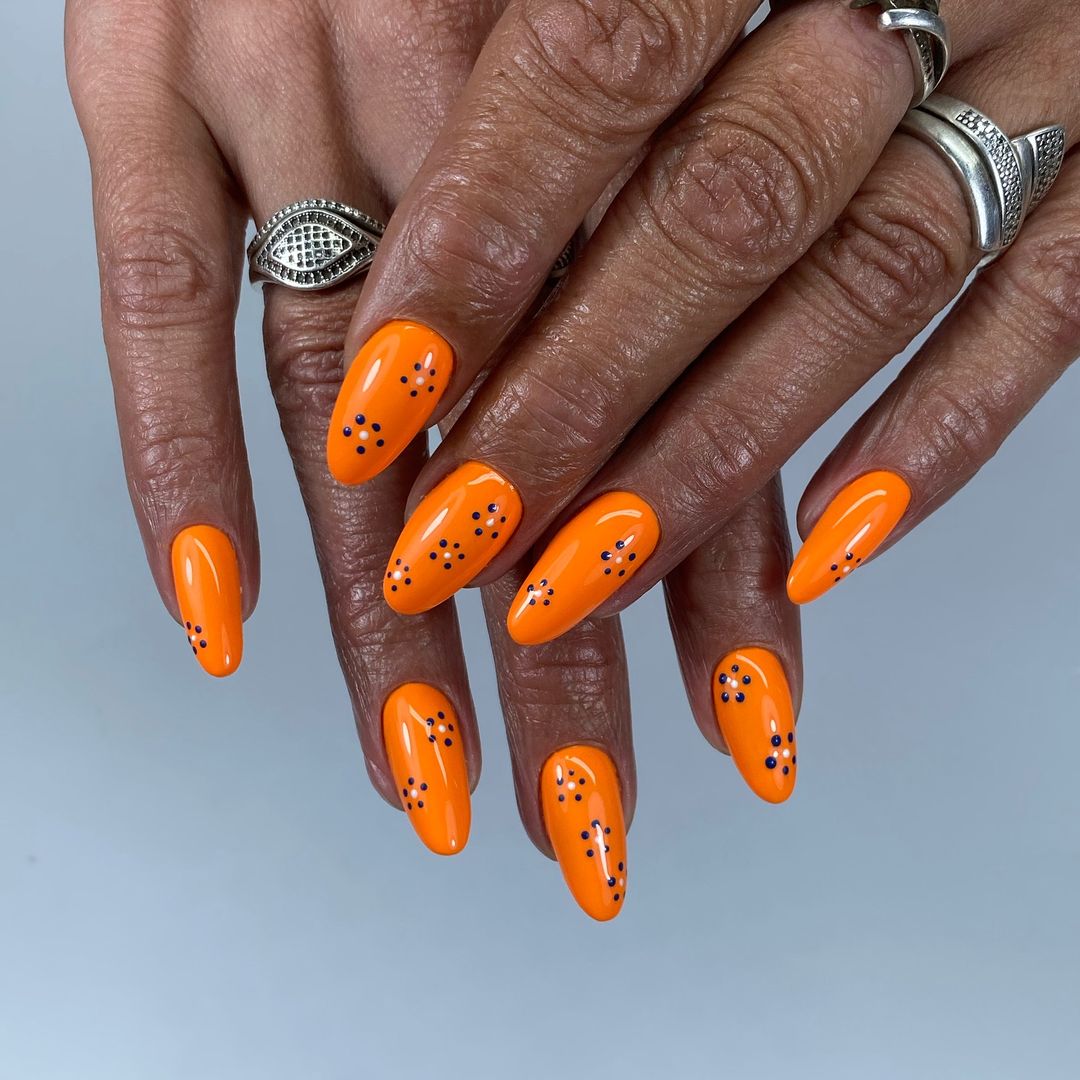
Orange Polka Dot Almond Nails
This playful design features a bright orange base with delicate black polka dots, perfect for adding a fun twist to your fall manicure. The almond shape gives the nails a sleek and elongated appearance, while the polka dots add a whimsical touch. This look is both stylish and easy to achieve, making it a great choice for those who want a cute yet sophisticated design.
-
- Bright orange polish (Brand: Zoya “Arizona”)
- Black polish (Brand: China Glaze “Liquid Leather”)
- Dotting tool (Brand: Winstonia Nail Art Dotting Tools)
- Gel polish top coat (Brand: Gelish)
Steps to Create at Home:
-
- Apply a bright orange base coat and cure under a UV/LED lamp.
- Using a dotting tool, create small black polka dots on the nails.
- Cure the design under the UV/LED lamp to set the dots.
- Finish with a gel top coat and cure for a shiny finish.
- Cleanse the nails with an alcohol wipe to ensure they are smooth and polished.
Neon Orange French Tips
The neon orange French tips are a modern twist on a classic design. This look features a nude base with vibrant neon orange tips, offering a fresh and trendy alternative to the traditional French manicure. The contrast between the neutral base and the bright tips creates a striking and fashionable appearance, perfect for those who love to make a bold statement.
-
- Nude base polish (Brand: Essie “Ballet Slippers”)
- Neon orange polish (Brand: ORLY “Orange Punch”)
- French tip guides (Brand: Kiss)
- Gel polish top coat (Brand: OPI GelColor)
Steps to Create at Home:
-
- Apply a nude base coat and cure under a UV/LED lamp.
- Place the French tip guides on the nails to mark the tips.
- Paint the tips with neon orange polish and remove the guides carefully.
- Cure the design under the UV/LED lamp to set the polish.
- Apply a gel top coat for a glossy finish and cure once more.
- Cleanse the nails with an alcohol wipe to ensure a perfect shine.
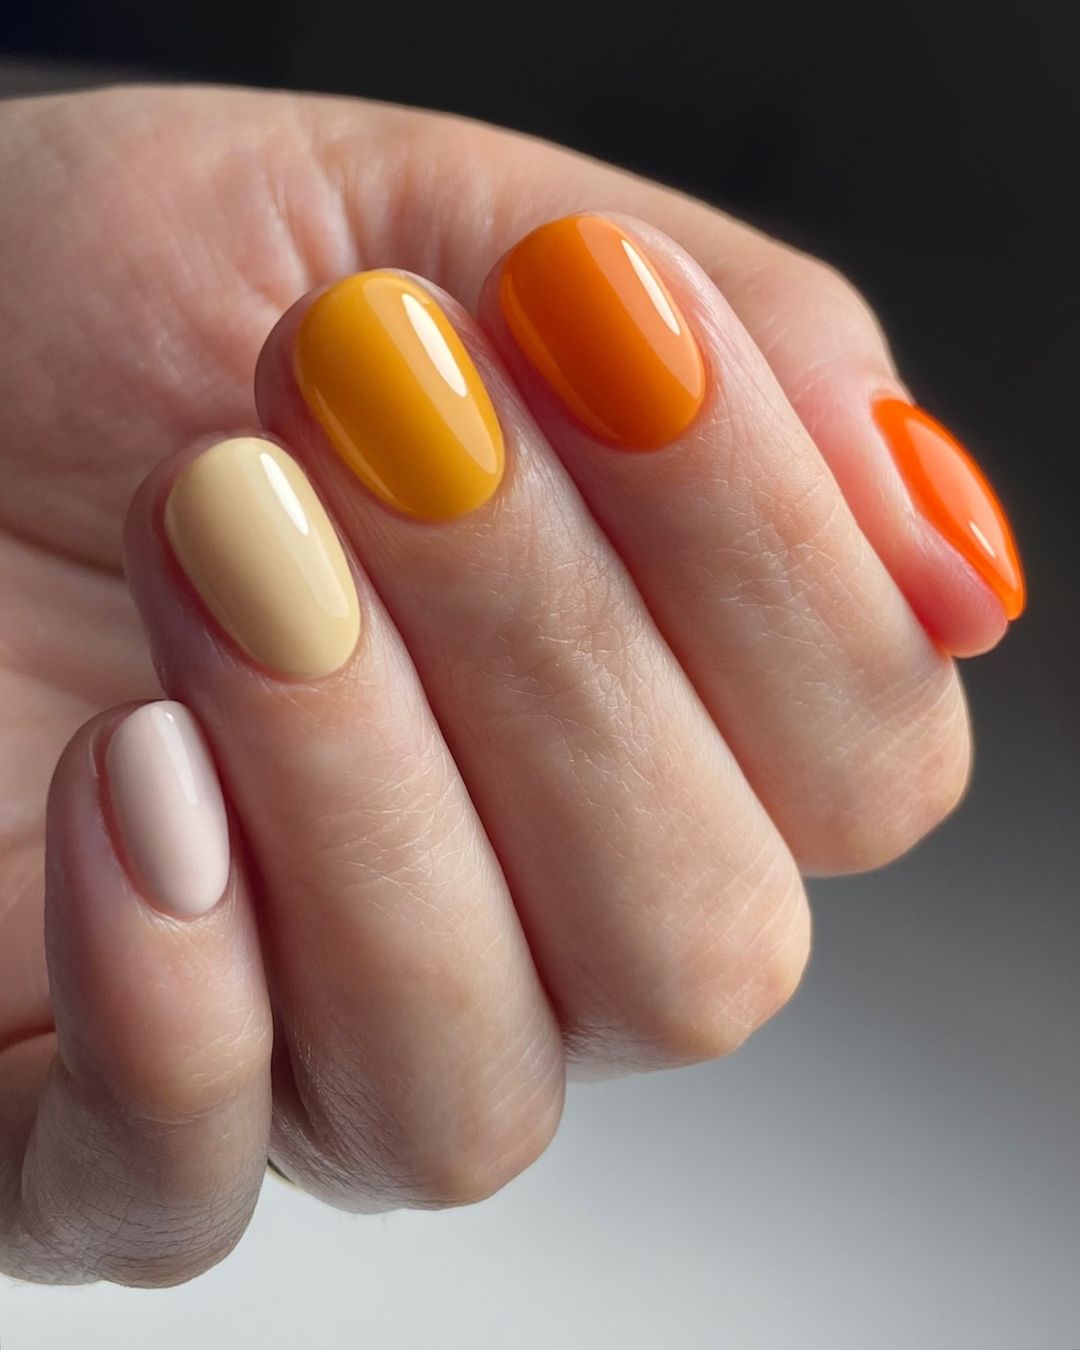
Autumn Hues Mix and Match Nails
This design beautifully combines various shades of fall, featuring a gradient from light beige to deep orange. Each nail is painted a different color, creating a harmonious yet vibrant look that embodies the essence of autumn. The simplicity of the oval shape enhances the overall elegance of the design, making it perfect for any occasion.
-
- Light beige polish (Brand: Essie “Ballet Slippers”)
- Mustard yellow polish (Brand: OPI “Sun, Sea, and Sand in My Pants”)
- Bright orange polish (Brand: Zoya “Arizona”)
- Deep orange polish (Brand: Sally Hansen “Koi Coral”)
- Gel polish top coat (Brand: Gelish)
Steps to Create at Home:
-
- Apply a base coat and cure under a UV/LED lamp.
- Paint each nail a different color, starting with the lightest shade and moving to the darkest.
- Cure each layer under the UV/LED lamp.
- Finish with a gel top coat and cure once more for a long-lasting finish.
- Cleanse the nails with an alcohol wipe to remove any tacky residue.
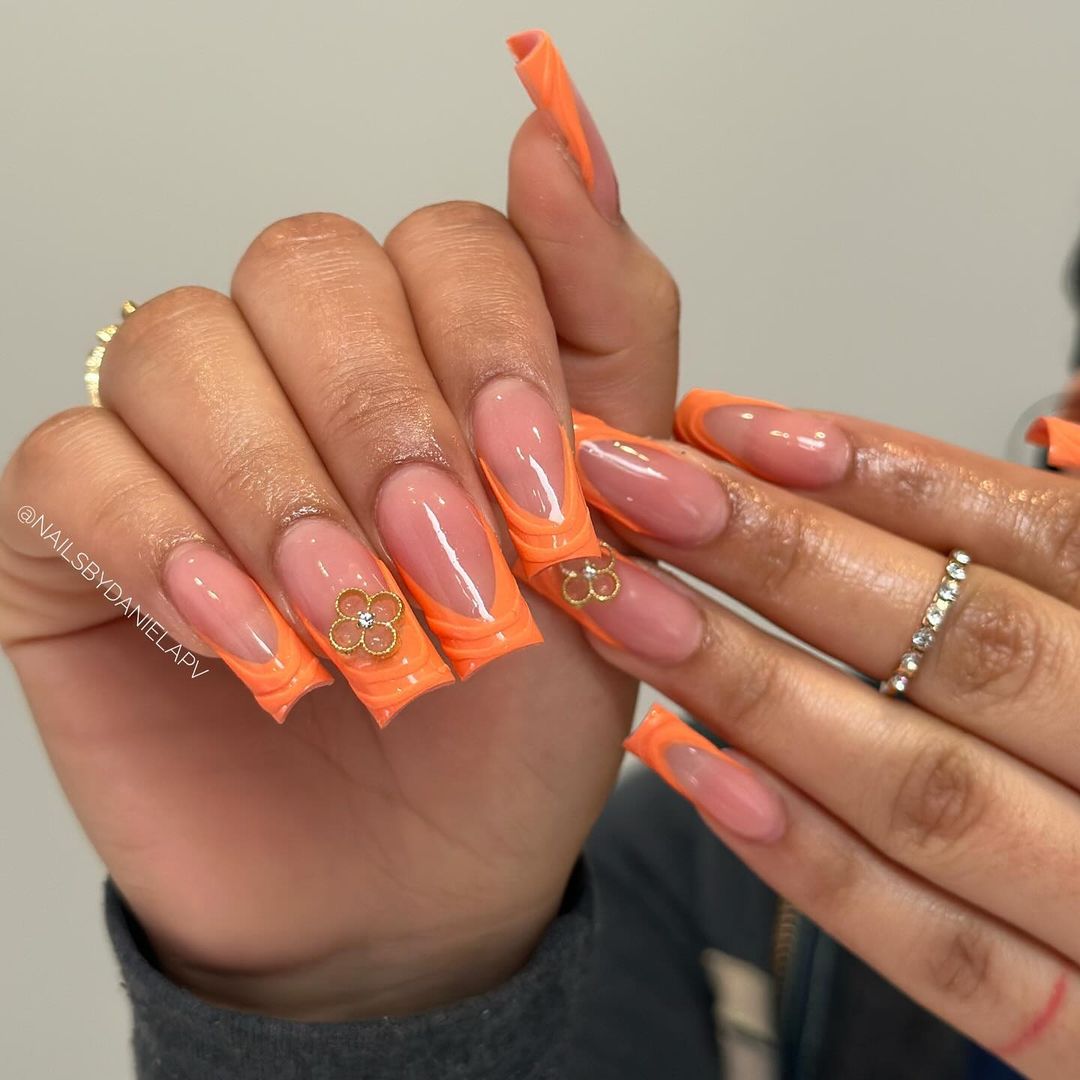
Floral Neon Coffin Nails
These floral neon coffin nails are a blend of modern design and playful accents. The nails feature a clear base with bright orange neon French tips, adorned with delicate gold floral designs. The contrast between the vibrant tips and the subtle floral accents creates a stunning and unique look, perfect for those who love to stand out.
-
- Clear base polish (Brand: OPI “Bubble Bath”)
- Neon orange polish (Brand: ORLY “Orange Punch”)
- Gold nail art flowers (Brand: Born Pretty)
- Gel polish top coat (Brand: CND Shellac)
Steps to Create at Home:
-
- Apply a clear base coat and cure under a UV/LED lamp.
- Use French tip guides to create the neon orange tips and cure under the lamp.
- Apply gold floral designs to the nails and cure to set.
- Finish with a gel top coat and cure for a glossy finish.
- Cleanse the nails with an alcohol wipe to ensure a smooth, shiny surface.
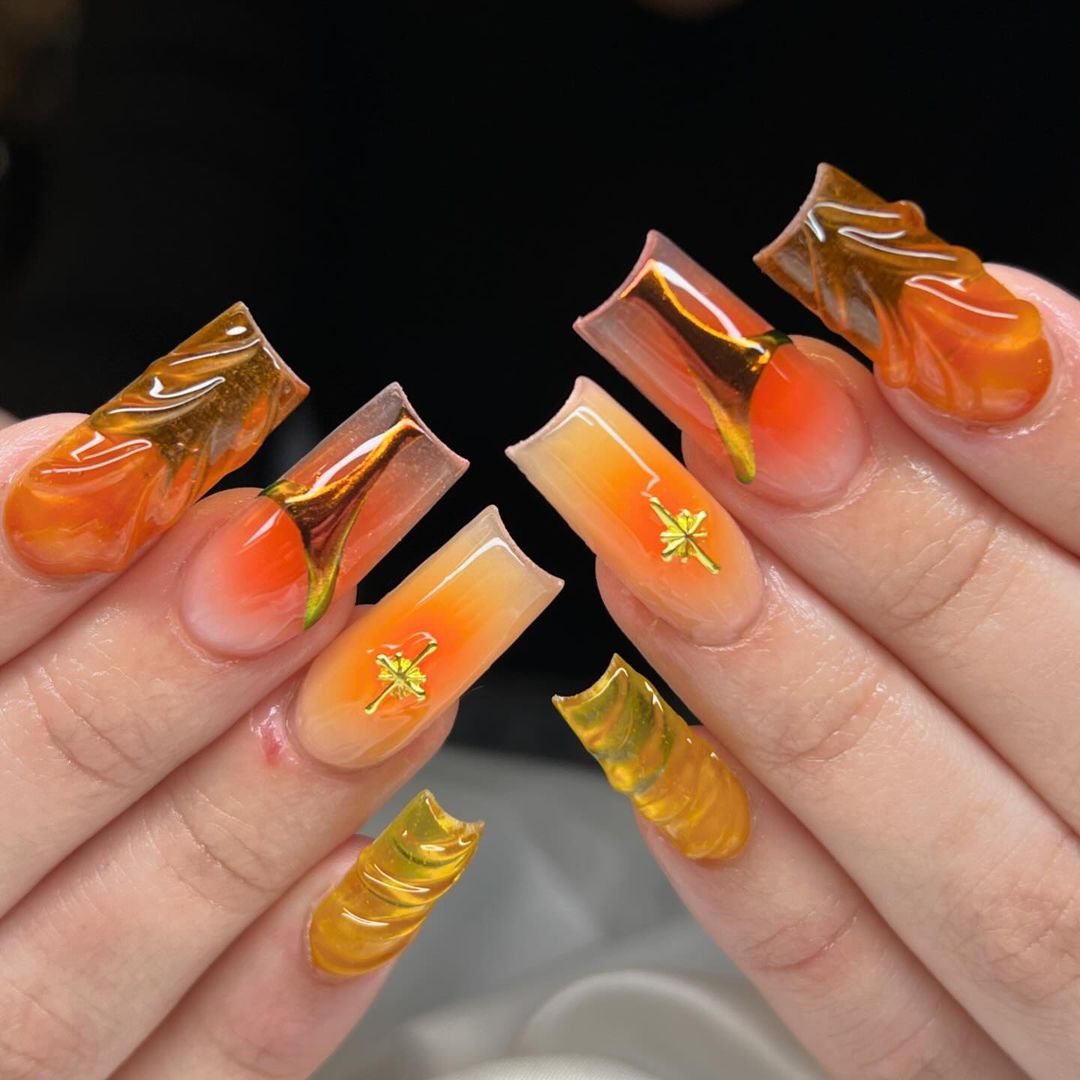
Autumn Leaf Sculpted Nails
This design takes nail art to a new level with intricate autumn leaf sculptures. The nails feature a gradient from clear to orange, with sculpted leaves in various fall shades. The coffin shape provides a large canvas for the detailed designs, making these nails a true work of art. The addition of subtle glitter accents adds a touch of sparkle, perfect for capturing the magic of the fall season.
-
- Clear base polish (Brand: Essie “Allure”)
- Gradient orange polish (Brand: OPI “A Roll in the Hague”)
- Sculpting gel (Brand: Gelish PolyGel)
- Autumn leaf nail art (Brand: Nail Art Supplies)
- Fine glitter (Brand: Young Nails)
Steps to Create at Home:
-
- Apply a clear base coat and cure under a UV/LED lamp.
- Use a sponge to create the gradient effect with orange polish and cure.
- Sculpt the leaves using the sculpting gel and cure each layer.
- Add glitter accents and cure to set the design.
- Finish with a gel top coat and cleanse with an alcohol wipe for a polished look.
Save Pin
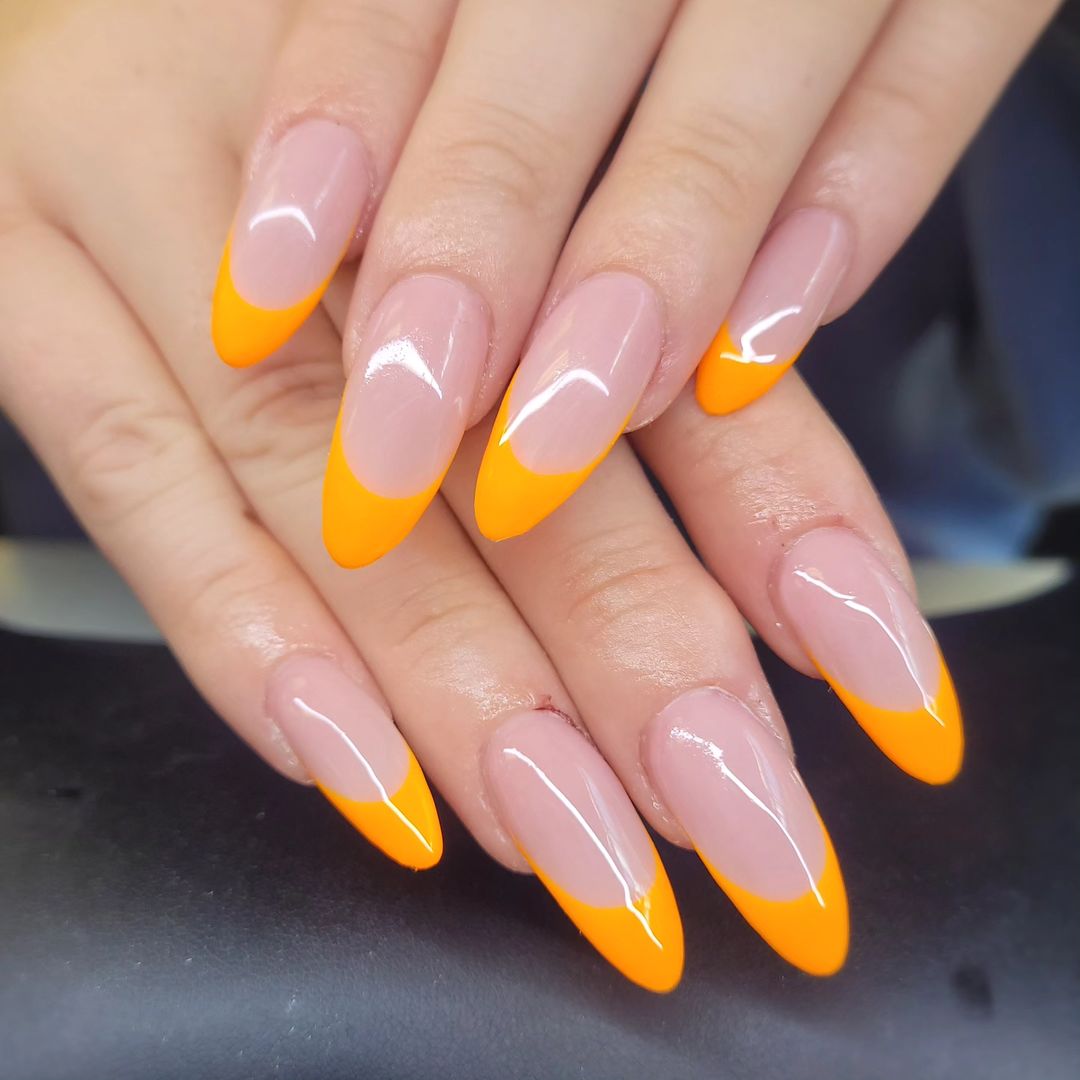
Bright Orange French Tips
Bright orange French tips are a fun and modern twist on a classic design. This look features a nude base with vibrant orange tips, creating a striking contrast that is both stylish and playful. The almond shape enhances the elegance of the design, making it suitable for any event, from casual outings to more formal occasions.
-
- Nude base polish (Brand: OPI “Samoan Sand”)
- Bright orange polish (Brand: Essie “Tangerine Tease”)
- French tip guides (Brand: Kiss)
- Gel polish top coat (Brand: Gelish)
Steps to Create at Home:
-
- Apply a nude base coat and cure under a UV/LED lamp.
- Place French tip guides on the nails and paint the tips with bright orange polish.
- Remove the guides and cure under the lamp.
- Finish with a gel top coat and cure for a high-gloss finish.
- Cleanse the nails with an alcohol wipe to remove any tacky residue.
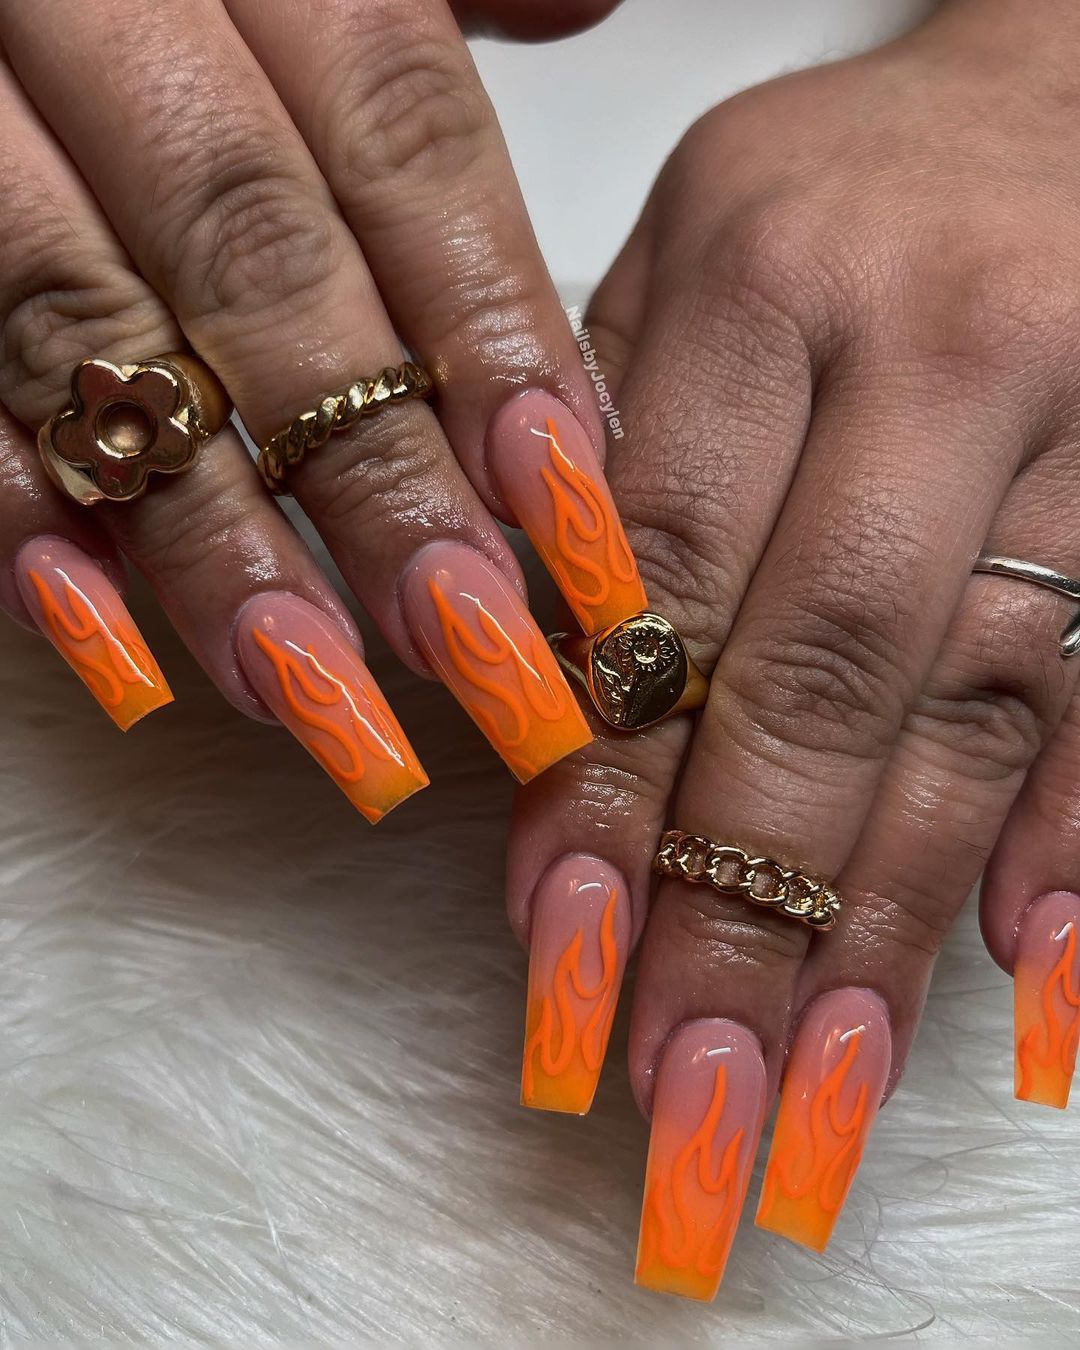
Flaming Orange Coffin Nails
These flaming orange coffin nails are perfect for those who want to make a bold statement. The design features a nude base with vibrant orange flames that appear to dance across the nails. The coffin shape provides a large canvas for the intricate flame designs, making these nails a standout look for the fall season. The glossy finish adds a touch of sophistication to the fiery design.
-
- Nude base polish (Brand: Essie “Mademoiselle”)
- Bright orange polish (Brand: Sally Hansen “Sun-kissed”)
- Fine detail brush (Brand: Beetles Nail Art Brushes)
- Gel polish top coat (Brand: CND Shellac)
Steps to Create at Home:
-
- Apply a nude base coat and cure under a UV/LED lamp.
- Using a fine detail brush, paint the orange flames on each nail and cure.
- Apply a gel top coat and cure for a glossy finish.
- Cleanse the nails with an alcohol wipe to remove any tacky residue.
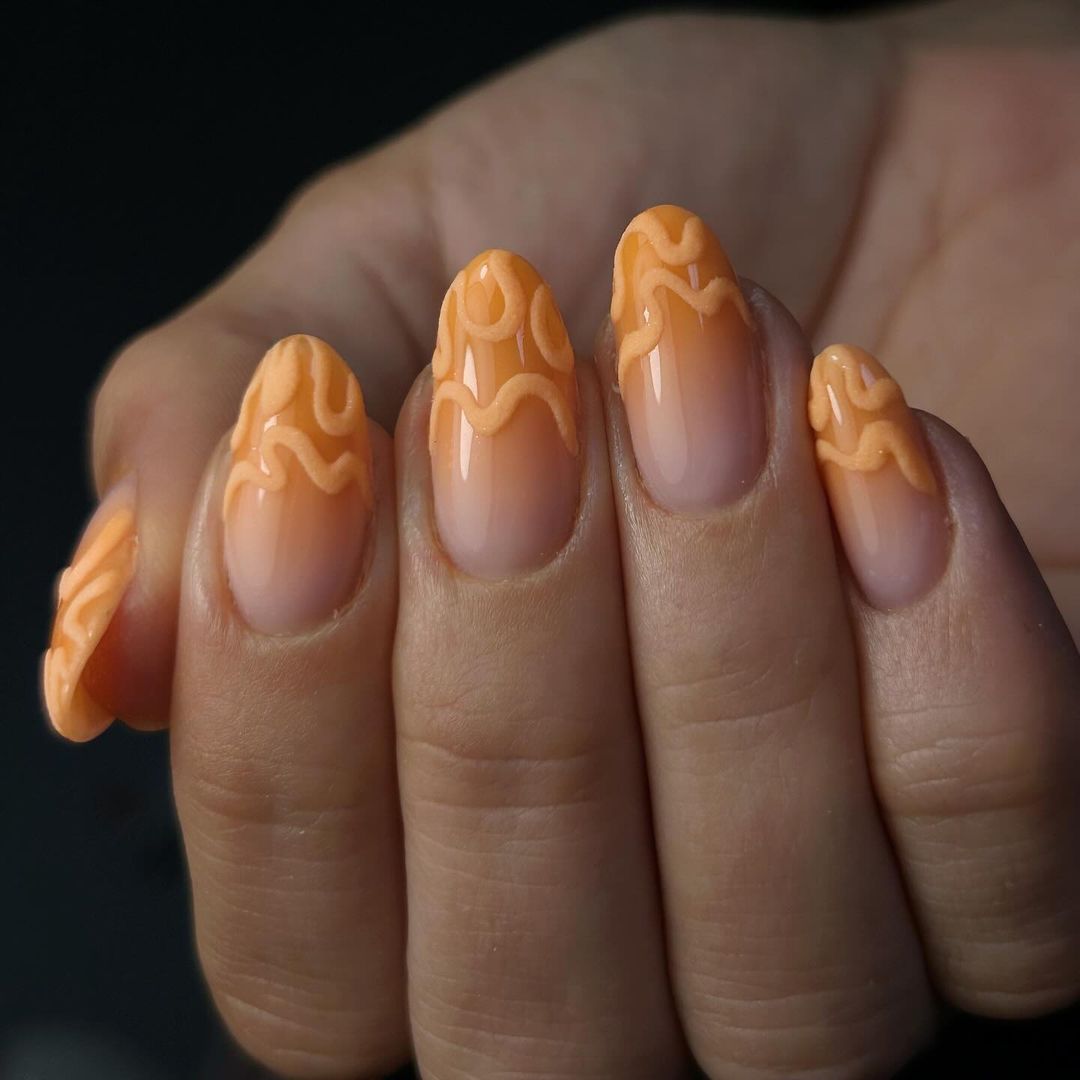
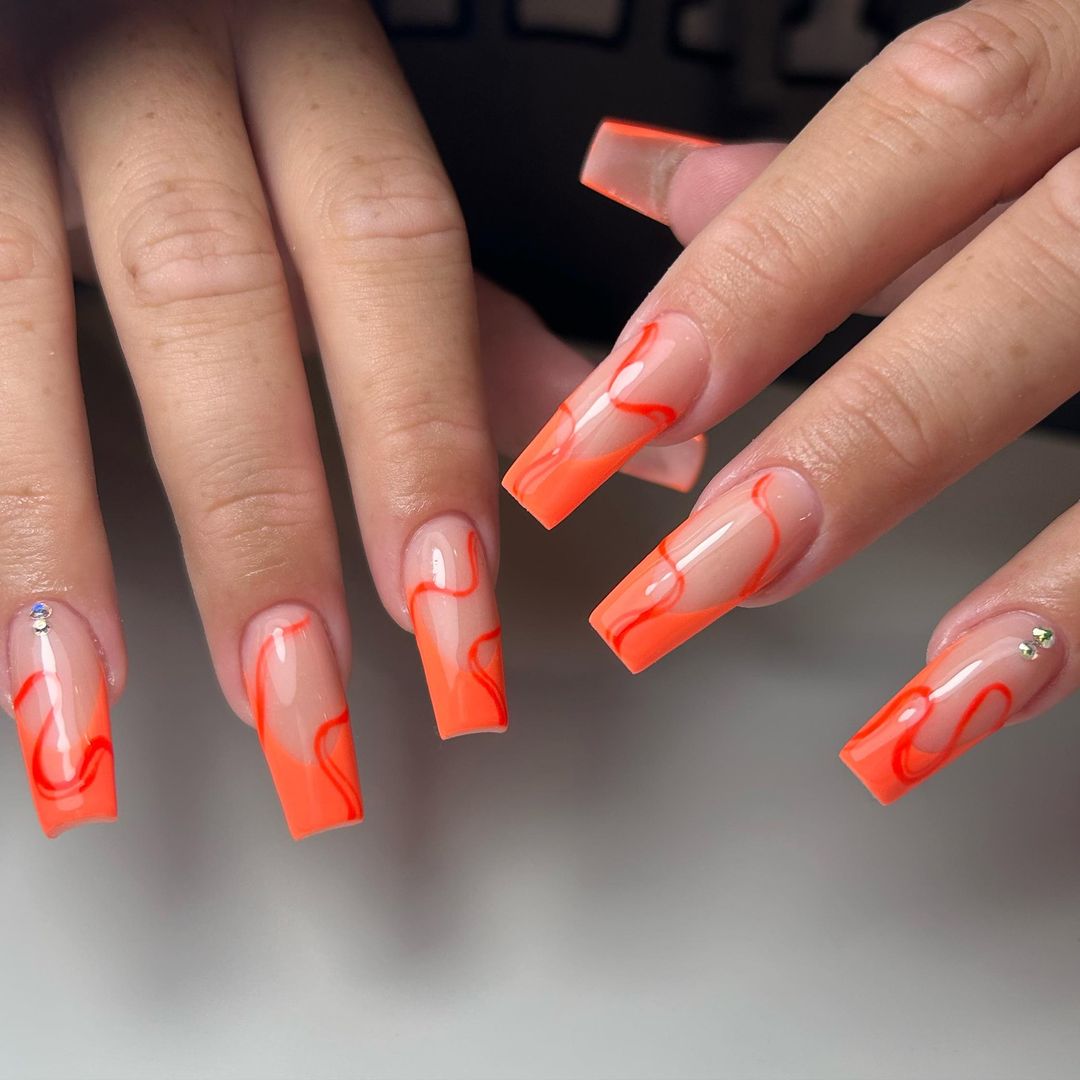
Subtle Orange Swirl Nails
These subtle orange swirl nails feature a delicate and elegant design, perfect for those who prefer a more understated look. The nails have a nude base with light orange swirls that create a soft, flowing pattern. The almond shape enhances the femininity and grace of the design, making it ideal for everyday wear or special occasions.
-
- Nude base polish (Brand: OPI “Bubble Bath”)
- Light orange polish (Brand: Zoya “Sawyer”)
- Fine detail brush (Brand: Winstonia Nail Art Brushes)
- Gel polish top coat (Brand: Gelish)
Steps to Create at Home:
-
- Apply a nude base coat and cure under a UV/LED lamp.
- Use a fine detail brush to paint the light orange swirls on each nail.
- Cure the design under the UV/LED lamp to set the swirls.
- Finish with a gel top coat and cure for a smooth finish.
- Cleanse the nails with an alcohol wipe to ensure a perfect shine.
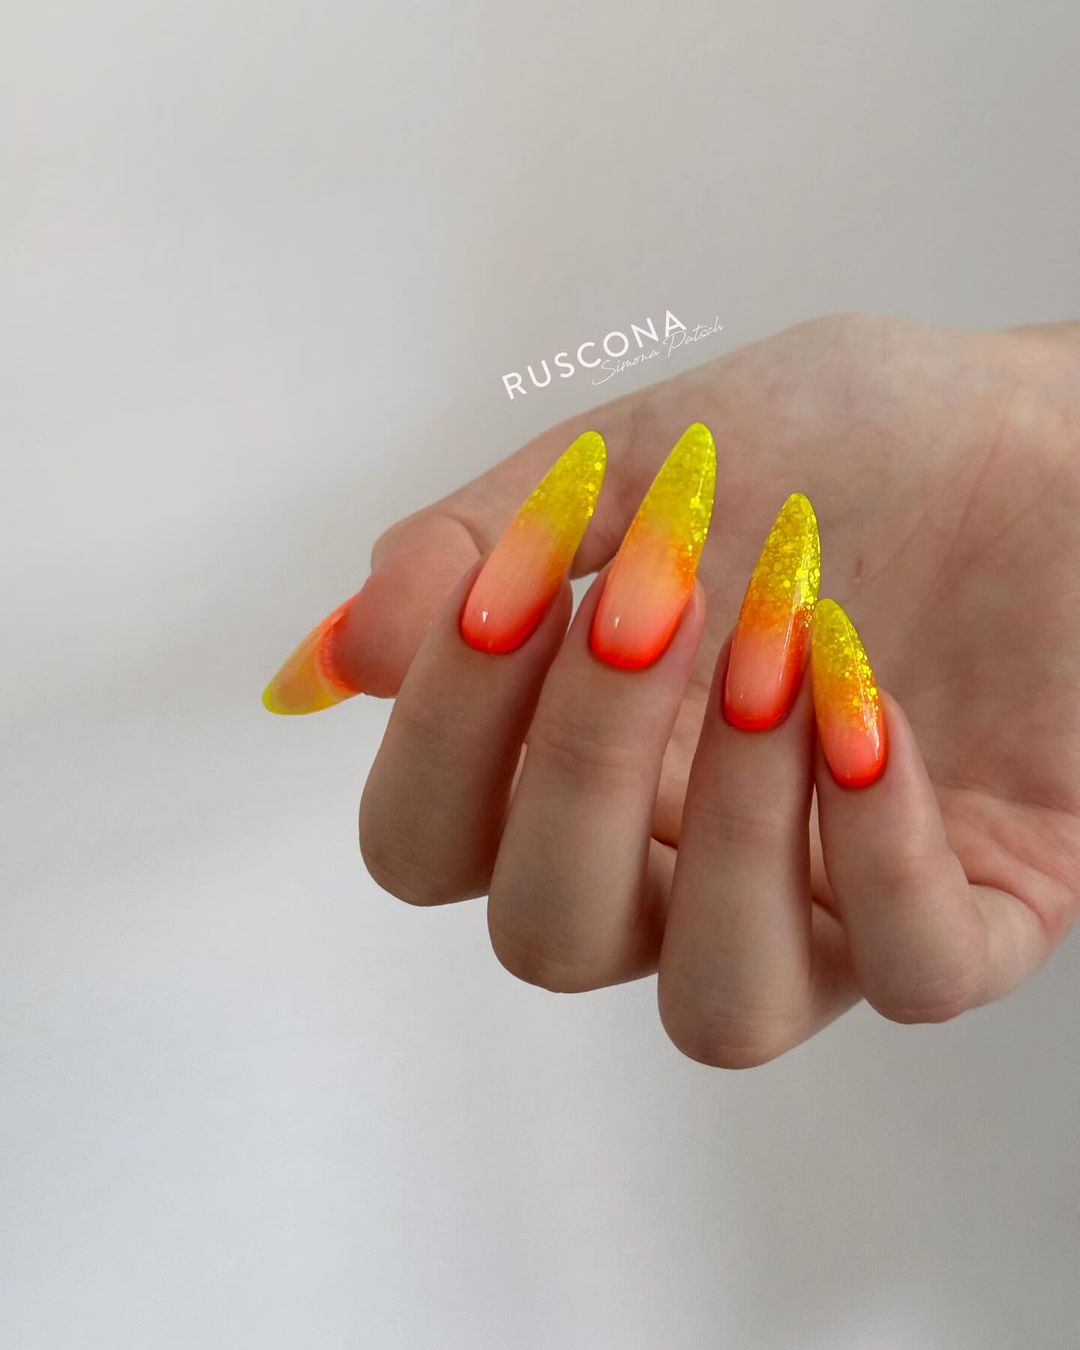
Yellow-Orange Ombre Glitter Nails
This stunning design blends yellow and orange in a smooth ombre, topped with sparkling glitter. The stiletto shape accentuates the gradient, making the nails look elongated and elegant. The glitter adds a touch of glamour, perfect for those who love a bit of sparkle in their life.
-
- Yellow polish (Brand: Essie “Hay There”)
- Orange polish (Brand: OPI “A Roll in the Hague”)
- Gold glitter polish (Brand: Sally Hansen “Golden-I”)
- Gel polish top coat (Brand: CND Shellac)
Steps to Create at Home:
-
- Apply a base coat and cure under a UV/LED lamp.
- Use a sponge to create the yellow-to-orange gradient on each nail, curing after each application.
- Apply a layer of gold glitter polish to the top half of the nails and cure.
- Finish with a gel top coat and cure for a long-lasting, glossy finish.
- Cleanse the nails with an alcohol wipe to remove any tacky residue.
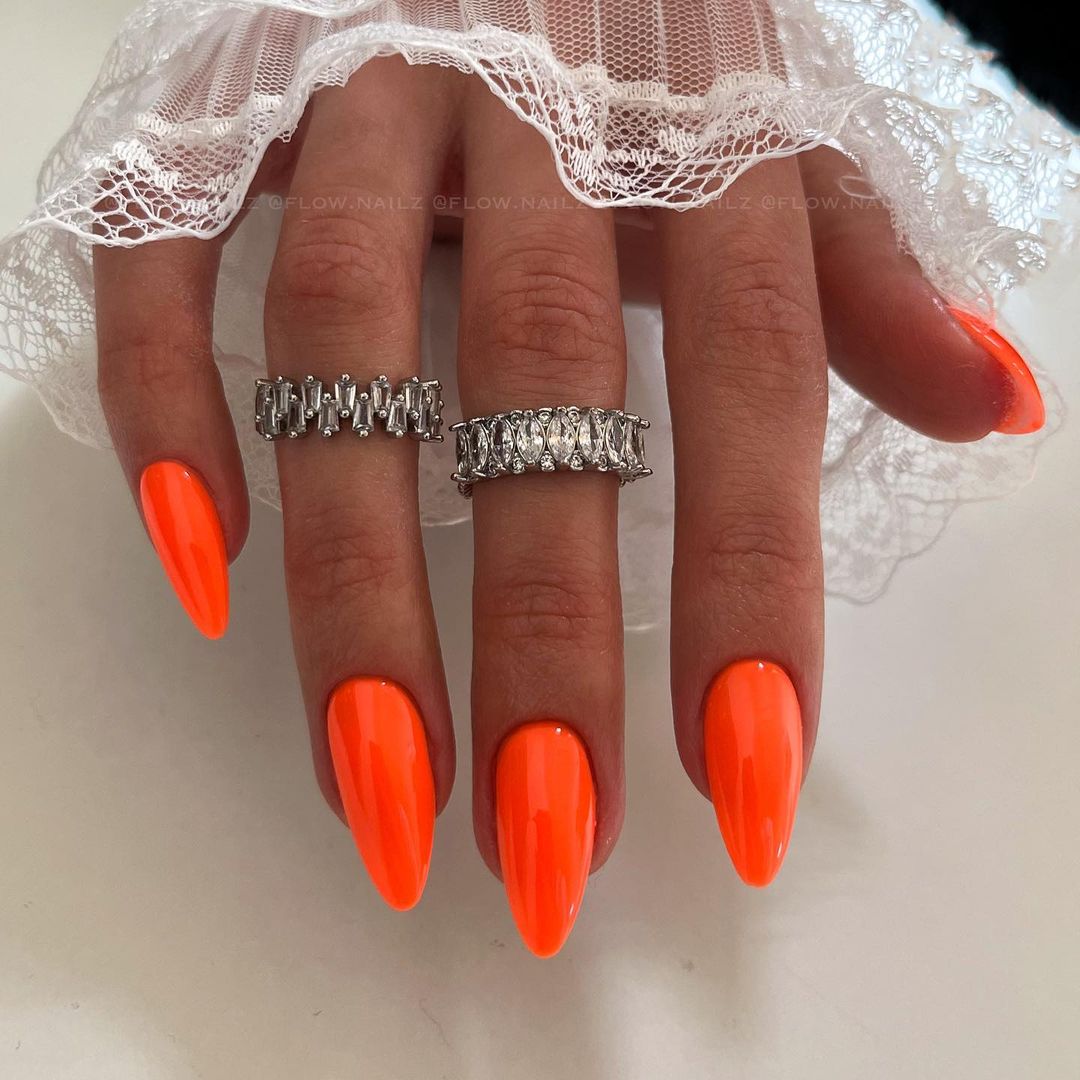
Neon Orange Almond Nails
Neon orange almond nails are bold and vibrant, perfect for making a statement. The bright color is eye-catching, and the almond shape adds a touch of sophistication. These nails are perfect for those who want to stand out and embrace a lively, energetic look.
-
- Neon orange polish (Brand: ORLY “Orange Punch”)
- Clear base coat (Brand: OPI)
- Gel polish top coat (Brand: Gelish)
Steps to Create at Home:
-
- Apply a clear base coat and cure under a UV/LED lamp.
- Apply two coats of neon orange polish, curing each layer.
- Finish with a gel top coat and cure for a high-gloss finish.
- Cleanse the nails with an alcohol wipe to ensure a smooth, shiny surface.
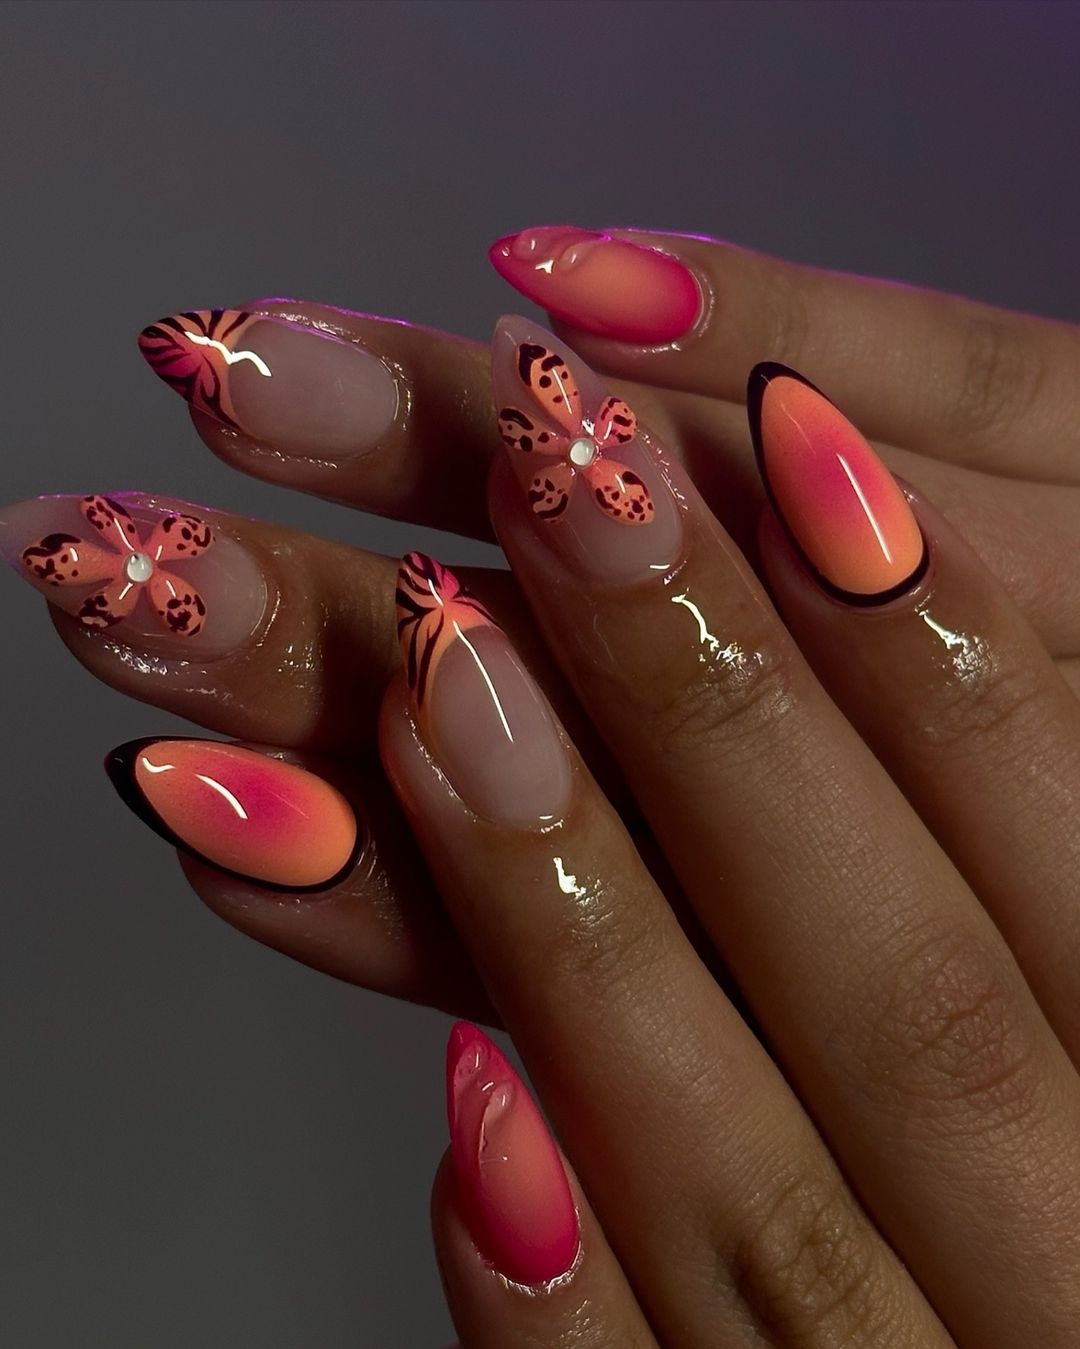
Tropical Floral Nails
These tropical floral nails are a delightful mix of vibrant colors and intricate designs. The gradient background transitions from pink to orange, creating a beautiful sunset effect. The detailed floral designs and black accents add depth and complexity, making these nails perfect for a tropical getaway or simply bringing a bit of paradise to your everyday look.
-
- Pink polish (Brand: Essie “Strike a Rose”)
- Orange polish (Brand: China Glaze “Stoked to be Soaked”)
- Black polish (Brand: OPI “Black Onyx”)
- Fine detail brush (Brand: Beetles Nail Art Brushes)
- Gel polish top coat (Brand: CND Shellac)
Steps to Create at Home:
-
- Apply a base coat and cure under a UV/LED lamp.
- Use a sponge to create the pink-to-orange gradient and cure.
- Using a fine detail brush, paint the floral and black accents on each nail.
- Cure the design under the UV/LED lamp to set the polish.
- Finish with a gel top coat and cleanse with an alcohol wipe for a perfect shine.
Neon Orange Swirl Coffin Nails
This design features neon orange swirls on a nude base, creating a modern and artistic look. The coffin shape enhances the visual impact of the swirls, making the nails look elongated and stylish. The simplicity of the design combined with the vibrant color makes these nails a perfect choice for any fashion-forward individual.
-
- Nude base polish (Brand: OPI “Be There in a Prosecco”)
- Neon orange polish (Brand: Essie “Tangerine Tease”)
- Fine detail brush (Brand: Winstonia Nail Art Brushes)
- Gel polish top coat (Brand: Gelish)
Steps to Create at Home:
-
- Apply a nude base coat and cure under a UV/LED lamp.
- Using a fine detail brush, paint the neon orange swirls on each nail and cure.
- Finish with a gel top coat and cure for a glossy finish.
- Cleanse the nails with an alcohol wipe to ensure a smooth surface.
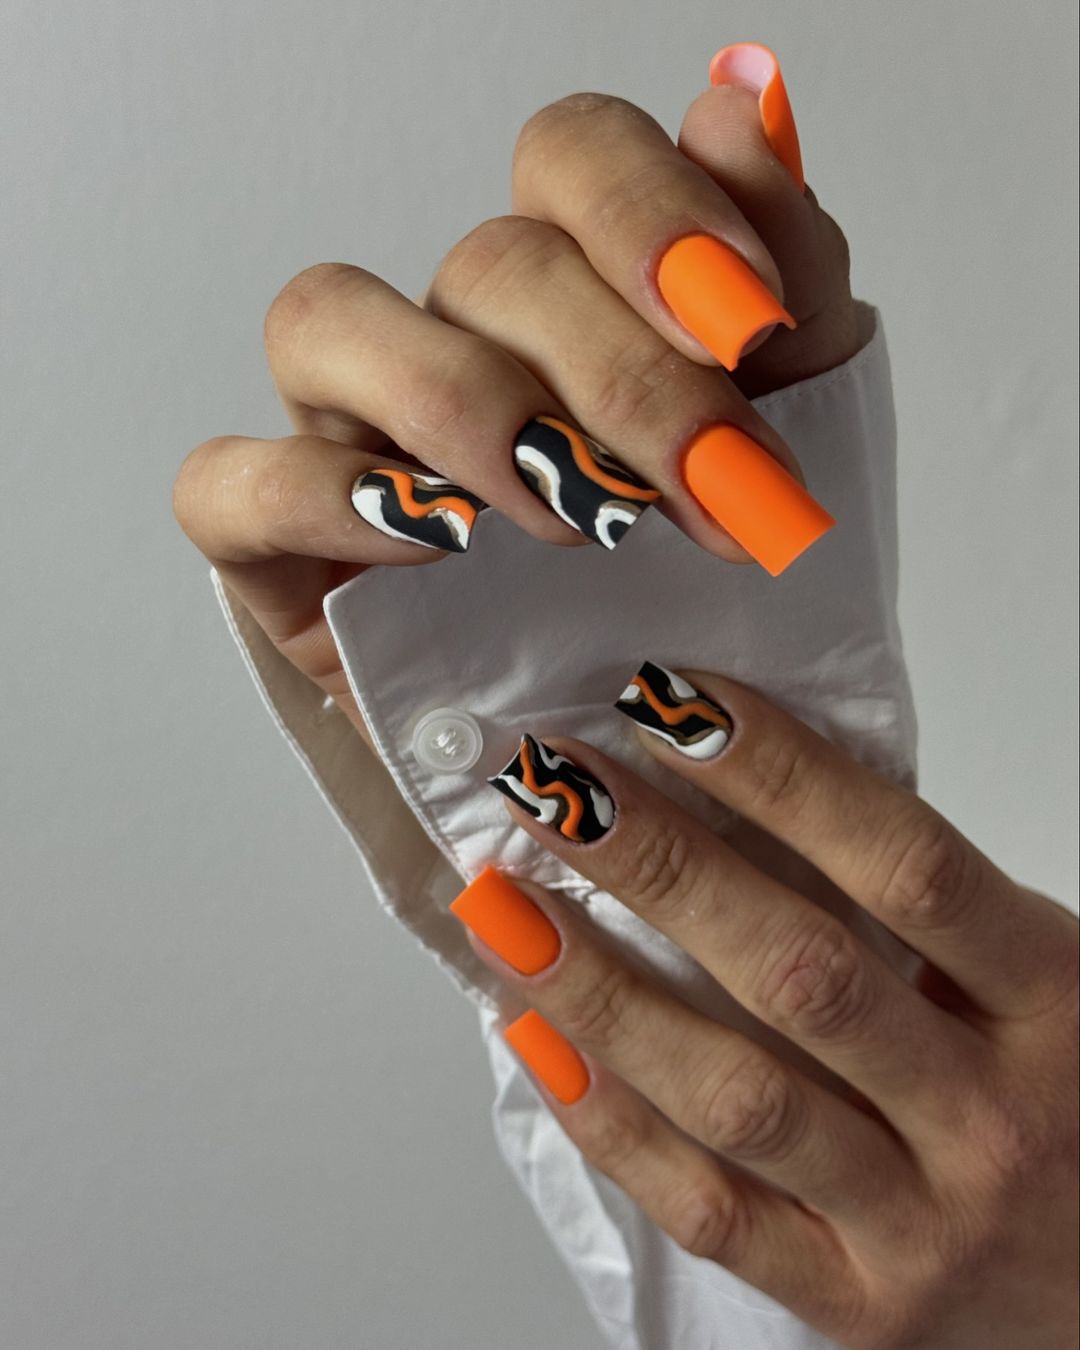
Bold Black and Orange Nails
This bold design combines bright orange with black and white swirls for a striking contrast. The matte finish on the orange nails adds a modern touch, while the black and white swirls provide a dynamic and eye-catching detail. This look is perfect for those who love to make a bold statement with their nails.
-
- Bright orange polish (Brand: Sally Hansen “Sun-kissed”)
- Black polish (Brand: OPI “Black Onyx”)
- White polish (Brand: Essie “Blanc”)
- Matte top coat (Brand: Zoya “MatteVelvet Topcoat”)
- Gel polish top coat (Brand: CND Shellac)
Steps to Create at Home:
-
- Apply a base coat and cure under a UV/LED lamp.
- Paint some nails bright orange and others with black and white swirls, curing each layer.
- Apply a matte top coat to the orange nails and a gel top coat to the swirled nails, then cure.
- Cleanse the nails with an alcohol wipe for a smooth finish.
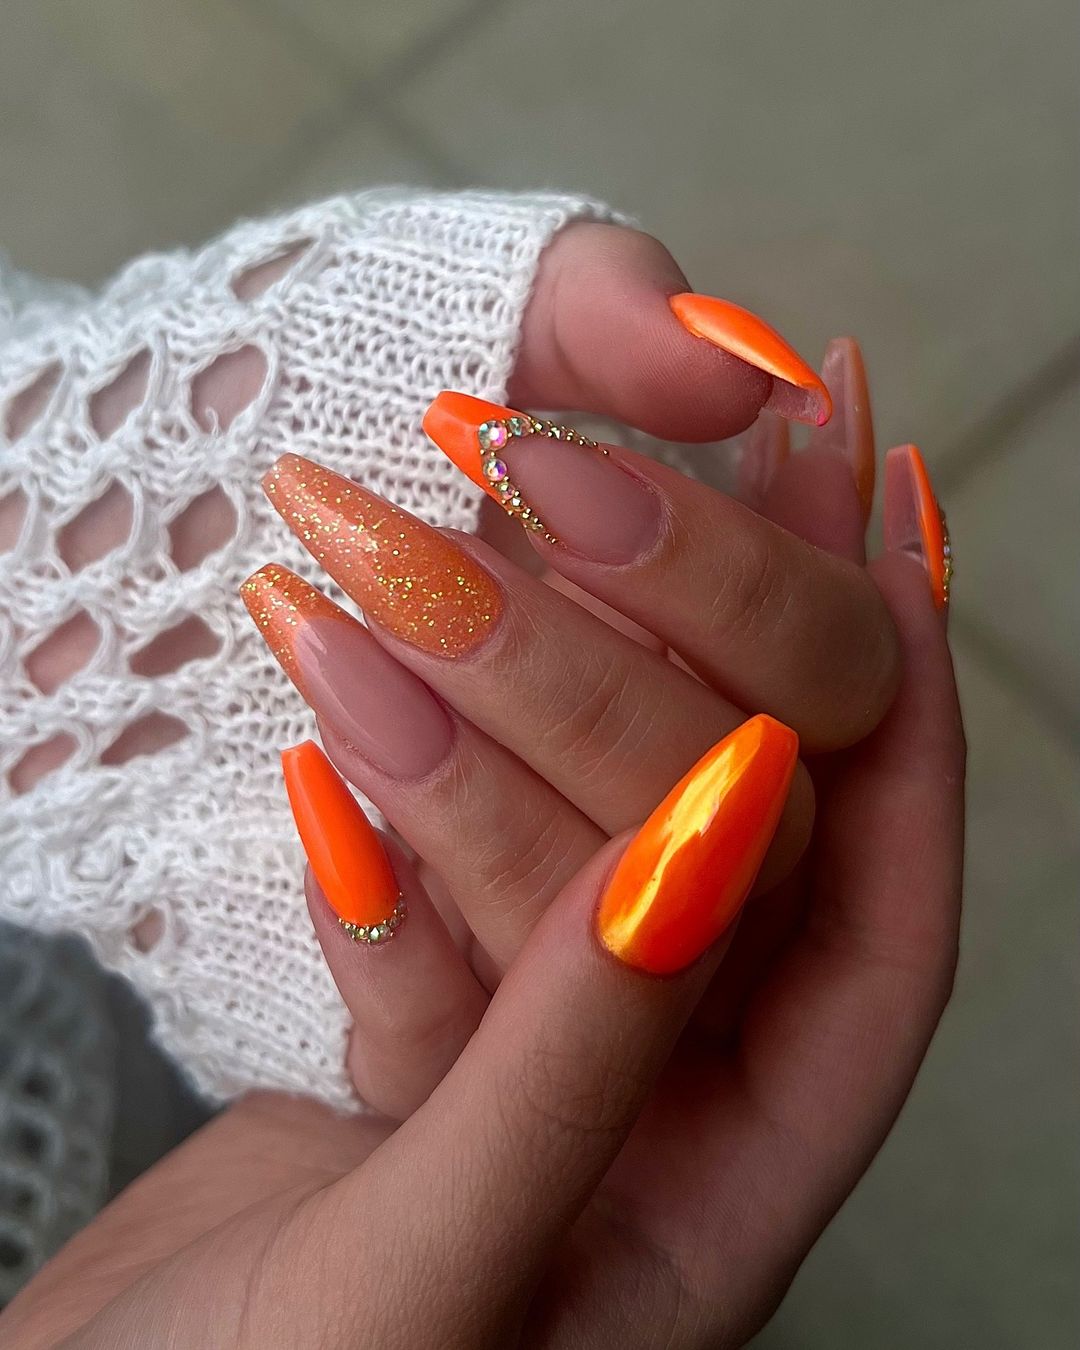
Glittering Orange Almond Nails
These glittering orange almond nails are perfect for adding a touch of glamour to your look. The nails feature a bright orange base with sparkling glitter accents and rhinestones, creating a dazzling effect. The almond shape adds elegance, making these nails suitable for both special occasions and everyday wear.
-
- Bright orange polish (Brand: Essie “Tangerine Tease”)
- Gold glitter polish (Brand: China Glaze “Golden Enchantment”)
- Rhinestones (Brand: Swarovski)
- Gel polish top coat (Brand: Gelish)
Steps to Create at Home:
-
- Apply a bright orange base coat and cure under a UV/LED lamp.
- Apply gold glitter polish to the accent nails and cure.
- Attach rhinestones using nail glue and cure to set.
- Finish with a gel top coat and cure for a high-gloss finish.
- Cleanse the nails with an alcohol wipe to ensure a perfect shine.
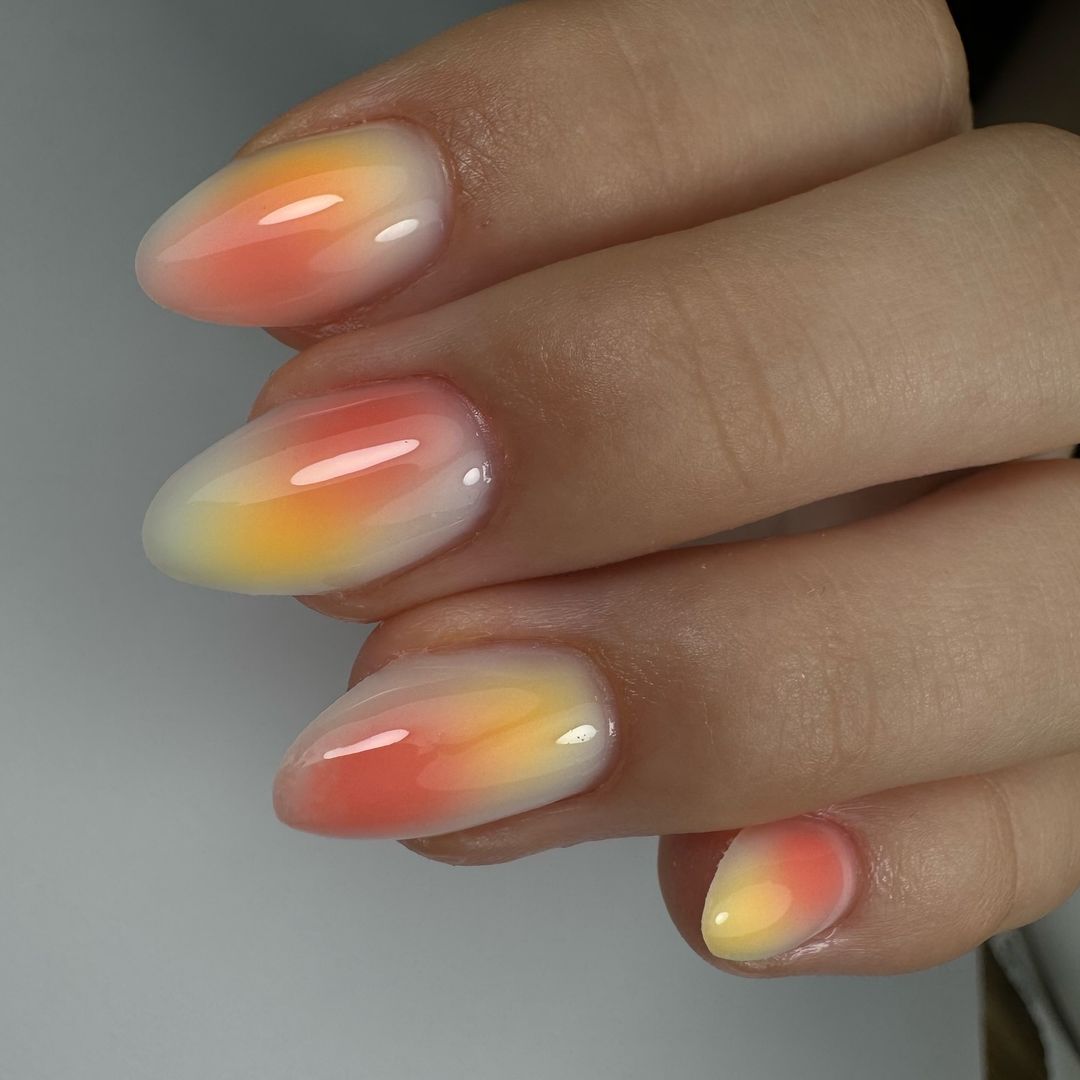
Pastel Ombre Nails
These pastel ombre nails feature a soft gradient from yellow to orange, creating a dreamy and elegant look. The subtle colors are perfect for those who prefer a more understated manicure, yet want to add a touch of color to their nails. The almond shape adds to the overall delicate appearance, making these nails suitable for any occasion.
-
- Yellow polish (Brand: Essie “Hay There”)
- Peach polish (Brand: OPI “Got Myself into a Jam-balaya”)
- Orange polish (Brand: Zoya “Sawyer”)
- Sponge for ombre effect (Brand: Beauty Secrets)
- Gel polish top coat (Brand: CND Shellac)
Steps to Create at Home:
-
- Apply a base coat and cure under a UV/LED lamp.
- Use a sponge to create the gradient effect, applying yellow at the base and transitioning to orange at the tips.
- Cure each layer under the UV/LED lamp.
- Finish with a gel top coat and cure for a glossy finish.
- Cleanse the nails with an alcohol wipe to remove any tacky residue.
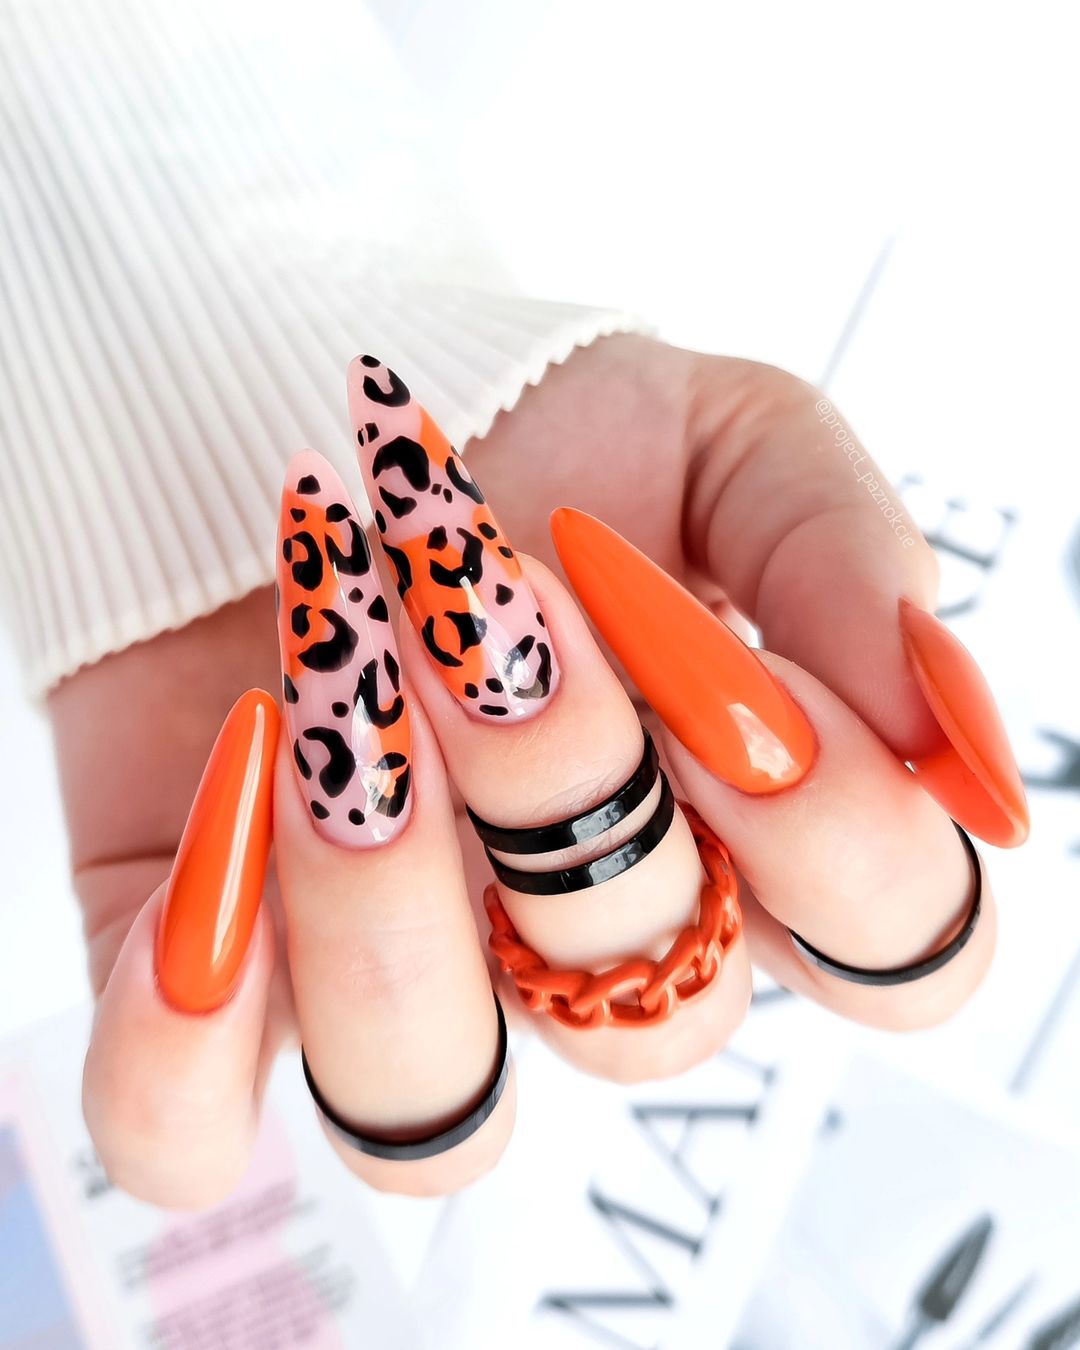
Neon Leopard Print Nails
This striking design combines neon orange with a bold leopard print, creating a vibrant and edgy look. The mix of bright colors and animal print makes these nails perfect for those who love to stand out. The stiletto shape enhances the dramatic effect, making these nails a statement piece.
-
- Neon orange polish (Brand: ORLY “Orange Punch”)
- Light pink polish (Brand: Essie “Ballet Slippers”)
- Black polish (Brand: OPI “Black Onyx”)
- Dotting tool (Brand: Winstonia Nail Art Dotting Tools)
- Gel polish top coat (Brand: Gelish)
Steps to Create at Home:
-
- Apply a base coat and cure under a UV/LED lamp.
- Paint the neon orange and light pink base coats, curing each layer.
- Use a dotting tool to create the leopard print with black polish on the pink nails and cure.
- Finish with a gel top coat and cure for a high-gloss finish.
- Cleanse the nails with an alcohol wipe to ensure a smooth surface.
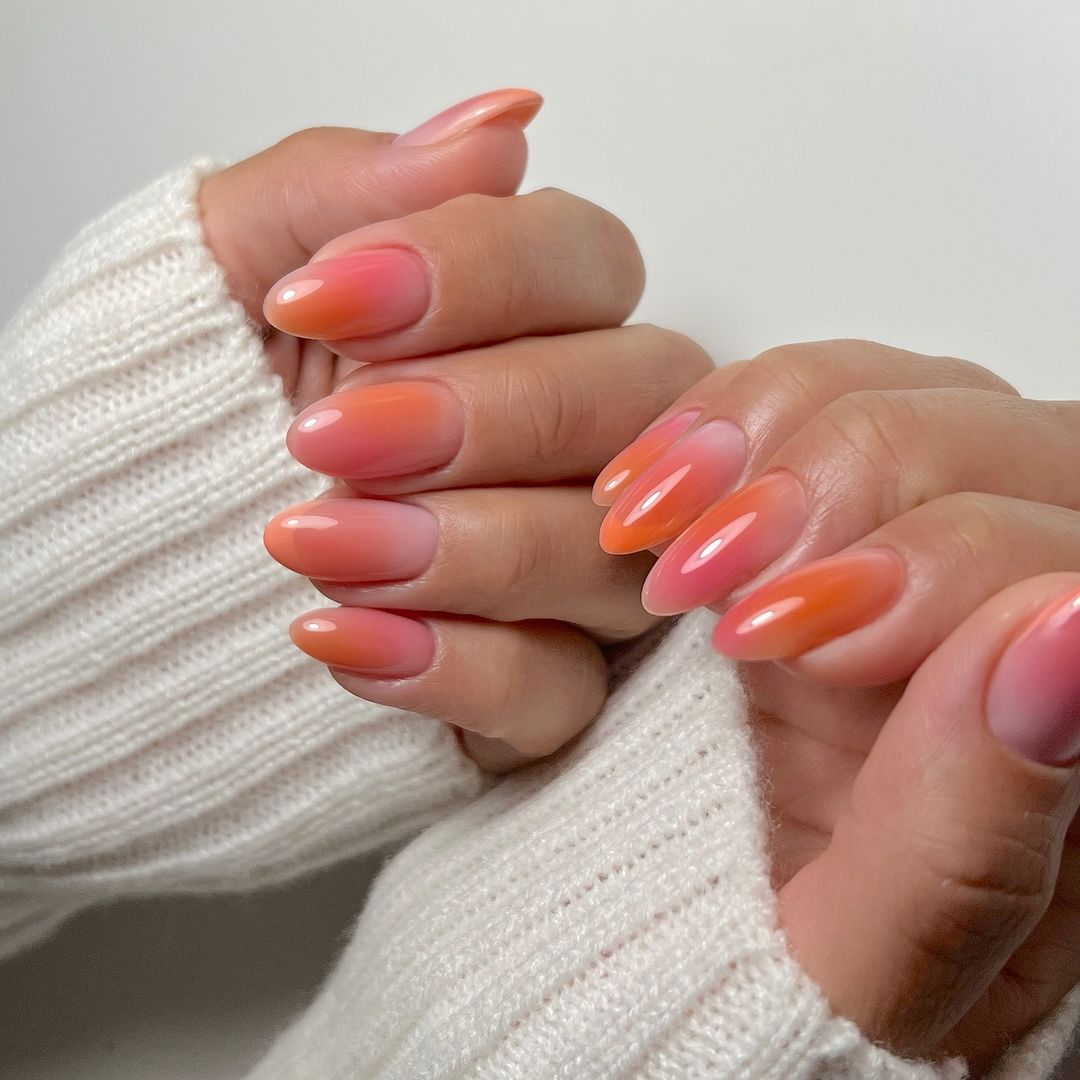
Sunset Gradient Almond Nails
These sunset gradient almond nails feature a beautiful blend of warm tones, transitioning from pink to orange. The gradient effect mimics the colors of a sunset, creating a serene and elegant look. The almond shape adds a touch of sophistication, making these nails perfect for any occasion.
-
- Pink polish (Brand: Essie “Strike a Rose”)
- Coral polish (Brand: OPI “Cajun Shrimp”)
- Orange polish (Brand: Sally Hansen “Sun-kissed”)
- Sponge for gradient effect (Brand: Beauty Secrets)
- Gel polish top coat (Brand: CND Shellac)
Steps to Create at Home:
-
- Apply a base coat and cure under a UV/LED lamp.
- Use a sponge to create the gradient effect, blending pink to orange.
- Cure each layer under the UV/LED lamp.
- Finish with a gel top coat and cure for a glossy finish.
- Cleanse the nails with an alcohol wipe to remove any tacky residue.
Classic French Tips with Orange Twist
This design is a playful twist on the classic French manicure. The nails feature a nude base with bright orange tips, adding a modern and vibrant touch to the timeless style. The almond shape enhances the elegance of the design, making it suitable for both casual and formal settings.
-
- Nude base polish (Brand: OPI “Be There in a Prosecco”)
- Bright orange polish (Brand: Essie “Tangerine Tease”)
- French tip guides (Brand: Kiss)
- Gel polish top coat (Brand: Gelish)
Steps to Create at Home:
-
- Apply a nude base coat and cure under a UV/LED lamp.
- Place French tip guides on the nails and paint the tips with bright orange polish.
- Remove the guides and cure under the lamp.
- Finish with a gel top coat and cure for a high-gloss finish.
- Cleanse the nails with an alcohol wipe to ensure a perfect shine.
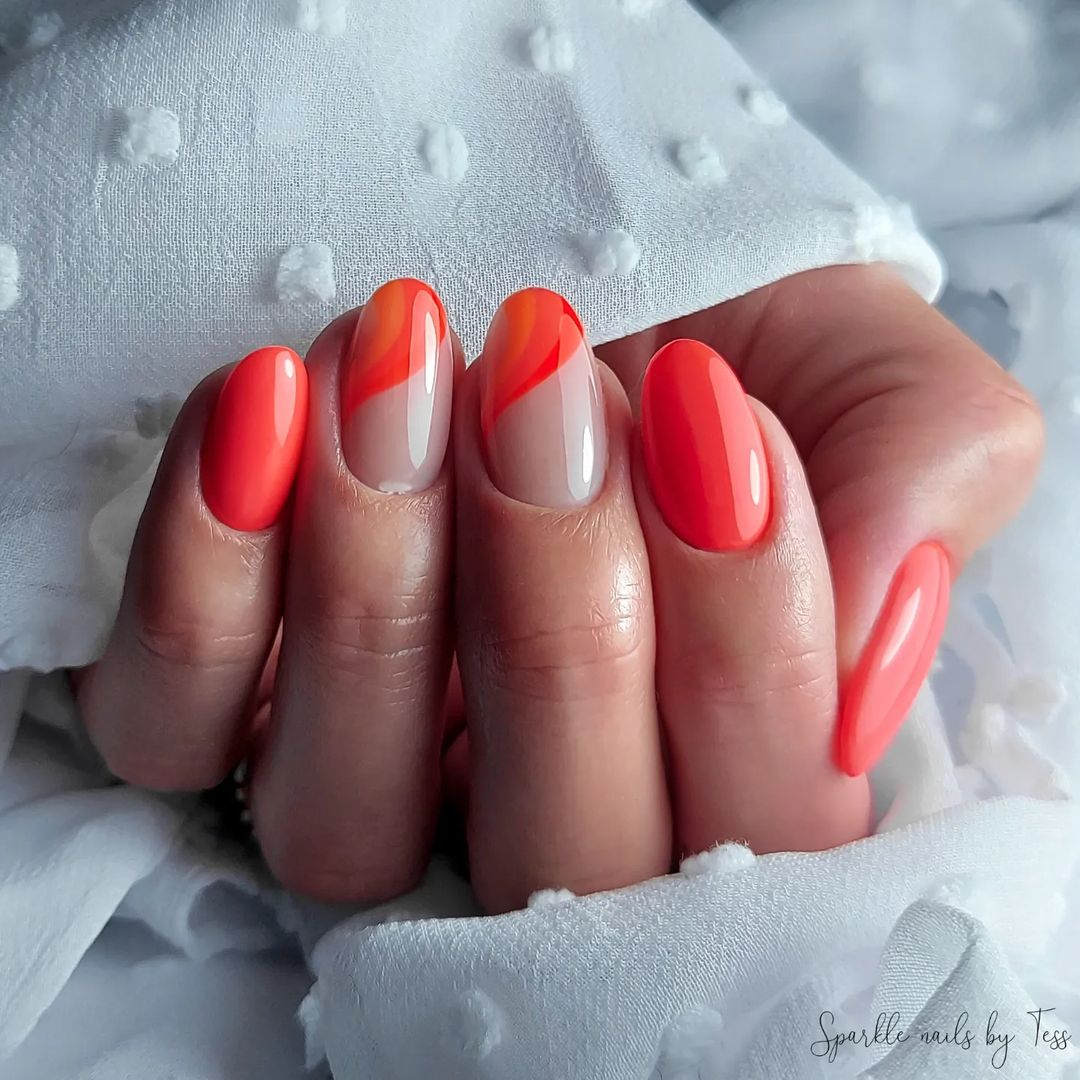
Coral and Orange Wave Nails
These coral and orange wave nails feature a unique wave design that adds a touch of creativity to the classic manicure. The combination of coral and orange creates a vibrant and playful look, perfect for those who love bold and artistic nail designs. The almond shape enhances the overall elegance of the nails.
-
- Coral polish (Brand: OPI “Live.Love.Carnaval”)
- Orange polish (Brand: Essie “Tangerine Tease”)
- Fine detail brush (Brand: Beetles Nail Art Brushes)
- Gel polish top coat (Brand: CND Shellac)
Steps to Create at Home:
-
- Apply a base coat and cure under a UV/LED lamp.
- Paint the nails with coral polish and cure.
- Use a fine detail brush to create the orange wave designs on each nail and cure.
- Finish with a gel top coat and cure for a glossy finish.
- Cleanse the nails with an alcohol wipe to ensure a smooth surface.
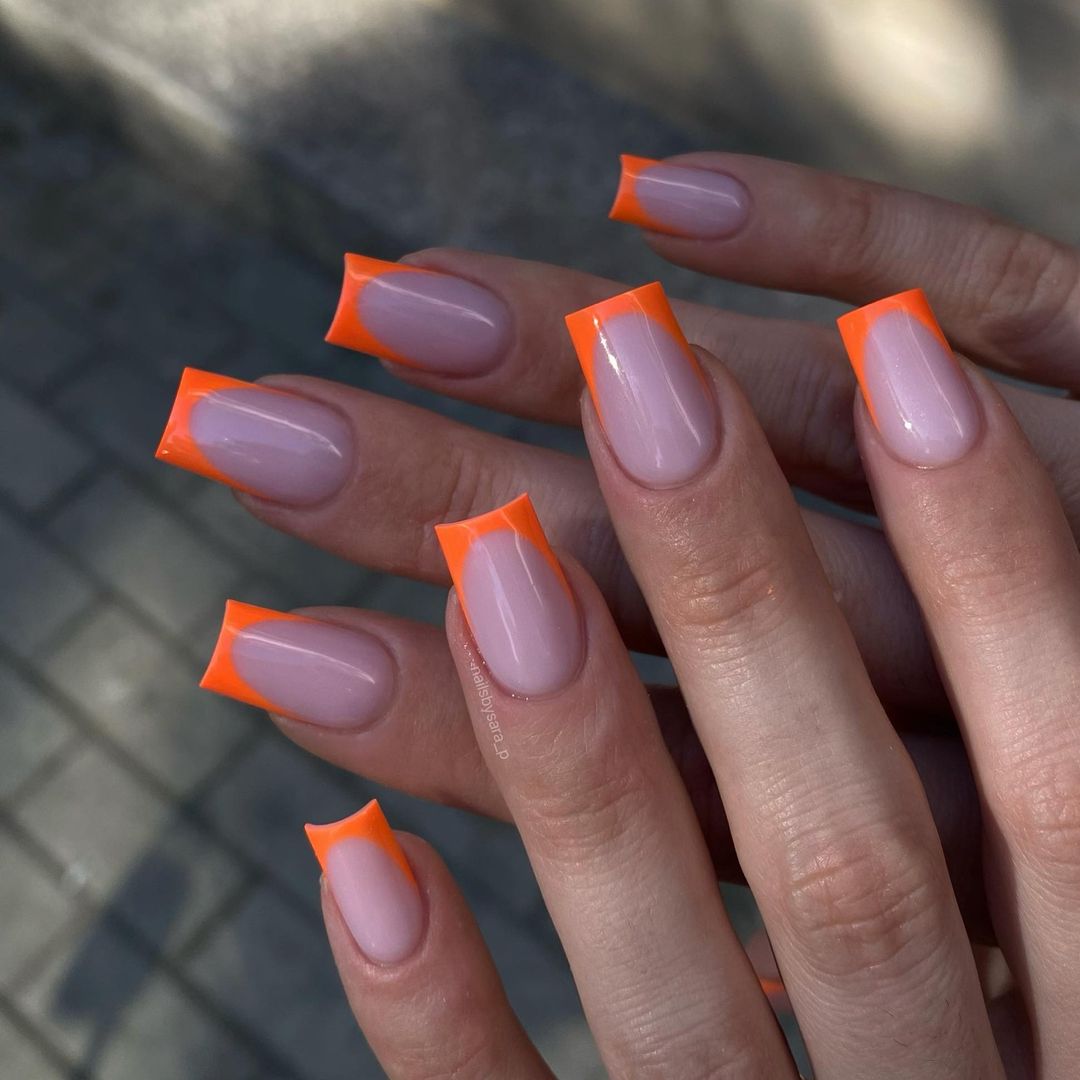
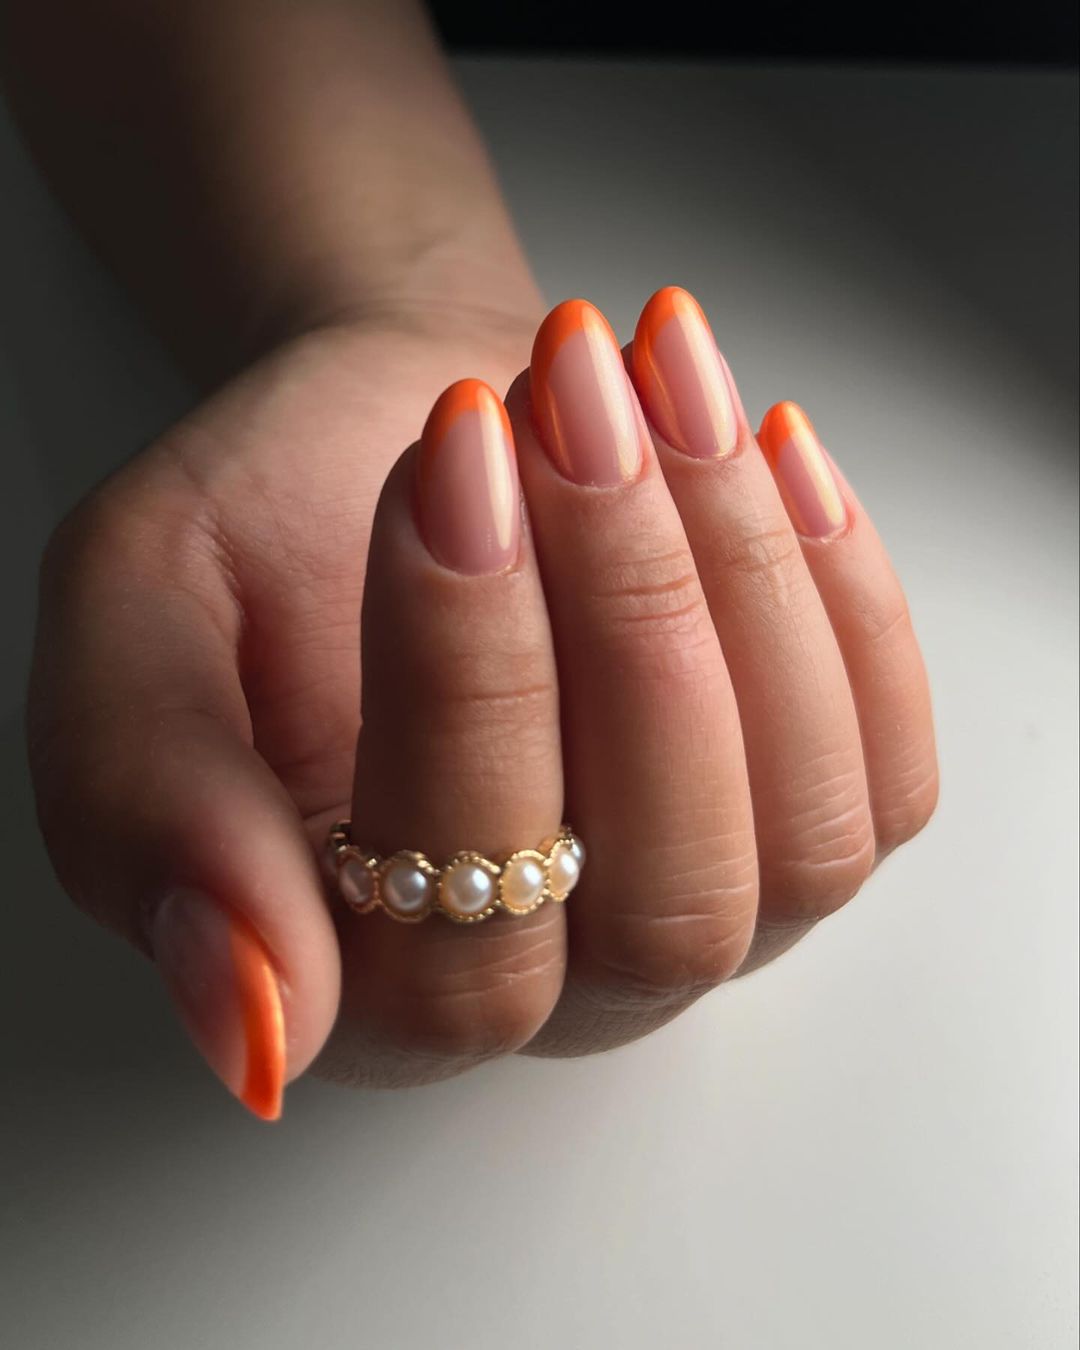
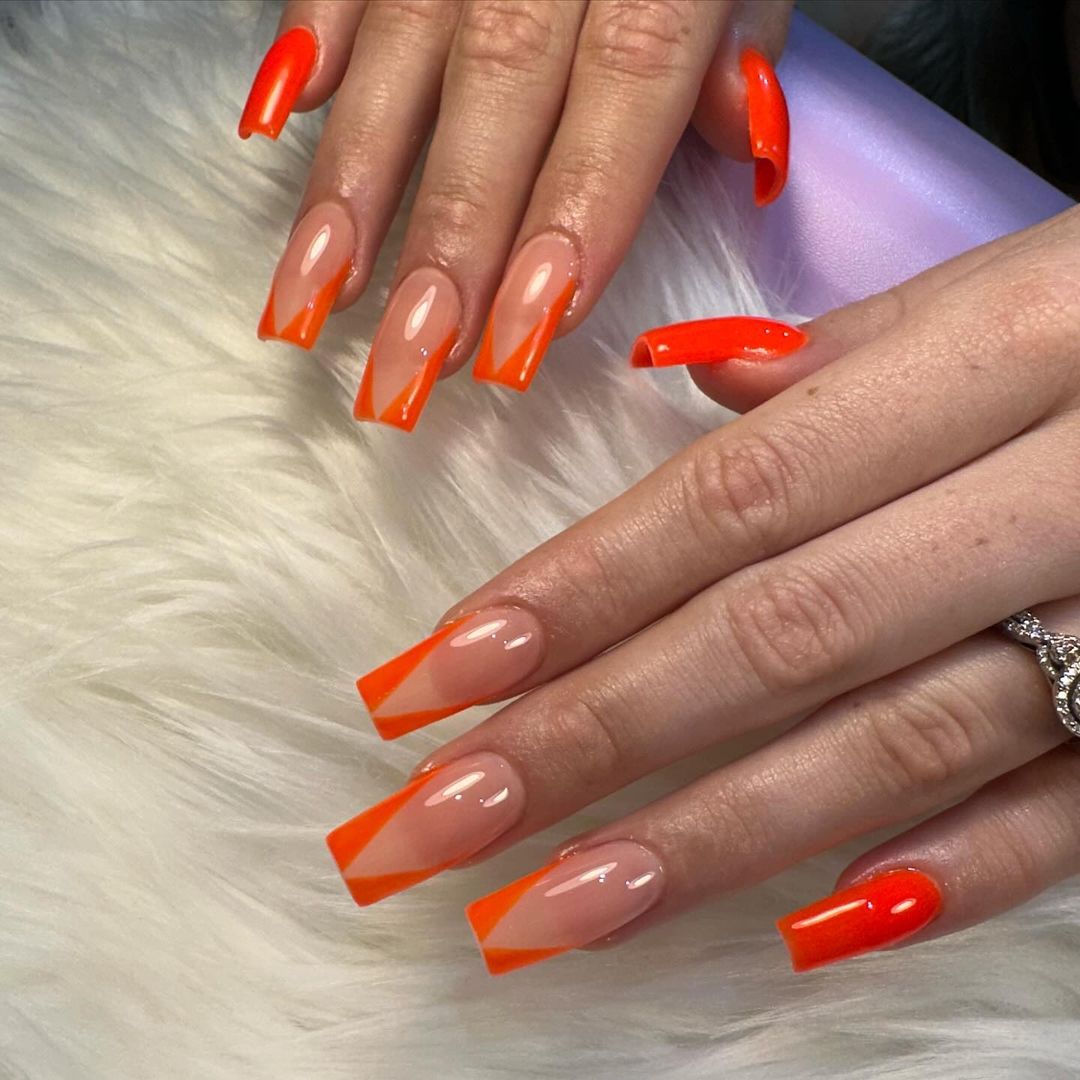
Orange French Tips with Nude Base
This design features a modern take on French tips with a bright orange color. The nude base provides a clean and elegant backdrop, while the orange tips add a pop of color. The coffin shape enhances the overall look, making these nails perfect for both casual and formal occasions.
-
- Nude base polish (Brand: OPI “Bubble Bath”)
- Bright orange polish (Brand: ORLY “Orange Punch”)
- French tip guides (Brand: Kiss)
- Gel polish top coat (Brand: Gelish)
Steps to Create at Home:
-
- Apply a nude base coat and cure under a UV/LED lamp.
- Place French tip guides on the nails and paint the tips with bright orange polish.
- Remove the guides and cure under the lamp.
- Finish with a gel top coat and cure for a high-gloss finish.
- Cleanse the nails with an alcohol wipe to ensure a smooth surface.
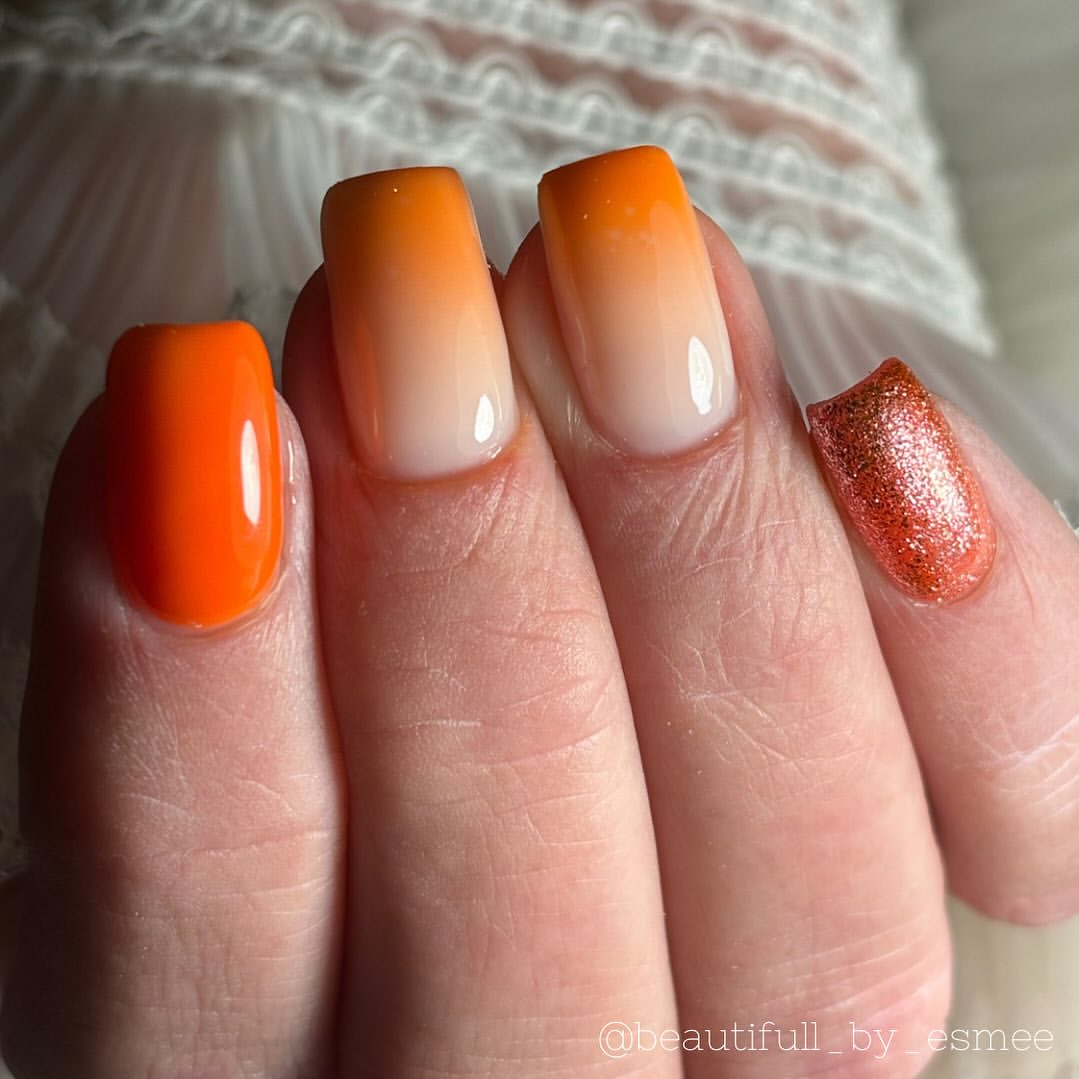
Gradient Orange Nails with Glitter Accent
These gradient orange nails feature a smooth transition from nude to bright orange, with a touch of glitter on the accent nail. The gradient effect creates a sophisticated look, while the glitter adds a hint of sparkle. The square shape provides a modern and chic appearance, perfect for any occasion.
-
- Nude base polish (Brand: Essie “Ballet Slippers”)
- Bright orange polish (Brand: Sally Hansen “Sun-kissed”)
- Gold glitter polish (Brand: China Glaze “Golden Enchantment”)
- Sponge for gradient effect (Brand: Beauty Secrets)
- Gel polish top coat (Brand: CND Shellac)
Steps to Create at Home:
-
- Apply a nude base coat and cure under a UV/LED lamp.
- Use a sponge to create the gradient effect from nude to bright orange.
- Apply gold glitter polish to the accent nail and cure.
- Finish with a gel top coat and cure for a high-gloss finish.
- Cleanse the nails with an alcohol wipe to remove any tacky residue.
FAQ
Q: How long do gel nails typically last? A: Gel nails can last up to three weeks with proper care, making them a durable option for long-lasting manicures.
Q: What is the best way to remove gel polish at home? A: Soak a cotton ball in acetone, place it on the nail, and wrap it with foil. Let it sit for 10-15 minutes, then gently push off the softened gel with a cuticle stick.
Q: Can I create nail art on very short nails? A: Absolutely! Many designs, such as French tips, glitter accents, and minimalistic art, look great on very short nails. It’s all about creativity and precision.
Save Pin