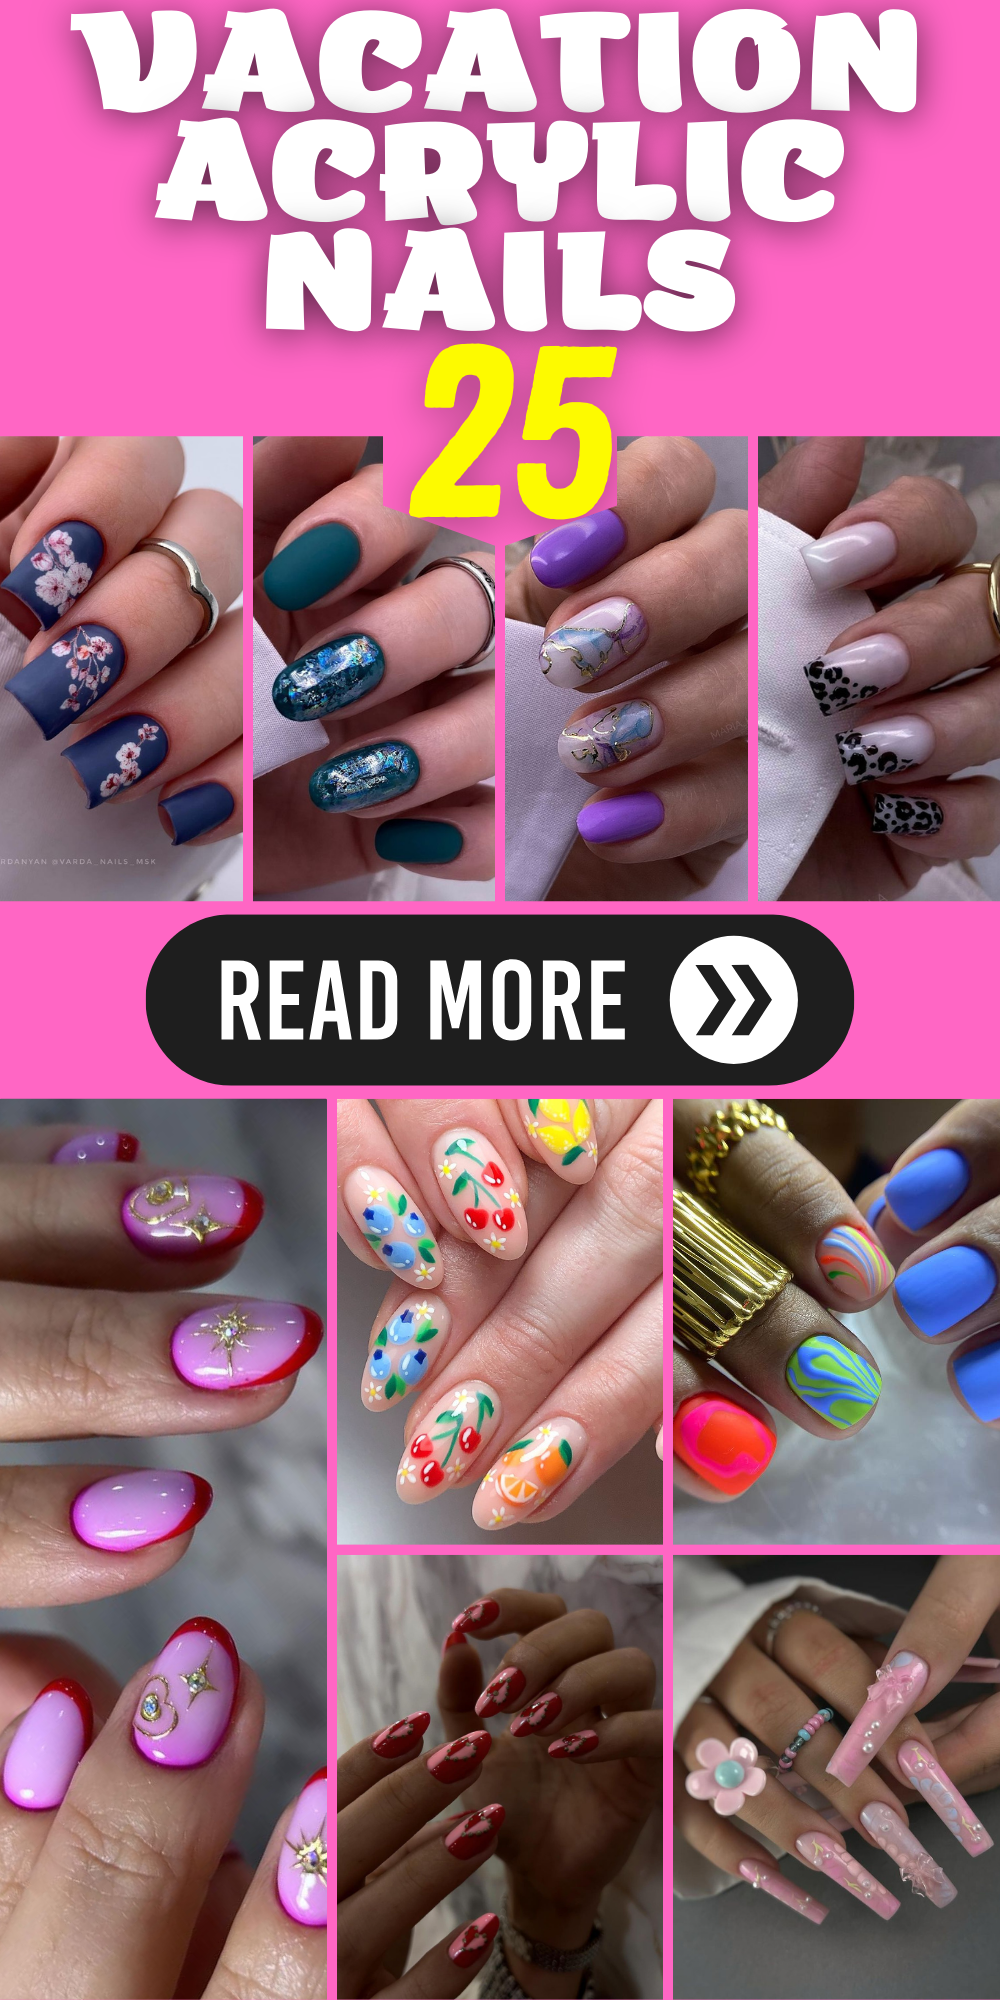
25 Vacation Acrylic Nail Ideas: Perfect Designs for Your Summer Getaway
Did you ever think about how vacation can be reflected in one’s nails? Believe it or not, I am a professional nail technician who changes lives with a fresh set of acrylics every single day. But when it comes to vacation nails, there is something else that happens with the mix of excitement and expression. What are some trending designs right now that represent the spirit of holidays? What kind of simple ideas can make your beach fashion look cute? And what inspiration might we take from Europe’s vibrant landscapes or the Caribbean sea blues or Florida bright colors’ vibes? So let us take this creative journey together and discover some holiday acrylics which combine elegance with fun!
Sophisticated Fuchsia with Floral Accents
Embrace complexity, sophistication with such vibrant crimson nails bedecked in fragile floral touches as an appreciation of the classical French tip but with brave modernity. It is a timeless contrast between intense colors and a neutral background that will be fitting for a chic vacation at an island spa or a luxurious Italian villa.

- Bright Fuchsia Acrylic Powder
- Pale Pink Base Polish
- Tiny Rhinestones for Embellishment
- Fine Art Brushes
Start by applying the soft pink polish all over your nails as the base coat before adding fuchsia on just the tips. Use fine brushes to paint delicate flowers and place rhinestones like dew drops where appropriate. This is not merely manicure; it is wearable art for your adventures!
Playful Pink and Leopard Print Fusion
To the daring, these pink nails that are neon with a hint of leopard print aren’t just an announcement but also a dialogue. This style is suitable for those impromptu dance parties in Florida or oddball Caribbean carnivals.
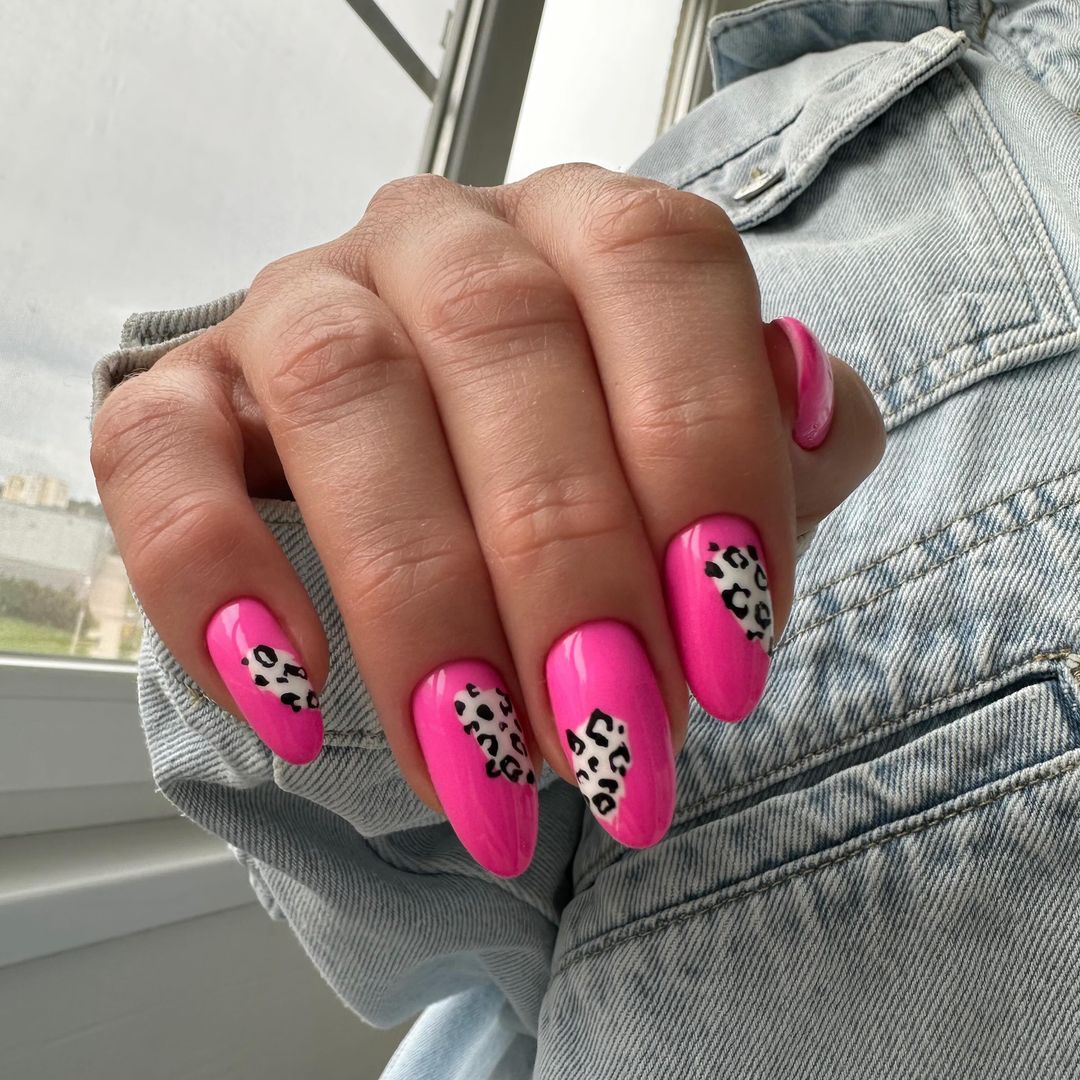
- Acrylic Powder – Neon Pink
- Precision Paint – Black & White
- High Gloss Finish Top Coat
Apply a pink foundation then freestyle some leopard spots; imperfection is key. Cover your design with a glossy topcoat to seal it for any adventure that comes your way.
Serene Seafoam with Glittery Accents
Use these sea bubble nails then you will feel like you are on a relaxing beach holiday. These subtle sparkles and crystals look expensive because they remind me of the sun reflecting off sand in Mexico. They show that less is more which matches well with neutral clothes.
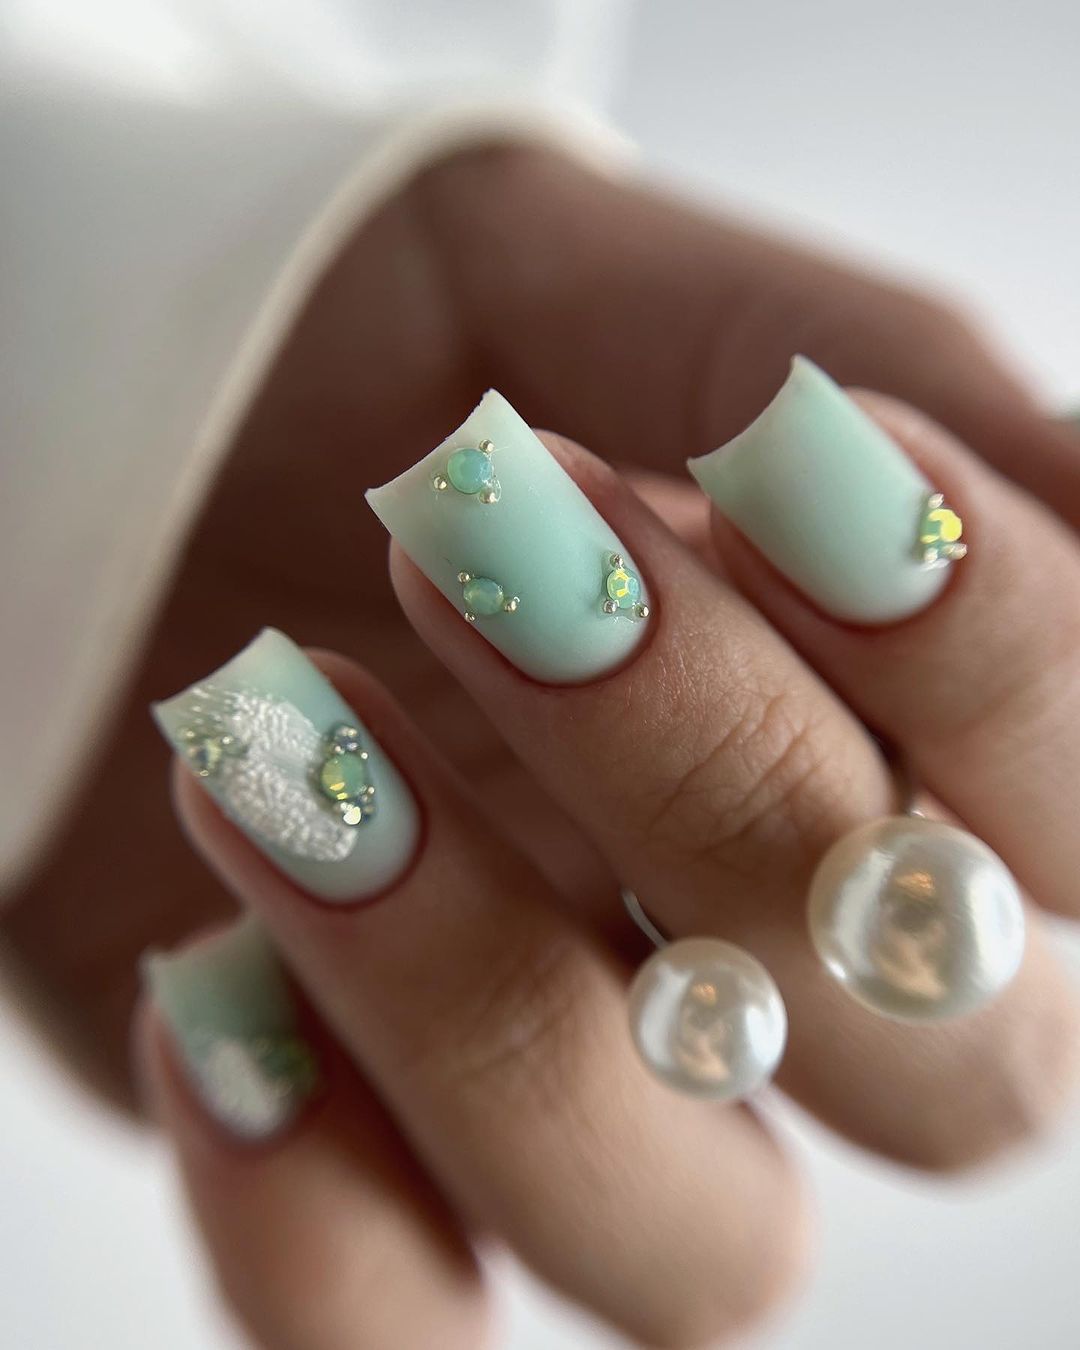
- Acrylic powder in pastel sea bubble
- Glitter that shines different colors depending on how it catches the light and crystal accents
- Delicate dotting tools for making tiny dots or other shapes on nails
First, paint your nails this soft green shade then wait until it dries a little before applying some glitter over them and sticking one crystal at each point carefully. Can you imagine what would happen? You get calm manicure that speaks without shouting.
Floral Elegance with White Detail
What makes these nails attractive are the delicate flowers that have been painted on them by hand, with every nail being outlined in white like a canvas. This is an imitation of nature’s own creativity and would be perfect for a peaceful holiday or refined afternoon tea.
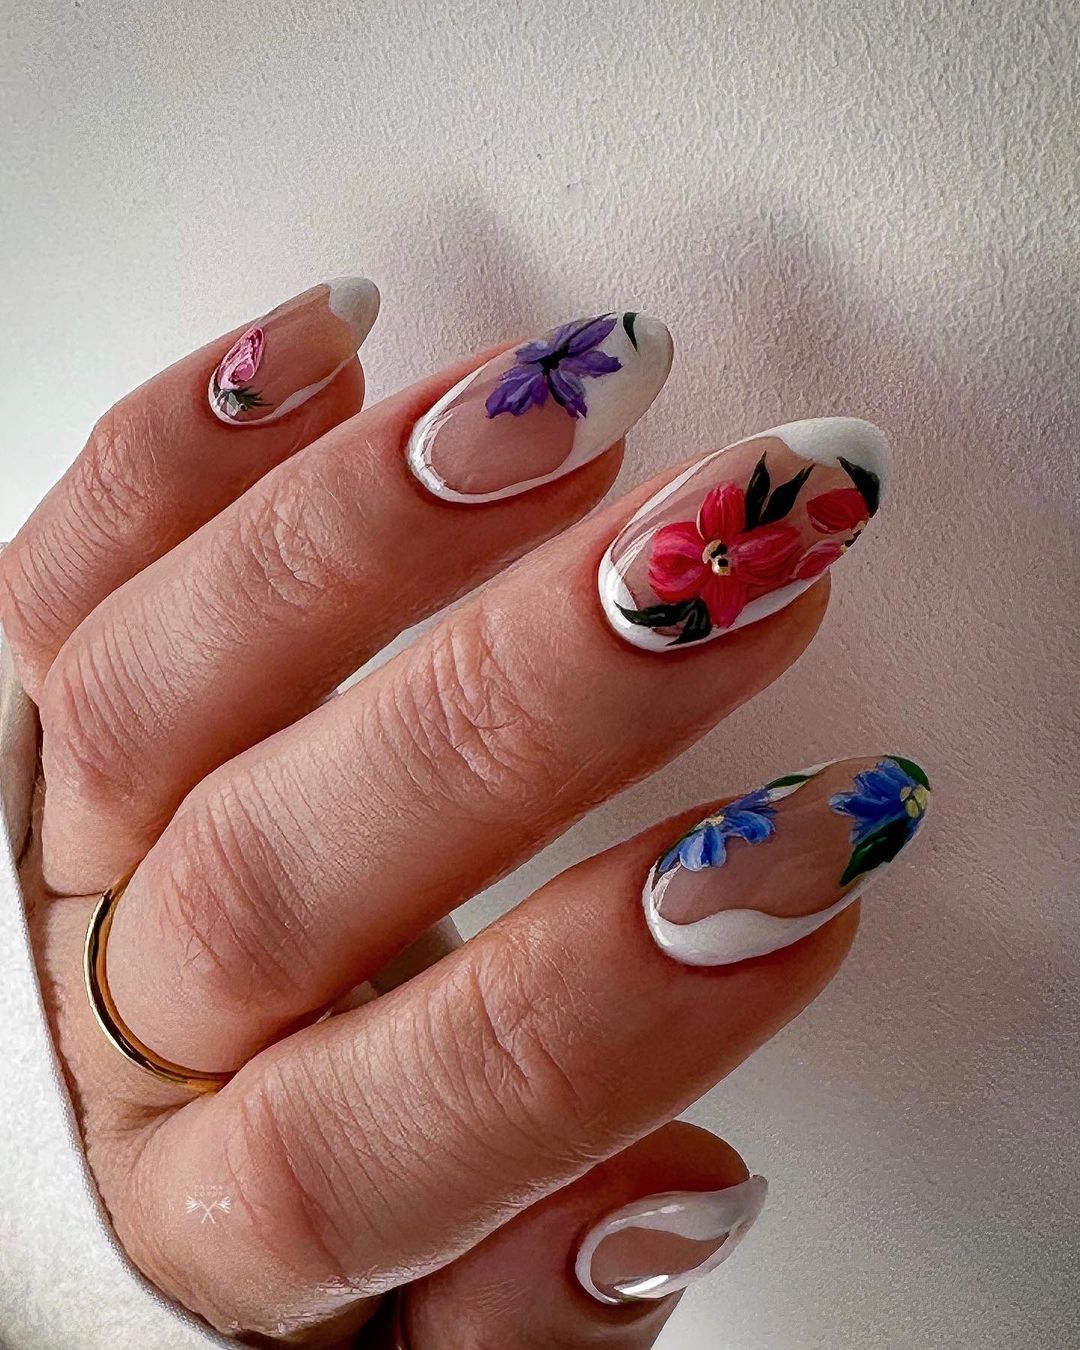
- Matte White Acrylic Powder
- Fine Detail Brushes for Floral Art
- A Range of Polish Colors for the Petals
- A Matte Finish Topcoat to Seal the Design
Start off with painting a swathe across each nail as an indication of where they should end. Combine different shades together to form petals then draw them on using a steady hand along with matte top coat. At this point, it becomes obvious that no two nails are alike since they all become individual works of art once finished off with matte topcoat.
Save Pin

Midnight Bloom
These nails remind me of a garden at midnight, with its deep blue shades acting as the perfect backdrop for soft cherry blossoms. This is a selection that whispers sophistication and would fit right in among chic boutiques and cafes in any city across Europe.
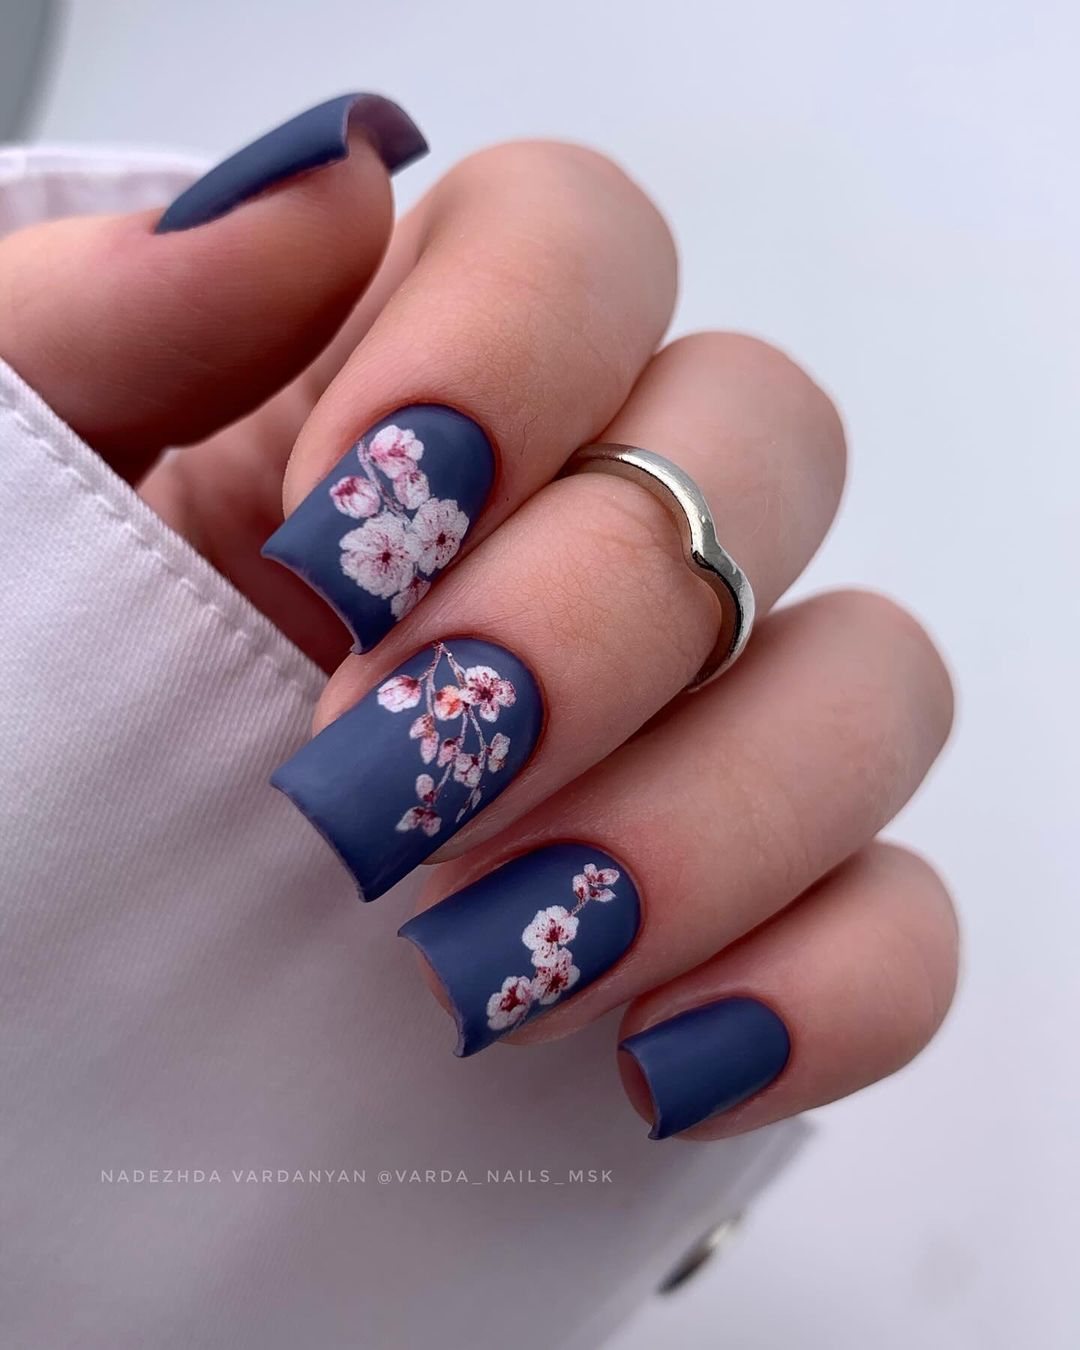
- Matte Acrylic Powder – Deep Blue
- Polish (White and Pink) for Blossoms
- Topcoat (Glossy) for Contrast
Use blue matte powder first, then apply cherry blossoms using white and pink polish. Vary size and stage of bloom to make it look natural. On top of flowers, glossy topcoat adds depth and vitality to each nail.
Aquatic Allure
These nails immediately make one feel like they are in the middle of an ocean with its vivid aqua blue. Fun mermaid scale accent nails make this set perfect for vacationing in the tropics or a day at the beach.
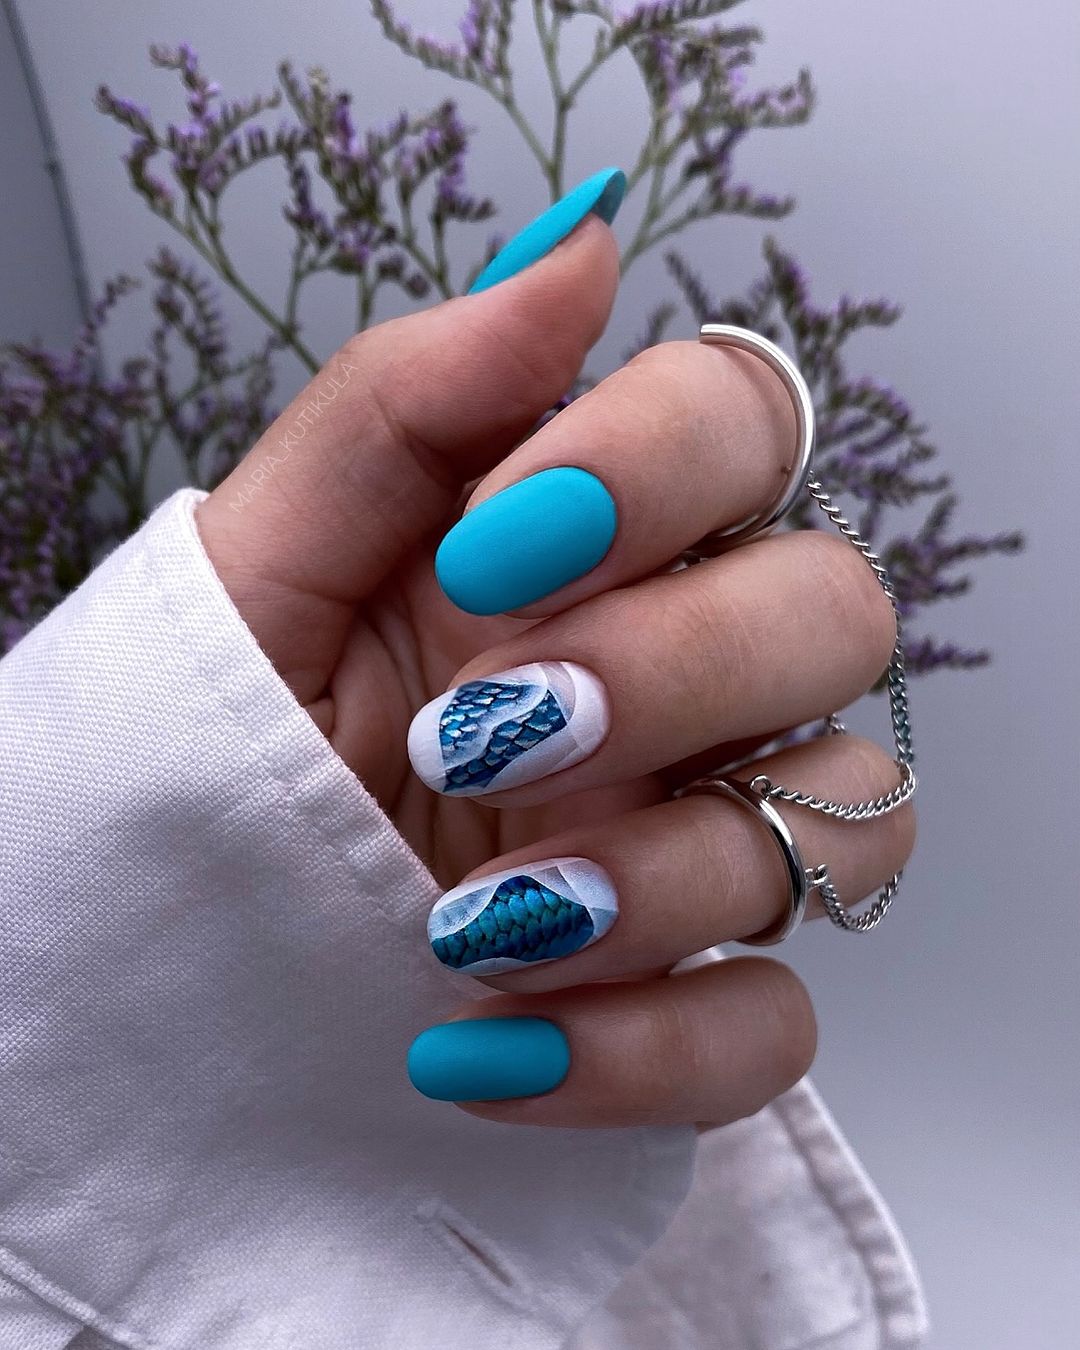
- Aqua Blue Acrylic Powder
- White and Multiple Shades of Blue for the Scales
- A Sheer Shimmer Topcoat for a Water-like Finish
Start with aqua base coat, then use various blues to create scales on accent nails. Add highlights with white, and a shimmer topcoat brings your underwater fantasy to life
Whispering Hearts
These nails, have a pale pink base with cute white hearts on them. This is really great for a Valentine’s Day nail look or for a romantic getaway. The hearts are applied softly and bring an element of love and tenderness to any design.
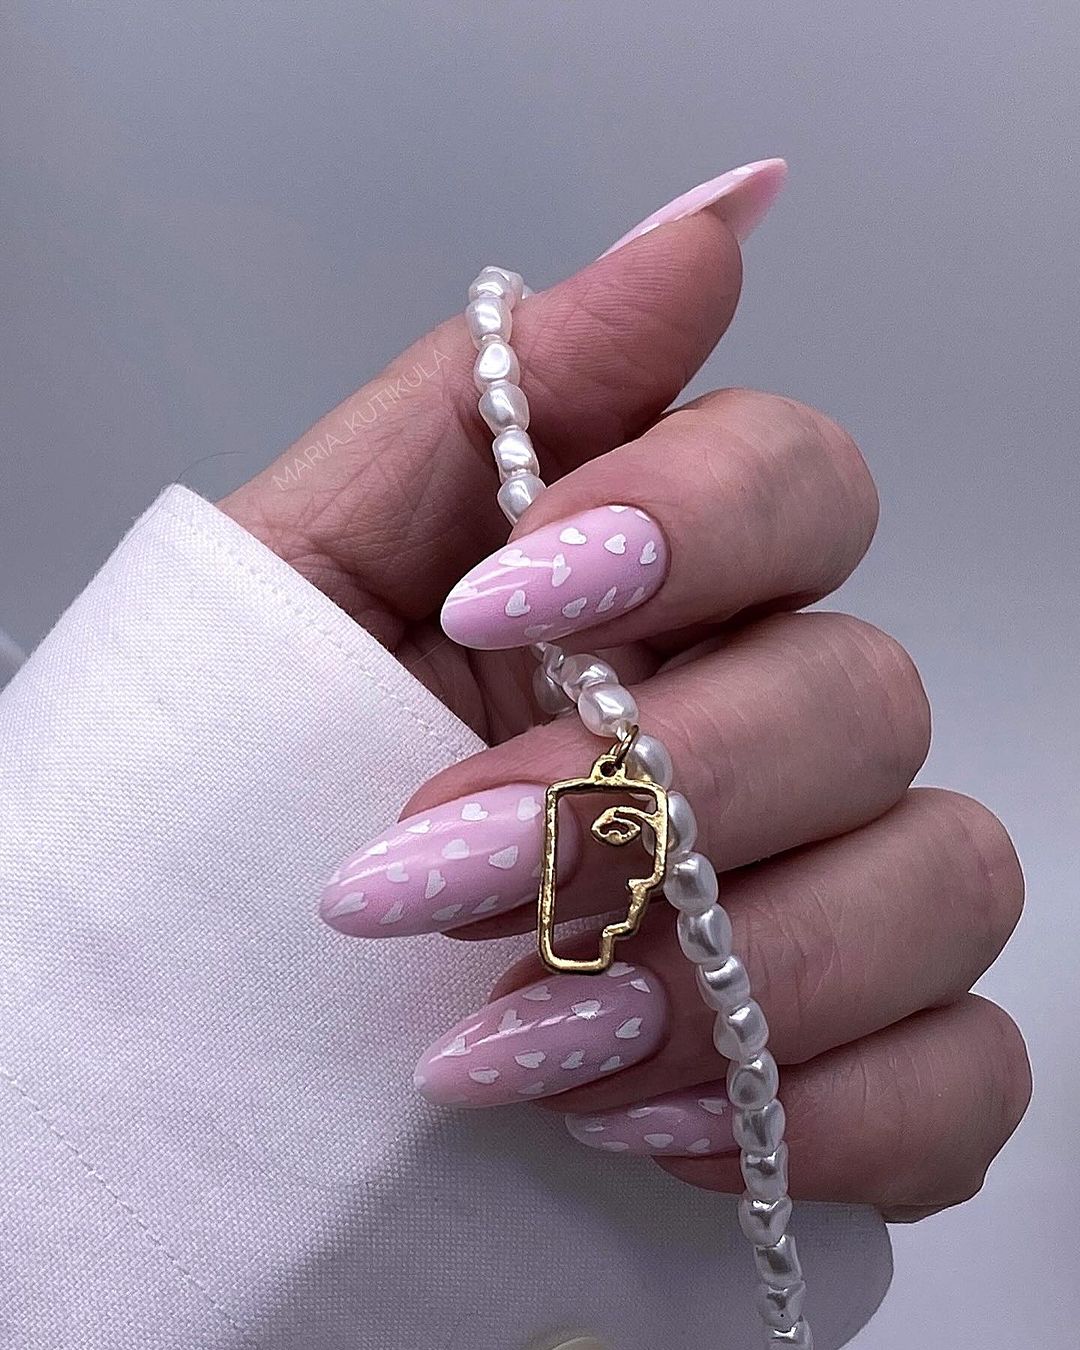
- Acrylic Powder in Pastel Pink
- White Acrylic Paint (for heart details)
- Dotting Tool or Fine Tip Brush
Paint your nails with the pastel pink polish as the base color. Then, use a dotting tool or fine tip brush to create white hearts on each nail. Make sure they are not too noticeable; instead, let them act more like delicate accents that reflect back the sentiment represented by this design.
Oceanic Splendor
The depth of the ocean is represented by a deep blue. To mimic the reflection of light on water, some nails are covered in glitter. This set is perfect for a fancy boat trip or hanging out at the beach.
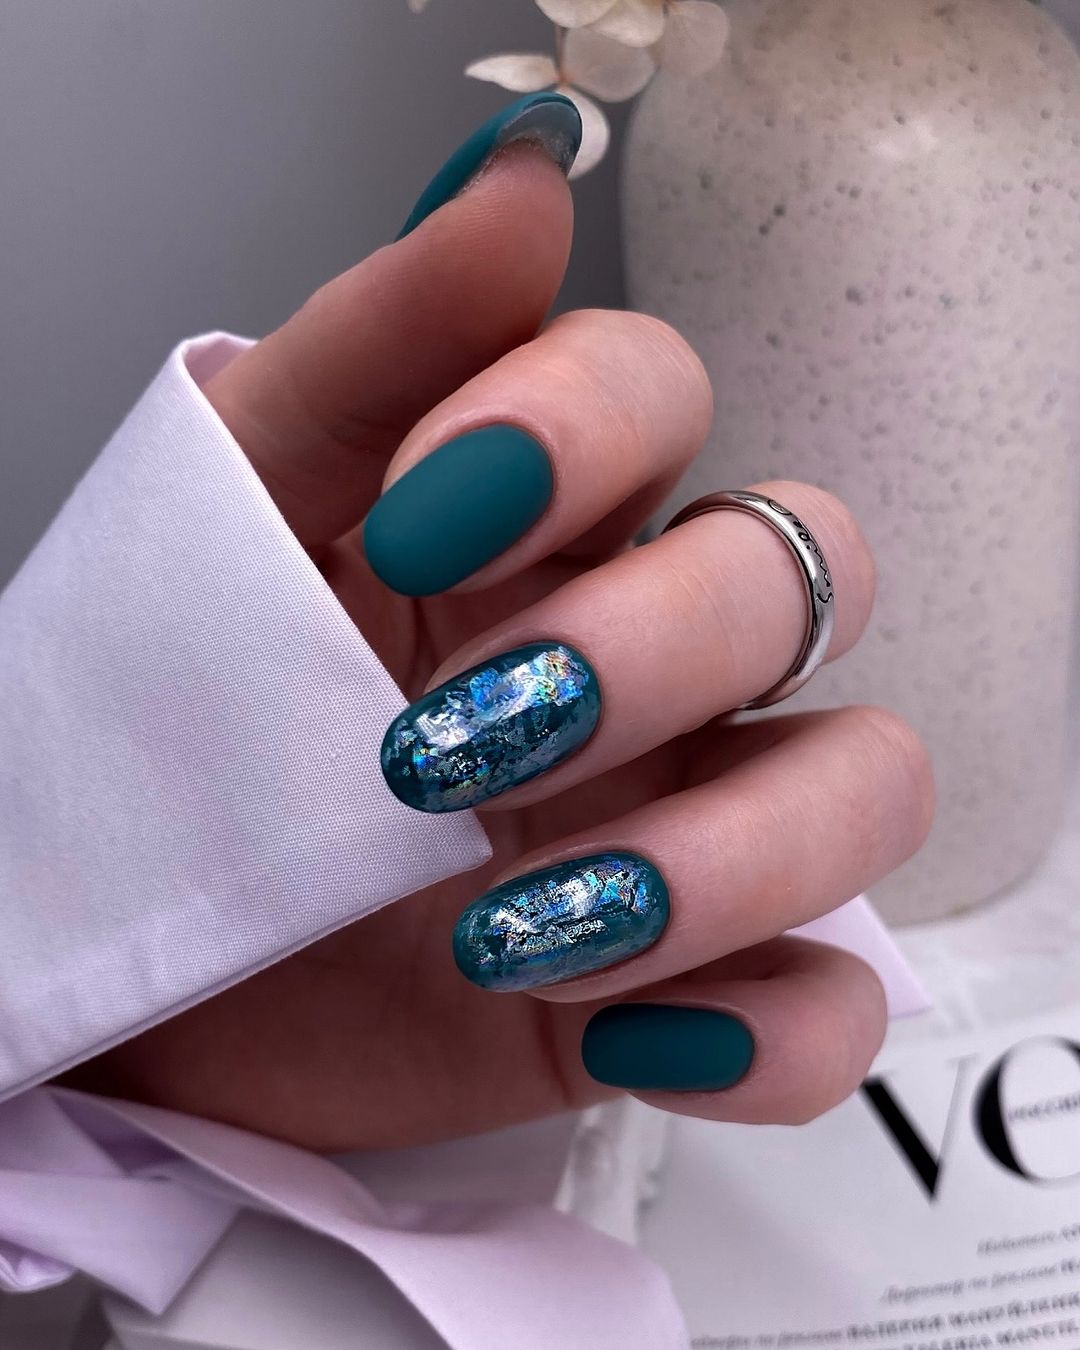
- Teal Acrylic Powder
- Blue and Silver Glitter Mix
- Clear Gel Topcoat for Encapsulation
Start with the teal powder as your base layer. After mixing your glitters together, put them onto accent nails and seal everything off with a gel topcoat. The result should be an entrancing effect that seems like one could fall right into it.
Lavender Luxe
This nail design is inspired by blooming lavender fields, with a matte purple bottom and marbled accents that are flecked with gold. It’s the perfect design for an indulgent retreat or classy event—the luxurious side of nature.
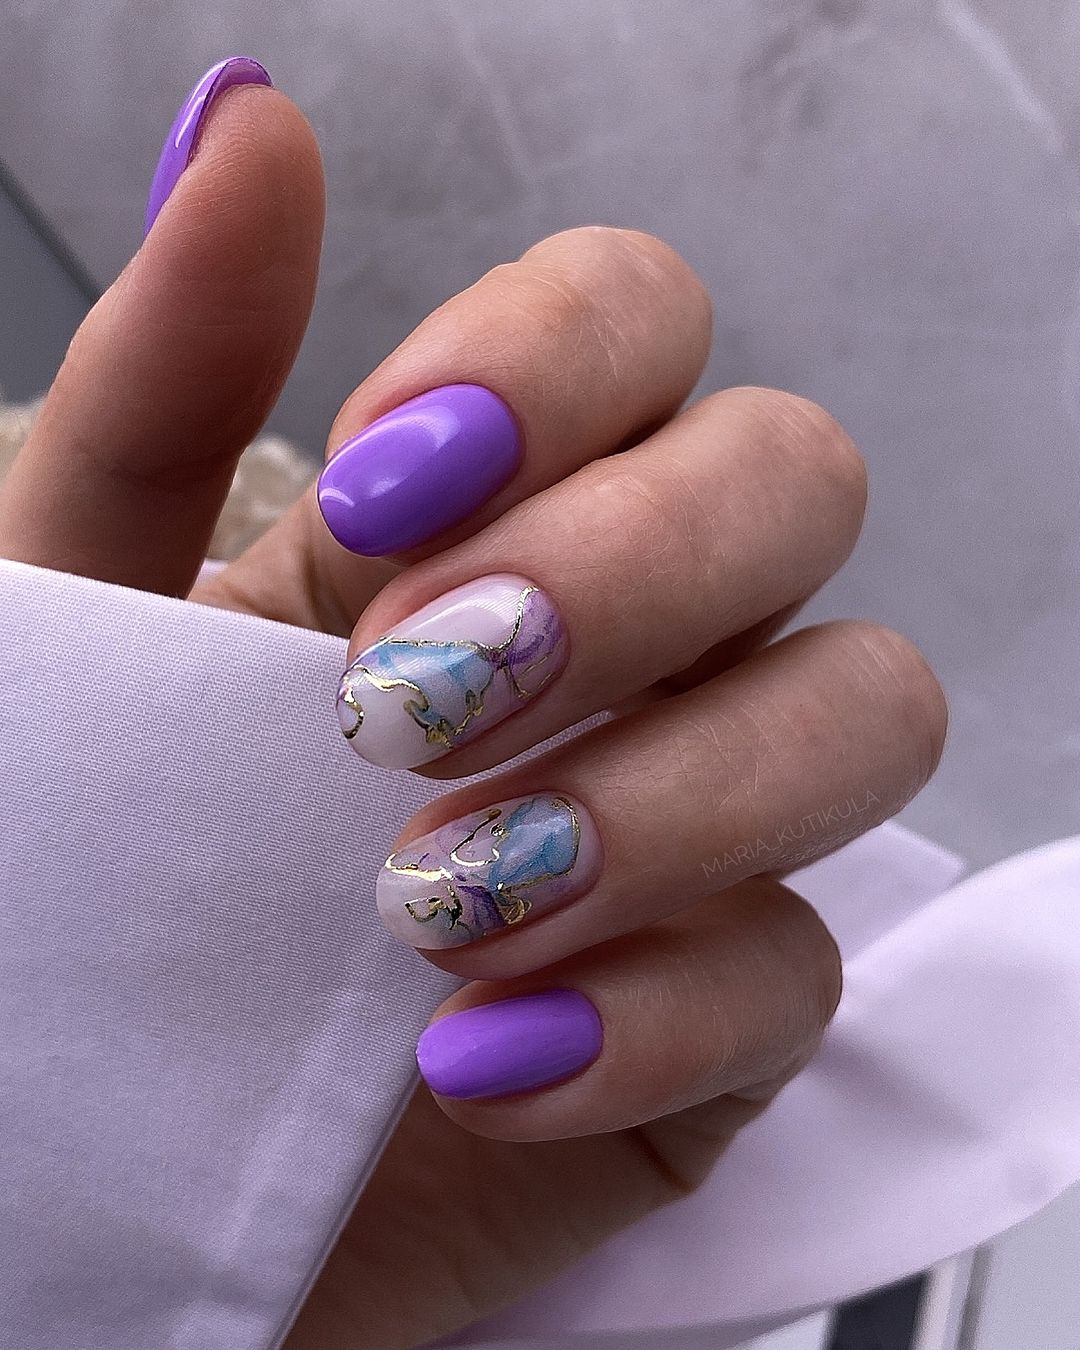
- Matte Lavender Acrylic Powder
- Polish for Marbling: White + Gold
- Brush for Marble Effects (Detailing)
Start off with applying your base coat in matte lavender. Then take your white and gold polish, along with a detailing brush, and create a marble effect. Let the gold be sparingly used—like little sunbeams caught within those purple fields.
Save Pin
Classic Chic with a Wild Twist
The classic and timeless beauty of a shiny white base can be made fierce with pops of vibrant leopard print. This design celebrates traditional elegance coupled with an undomesticated soul – perfect for the stylish adventurer.
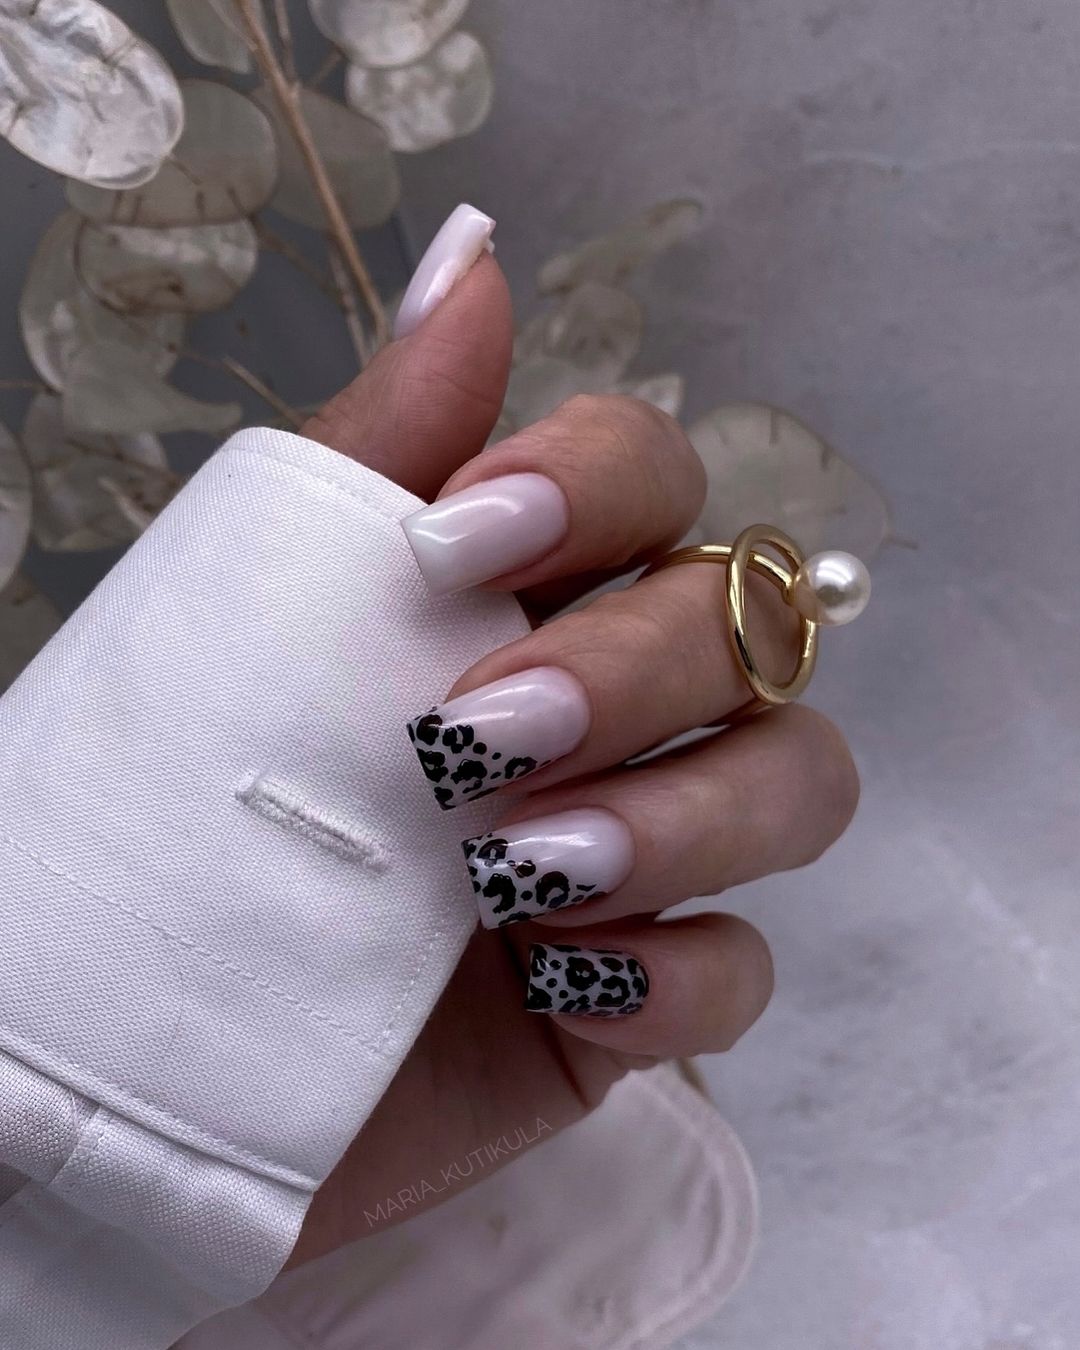
- Glossy White Acrylic Powder
- Nude and Black Polish (for making Leopard spots)
- Top Coat (for a smooth finish)
Start by painting your nails with the white polish as a base. Next, use a small brush to create leopard spots in black over each nude spot. The trick is to flick your hand in order to achieve that famous jagged shape. Lastly, apply top coat for shine and protection.
Ocean Wave Swirls
Can you picture if your nails were a snare for the rhythm of ocean waves? The calming effect produced by cool aqua swirling over a translucent base is also quite mesmerizing which is even more enhanced by crystals that imitate sea’s glimmering.
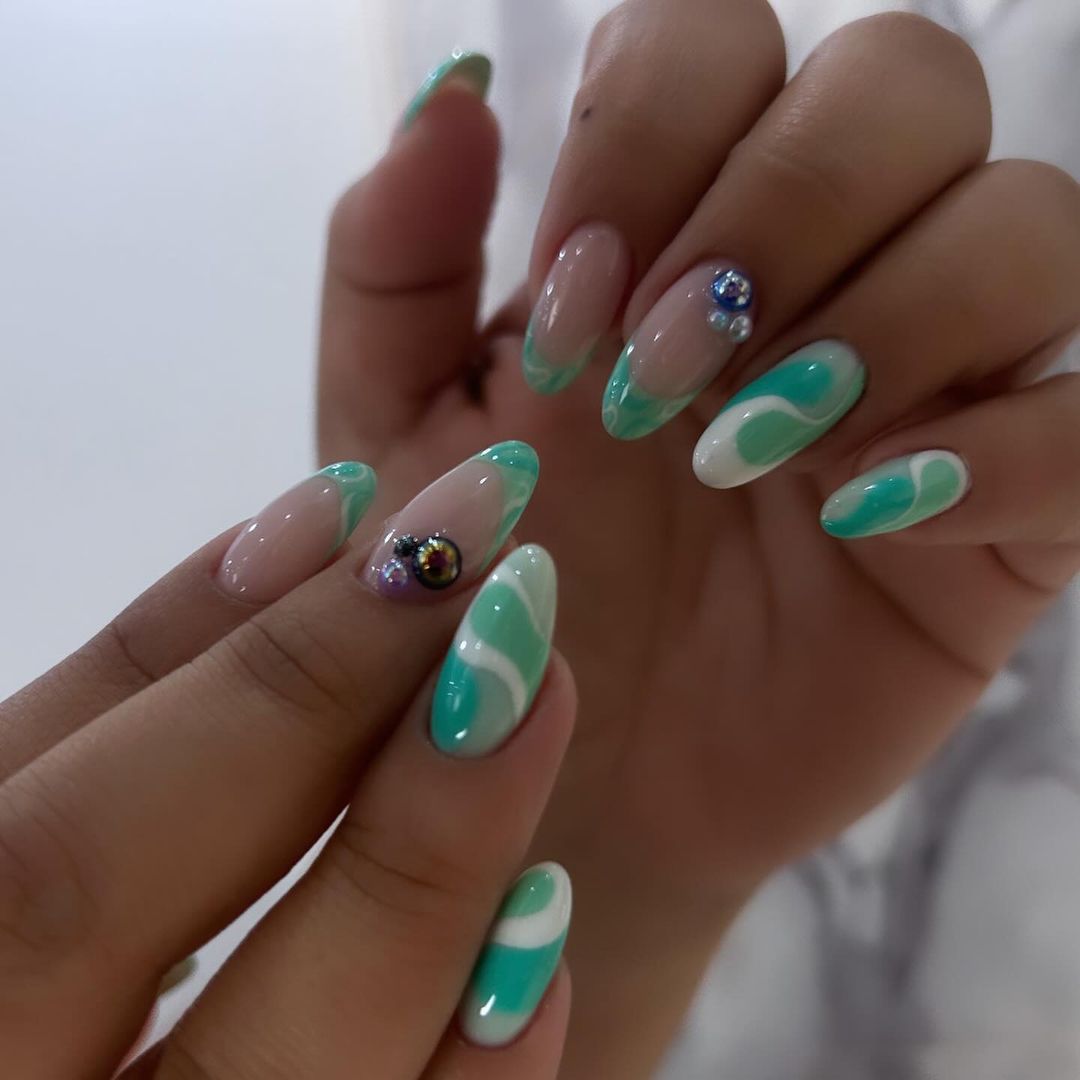
- Gel polishes in Aqua and White for Swirls
- Crystals
- Sheer Base Coat
Begin with a sheer base, then take an ultra-thin brush and apply white and aqua gel polish in swirls. While it’s not hardened yet, put some crystals to catch reflections of light like sunshine does on water. Set under the lamp until dry.
Geode Grandeur
A salute to the ornate elegance of geodes, this manicure combines a quiet foundation with a striking confederate. The geode pattern is an intricate masterpiece made up of different shades and gold leaf ornamentation that reminds one of jewels.
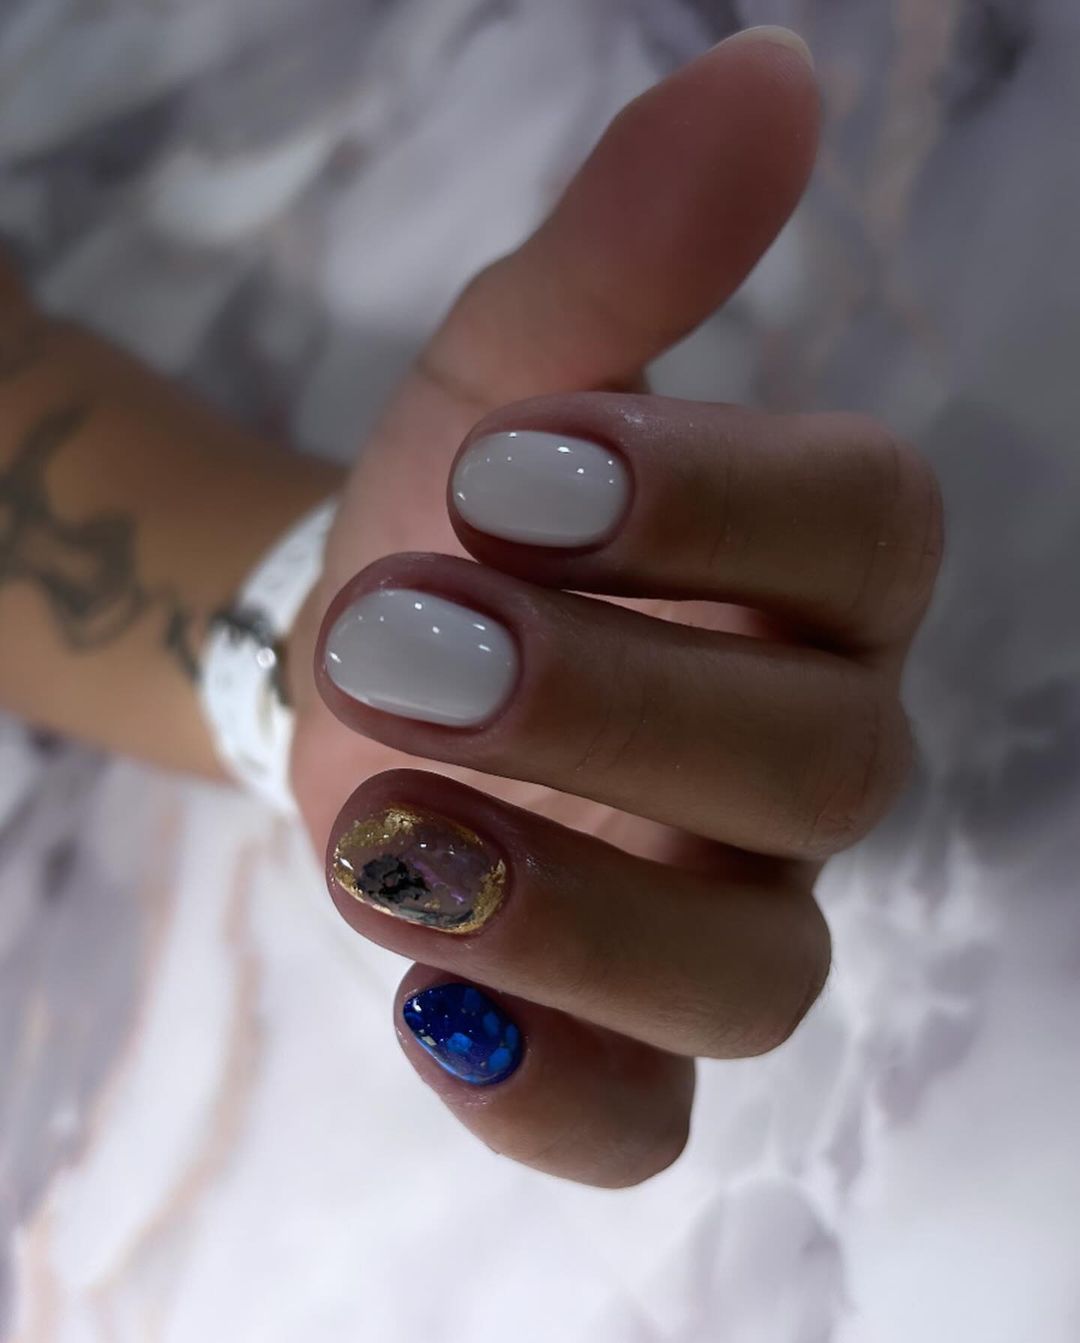
- Neutral Base Polish,
- Several Colored Polishes for Geode Effect
- Gold Leaf Sheets
- Glossy Topcoat for Dimension
After applying the base neutral color, move on to the accent nail. To simulate the inside of a geode, layer polishes and break into pieces gold leaf. This design’s true depth and intricacy will only emerge when a shiny topcoat is applied over its confederates.
Starlit Gradient
Similar to the changing sky during dusk, these nails have an ombre effect from hot pink to a pale purple. Covered with gilded stars and moons, they are like taking a trip through outer space for anyone who sees them.
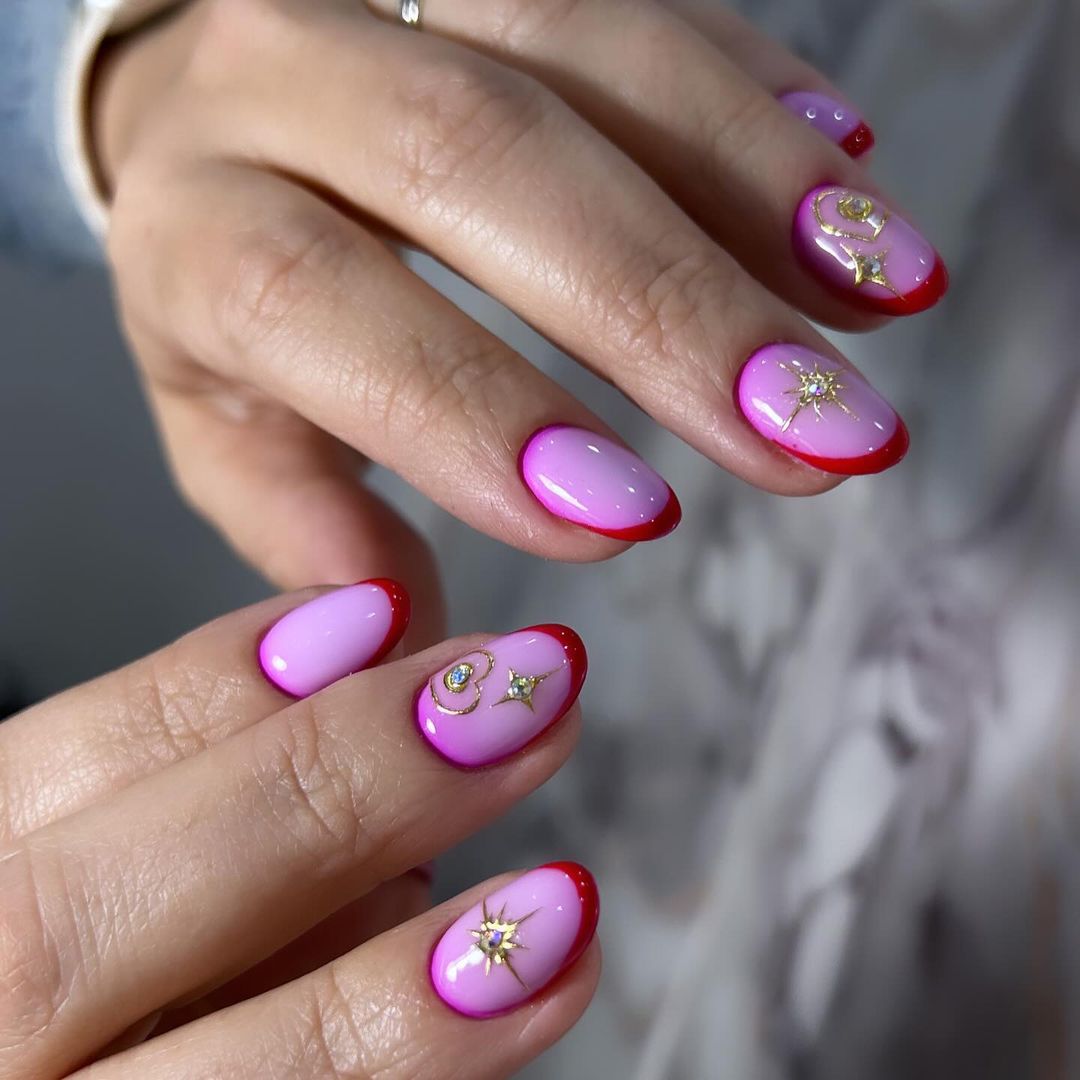
- Acrylic powders in pink and lilac for gradient
- Gold star and moon decals
- Shiny topcoat for extra glow
Mix the two acrylic powders on your nail until they blend from one color to another. Place the gold decals as though you were mapping out constellations on them. Finish with a layer of shiny topcoat to make sure those stars really sparkle against their nighttime backdrop.
Cherry Blossom Nights
This is dedicated to the short-lasting beauty of cherry blooms in moonlight, so it has a shiny red base and delicate flower designs. It is created in honor of nature’s midnight art and thus will be great for any fancy night out.
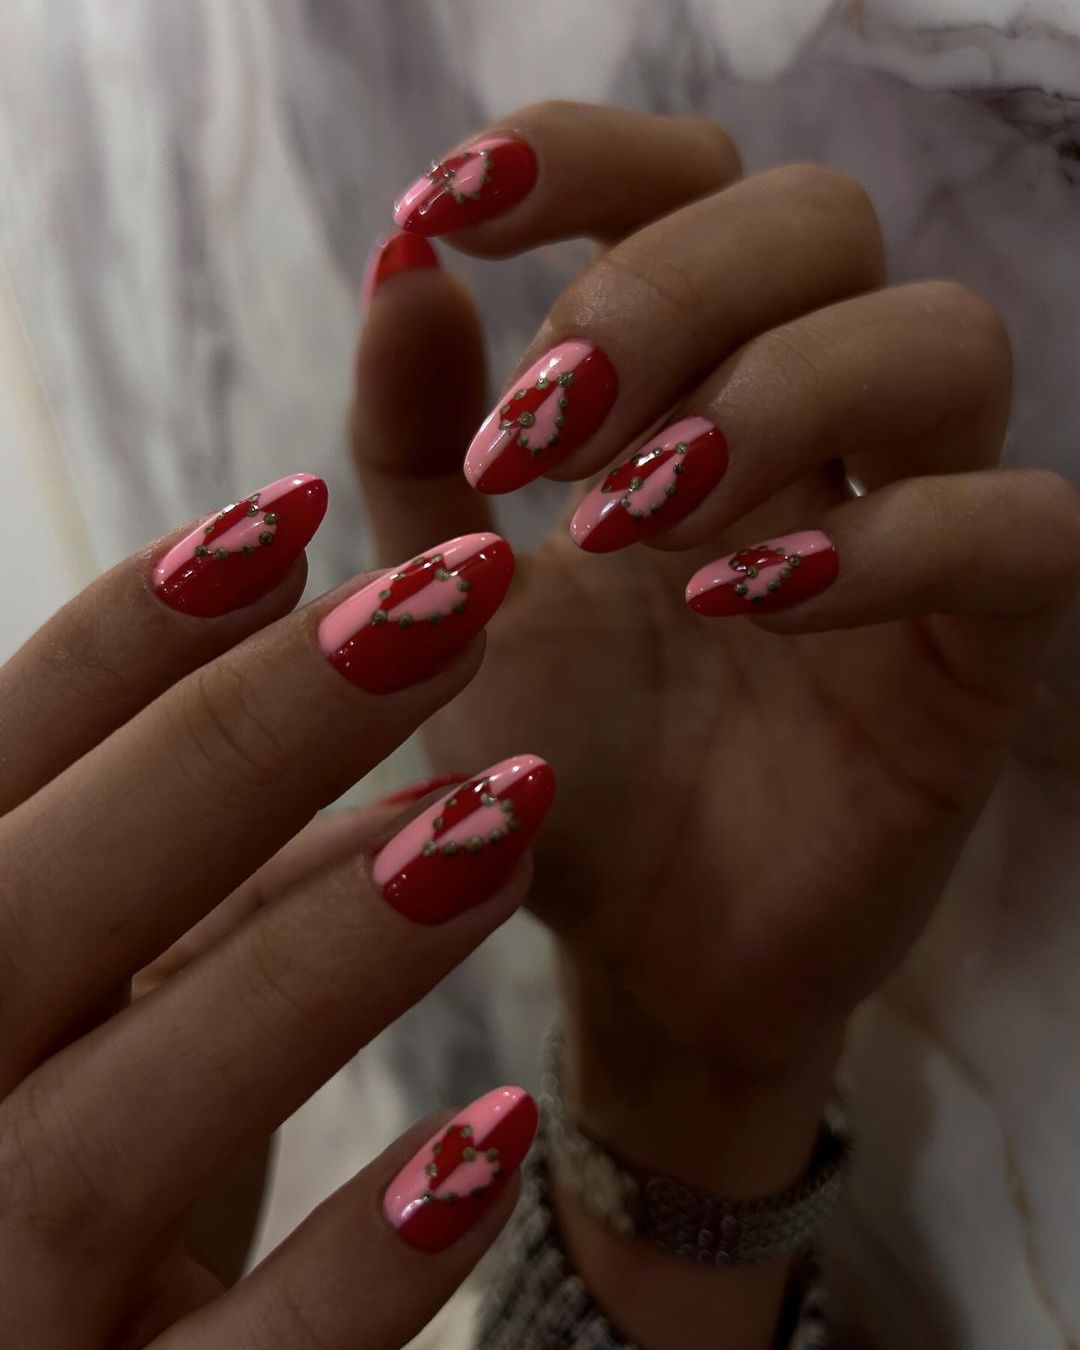
- Gel Polish – Glossy Red
- White and Green Paints – Blossoms and Leaves
- Fine Detail Brush
Apply the red polish first. Then, using a fine brush, paint on cherry blossoms and leaves. You want them to look balanced — not too many, not too few, like an arranged floral piece for an orchestra.
Candy Neon Dreams
These nails are like lightning, a fearless show of bright colors that pop out three-dimensionally in shape and design. Perfect for those who aren’t afraid to stand out, they’re a piece of jewelry that screams “vacation” even louder than the word itself.
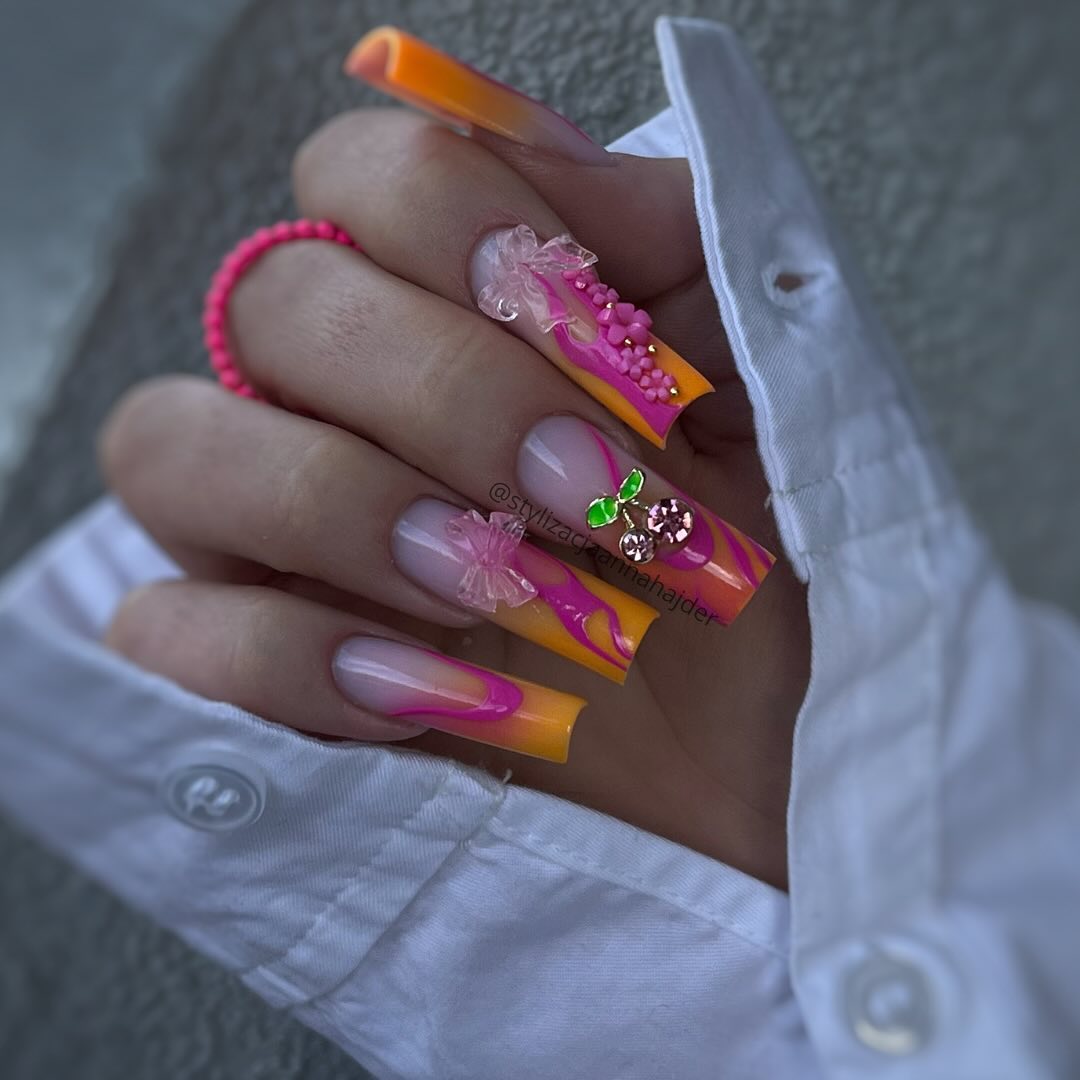
- Powders: neon yellow, neon pink
- 3D decorative pieces for nails
- Thin Brushes and Dabbing Tools for Designs
Spread the neon powders as either swatches or patterns. Use clear polish to attach 3D elements such as bows or fruit decals. This appearance is all about having fun and expressing yourself without any limits or worries.
Pink Elegance with Gemstone Accents
These nails mix the delicate appeal of rose with the impressive richness of jewels, creating a fancy look that is fun yet sophisticated. It is ideal for people who would like a bit more glamour in their daily dressing.
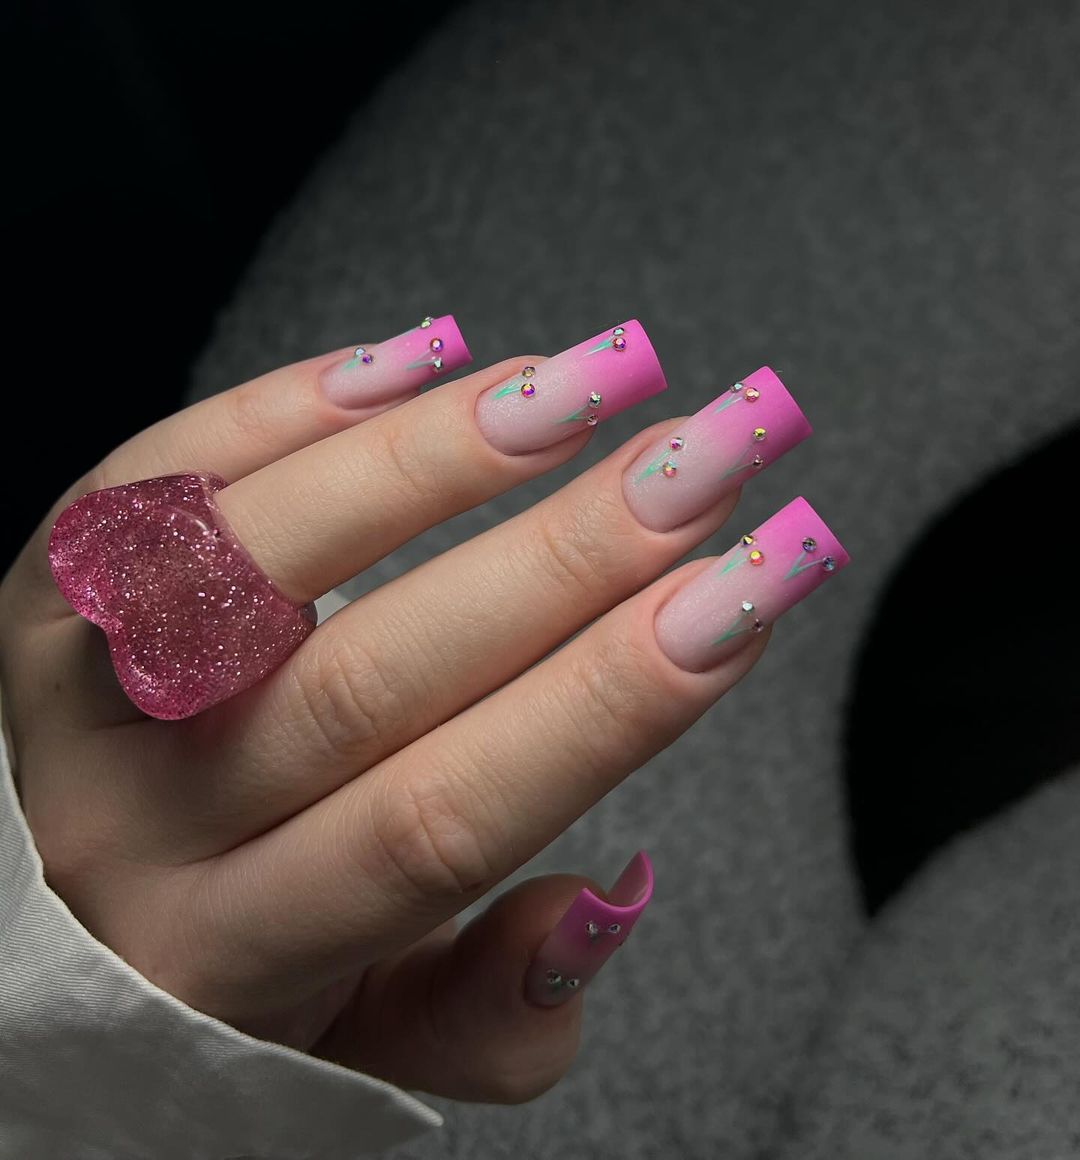
- Rose Acrylic Powder
- Assorted Jewels and Rhinestones
- Clear Gel Topcoat for Attachment and Sealing
Once you have put on the pink powder, put the gemstones in position so as to form a refined design. Apply not only on stones but all over design clear gel topcoat for glass-like finish.
Flower Power with a 3D Twist
These nails are a celebration of everything vibrant and happy – with neon pinks and bright 3D floral decorations. They’re like the blooming flowers outside your window or the candy aisle at a store.
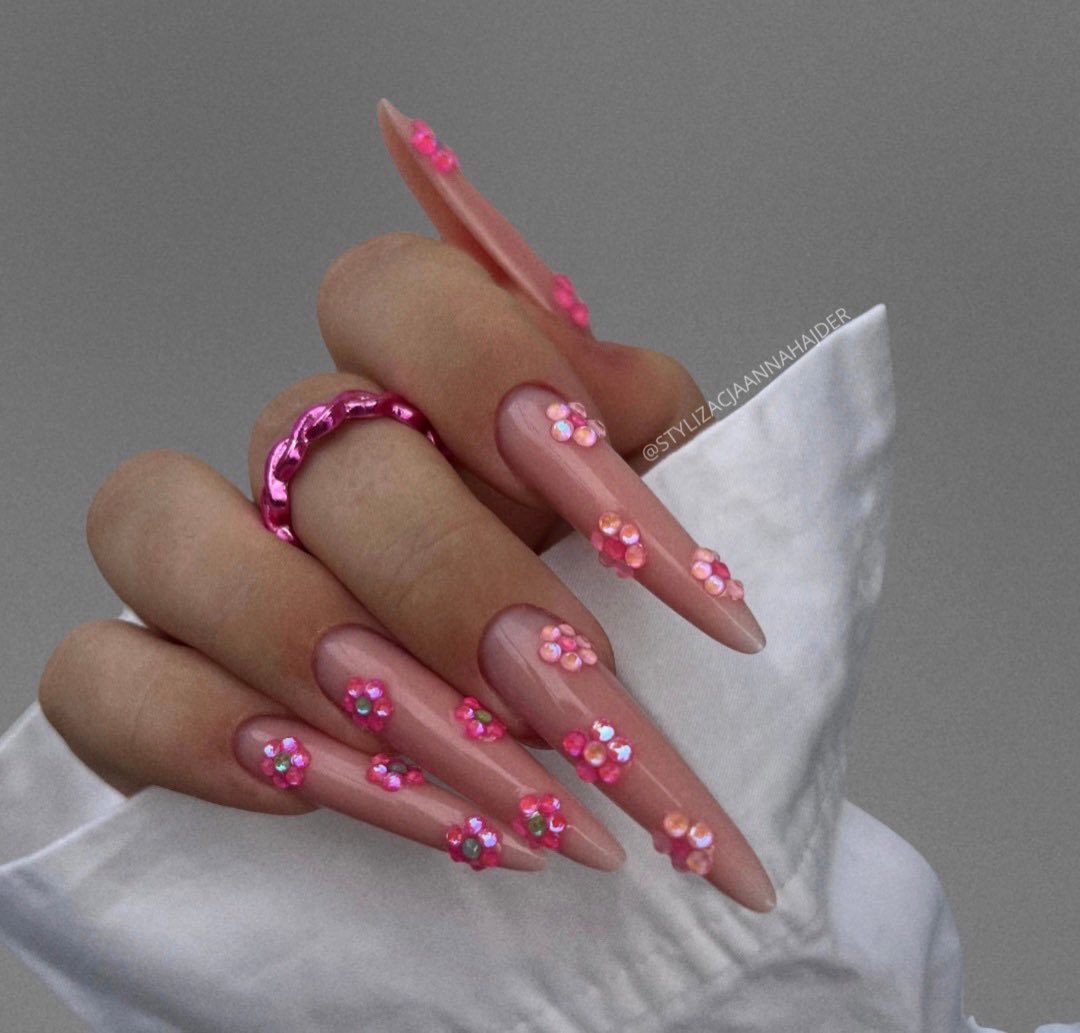
- Two Different Shades of Pink Acrylic Powder (for the base and flowers)
- 3D Acrylic Molds (for making the flowers)
- Small Pearls and Rhinestones (for centers)
Apply layers of pink on each nail, using two shades. Make 3D flowers with molding acrylic and attach them to still-tacky bases. Finish off by adding some rhinestones or pearls in the middle for fun!
Pastel Dream with Embossed Art
This set is a dreamy confection of pastel pink with an embossed design that’s as whimsical as it is intricate. Perfect for those who favor the soft touch of pastel and the delicate detail of raised art.
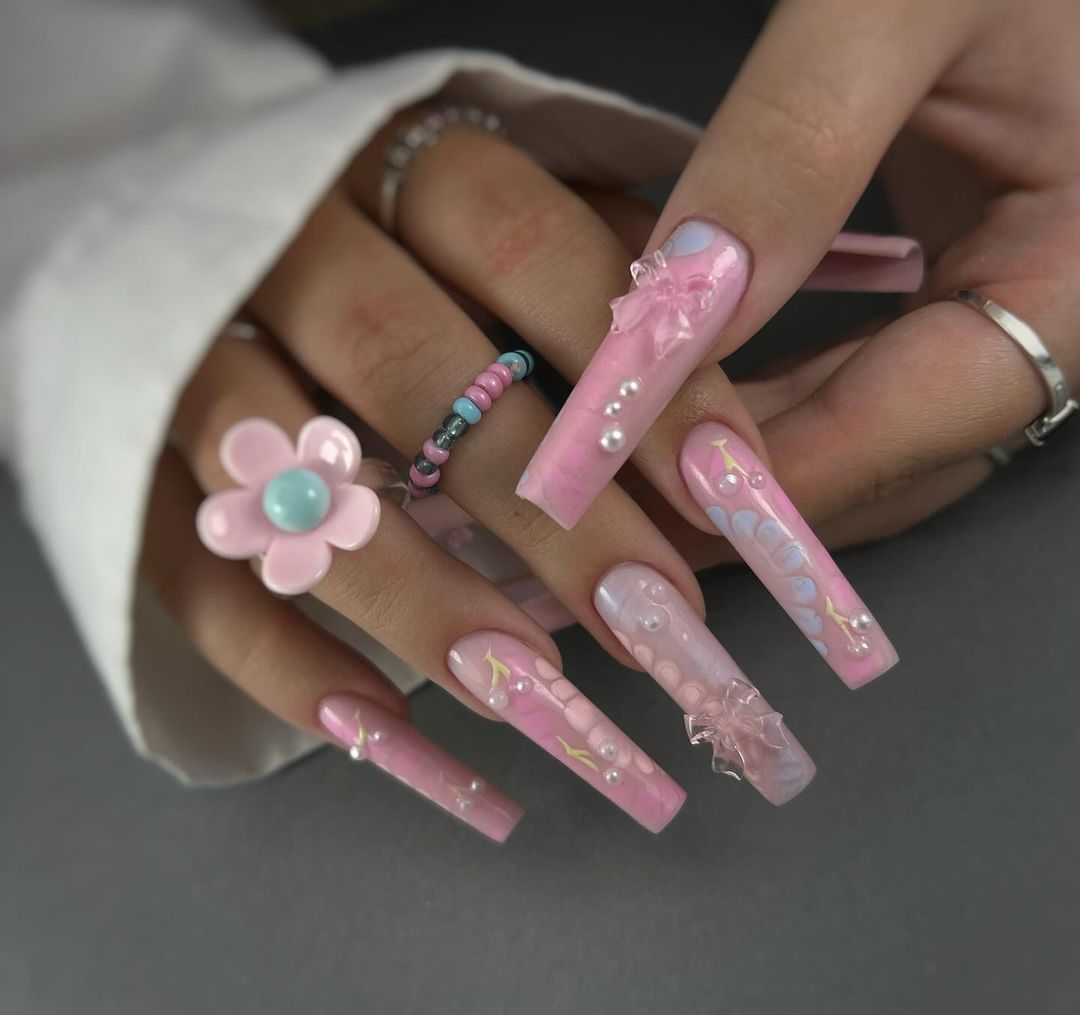
- Pastel Pink Acrylic Powder
- Embossing Tools for Raised Designs
- Sheer Shimmer Powder for a Subtle Glow
Apply the pastel pink base. While still pliable, use embossing tools to create raised patterns. A dusting of shimmer powder adds a magical aura that’s almost ethereal in its beauty.
Garden Party
These nails were inspired by the bright colours of a summer garden. They have a soft, transparent base with painted fruits and flowers. These would be great for a garden party or just for going out on a sunny day – they’re both fun and artistic.
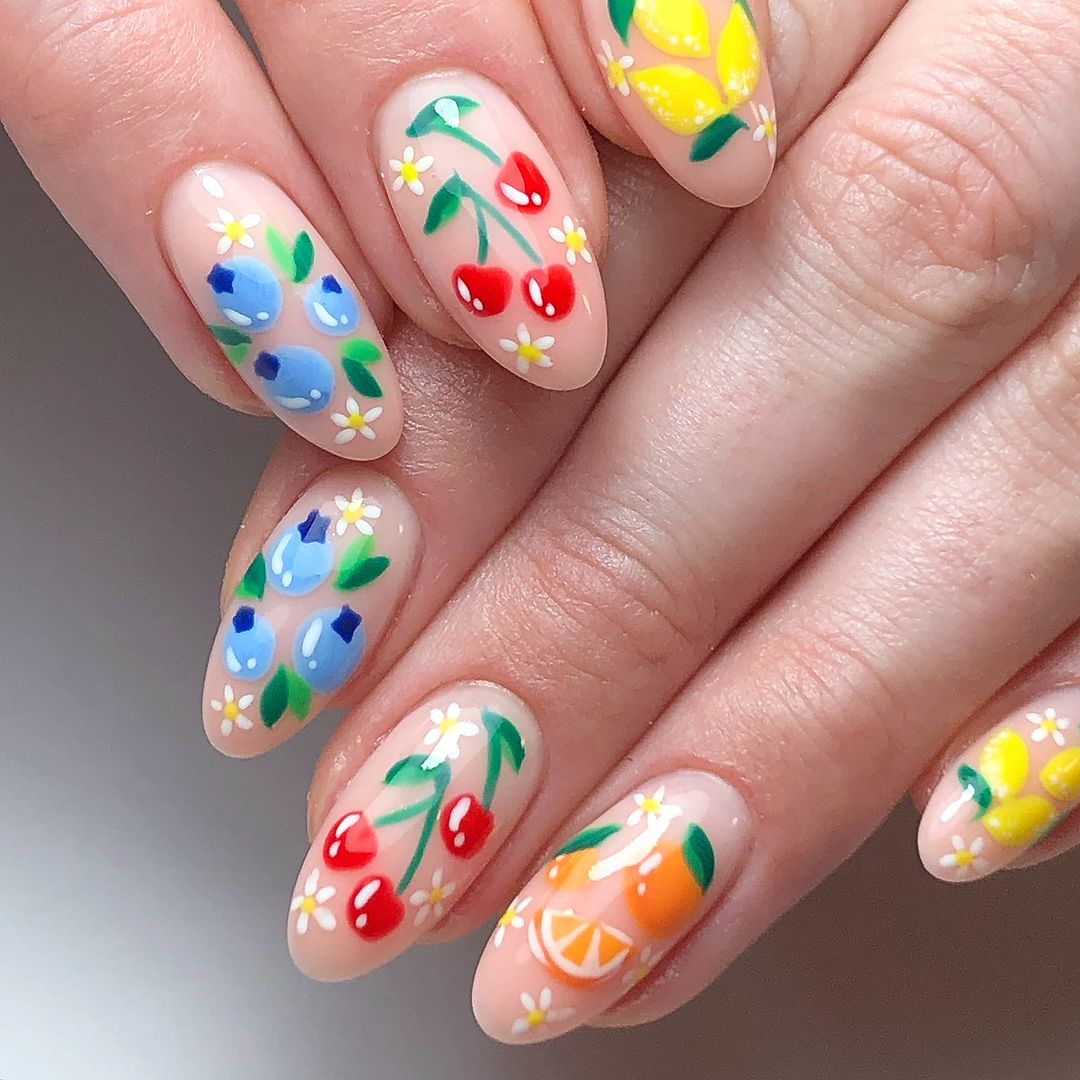
- Sheer Nude Acrylic or Gel Polish
- Colored Acrylic Paints for Fruit and Flower Details
- Fine Detailing Brushes for Precision
Start with a sheer nude base. Then, paint the fruits and florals using coloured acrylic paints; being careful not to make any mistakes since each nail becomes a mini masterpiece representing various parts of nature from the garden.
Pop Art Pizzazz
This is a pop art extravaganza for nails with bright primary colors and bold graphic designs. These are modern wearable art which will certainly get people talking wherever they are worn.
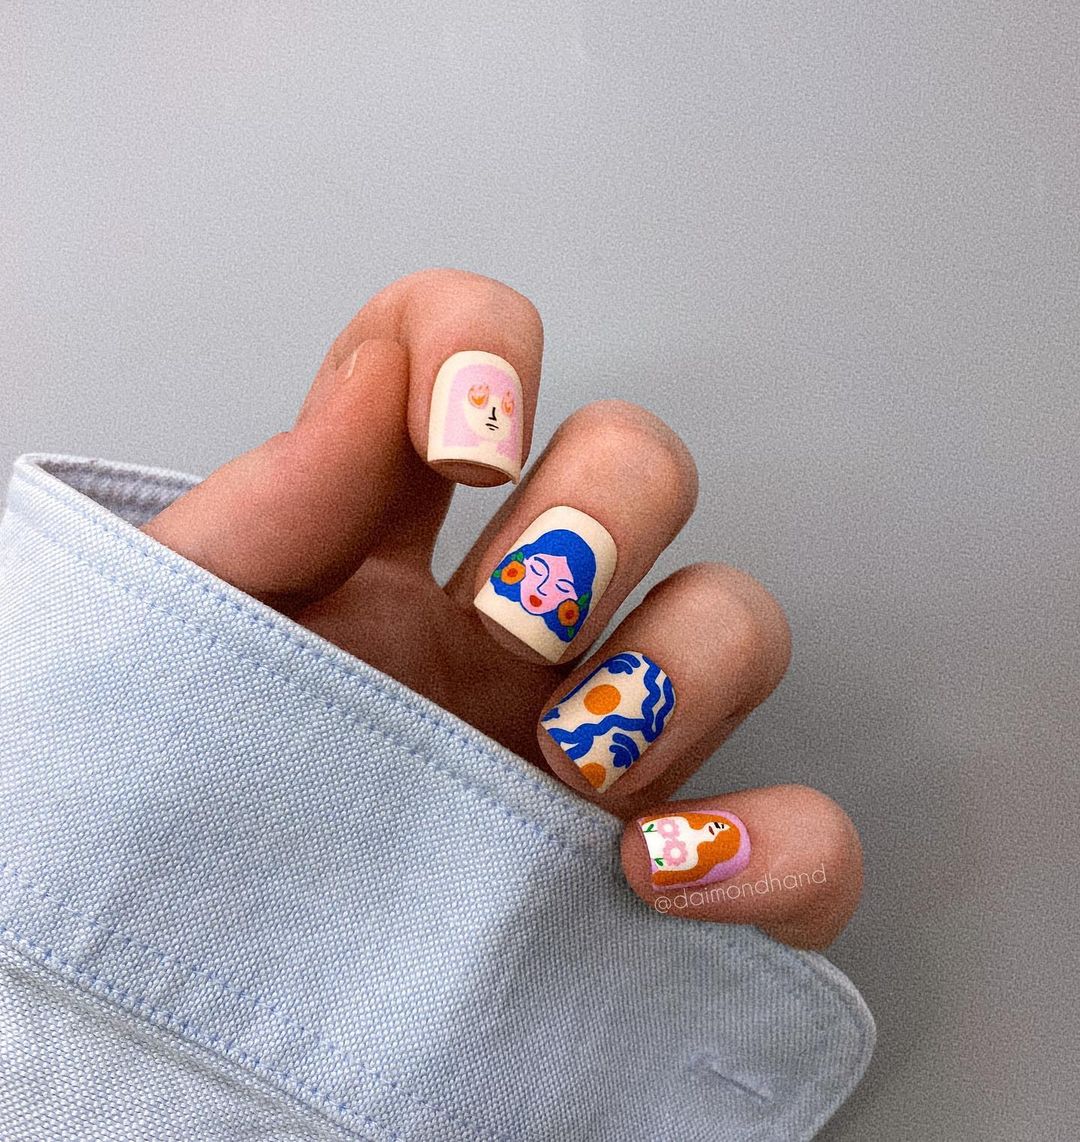
- Monochromatic Gel Polishes in Basic Colors
- Black Acrylic Paint as Line Drawing Liquid
- Matte Topcoat for a Now Finish
Coat each nail with one intense solid hue. After it dries, draw shapes or lines on them using black paint. Get that contemporary gallery look by using matte topcoats making each finger a work of art.
Stained Glass Elegance
Like stained glass, these nails are beautiful. They do this by mixing see-through colors with dark borders in a radial pattern. It’s a combination of softness and contrast that only those who can appreciate unusual beauty will love.
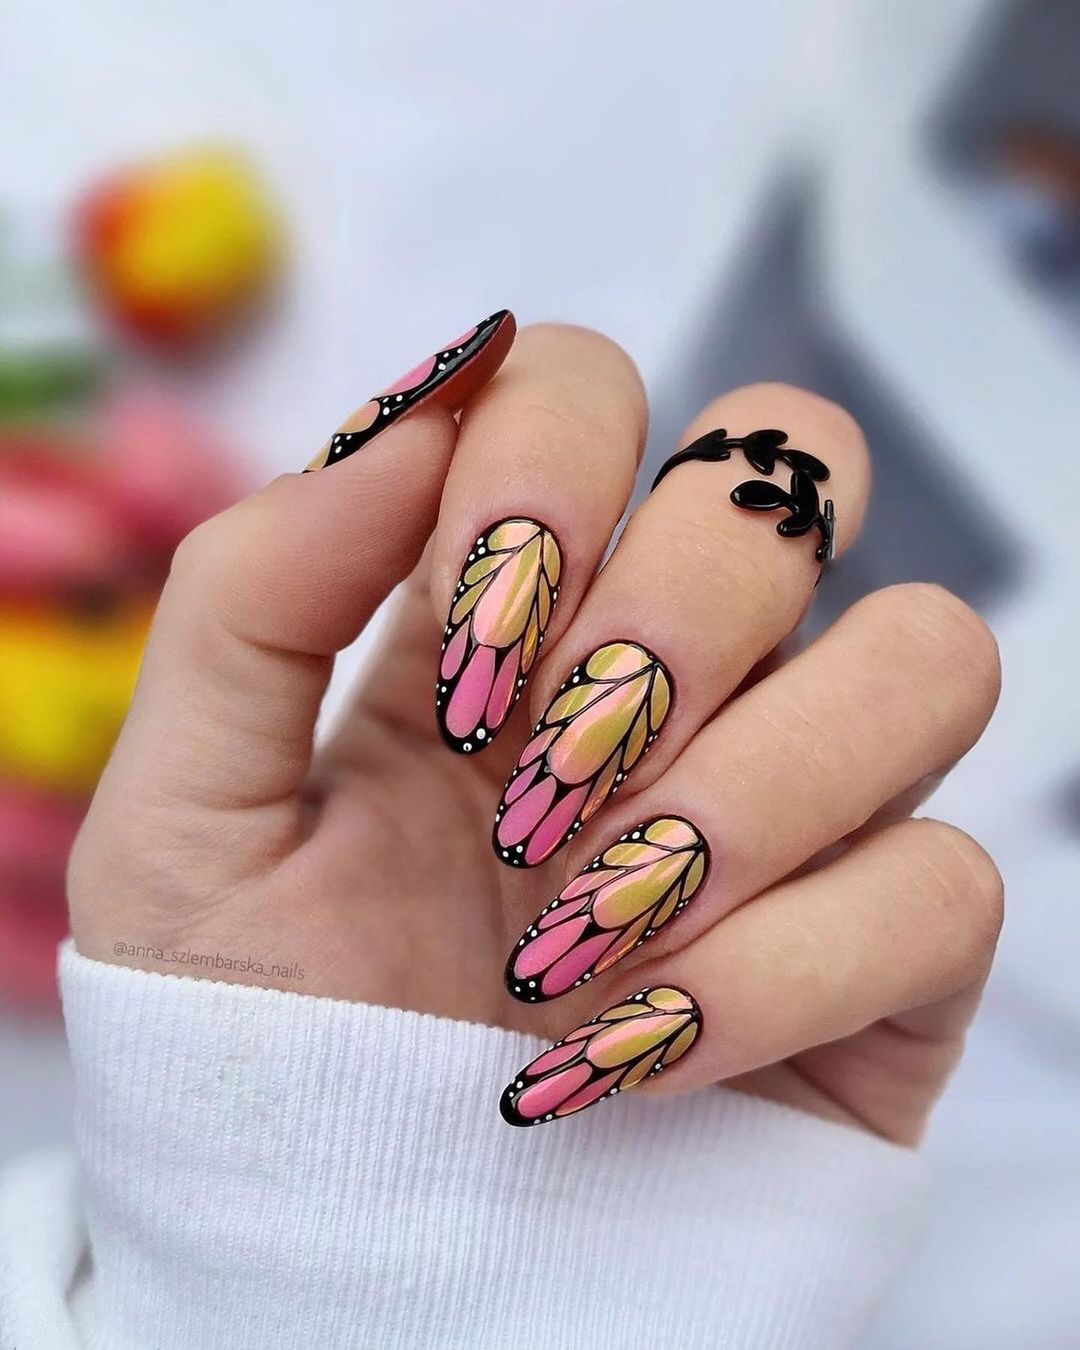
- Translucent Colored Gels for Glassy Shades
- Black Gel Paint for ‘Lead’ Lines
- Glossy Topcoat to Make it Look Like Glass
Apply the colored gels so they make transparent segments on each nail. After that, cure them. Then draw lines with black gel paint to imitate stained glass lead. Finish with a glossy top coat which will give more of the effect that it’s made out of glass.
Neon and Pastel Fusion
This set is flashy because it mixes neon and pastel colors. This combination is daring, but also very lively and radiant. A few nails have been marbled with neon paint to create a contrast that’s impossible to ignore.
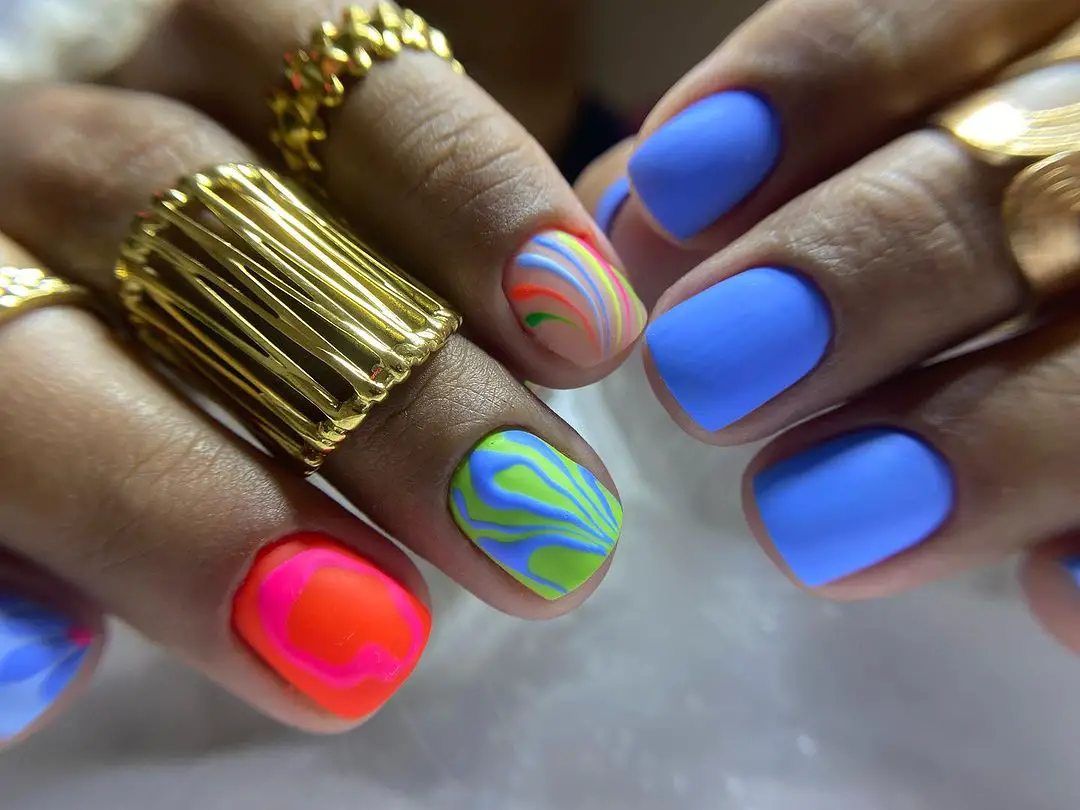
- Gel polishes – neons for marbling
- Acrylic powder in pastel blue for solid color nails
- Dotting tool for marbling effect
- High gloss topcoat for shiny finish
Do solid nails in pastel shades and then do others with neon swirls on them. To marbleize, mix different dots of neon together using dotting tool then refine marble pattern by use of small brush. Apply glassy sheen by sealing it up with top coat when dry so it can shine bright like a diamond!
Soft Elegance with a Pop
The nails combine grace and liveliness by using a traditional nude foundation with lively splashes of color and pattern. The design is sophisticated but with an element of surprise, representing light-heartedness tinged with polishedness.
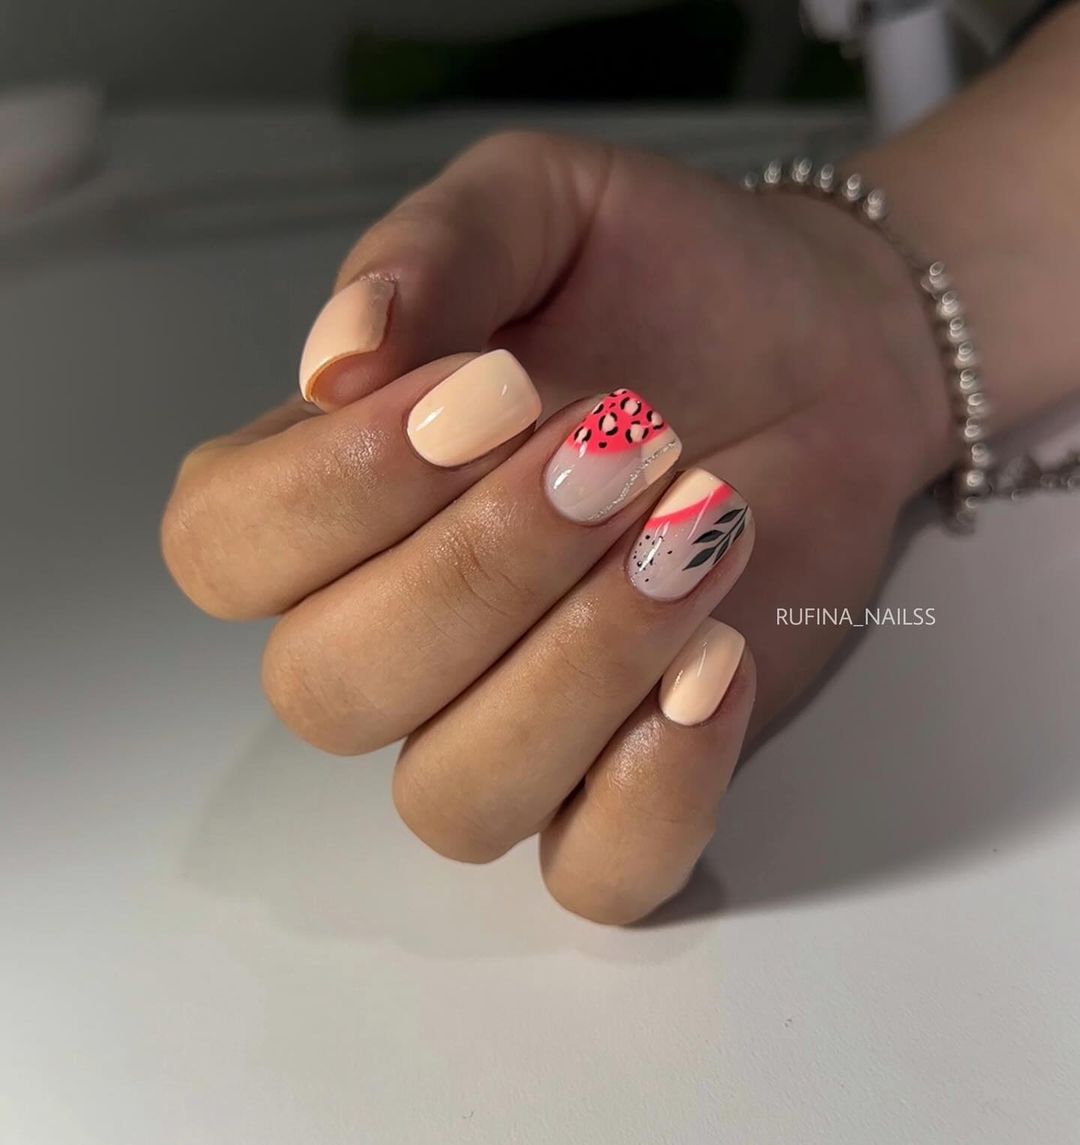
- Base – Nude gel polish
- Accents – Bright polishes for accent designs
- Patterns – Fine detailing brush for precise patterns
Start by applying a smooth coat of nude polish as your base color. On the accent nails, use a delicate touch with the fine brush to create intricate designs or add pops of color. The goal is to have some fun while still keeping it classy against the understated backdrop of neutral shades.
Playful Pastel Abstracts
A canvas of sweet pink provides the ideal background for a playful dance of abstract shapes and bold colours. It’s a fresh look at the spring joy, each nail having its own story about whimsical charm and youthful happiness.
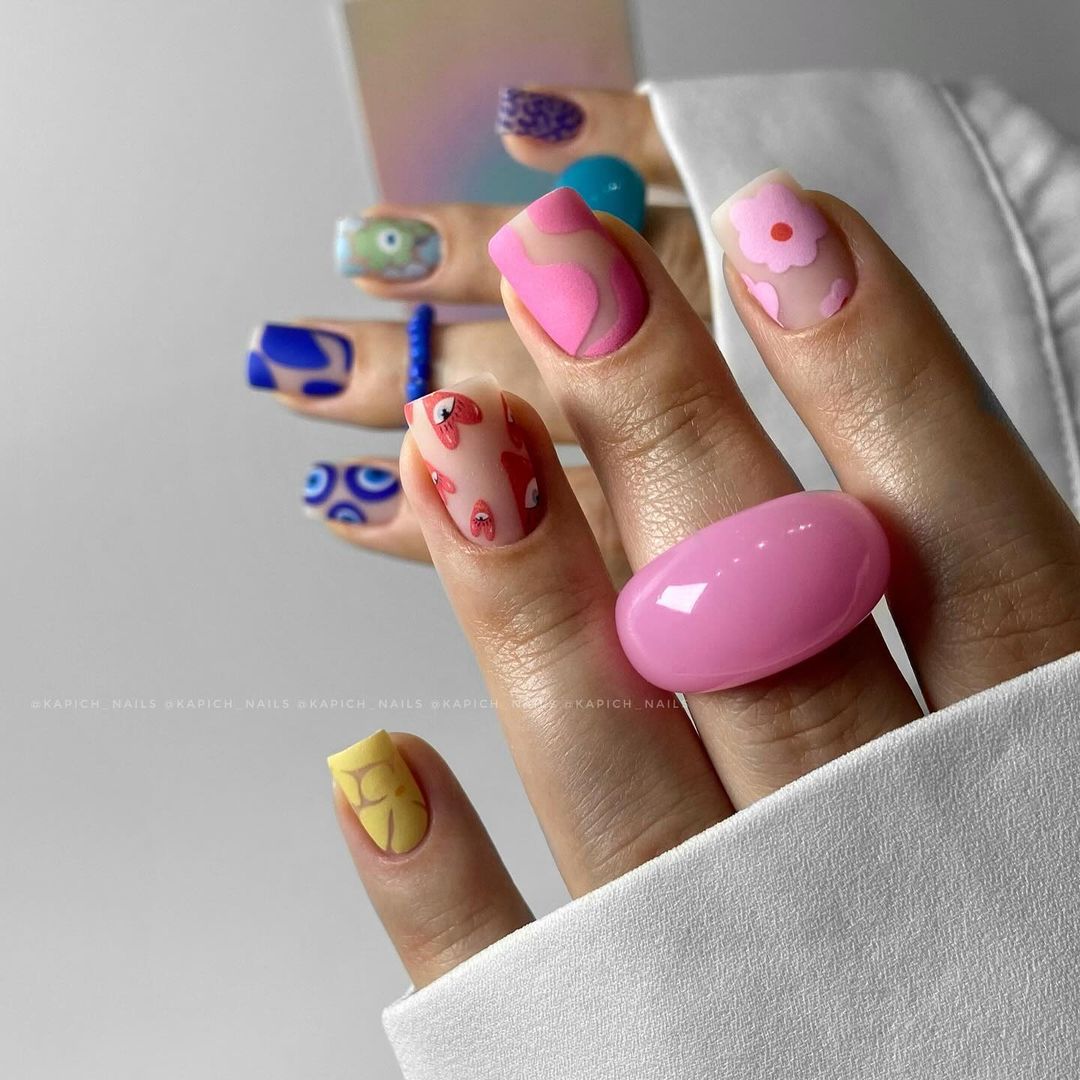
- Pastel Pink Gel Polish for Base
- Variety of Gel Polishes for Abstract Shapes
- Detailing Brushes for Precise Application
- Glossy Topcoat for a Sleek Finish
Apply the pastel pink as base shade. Using detailing brushes, create abstract shapes in various colors on each nail allowing your creativity to direct the design. Finally, use glossy top coat to make each color pop out and preserve the design.
Sunshine and Silhouettes
These nails represent the lively and vibrant vibes of summer through a combination of sunny yellow base and bold black silhouettes. It is stylish and contemporary, making it ideal for individuals who want their nail arts to stand out.
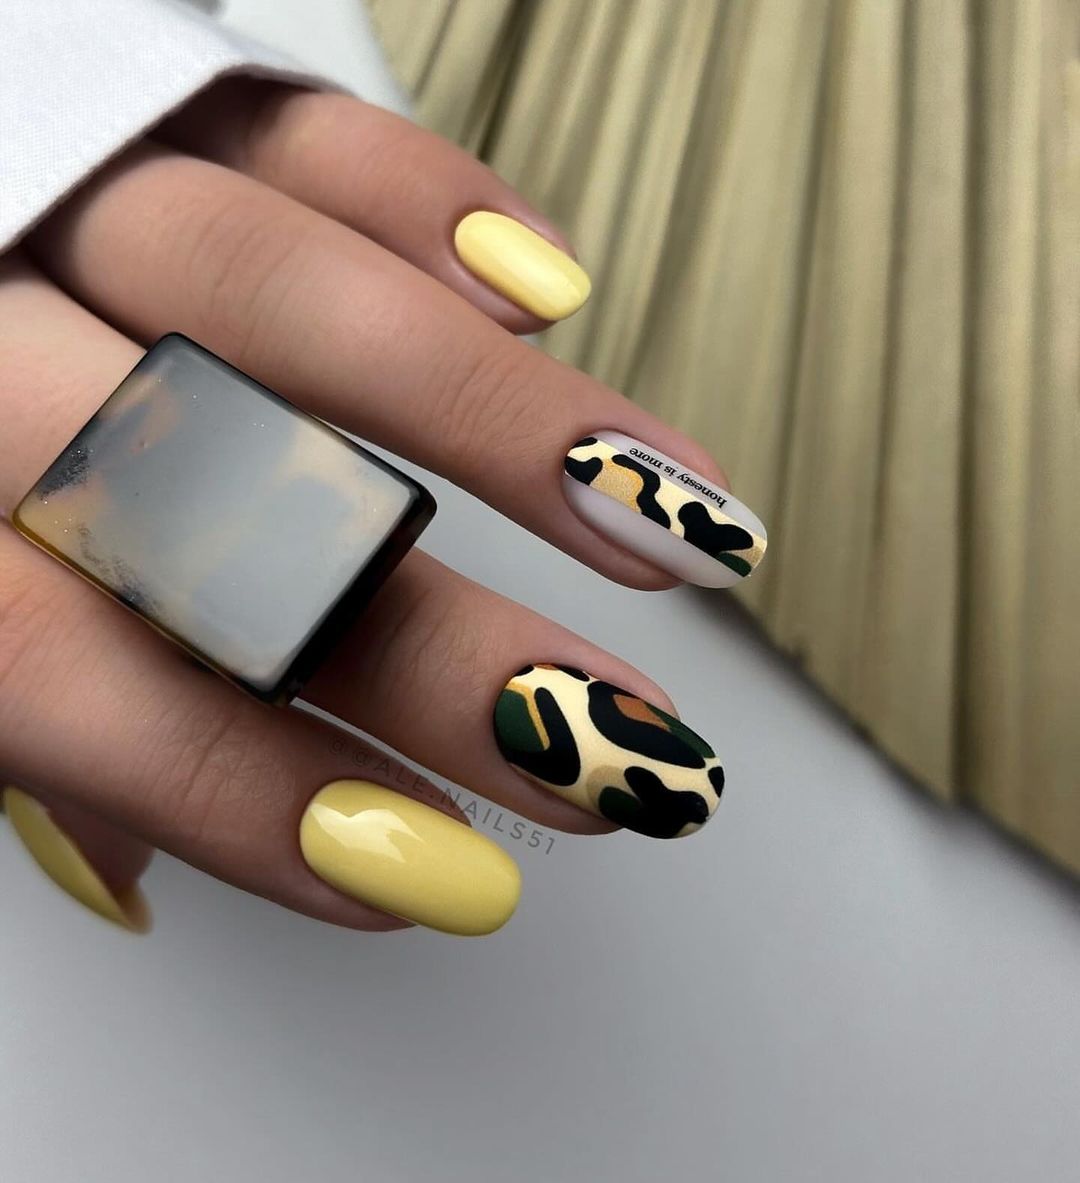
- Gel Polish – Bright Yellow (Base)
- Gel Polish – Black (Silhouette Design)
- Thin Brush (For Detail Work)
- Matte Topcoat (For Contemporary Finish)
Apply an optimistic yellow as the base color. After that, using a thin brush paint some silhouette designs that remind one of summer scenes or abstract figures. Finally, top it off with matte topcoat to give a more modern sophisticated touch.
FAQ
Q: How can I know which nail art design is right for my holiday?
A: Take into account where you’re going and what you’ll be doing. Tropical vacations call for bright, fun looks while something more understated might be better for a city break. Just always go with what makes you feel amazing!
Q: Can I do these nail art designs at home?
A: Yes, but it takes practice and patience! Start off easy and then work your way up to more complex patterns as you become more confident. Also don’t forget about good brushes and polishes.
Q: How long will these nail designs last?
A: With proper application and care, most gel-based designs can last for two weeks. Adding a top coat every few days will help extend the wear time.
Q: What if a rhinestone or some other decorative element falls off of my nail?
A: You can easily reattach it by putting a little bit of nail glue or clear polish on it. Keep a small nail repair kit with you for those types of emergencies.
Q: Will 3D nail elements catch on clothing?
A: They can, so just be mindful! If you’re worried about it then go for smoother 3D elements that have been secured well with a gel top coat.
Q: How do I take these nail designs off when I’m ready for a new look?
A: Soak-off gels and acrylics can be removed at home using acetone, but it’s typically best to visit a professional to prevent damage to your nails.
Q: Is bold nail design appropriate for all ages?
A: Absolutely! Nail art is meant to be fun and show off your personal style so anyone should feel free to enjoy it regardless of their age. Just pick designs that make you happy!
Q: Can doing different kinds of nail art help strengthen my nails?
A: No, not really. Nail art doesn’t actually strengthen your nails but the gels and acrylics used can provide a protective overlay, which may help reduce breakage. However, you should still give your nails a break in between applications so that they can stay healthy.
Save Pin
