
Fall is the perfect season to experiment with warm, rich tones, and what better way to embrace the autumnal vibe than with brown fall nails? This guide will walk you through various nail designs that are perfect for the season, using specific examples to inspire your next manicure. Whether you prefer short, long, gel, or acrylic nails, there’s something here for everyone.
Rich Chocolate Elegance
When it comes to autumn nails, you can’t go wrong with a deep, rich chocolate brown. This stunning shade exudes warmth and sophistication, making it a perfect choice for the cooler months. The accent nail with a marble effect adds a unique touch, blending lighter tones of brown and white, creating a captivating design.
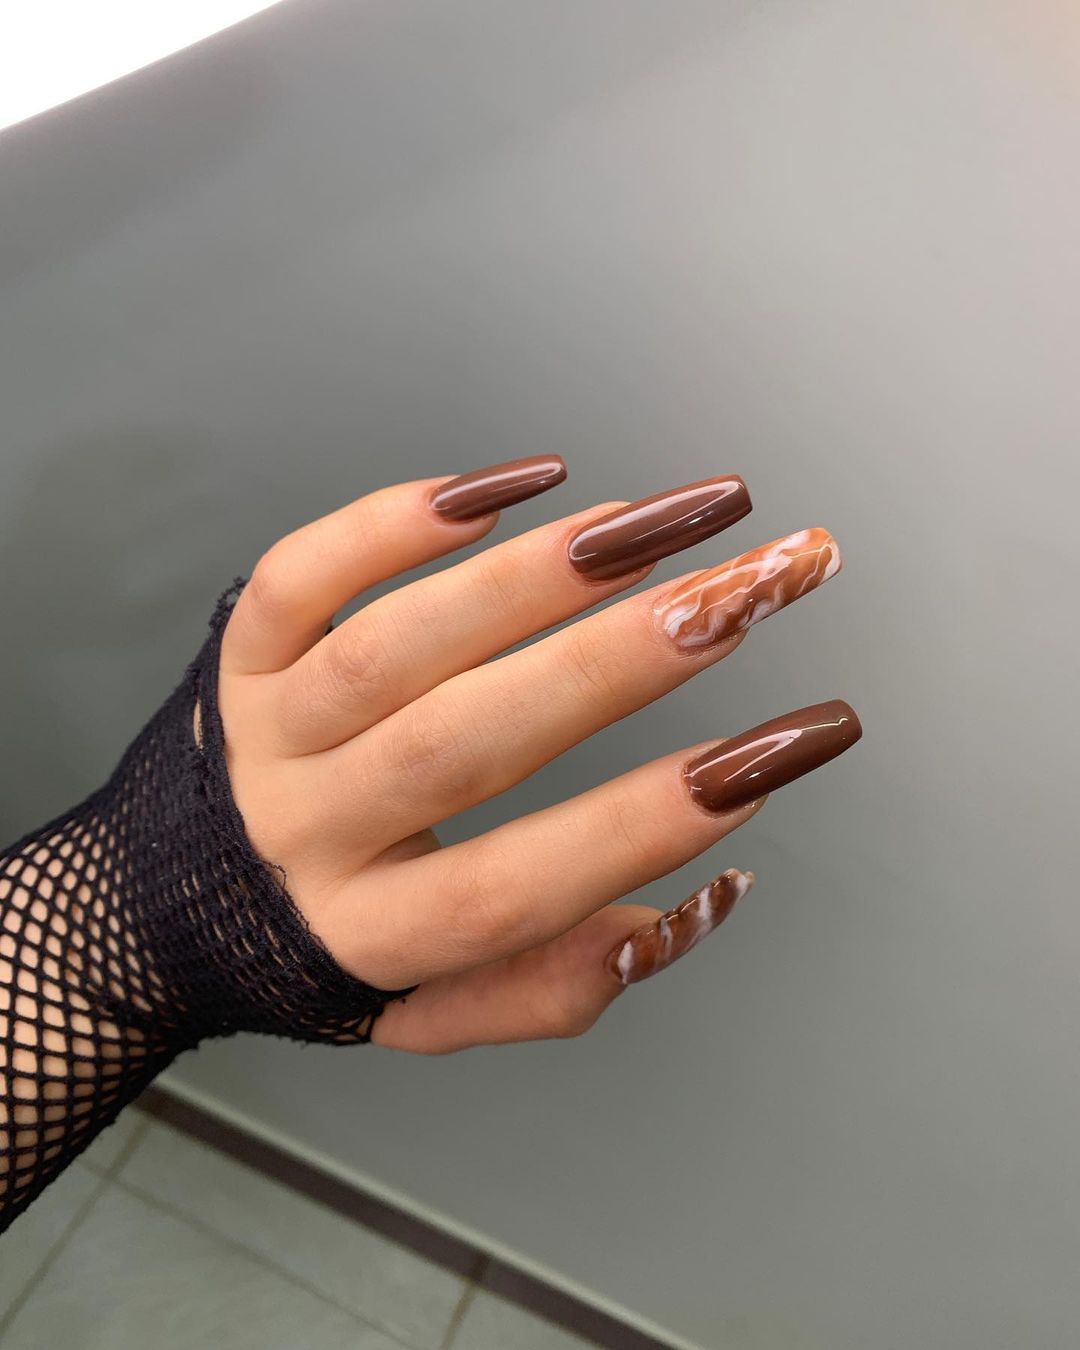
- Chocolate brown nail polish (e.g., OPI’s “Espresso Your Inner Self”)
- White and light brown polish for the marble effect (e.g., Essie’s “Blanc” and “Mink Muffs”)
- Thin nail art brush for creating marble effect
- Top coat for a glossy finish
How to Create This Look at Home:
- Prep your nails: Start with clean, filed nails. Apply a base coat to protect your natural nails.
- Apply the base color: Paint all your nails with the chocolate brown polish. Apply 2-3 coats for full opacity.
- Create the marble effect: On the accent nail, apply a drop of white and light brown polish. Use a thin brush to swirl the colors together gently.
- Finish with a top coat: Seal your design with a top coat to add shine and extend the life of your manicure.
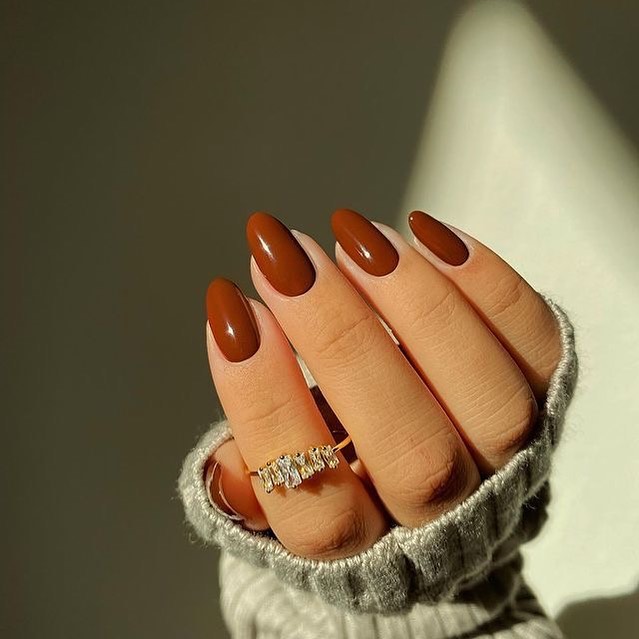
Sleek and Classy Almond Nails
Almond nails are a timeless shape that elongates the fingers, giving a classy and sophisticated look. The deep brown color is perfect for fall, adding a touch of elegance to any outfit. These gel almond nails are not only stylish but also durable, making them a practical choice for the season.
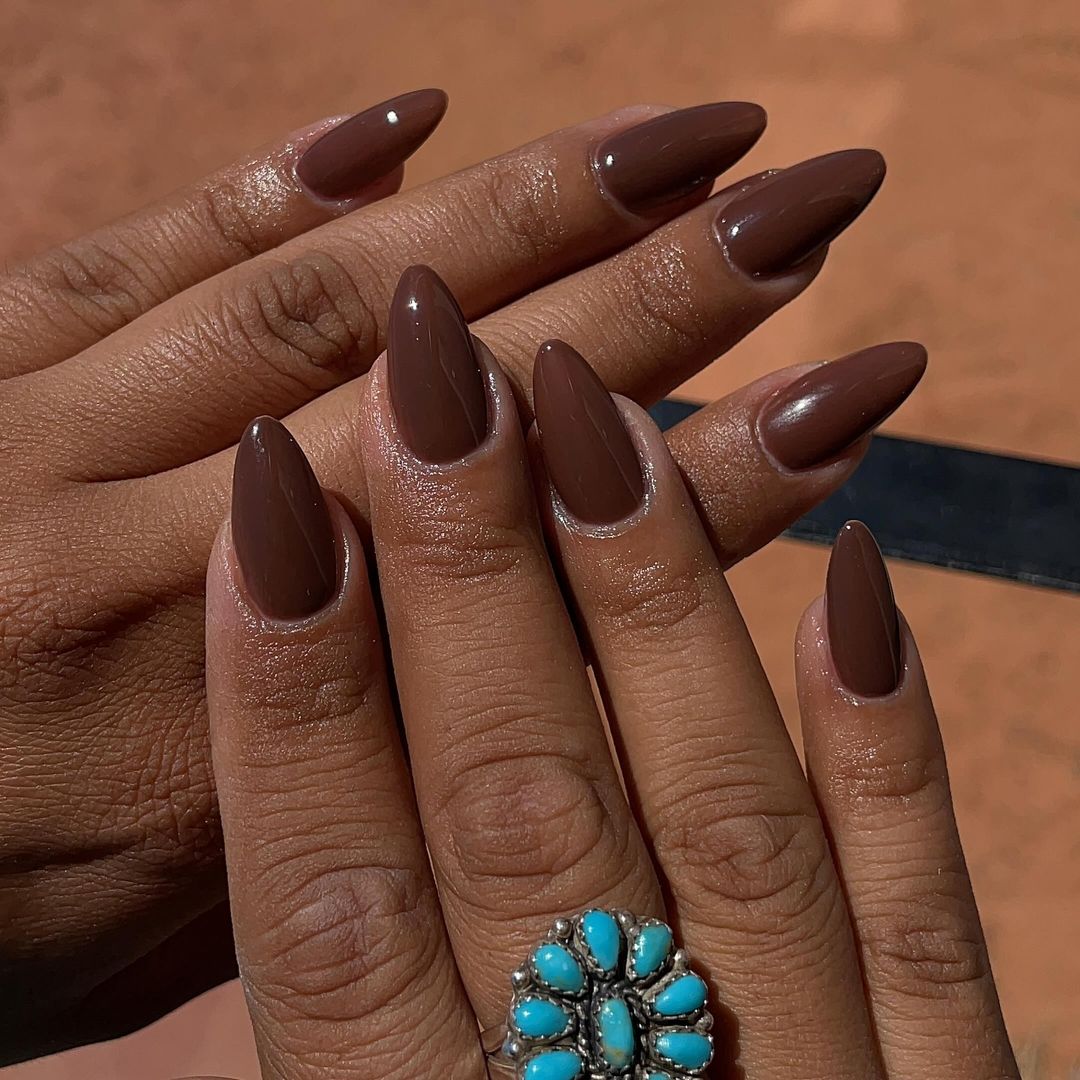
- Deep brown gel polish (e.g., Gelish’s “Black Cherry Berry”)
- UV or LED lamp for curing gel polish
- Nail file and buffer for shaping
- Cuticle oil for aftercare
How to Create This Look at Home:
- Shape your nails: File your nails into an almond shape, ensuring they are even and smooth.
- Apply the gel polish: Start with a base coat and cure it under a UV or LED lamp. Apply the brown gel polish in thin layers, curing each layer.
- Finish with a top coat: Apply a gel top coat and cure. Finish by applying cuticle oil to keep your cuticles hydrated.
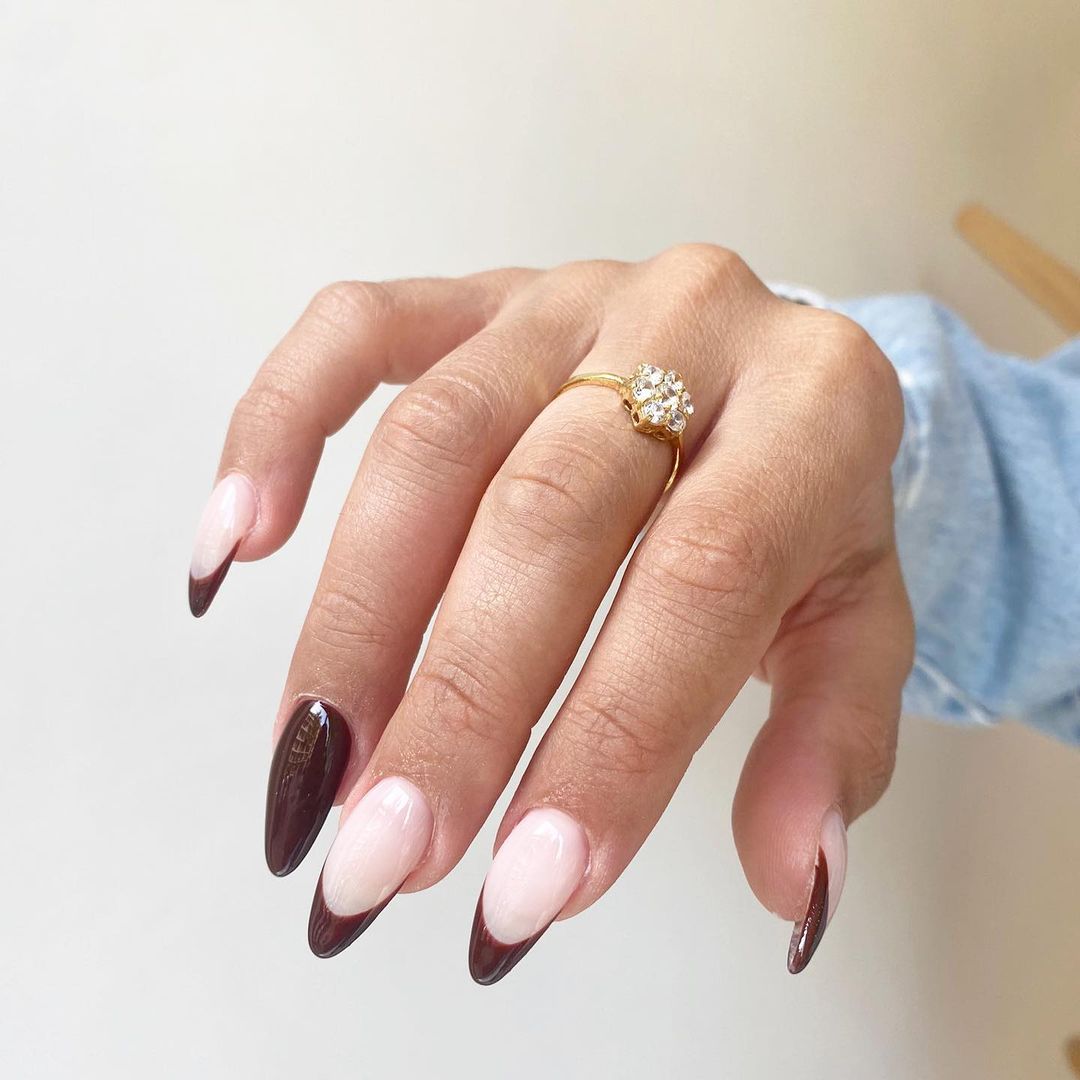
Modern French Tip with a Twist
This design takes the classic French tip and gives it an autumnal twist with a rich brown color. The contrast between the nude base and the brown tips makes for a striking yet sophisticated look. This gel short almond design is perfect for those who prefer a modern and stylish manicure.
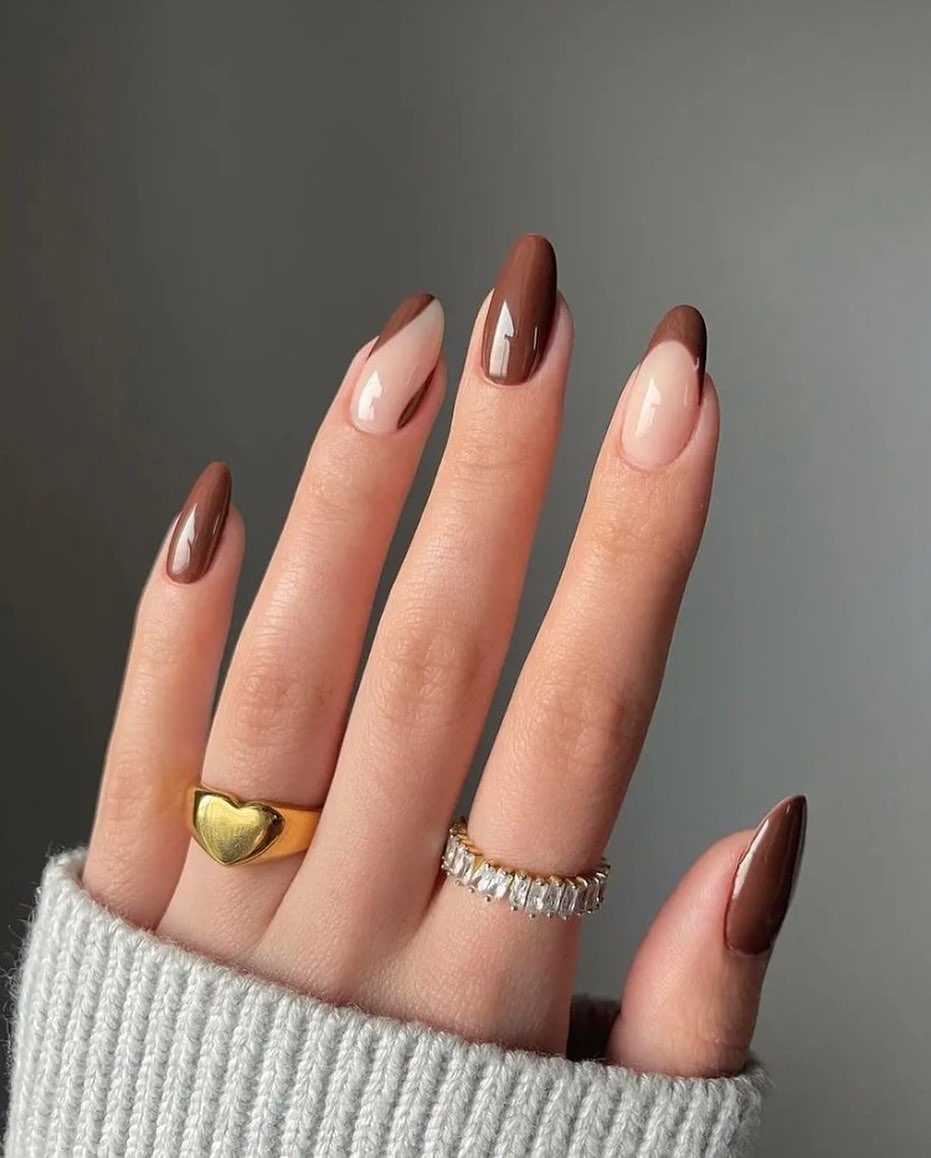
- Nude base polish (e.g., Essie’s “Ballet Slippers”)
- Brown polish for tips (e.g., OPI’s “That’s What Friends Are Thor”)
- Thin nail art brush for precise application
- Top coat for a smooth finish
How to Create This Look at Home:
- Prep and paint the base: Apply a nude polish to your nails and let it dry completely.
- Create the tips: Using a thin nail art brush, carefully paint the tips of your nails with the brown polish. You can use nail guides if you need extra help with precision.
- Seal the design: Apply a top coat to protect your manicure and give it a glossy finish.
Glamorous Brown and Gold French Tips
These elegant brown nails with gold accents take the classic French tip design to a whole new level. The matte finish of the brown polish contrasts beautifully with the glossy gold tips, creating a luxurious and sophisticated look. This design is perfect for those who want to add a touch of glamour to their fall manicure while maintaining a chic aesthetic.
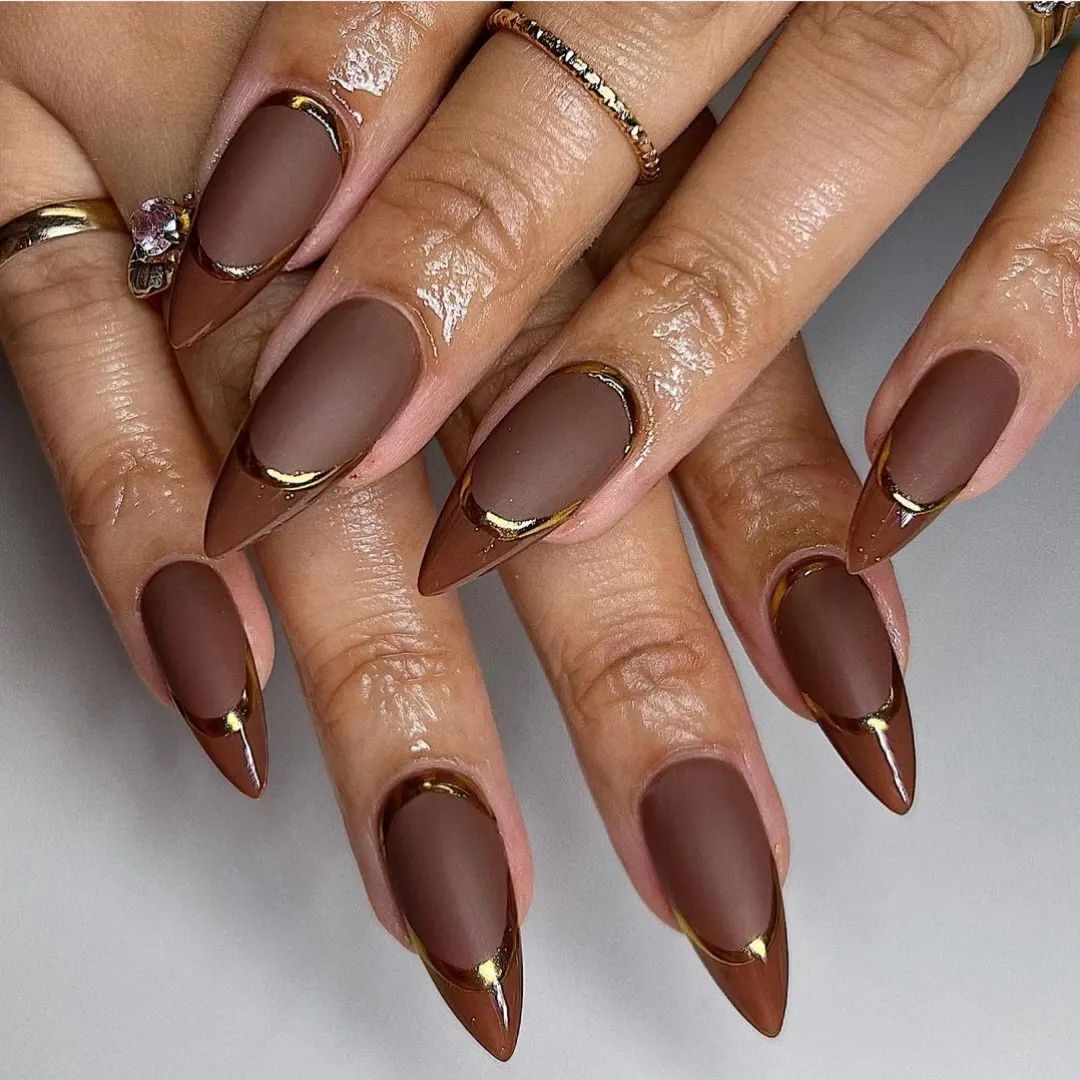
- Matte brown nail polish (e.g., Zoya’s “Emilia”)
- Gold metallic polish for the tips (e.g., Essie’s “Good as Gold”)
- Thin nail art brush for precise application
- Matte top coat to maintain the finish
How to Create This Look at Home:
- Prepare your nails: Start with clean, shaped nails. Apply a base coat to protect your natural nails.
- Apply the matte brown polish: Paint your nails with the matte brown polish. Apply 2-3 coats for full coverage.
- Add the gold tips: Using a thin brush, carefully paint the tips of your nails with the gold polish. Ensure the lines are smooth and even.
- Seal the design: Finish with a matte top coat to preserve the look and add durability.
Save Pin
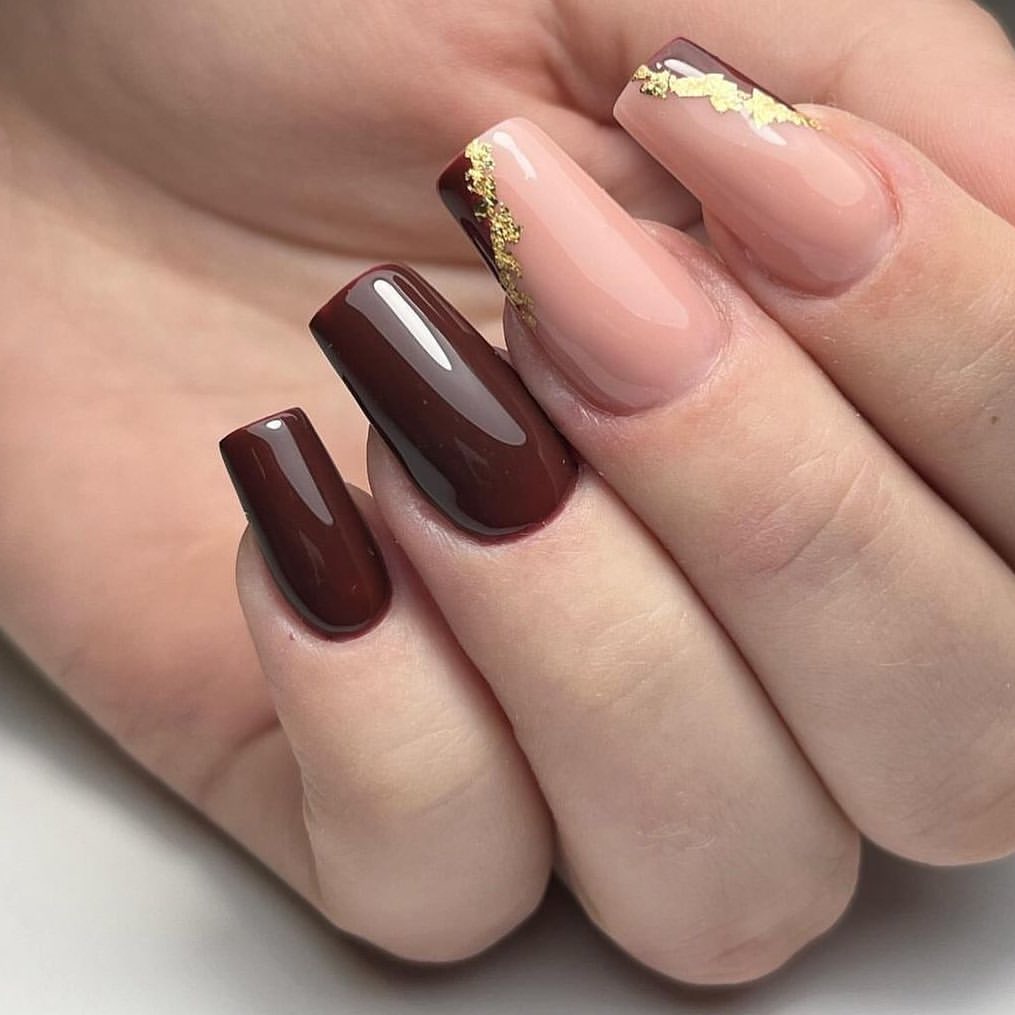
Chic Brown French Tips with Nude Base
This design combines a nude base with rich brown tips, creating a modern and stylish twist on the traditional French manicure. The contrast between the soft nude and the bold brown is both subtle and striking, making it a versatile choice for any occasion.
- Nude base polish (e.g., OPI’s “Bubble Bath”)
- Dark brown polish for the tips (e.g., Sally Hansen’s “Bittersweet”)
- Nail guides or thin nail art brush for precision
- Top coat for a glossy finish
How to Create This Look at Home:
- Prep your nails: Ensure your nails are clean and filed into your desired shape. Apply a base coat.
- Paint the base color: Apply the nude polish to your nails and let it dry completely.
- Create the French tips: Use nail guides or a thin brush to apply the brown polish to the tips of your nails. Make sure the lines are neat and consistent.
- Finish with a top coat: Apply a top coat to protect your manicure and give it a beautiful shine.
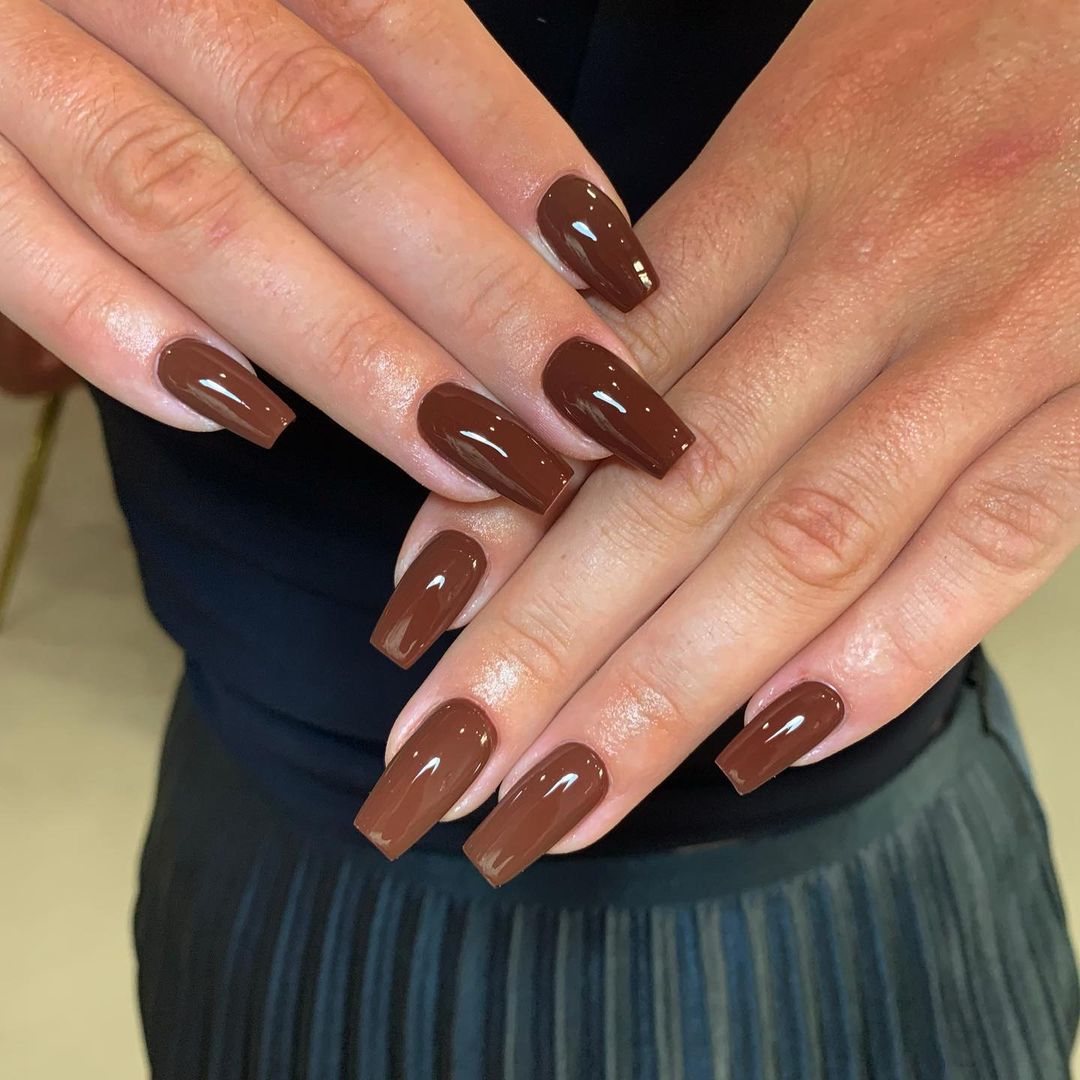
Bold Brown Coffin Nails
For those who love a bold and edgy look, these brown coffin nails are a perfect choice. The deep brown color is rich and intense, making a strong statement. The coffin shape adds a modern touch, giving the nails a sleek and fashionable appearance.
- Deep brown nail polish (e.g., OPI’s “Chocolate Moose”)
- Nail file and buffer for shaping
- Base coat to protect your nails
- Top coat for added shine and durability
How to Create This Look at Home:
- Shape your nails: File your nails into a coffin shape, making sure they are even and smooth.
- Apply the base coat: Start with a base coat to protect your natural nails.
- Paint your nails: Apply the deep brown polish in thin, even layers. You may need 2-3 coats for full opacity.
- Seal with a top coat: Finish with a top coat to add shine and extend the life of your manicure.
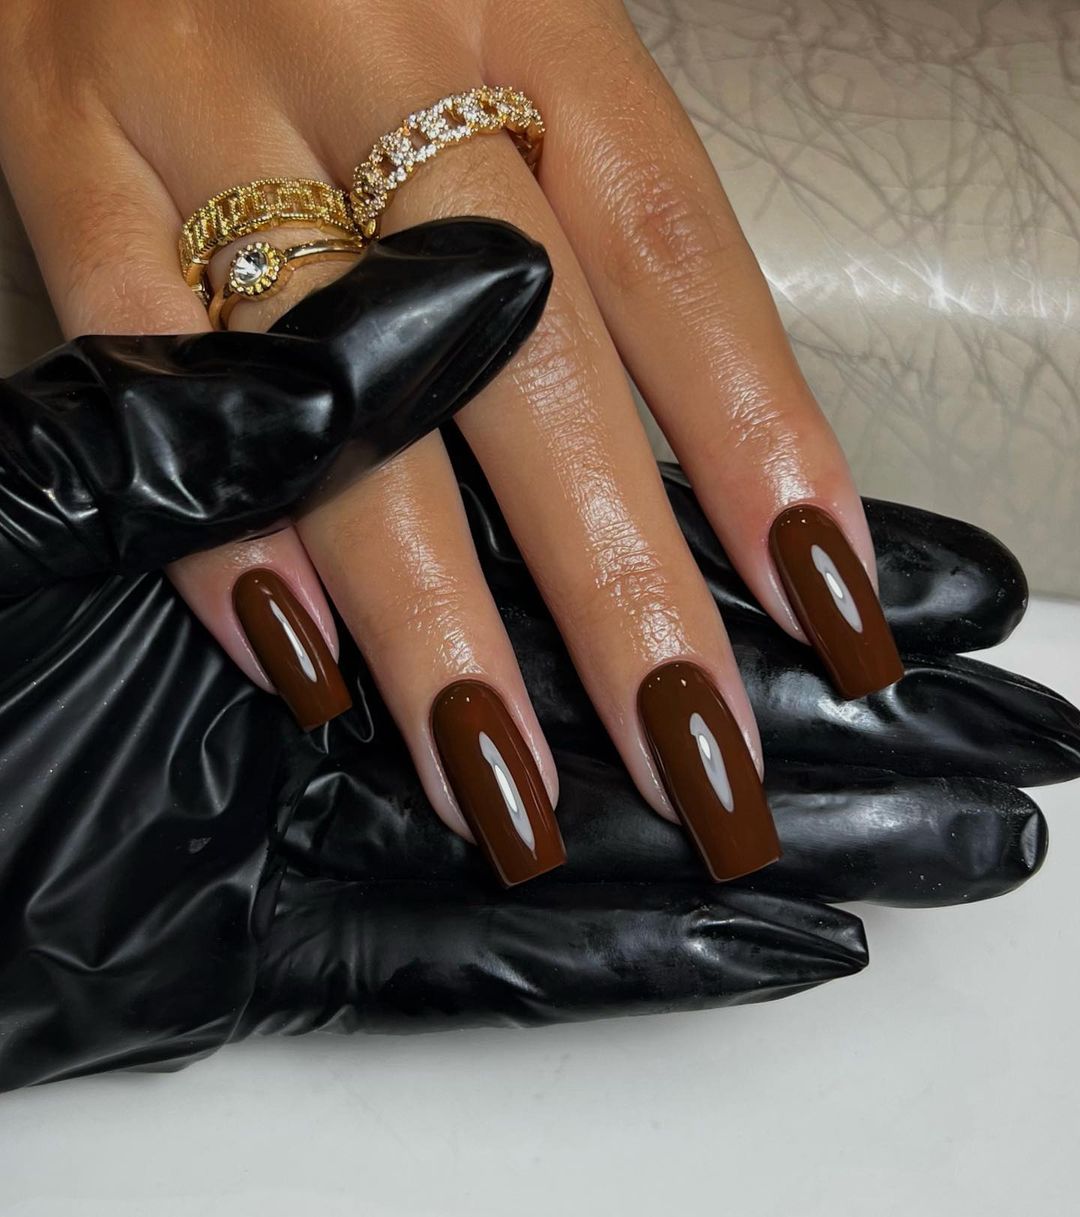
Glossy Chocolate Brown Nails
These glossy chocolate brown nails exude elegance and sophistication. The deep brown color is rich and captivating, making a bold statement. The high-shine finish adds a touch of glamour, perfect for both everyday wear and special occasions.
- Chocolate brown nail polish (e.g., OPI’s “You Don’t Know Jacques!”)
- Base coat to protect the natural nails
- Top coat for a glossy finish
- Nail file and buffer for shaping
How to Create This Look at Home:
- Prep your nails: Start by cleaning and filing your nails to your desired shape. Apply a base coat.
- Apply the chocolate brown polish: Paint your nails with the brown polish, applying 2-3 coats for full opacity.
- Finish with a top coat: Apply a top coat to add shine and protect your manicure.
Smoky Brown Gradient Nails
The smoky brown gradient nails are a modern and edgy take on the classic brown manicure. The gradient effect transitions from a lighter brown to a deep, almost black shade, creating a striking and sophisticated look.
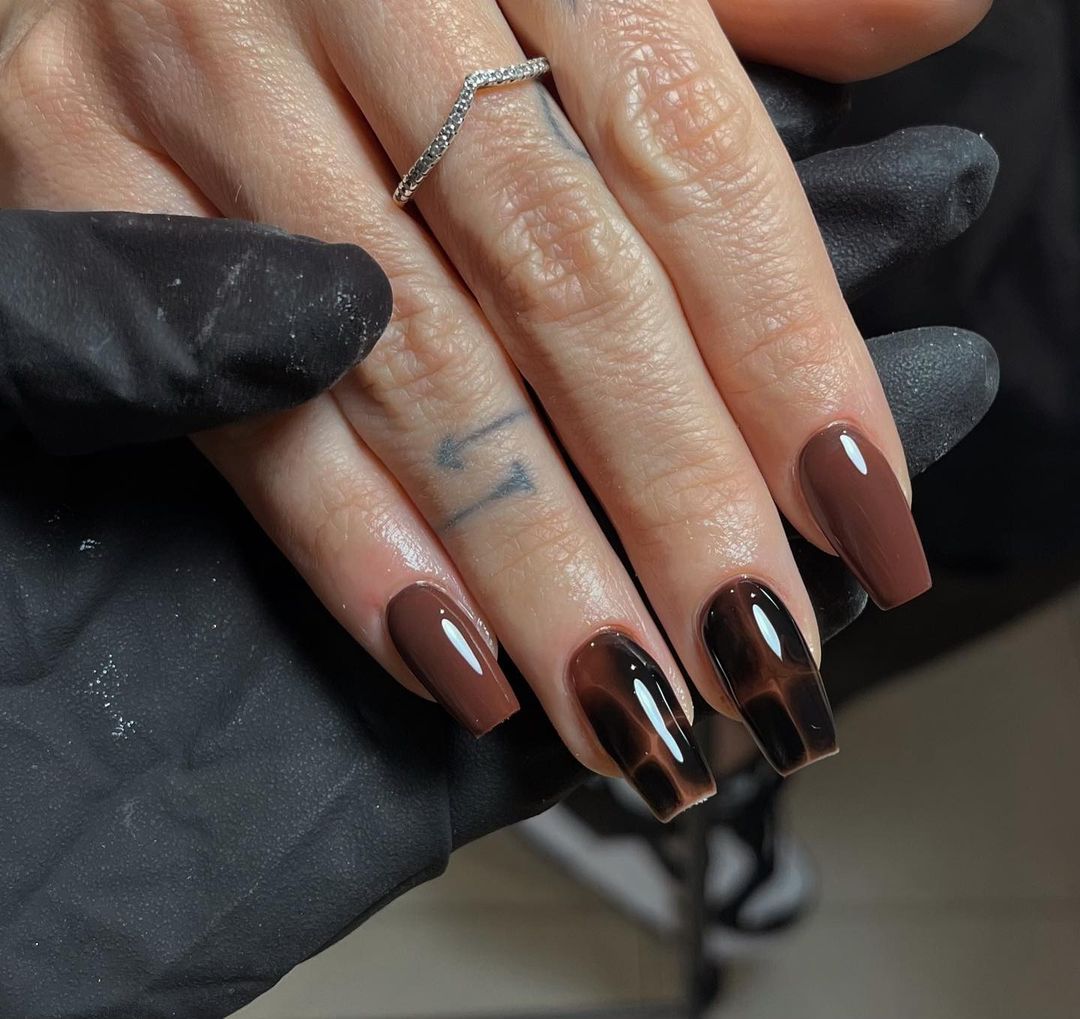
- Light brown nail polish (e.g., Essie’s “Mink Muffs”)
- Dark brown to black gradient polish (e.g., Sally Hansen’s “Commander in Chic”)
- Makeup sponge for blending the gradient
- Top coat for a smooth finish
How to Create This Look at Home:
- Prepare your nails: Clean and shape your nails. Apply a base coat to protect your natural nails.
- Apply the base color: Start with the light brown polish as your base color.
- Create the gradient: Using a makeup sponge, dab the darker polish at the tips of your nails and blend it towards the base for a seamless gradient effect.
- Seal with a top coat: Apply a top coat to smooth out the gradient and add shine.
Classic Brown Short Nails
These classic brown short nails are a testament to the beauty of simplicity. The deep brown color is versatile and timeless, suitable for any occasion. The short length makes them practical and easy to maintain.
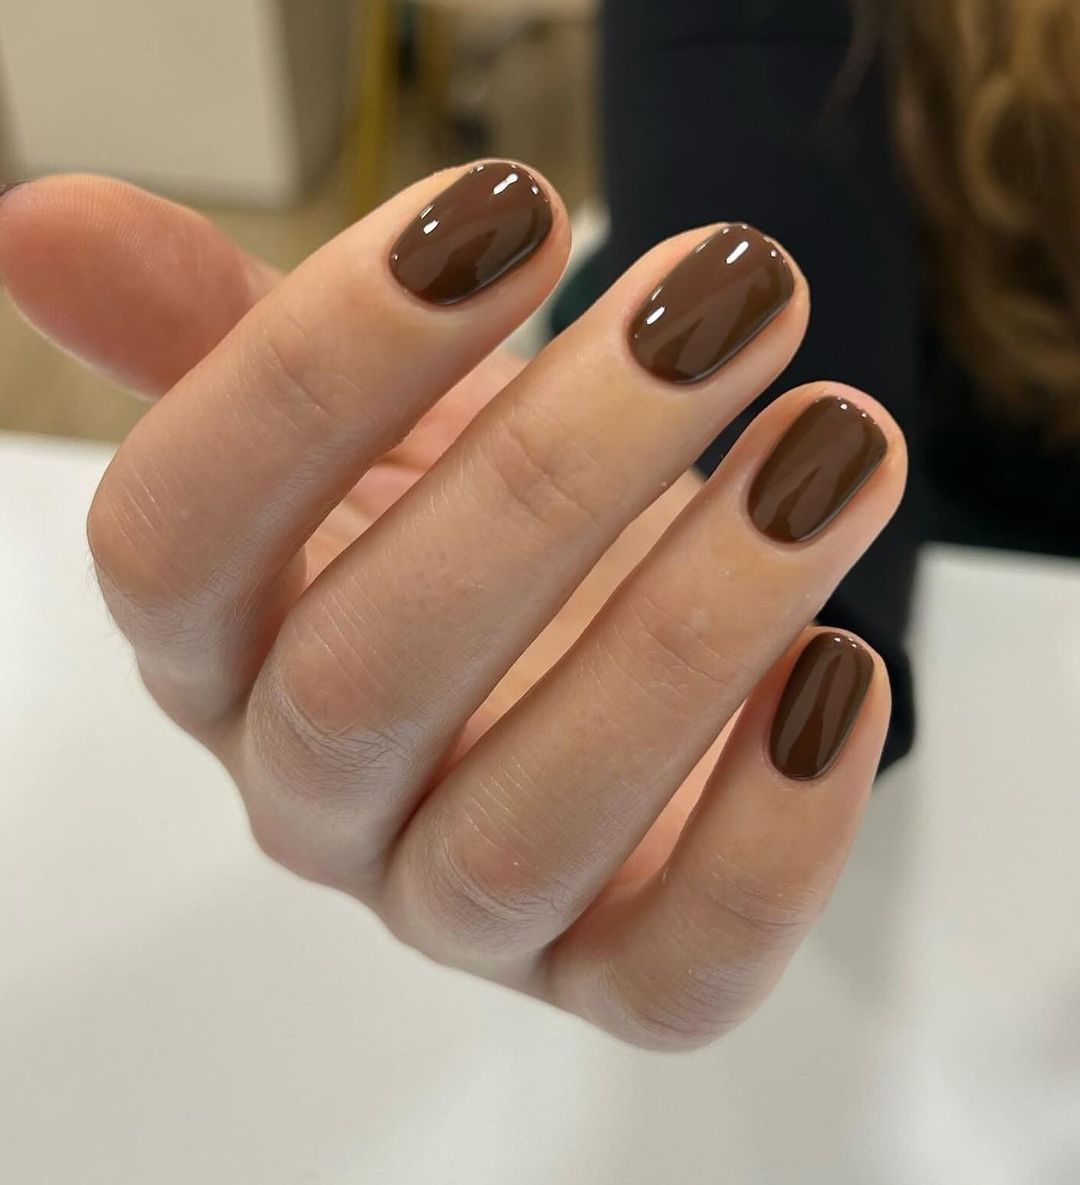
- Deep brown nail polish (e.g., Zoya’s “Louise”)
- Base coat to protect the nails
- Top coat for added durability
- Nail file for shaping
How to Create This Look at Home:
- Prep your nails: Clean and file your nails into a short, rounded shape. Apply a base coat.
- Apply the brown polish: Paint your nails with the deep brown polish, using 2-3 coats for full coverage.
- Finish with a top coat: Seal your manicure with a top coat to add shine and prevent chipping.
Save Pin
Subtle Brown Swirl Nails
These subtle brown swirl nails combine a neutral base with delicate brown swirls for a sophisticated and modern look. The design is understated yet eye-catching, making it perfect for those who prefer a minimalist aesthetic.
- Neutral base polish (e.g., OPI’s “Samoan Sand”)
- Brown polish for swirls (e.g., Essie’s “Clothing Optional”)
- Thin nail art brush for creating swirls
- Top coat for a smooth finish
How to Create This Look at Home:
- Prep your nails: Clean and shape your nails. Apply a base coat.
- Apply the base color: Paint your nails with the neutral base polish and let it dry completely.
- Create the swirls: Using a thin brush, draw delicate swirls with the brown polish on each nail.
- Seal with a top coat: Apply a top coat to protect the design and add shine.
Intricate Brown and Gold Nail Art
These nails feature an intricate combination of brown and gold designs, perfect for those who love detailed and elaborate nail art. The mix of patterns and textures creates a unique and luxurious look, ideal for special occasions.
- Brown nail polish (e.g., OPI’s “That’s What Friends Are Thor”)
- Gold glitter polish (e.g., Essie’s “Rock at the Top”)
- Nail art brushes for detailed designs
- Top coat for a glossy finish
How to Create This Look at Home:
- Prepare your nails: Clean and shape your nails. Apply a base coat.
- Apply the brown polish: Paint your nails with the brown polish as your base color.
- Add the gold details: Using nail art brushes, create intricate designs with the gold glitter polish on each nail.
- Finish with a top coat: Seal your manicure with a top coat to add shine and protect the nail art.
Elegant Brown Swirl Nails
These elegant brown swirl nails feature a sophisticated combination of neutral and brown tones with delicate gold accents. The swirling design adds a dynamic and artistic touch, making this manicure perfect for those who appreciate subtle yet intricate nail art.
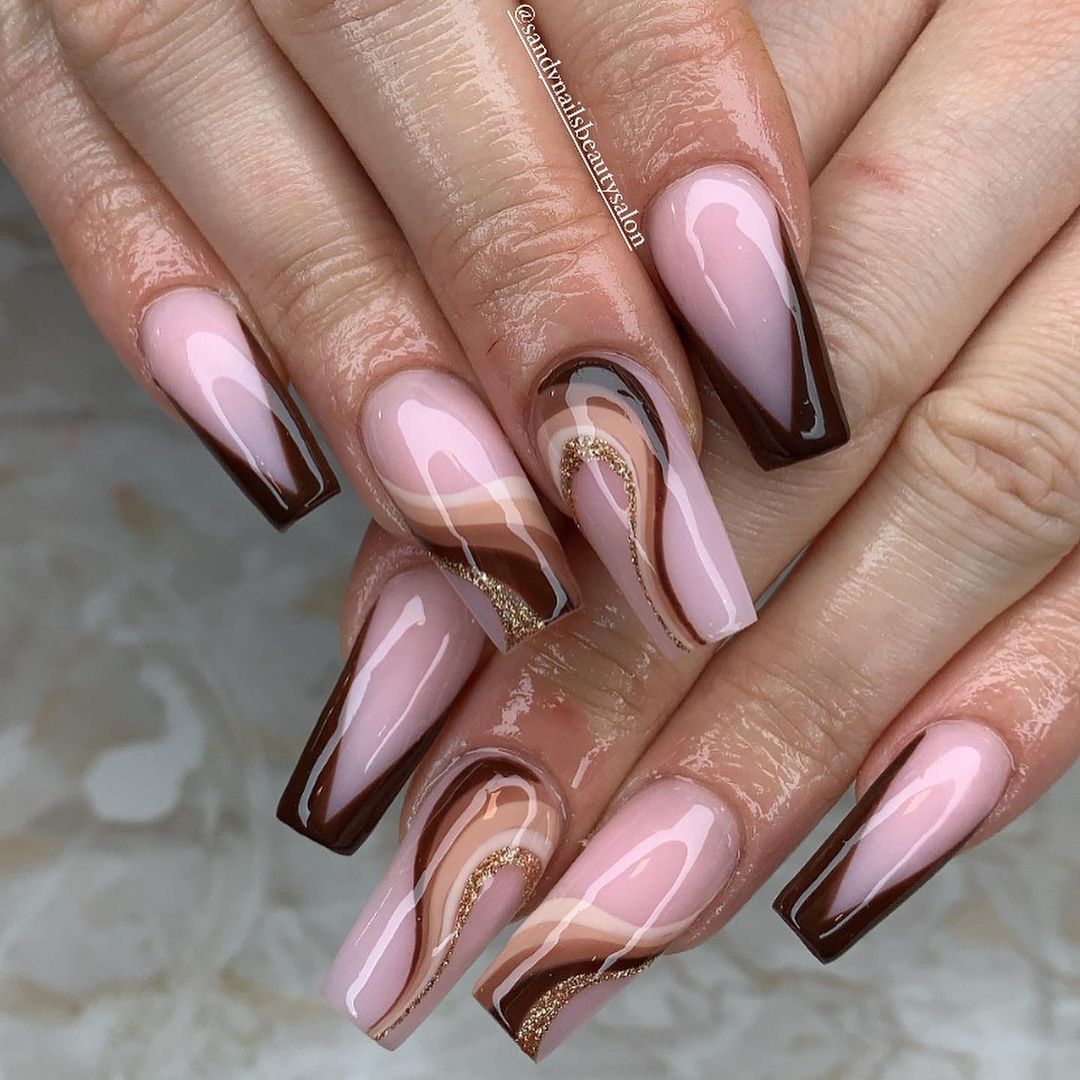
- Neutral base polish (e.g., Essie’s “Ballet Slippers”)
- Brown polish for swirls (e.g., Zoya’s “Dea”)
- Gold glitter polish for accents (e.g., OPI’s “Goldeneye”)
- Thin nail art brush for creating swirls
- Top coat for a glossy finish
How to Create This Look at Home:
- Prep your nails: Clean and shape your nails. Apply a base coat.
- Apply the base color: Paint your nails with the neutral base polish and let it dry completely.
- Create the swirls: Using a thin brush, draw swirls with the brown polish and add gold accents for a touch of sparkle.
- Seal with a top coat: Apply a top coat to protect the design and add shine.
Brown Polka Dot French Tips
These brown polka dot French tips bring a playful twist to the traditional French manicure. The combination of a nude base with brown tips adorned with white polka dots creates a fun and stylish design that’s perfect for any occasion.
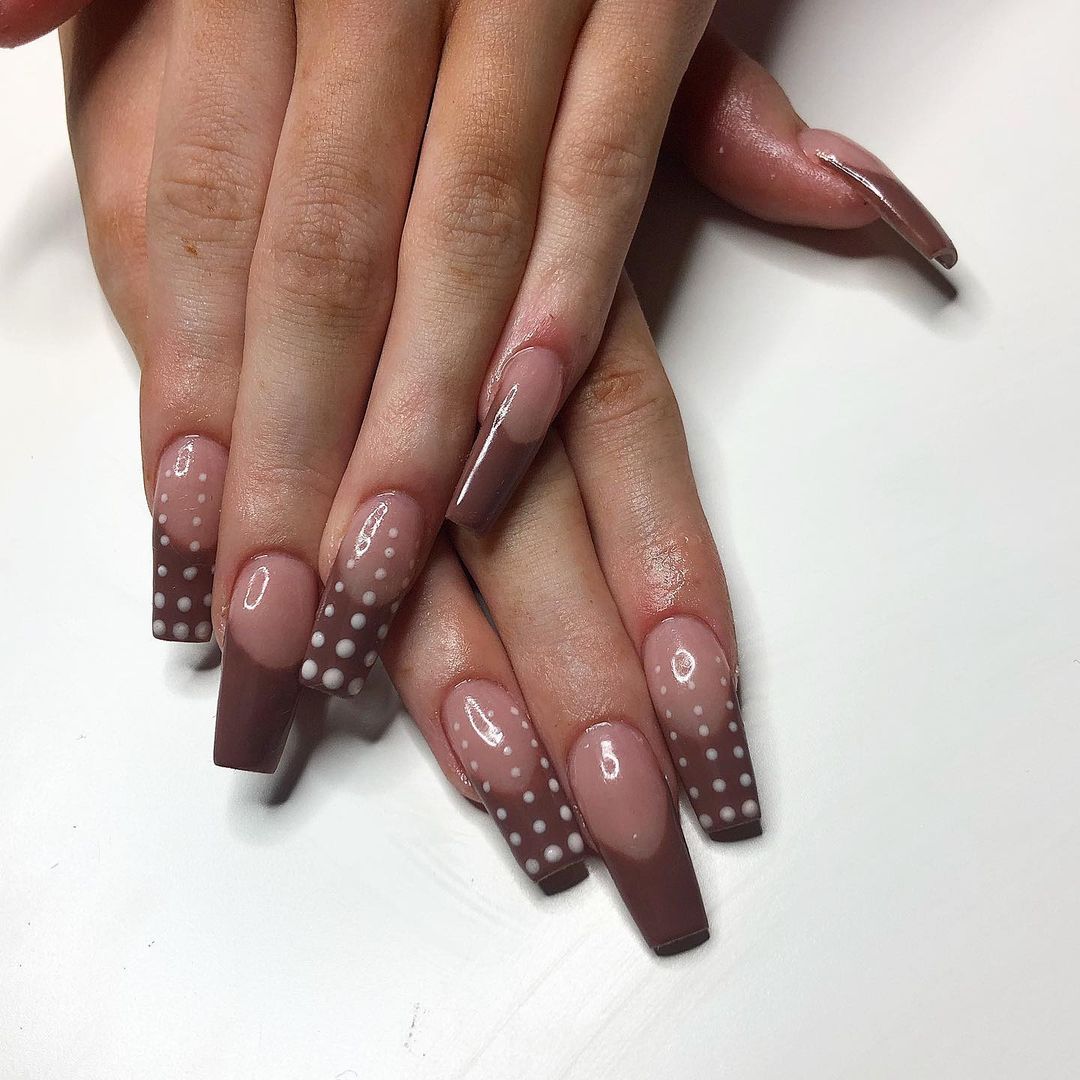
- Nude base polish (e.g., Essie’s “Ballet Slippers”)
- Dark brown polish for the tips (e.g., OPI’s “That’s What Friends Are Thor”)
- White polish for polka dots (e.g., Sally Hansen’s “White On”)
- Dotting tool for creating polka dots
- Top coat for a glossy finish
How to Create This Look at Home:
- Prepare your nails: Clean and shape your nails. Apply a base coat.
- Apply the base color: Paint your nails with the nude polish and let it dry completely.
- Create the French tips: Using the dark brown polish, carefully paint the tips of your nails.
- Add polka dots: Use a dotting tool to apply white polka dots on the brown tips.
- Seal with a top coat: Apply a top coat to protect your design and add shine.
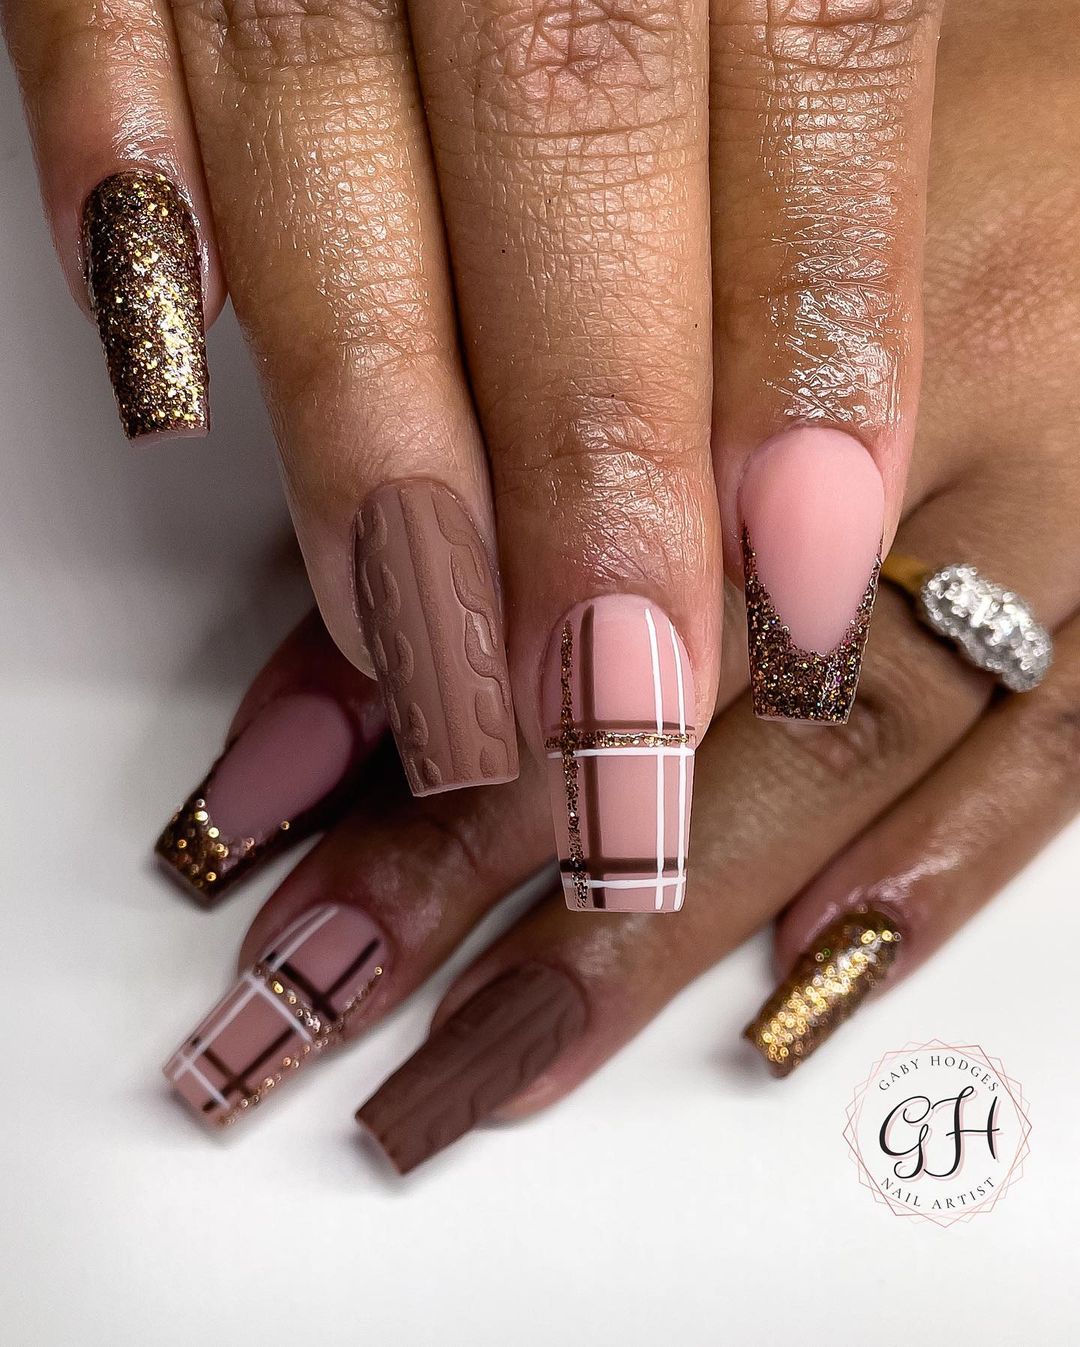
Plaid and Glitter Accents
This nail design features a combination of plaid patterns and glitter accents, creating a chic and sophisticated look. The warm tones of brown and nude, highlighted with gold glitter, make it a perfect choice for the fall season.
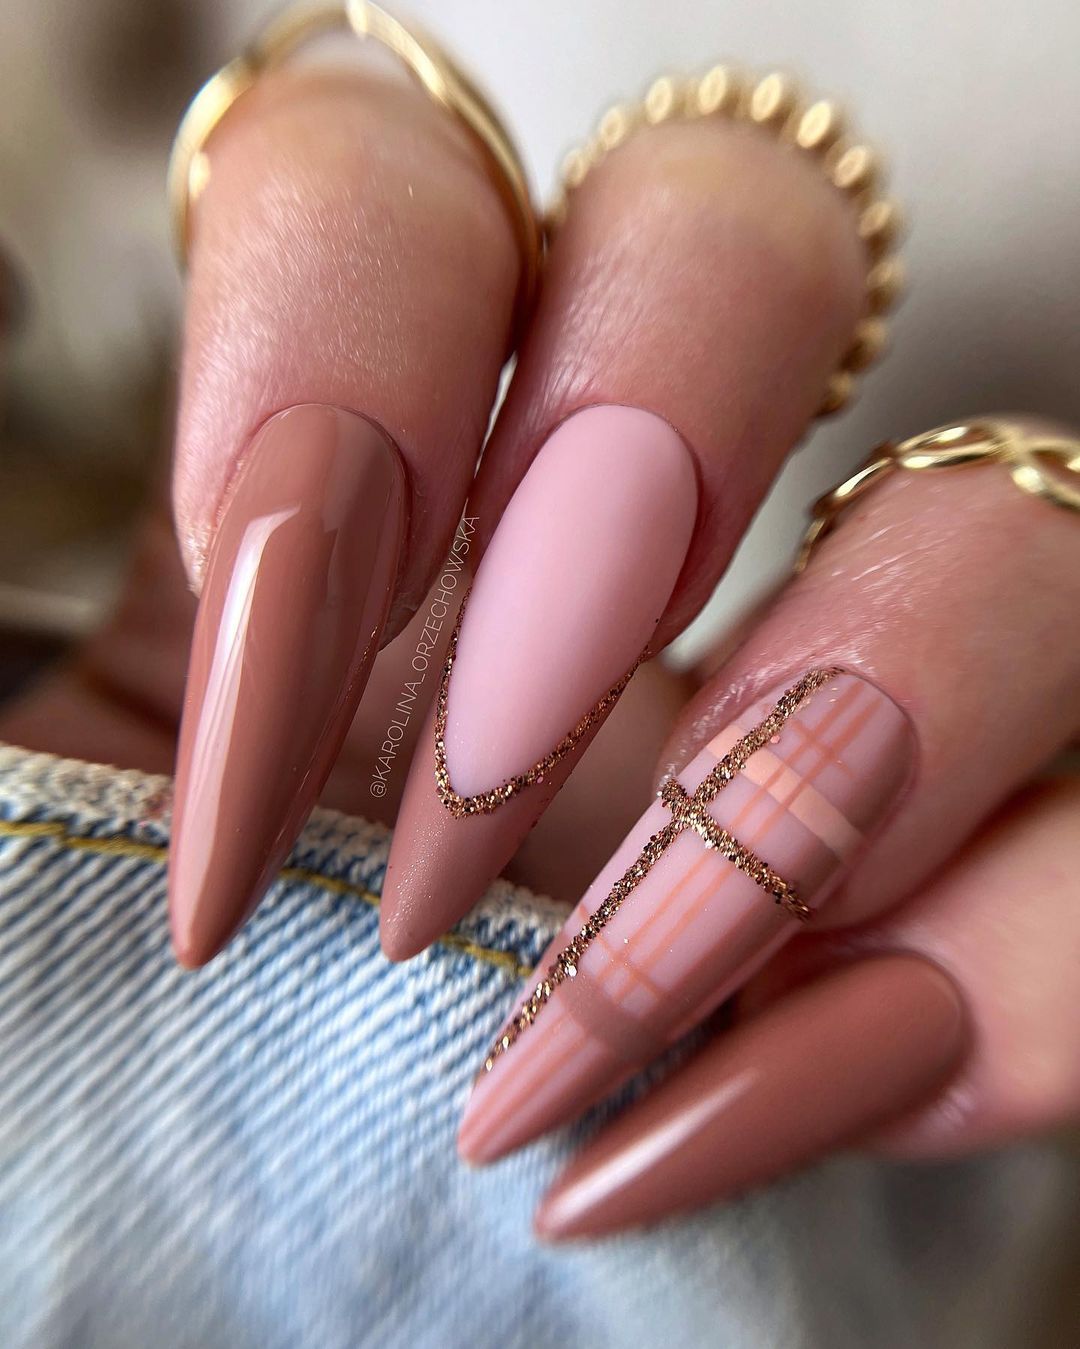
- Nude base polish (e.g., OPI’s “Samoan Sand”)
- Light brown polish for plaid (e.g., Essie’s “Mink Muffs”)
- Gold glitter polish for accents (e.g., Essie’s “Rock at the Top”)
- Nail art brush for creating plaid lines
- Top coat for durability
How to Create This Look at Home:
- Prep your nails: Clean and shape your nails. Apply a base coat.
- Apply the base colors: Paint your nails with the nude and light brown polishes as desired and let them dry.
- Create the plaid pattern: Using a thin brush, draw plaid lines on one or more nails with the brown polish.
- Add glitter accents: Apply the gold glitter polish along some lines or edges for a touch of sparkle.
- Finish with a top coat: Seal the design with a top coat to add shine and protect your manicure.
Chocolate and Caramel Swirls
These nails feature a blend of chocolate and caramel swirls, creating a deliciously rich design. The deep brown tones are complemented by lighter shades, making this a warm and inviting look for fall.
- Dark brown polish (e.g., OPI’s “Espresso Your Inner Self”)
- Light brown and caramel polishes (e.g., Essie’s “Clothing Optional” and “Mochachino”)
- Thin nail art brush for creating swirls
- Top coat for a glossy finish
How to Create This Look at Home:
- Prepare your nails: Clean and shape your nails. Apply a base coat.
- Apply the base color: Paint your nails with the dark brown polish.
- Create the swirls: Using a thin brush, draw swirls with the light brown and caramel polishes on each nail.
- Seal with a top coat: Apply a top coat to protect the design and add shine.
Black and Brown Marble Nails
This nail design combines brown and black marble patterns for a dramatic and elegant look. The contrast between the two colors creates a striking effect, perfect for a night out or special event.
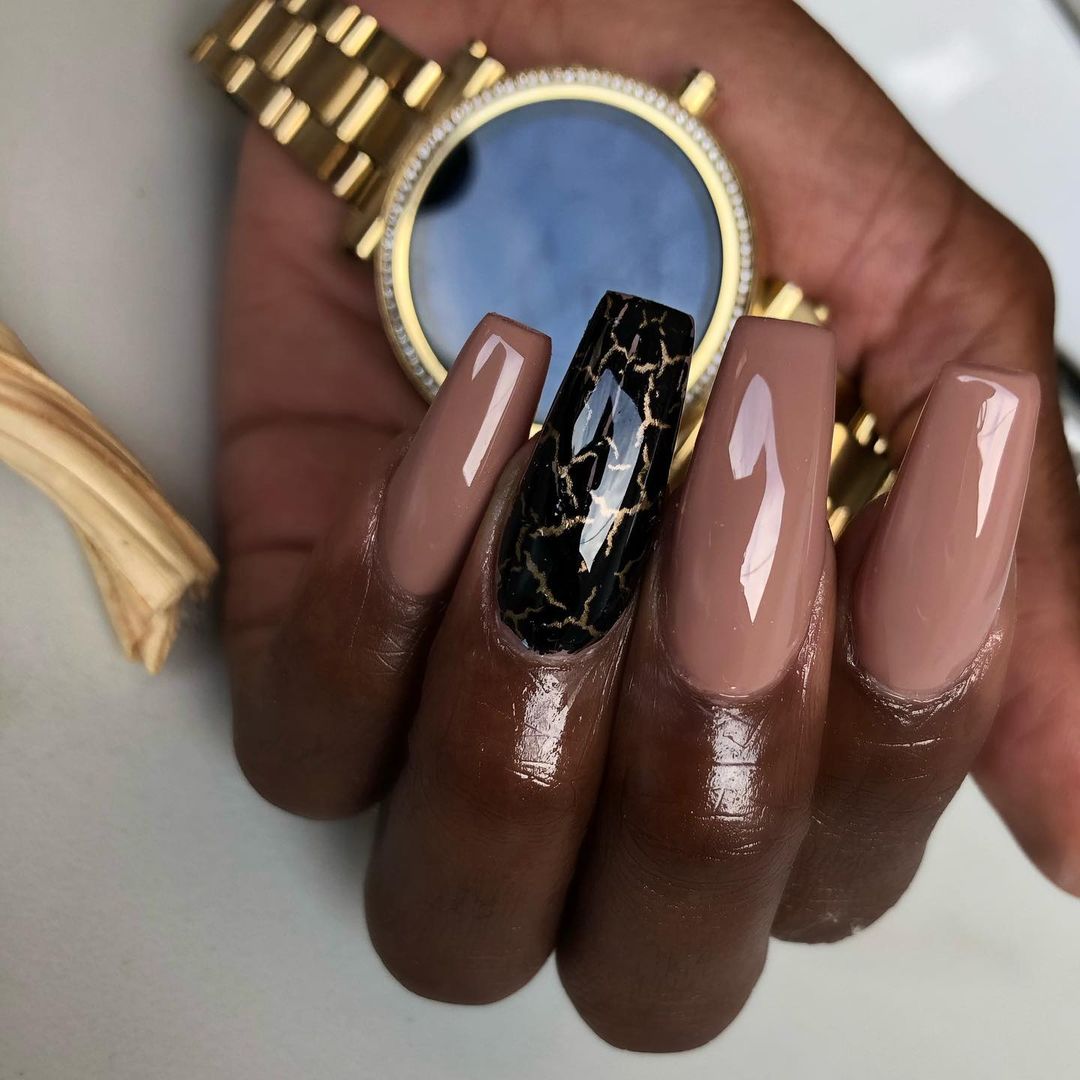
- Brown base polish (e.g., Zoya’s “Louise”)
- Black polish for marble effect (e.g., OPI’s “Black Onyx”)
- Thin nail art brush for marbleizing
- Top coat for a smooth finish
How to Create This Look at Home:
- Prep your nails: Clean and shape your nails. Apply a base coat.
- Apply the base color: Paint your nails with the brown polish.
- Create the marble effect: Using a thin brush, draw black marble lines and blend them slightly for a natural look.
- Finish with a top coat: Seal your manicure with a top coat to add shine and durability.
Earthy Abstract Design
These nails feature an earthy abstract design with shades of brown, green, and gold. The artistic swirls and patterns make this a unique and eye-catching manicure, perfect for those who love creative nail art.
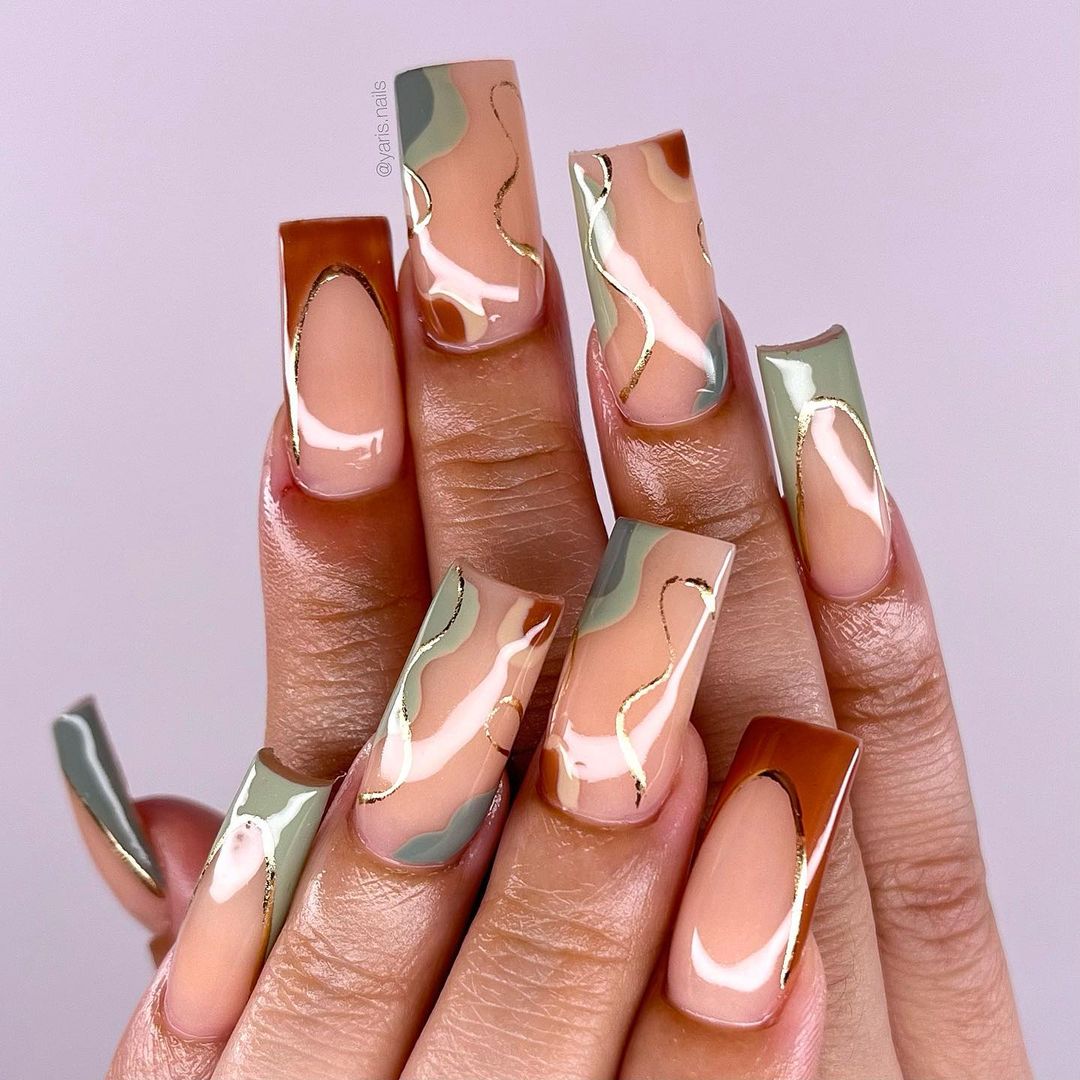
- Nude base polish (e.g., Essie’s “Ballet Slippers”)
- Brown, green, and gold polishes (e.g., Essie’s “Mink Muffs”, “Sew Psyched”, and “Good as Gold”)
- Thin nail art brush for creating patterns
- Top coat for protection
How to Create This Look at Home:
- Prepare your nails: Clean and shape your nails. Apply a base coat.
- Apply the base color: Paint your nails with the nude polish and let it dry completely.
- Create the abstract design: Using a thin brush, draw swirls and patterns with the brown, green, and gold polishes.
- Seal with a top coat: Apply a top coat to protect the design and add shine.
Classic Brown French Tips
These classic brown French tips offer a sophisticated and timeless look. The contrast between the nude base and the dark brown tips is elegant and versatile, suitable for both casual and formal occasions.
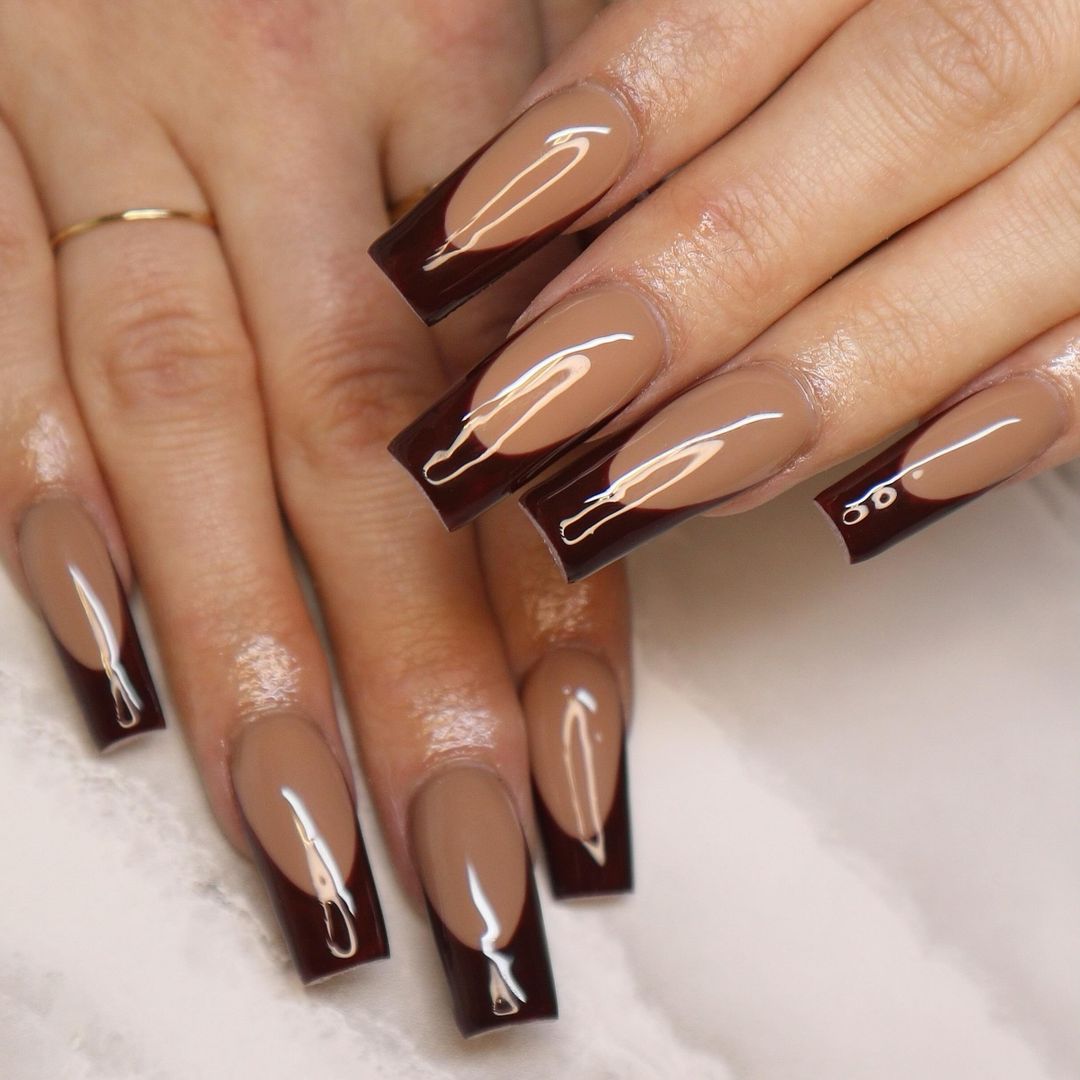
- Nude base polish (e.g., OPI’s “Bubble Bath”)
- Dark brown polish for tips (e.g., Essie’s “Chocolate Cakes”)
- Thin nail art brush or nail guides for precision
- Top coat for a glossy finish
How to Create This Look at Home:
- Prep your nails: Clean and shape your nails. Apply a base coat.
- Apply the base color: Paint your nails with the nude polish and let it dry.
- Create the French tips: Using a thin brush or nail guides, apply the dark brown polish to the tips of your nails.
- Finish with a top coat: Seal your manicure with a top coat to add shine and protect your design.
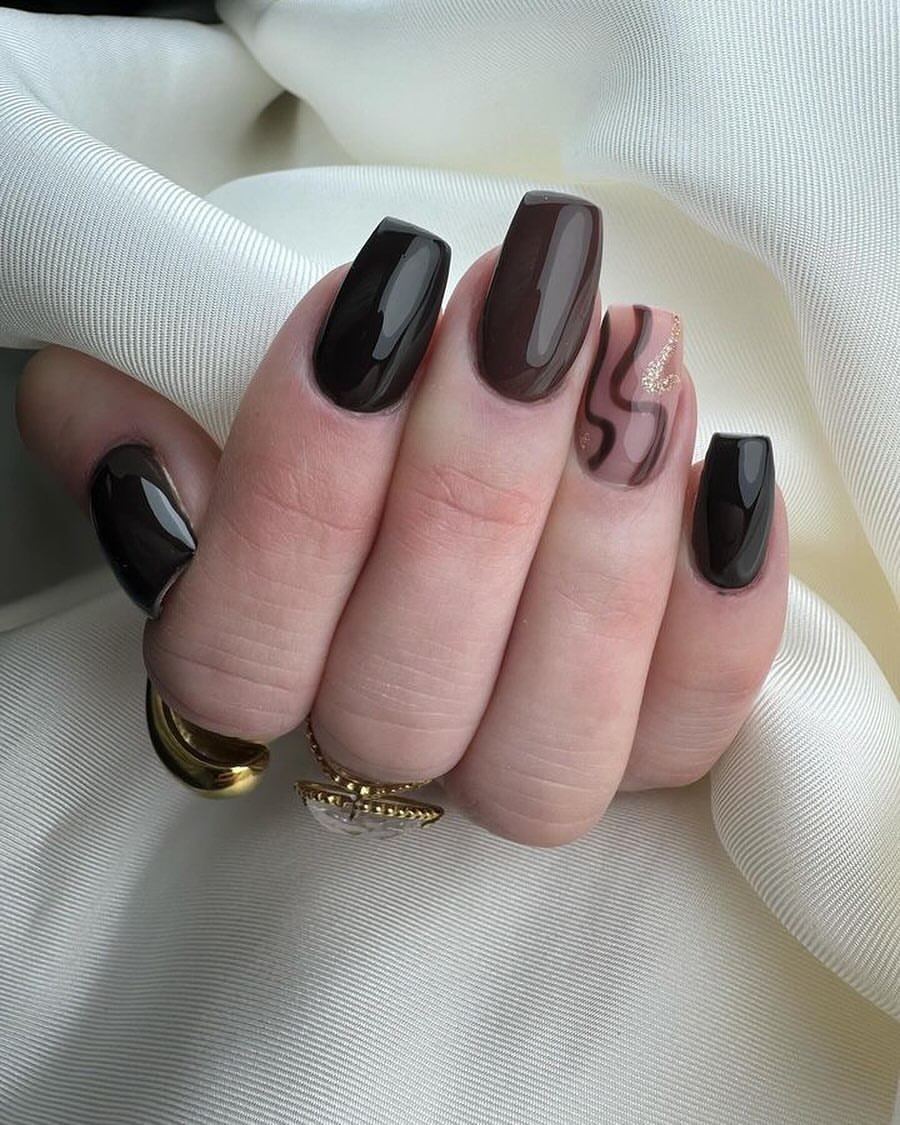
Brown and Beige Almond Nails
These almond nails combine rich brown and soft beige tones, creating a warm and inviting autumn look. The accent nail with a delicate swirl design adds a touch of playfulness, making this manicure both elegant and fun.
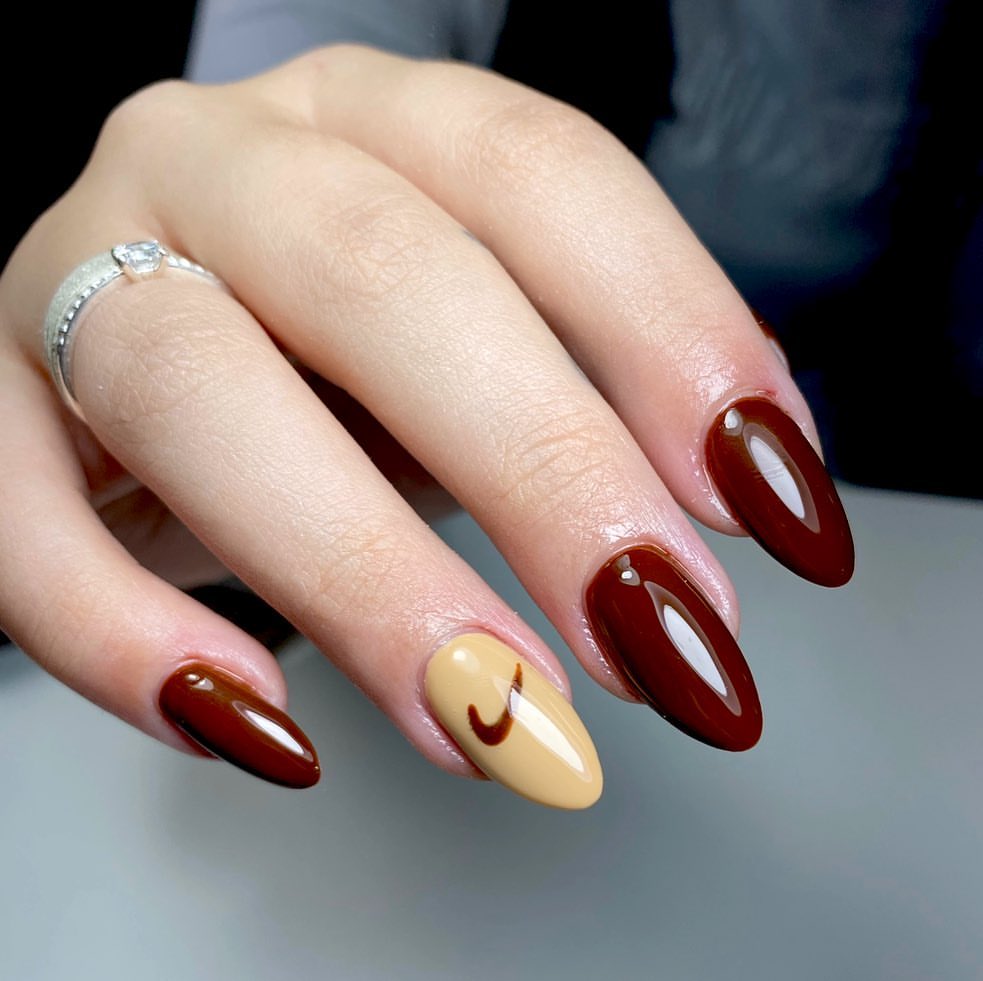
- Deep brown nail polish (e.g., OPI’s “Espresso Your Inner Self”)
- Beige polish for the accent nail (e.g., Essie’s “Sand Tropez”)
- Nail art brush for creating the swirl design
- Top coat for a glossy finish
How to Create This Look at Home:
- Prep your nails: Clean and shape your nails into an almond shape. Apply a base coat.
- Apply the base colors: Paint most of your nails with the deep brown polish, and the accent nail with the beige polish.
- Add the swirl design: Use a nail art brush to create the swirl design on the accent nail with the brown polish.
- Seal with a top coat: Apply a top coat to protect the design and add shine.
Ballerina-Inspired Bow Nails
These nails are a whimsical take on ballerina elegance, featuring bows and pearls on a nude and brown base. The combination of the soft pink bows and the delicate pearls makes this design perfect for those who love a touch of romance in their nail art.
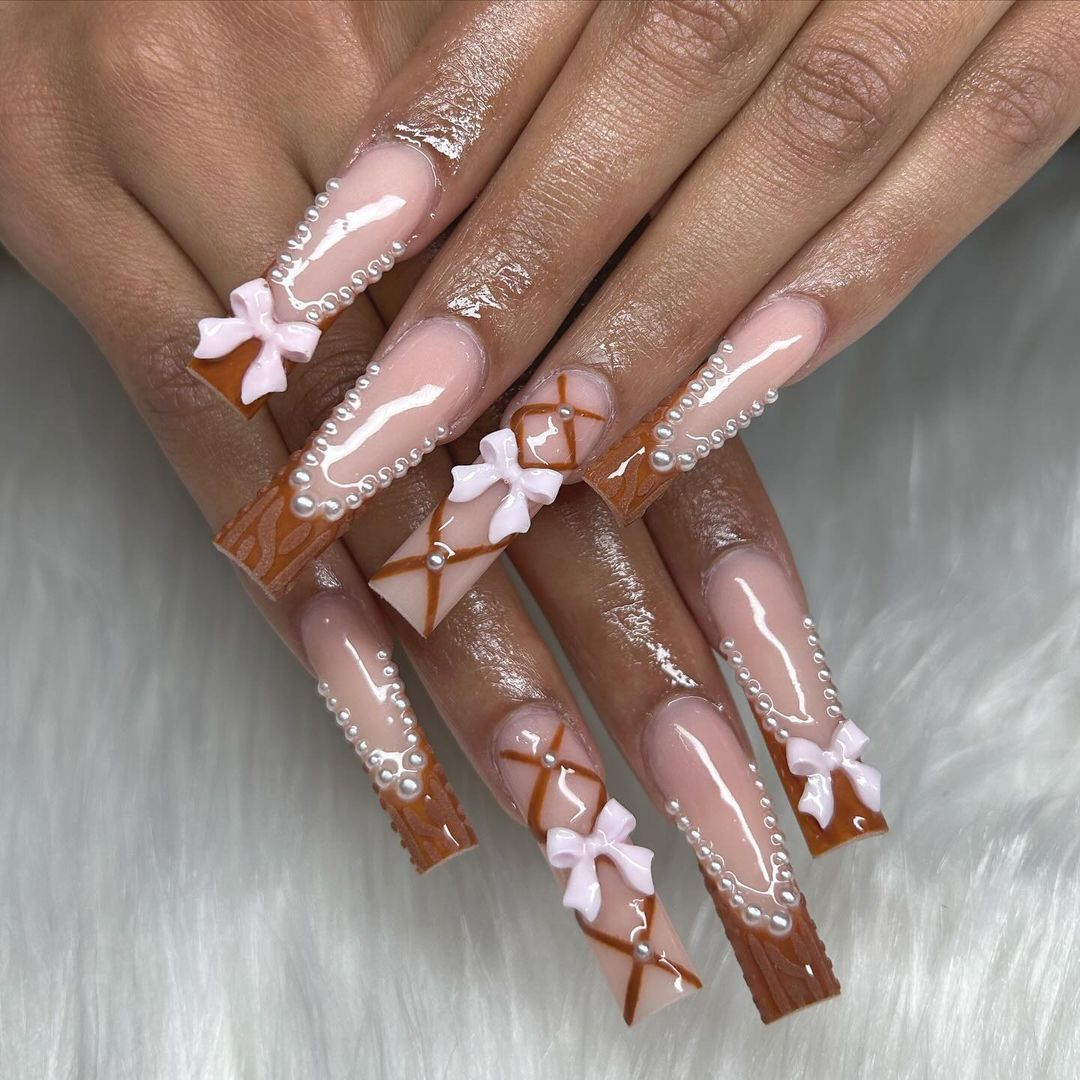
- Nude base polish (e.g., OPI’s “Bubble Bath”)
- Brown polish for details (e.g., Essie’s “Mink Muffs”)
- Pink 3D bows and pearls for decoration
- Nail art brush for creating fine details
- Nail glue for attaching decorations
- Top coat for durability
How to Create This Look at Home:
- Prep your nails: Clean and shape your nails. Apply a base coat.
- Apply the base color: Paint your nails with the nude polish and let it dry completely.
- Create the bow and pearl design: Use the brown polish to add detailed lines and patterns. Attach the pink bows and pearls with nail glue.
- Seal with a top coat: Apply a top coat to secure the decorations and add shine.
Elegant Rhinestone Nails
These nails are adorned with rhinestones and intricate designs, combining brown and nude tones with a touch of sparkle. The detailed patterns and the shimmering rhinestones make this manicure perfect for special occasions.

- Nude base polish (e.g., Essie’s “Ballet Slippers”)
- Dark brown polish for accents (e.g., OPI’s “That’s What Friends Are Thor”)
- Rhinestones for decoration
- Nail art brush for creating fine details
- Nail glue for attaching rhinestones
- Top coat for protection
How to Create This Look at Home:
- Prepare your nails: Clean and shape your nails. Apply a base coat.
- Apply the base color: Paint your nails with the nude polish and let it dry.
- Add the brown accents and rhinestones: Use a nail art brush to create detailed patterns with the brown polish. Attach rhinestones with nail glue for added sparkle.
- Finish with a top coat: Seal your manicure with a top coat to protect the design and keep the rhinestones in place.
Floral and Glitter Ombre Nails
These nails feature a combination of floral designs and glitter ombre, creating a beautiful and artistic look. The blend of dark brown and glittery accents, along with delicate floral patterns, makes this manicure both stylish and unique.
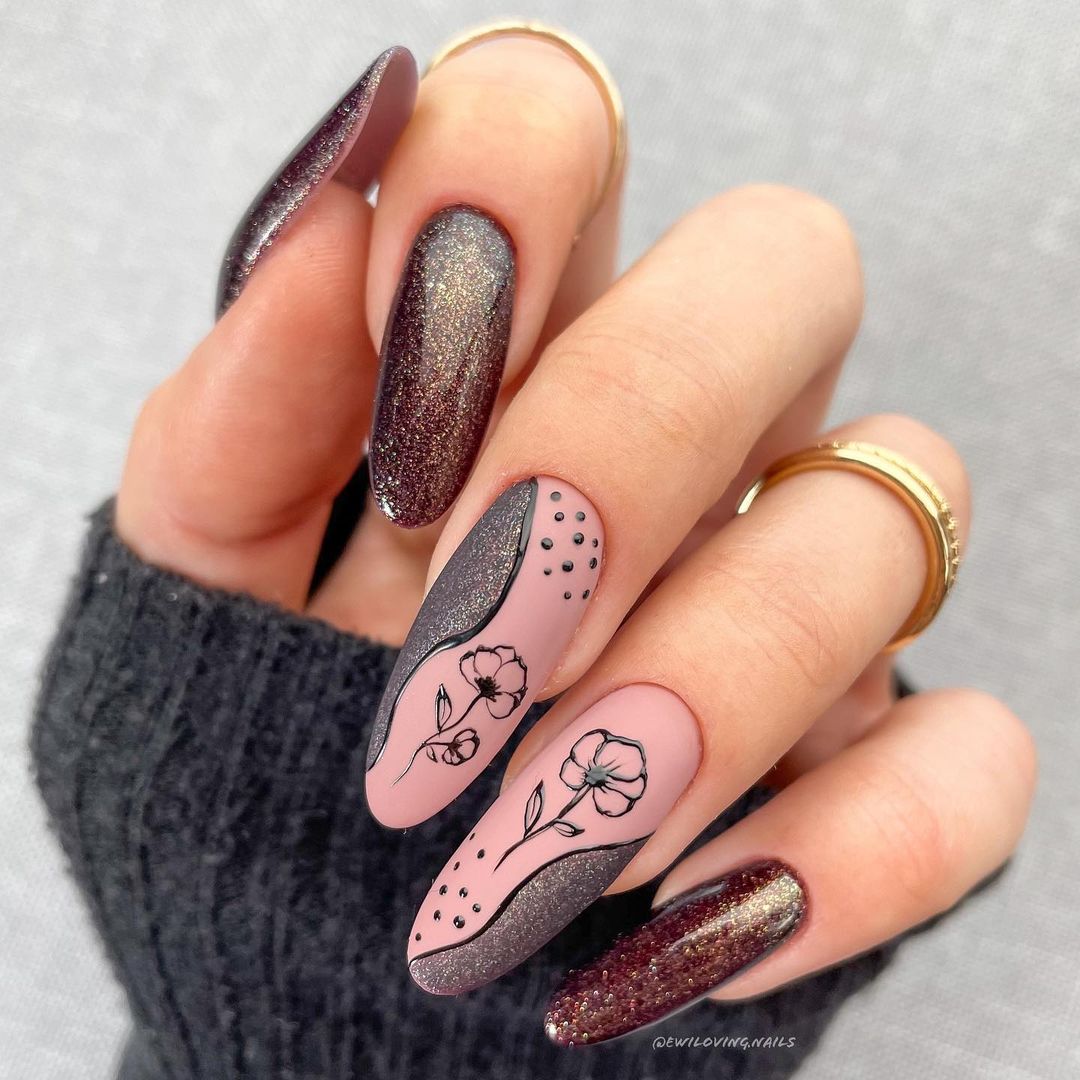
- Dark brown polish (e.g., OPI’s “You Don’t Know Jacques!”)
- Nude polish for base (e.g., Essie’s “Ballet Slippers”)
- Black nail art pen for floral designs
- Glitter polish for accents (e.g., Essie’s “Set in Stones”)
- Top coat for a glossy finish
How to Create This Look at Home:
- Prep your nails: Clean and shape your nails. Apply a base coat.
- Apply the base colors: Paint some nails with the dark brown polish and others with the nude polish.
- Create the floral and glitter ombre design: Use a black nail art pen to draw floral designs on the nude nails. Apply glitter polish to the tips of the brown nails for an ombre effect.
- Seal with a top coat: Apply a top coat to protect the design and add shine.
Glittery Brown French Tips
These nails combine a classic French tip design with glittery brown tips, adding a touch of sparkle to a timeless look. The combination of the nude base and the glittery brown tips is perfect for a subtle yet glamorous manicure.
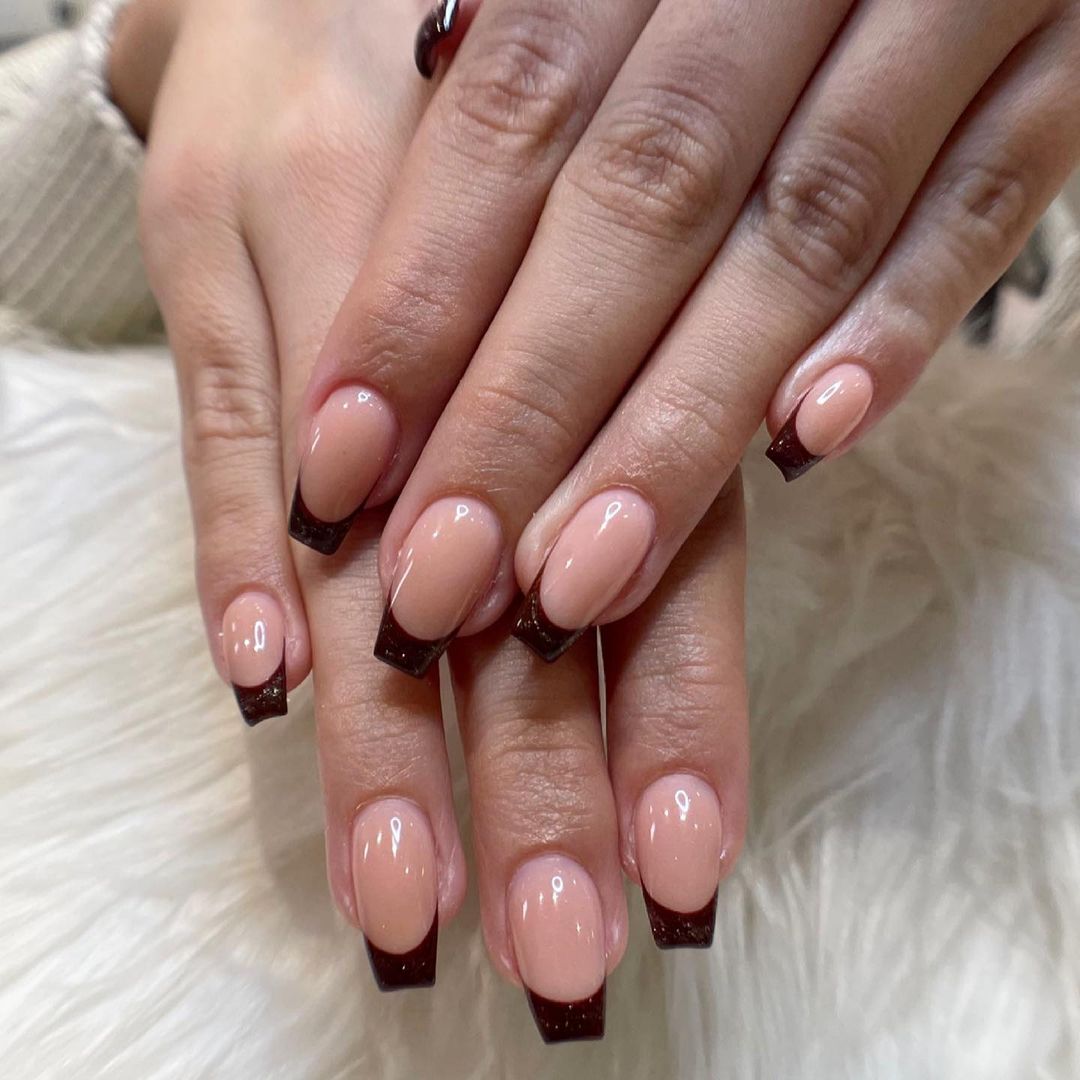
- Nude base polish (e.g., OPI’s “Bubble Bath”)
- Glittery brown polish for tips (e.g., Essie’s “Rock at the Top”)
- Thin nail art brush or nail guides for precision
- Top coat for durability
How to Create This Look at Home:
- Prep your nails: Clean and shape your nails. Apply a base coat.
- Apply the base color: Paint your nails with the nude polish and let it dry.
- Create the glittery tips: Use a thin brush or nail guides to apply the glittery brown polish to the tips of your nails.
- Finish with a top coat: Seal your manicure with a top coat to add shine and protect the glitter.
Warm Brown Almond Nails
These almond-shaped nails feature a warm brown polish that’s perfect for the fall season. The rich color is both sophisticated and versatile, making it suitable for both casual and formal occasions.
- Warm brown polish (e.g., OPI’s “Chocolate Moose”)
- Base coat to protect your nails
- Top coat for added shine
- Nail file and buffer for shaping
How to Create This Look at Home:
- Prep your nails: Clean and shape your nails into an almond shape. Apply a base coat.
- Apply the brown polish: Paint your nails with the warm brown polish, using 2-3 coats for full coverage.
- Finish with a top coat: Apply a top coat to add shine and protect your manicure.
Brown and Nude with Gold Accents
These nails feature a sophisticated combination of deep brown and nude polishes with delicate gold leaf accents. The luxurious gold details elevate the look, making it perfect for a chic and elegant fall manicure.
- Deep brown polish (e.g., OPI’s “Chocolate Moose”)
- Nude polish (e.g., Essie’s “Ballet Slippers”)
- Gold leaf flakes for accents
- Nail art brush for precise application
- Top coat for a glossy finish
How to Create This Look at Home:
- Prep your nails: Clean and shape your nails. Apply a base coat.
- Apply the base colors: Paint some nails with the deep brown polish and others with the nude polish.
- Add gold accents: Use a nail art brush to apply gold leaf flakes delicately onto the nude nails.
- Seal with a top coat: Apply a top coat to protect the design and add shine.
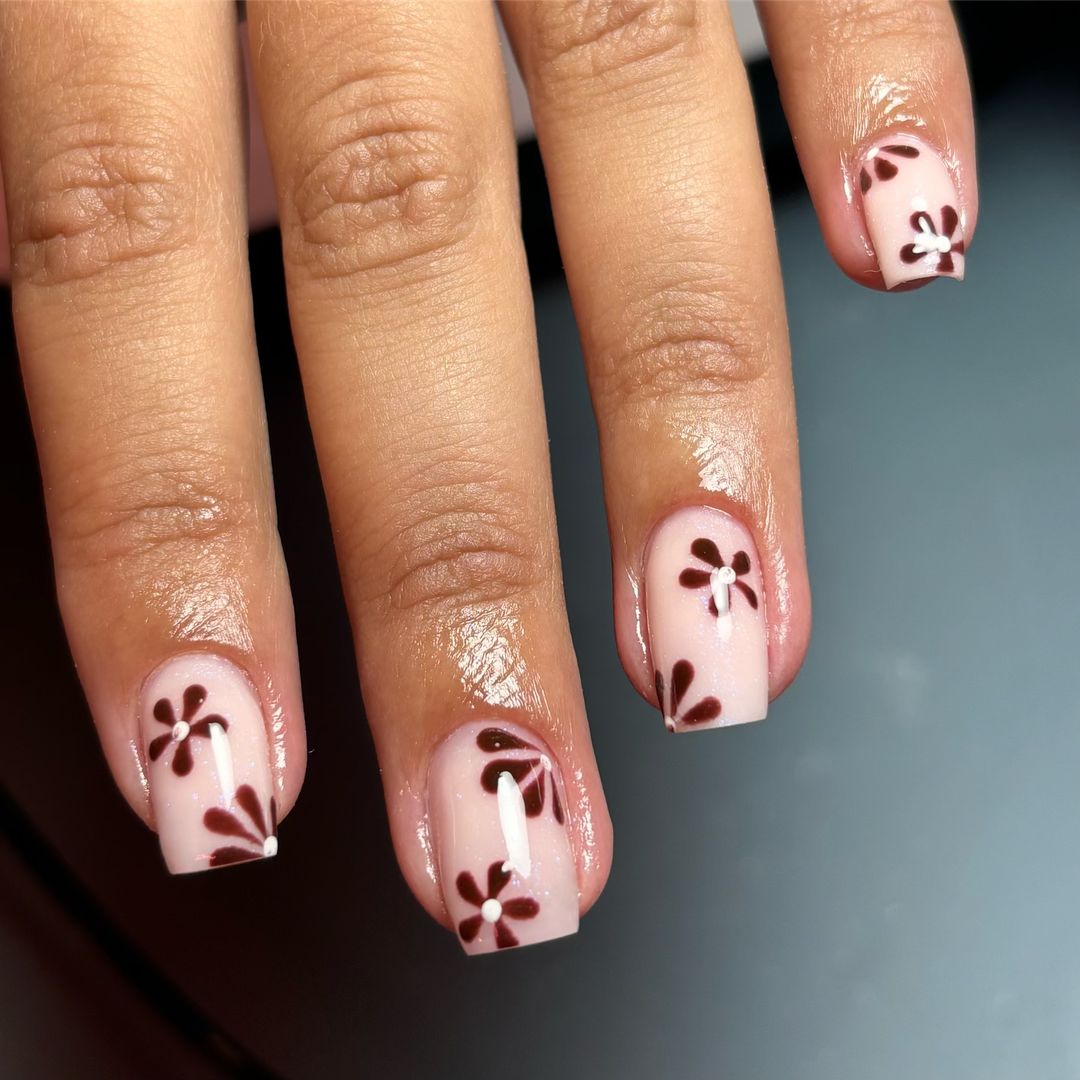
Floral Brown Short Nails
These nails feature a lovely floral design on a soft pink base with deep brown flowers. The short length and simple design make this manicure both charming and practical, perfect for everyday wear.
- Soft pink base polish (e.g., OPI’s “Bubble Bath”)
- Deep brown polish for flowers (e.g., Essie’s “Mink Muffs”)
- White polish for flower centers (e.g., Sally Hansen’s “White On”)
- Dotting tool and thin nail art brush for creating flowers
- Top coat for durability
How to Create This Look at Home:
- Prepare your nails: Clean and shape your nails. Apply a base coat.
- Apply the base color: Paint your nails with the soft pink polish and let it dry completely.
- Create the floral design: Use a dotting tool and nail art brush to create brown flowers on each nail, adding white dots for the centers.
- Seal with a top coat: Apply a top coat to protect the design and add shine.
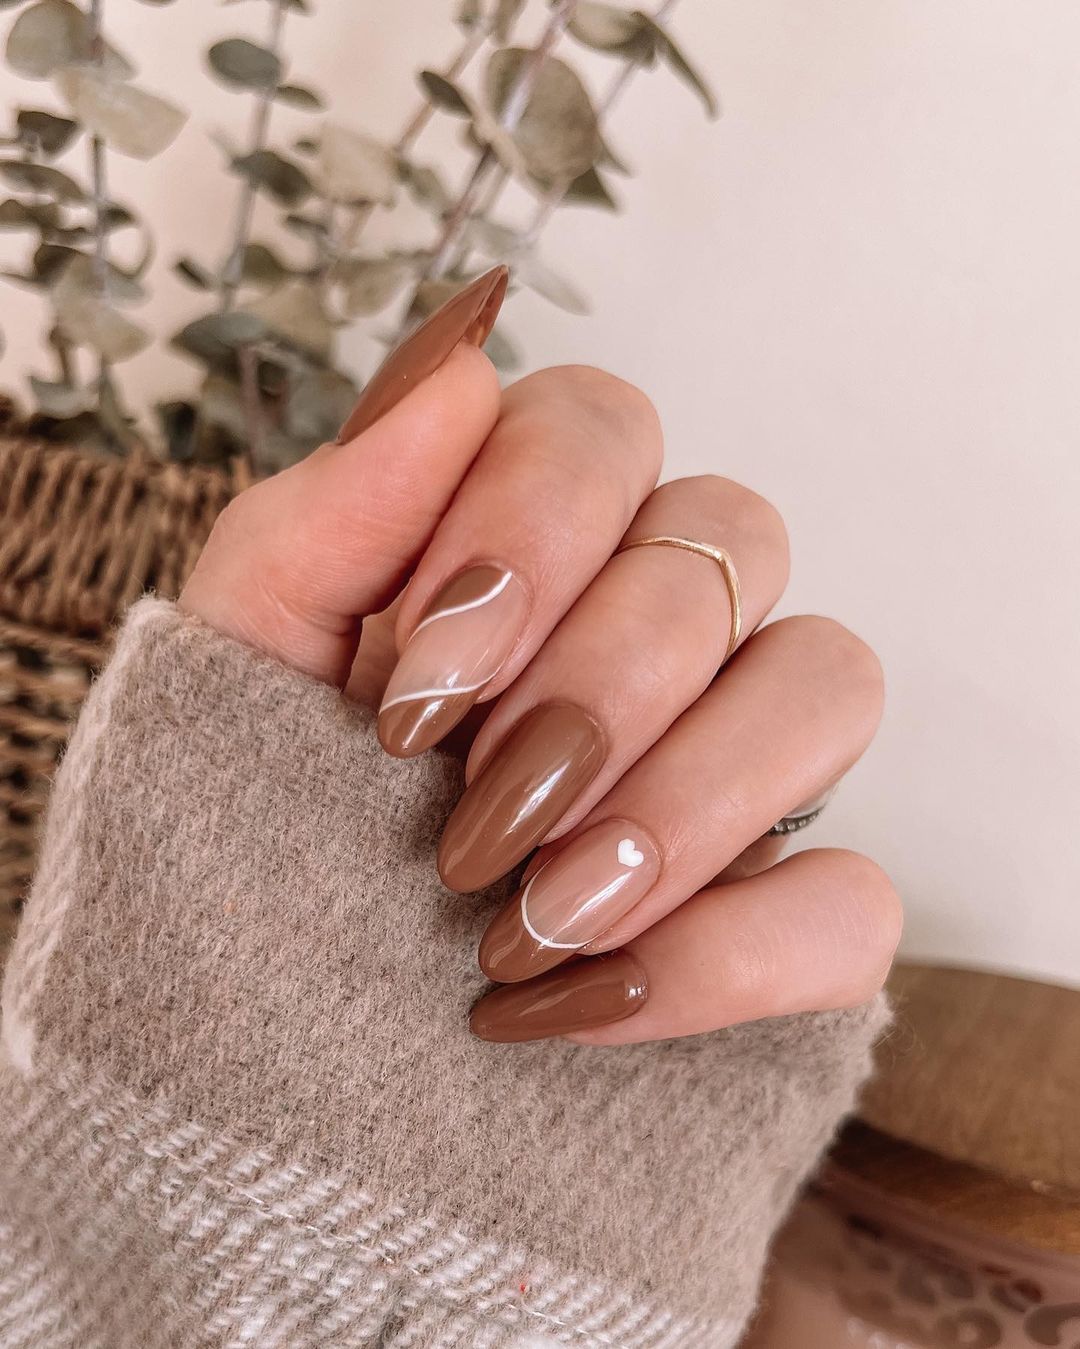
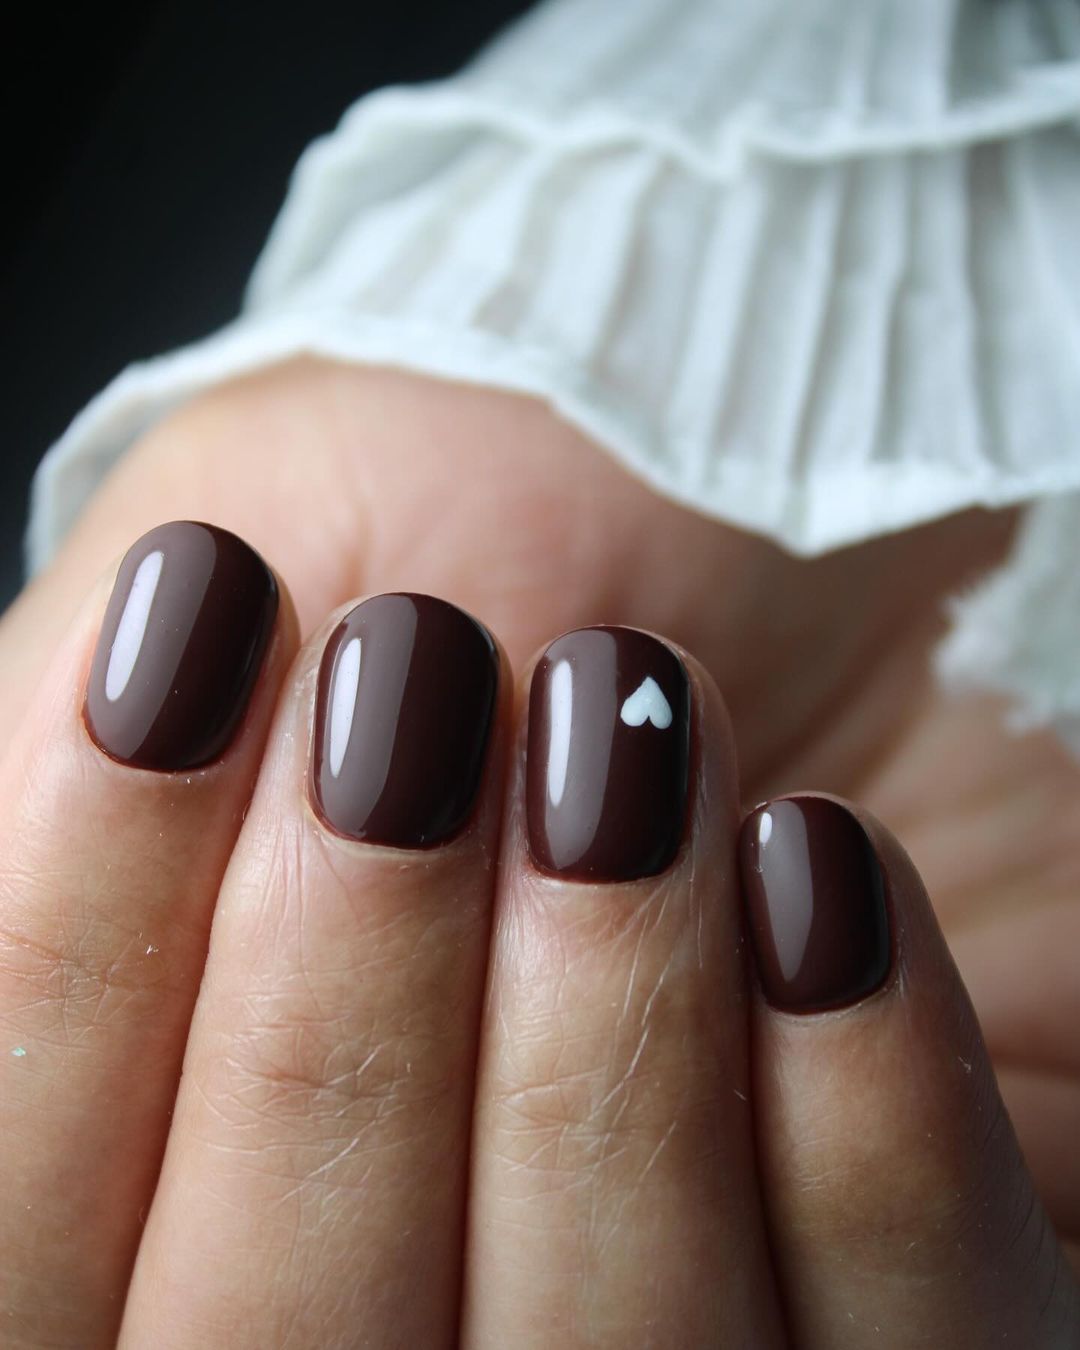
Simple Brown Nails with Heart Accent
These nails are painted in a rich brown color, with a single small white heart on one nail for a sweet and simple accent. This design is minimalistic yet stylish, making it perfect for those who prefer a subtle manicure.
- Rich brown polish (e.g., OPI’s “Espresso Your Inner Self”)
- White polish for the heart accent (e.g., Essie’s “Blanc”)
- Thin nail art brush for drawing the heart
- Top coat for a glossy finish
How to Create This Look at Home:
- Prep your nails: Clean and shape your nails. Apply a base coat.
- Apply the brown polish: Paint your nails with the rich brown polish, applying 2-3 coats for full coverage.
- Add the heart accent: Use a thin nail art brush to draw a small white heart on one nail.
- Seal with a top coat: Apply a top coat to protect the design and add shine.
FAQ
Q: What are the best colors to pair with brown for fall nails? A: Brown pairs beautifully with shades like orange, green, red, and even glitter accents for added sparkle. These colors complement the warm tones of autumn and create a cohesive seasonal look.
Q: How can I make my brown fall nails last longer? A: To extend the life of your manicure, always start with a base coat and finish with a high-quality top coat. Avoid using your nails as tools and wear gloves when doing household chores to prevent chipping.
Q: Are brown nails suitable for all skin tones? A: Yes, brown nails are incredibly versatile and can be flattering on all skin tones. The key is to find the right shade of brown that complements your complexion, whether it’s a deep chocolate, a warm caramel, or a cool taupe.
Save Pin
