Effortlessly Stylish: Short Colors & Designs for Summer Nails
Have you ever pondered how summer’s exuberance can be mirrored in the art of nailcraft? Can short nails capture the essence of the season, with its zest for life and nature’s bounty? Absolutely. In this foray into summer nails short colors & designs, we’ll unveil a spectrum of designs that celebrate the season’s vitality. From the subtle whispers of plain pastels to the playful shouts of bright, trendy patterns, each stroke of the brush is a testament to personal style. Whether you’re beach-bound or city-strolling, let’s explore how your nails can become your most enchanting accessories yet.
Soft Petal Bliss
As a professional manicurist, I delight in the understated elegance of soft floral designs that speak volumes in their whisper-quiet presence. The sheer base of this design allows the natural beauty of the nail to shine through, accented by delicate petal artwork that conjures images of serene summer gardens. It’s a masterful blend of simple and sophisticated, perfect for both pale skin and tan skin alike.

Consumables:
-
- Sheer pink gel polish
- Fine detail brush
- White and pink acrylic paint
- Glossy topcoat
My professional tip: Use a gel topcoat to lock in the design for long-lasting wear. These nails pair beautifully with a soft, flowing summer dress.
DIY Tips:
-
- Apply a gel base coat and cure under a UV lamp.
- With a fine brush, paint the petal outlines using white acrylic paint.
- Fill in with diluted pink paint for a translucent effect.
- Seal your artwork with a glossy gel topcoat for a durable, shiny finish.
Modern Swirl Sophistication
Embrace the fluidity of summer with this trending take on gel manicures. The almond shape of these nails provides a perfect canvas for black and gold swirls that dance whimsically over a pale pink backdrop. This design exemplifies a modern twist on the classic French tip, elevating it from simple to avant-garde.
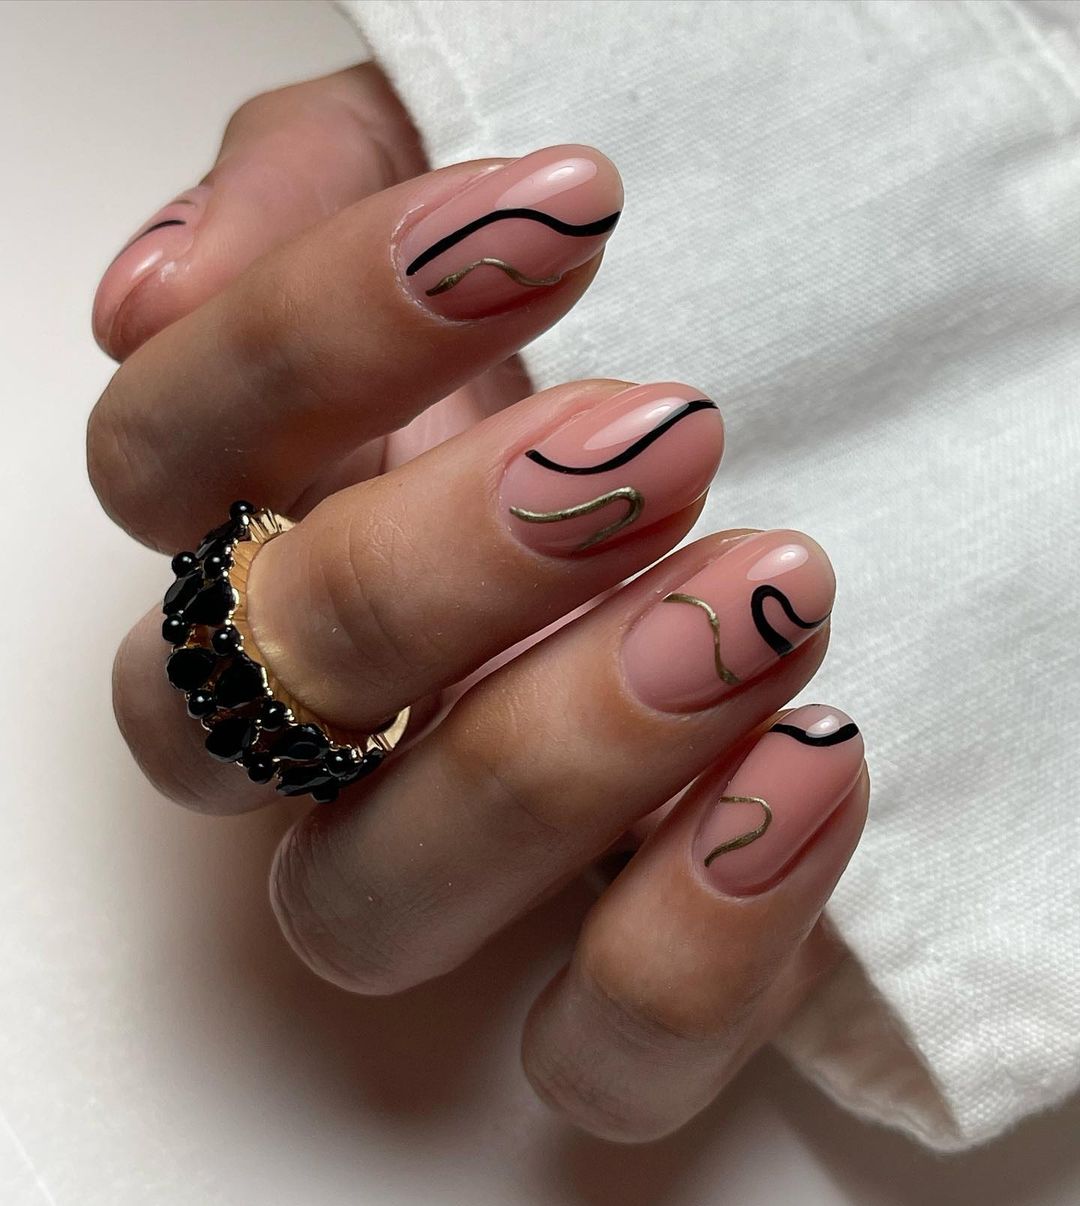
Consumables:
-
- Pale pink gel polish
- Black gel paint
- Gold foil or metallic gel paint
- Almond nail tips
- Matte and glossy topcoat for contrast
In my experience, a touch of matte on the swirls adds depth to the design, while a glossy base enhances the overall shine.
DIY Tips:
-
- After your gel base, paint the entire nail with pale pink.
- Sketch the swirl pattern with black gel paint and add gold accents.
- Use a matte topcoat on the black swirls, and a glossy one for the pink base.
- Cure under a UV lamp to set your stunning summer creation.
Celestial Charm
Summer nights come alive with this celestial-themed design. As a lover of the multi-faceted beauty of nail art, this gel manicure draws inspiration from the night sky. The blend of solid black and transparent effects creates a backdrop for sparkling stars and lunar motifs, perfect for those fun summer evenings out.
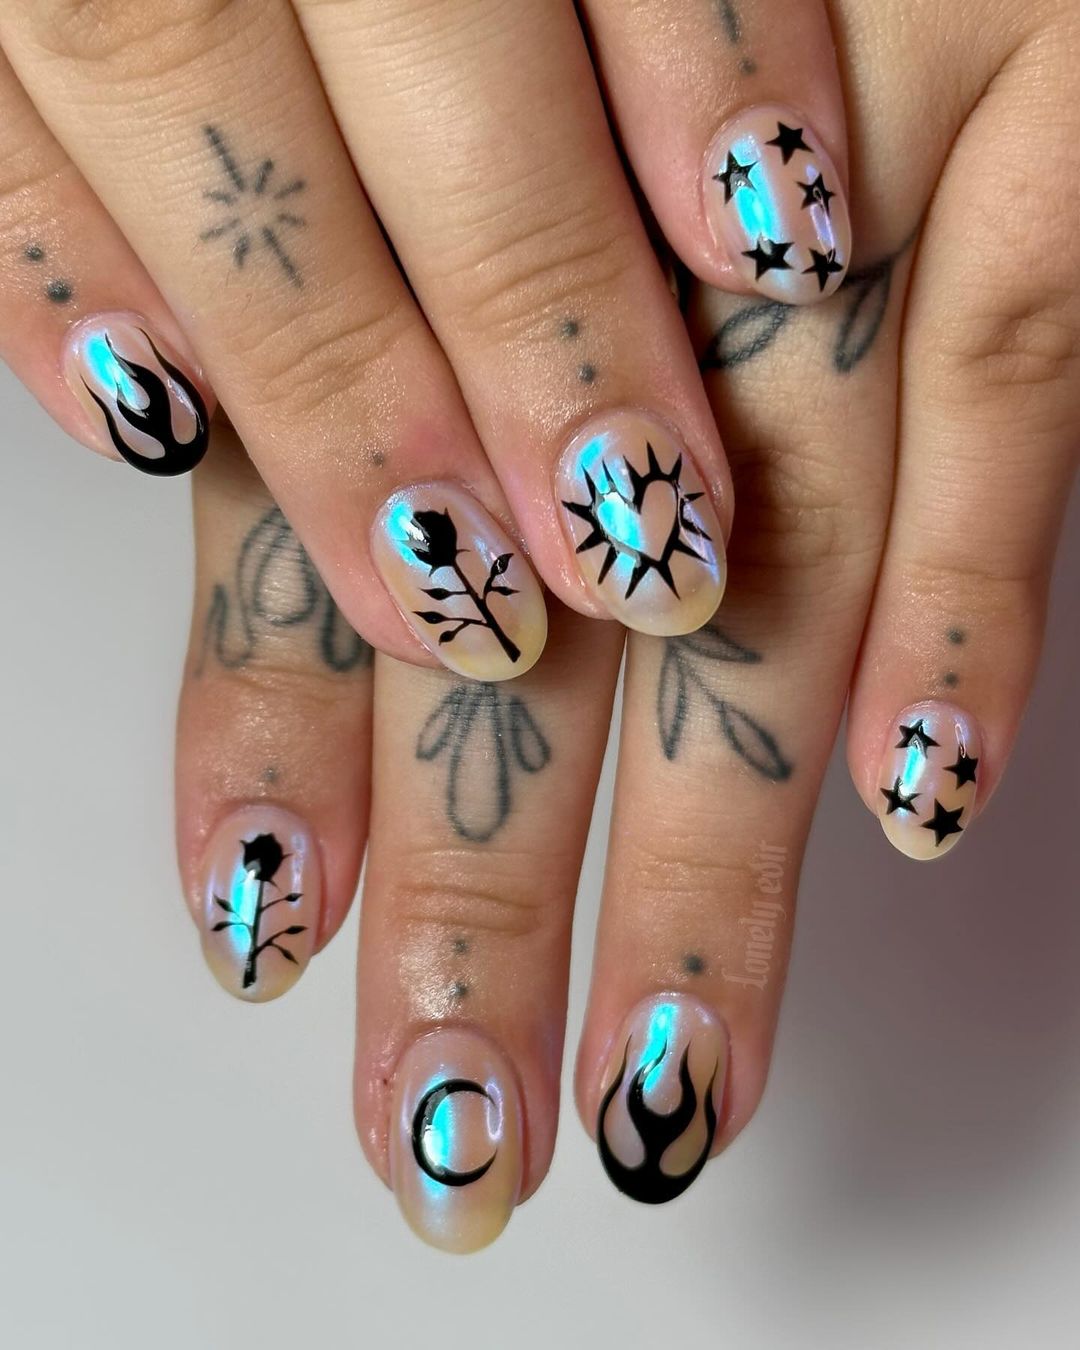
Consumables:
-
- Clear gel polish
- Black gel paint
- Holographic glitter
- Star-shaped decals
- Glossy topcoat
Always add a pinch of glitter into your clear gel to achieve that starry night effect.
DIY Tips:
-
- Apply a clear gel base and while tacky, sprinkle holographic glitter.
- Paint crescent moons and stars with black gel paint.
- Apply star decals for a 3D effect.
- Finish with a glossy topcoat to protect your design and add shine.
Playful Party
Venturing into the realm of multi-colored pastels, this design is a celebration, a festival on your fingertips. The dots and dashes of bright, cheerful colors bring a fun twist to the plain backdrop. This is the epitome of beachy chic, a nod to summer’s spontaneous ice cream runs and sunset beach parties.
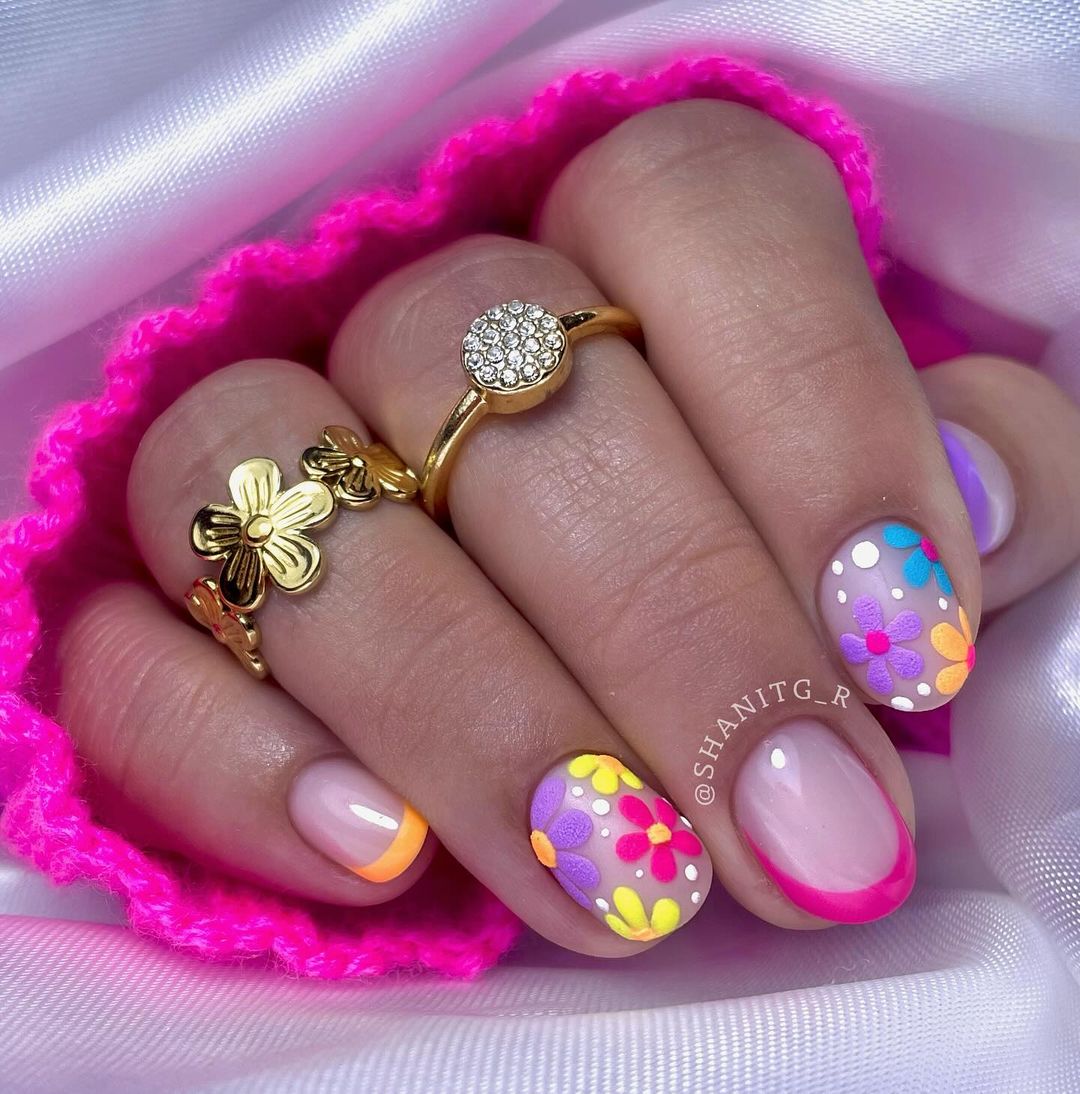
Consumables:
-
- White gel polish as a base
- A rainbow palette of pastel gel polishes for dots
- Dotting tool or a pinhead
- Glossy topcoat
To achieve this look, pick gel polishes that pop against each other for that playful contrast.
DIY Tips:
-
- Start with a white gel base and cure it.
- Dip your dotting tool into various pastel polishes, creating a scattered pattern.
- Cure between color applications to avoid smudging.
- Finish with a glossy topcoat to encapsulate your joyful design.
Save Pin

Sweet Pink Serenity
There’s nothing like a solid pink to bring a touch of soft, feminine grace to your summer look. These gel nails are a testament to simplicity’s power, with a solitary floral accent nail as the centerpiece. It’s a timeless choice for anyone seeking an elegant, simple manicure that whispers rather than shouts.
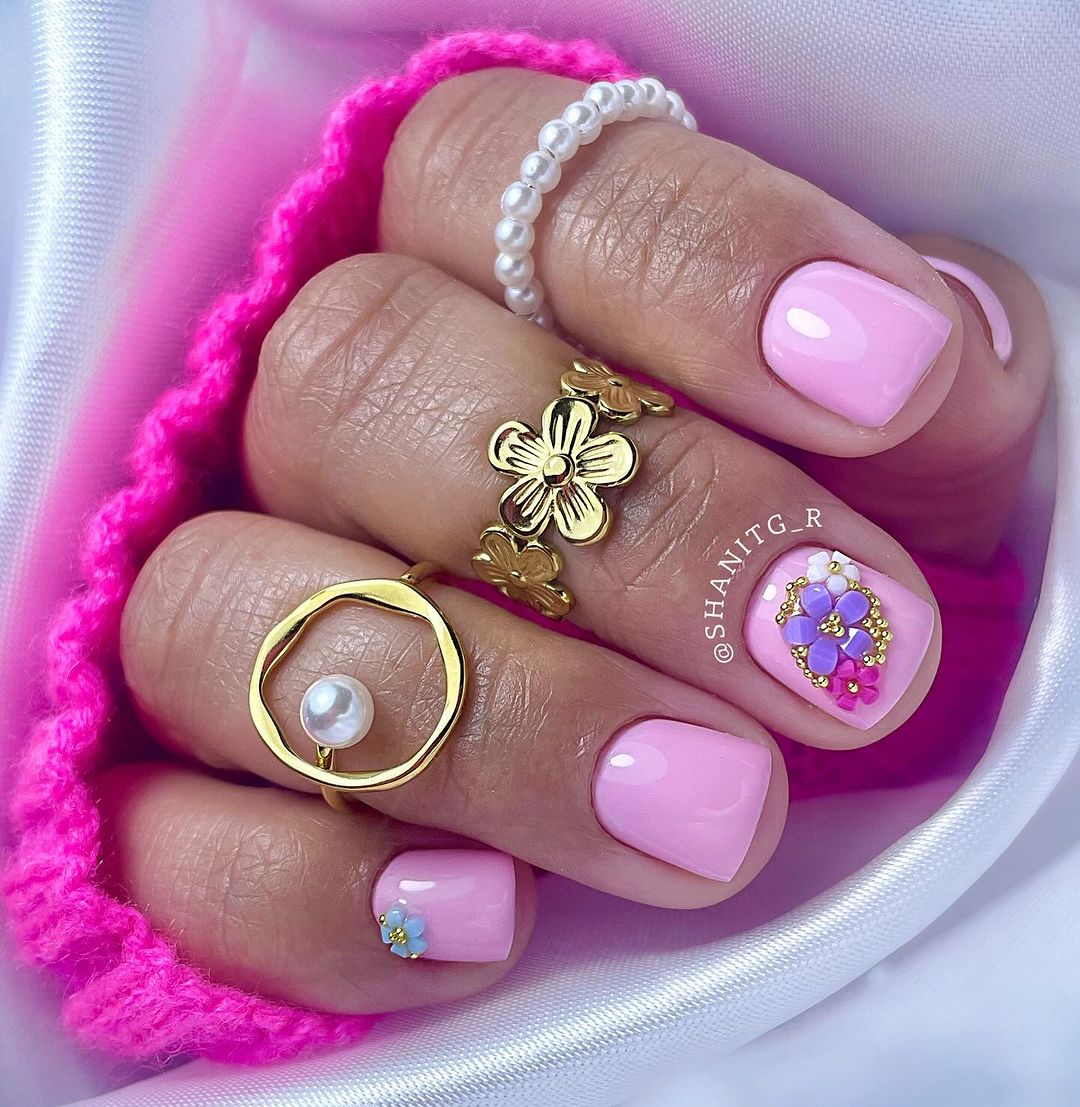
Consumables:
-
- Baby pink gel polish
- White gel paint for the flower
- Rhinestones and studs for accent
- Glossy topcoat
Select a pink shade that complements your skin tone – one that adds warmth and radiance.
DIY Tips:
-
- Apply two coats of baby pink gel polish, curing after each.
- On the accent nail, paint a simple flower with white gel paint.
- Adorn the center of the flower with a rhinestone.
- A glossy topcoat adds the perfect finishing touch, ensuring your design stays chip-free.
Love at First Spike
For those who dare to wear their heart on their nails, this design is a spirited portrayal of trends meeting passion. The spike of red hearts set against a clear gel base is bold and unapologetically romantic – the perfect companion for your summer love story.
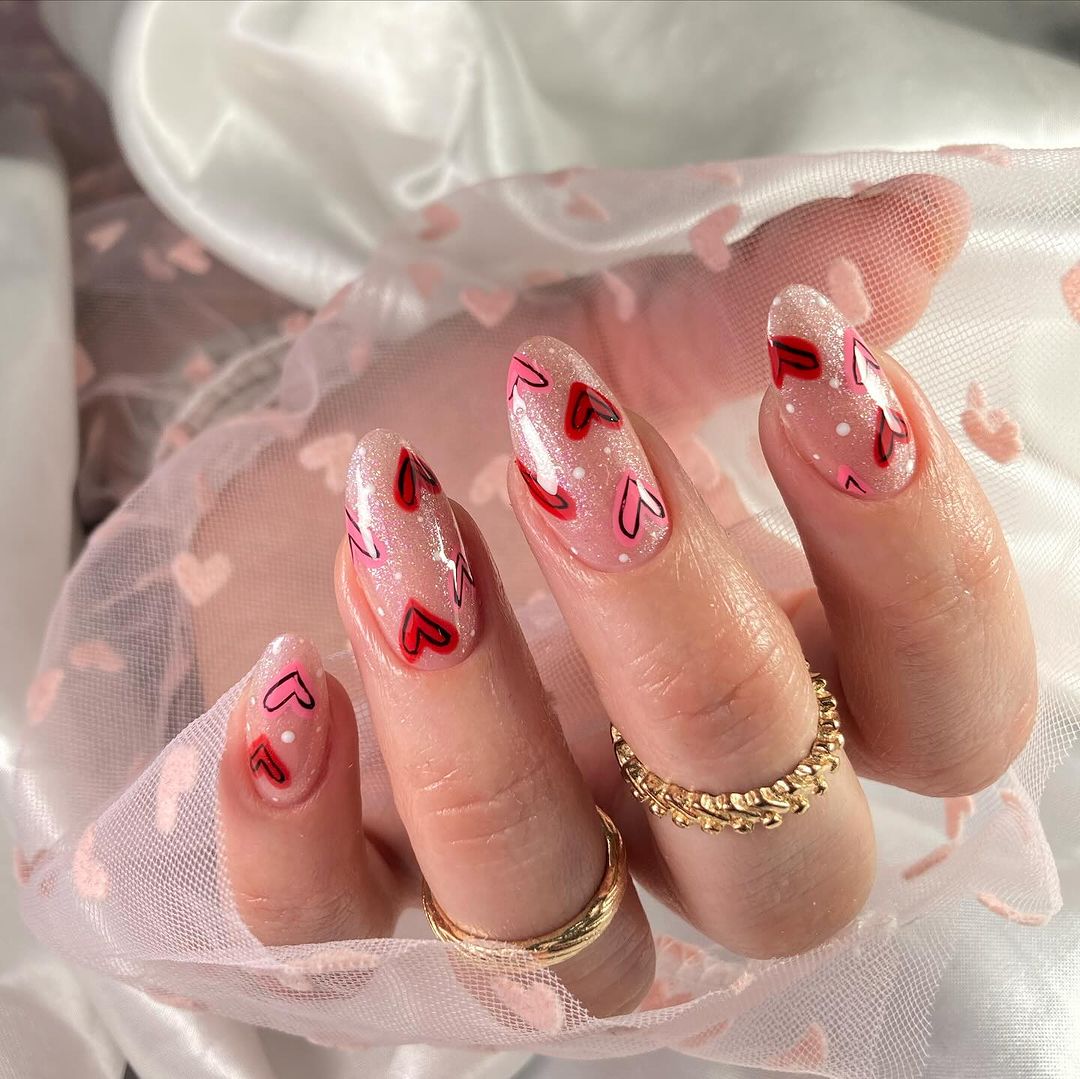
Consumables:
-
- Clear gel polish
- Red gel paint
- Fine detail brush
- Glossy topcoat
A steady hand and a fine brush are crucial for the precision this look demands.
DIY Tips:
-
- Start with a clear gel base coat.
- Paint hearts with red gel paint using a detail brush.
- For a 3D effect, leave some hearts only outlined and fill others in.
- Seal with a glossy topcoat for a glass-like finish that makes the hearts pop.
Chic Silhouette Whimsy
The minimalist beauty of a silhouette can turn a plain canvas into a narrative. Here, the stark black shapes of birds in flight evoke a sense of freedom, perfect for those longing for summer adventures. This design is a trend-setter’s dream, striking yet subtle, and oh-so-sophisticated for any short nail aficionado.
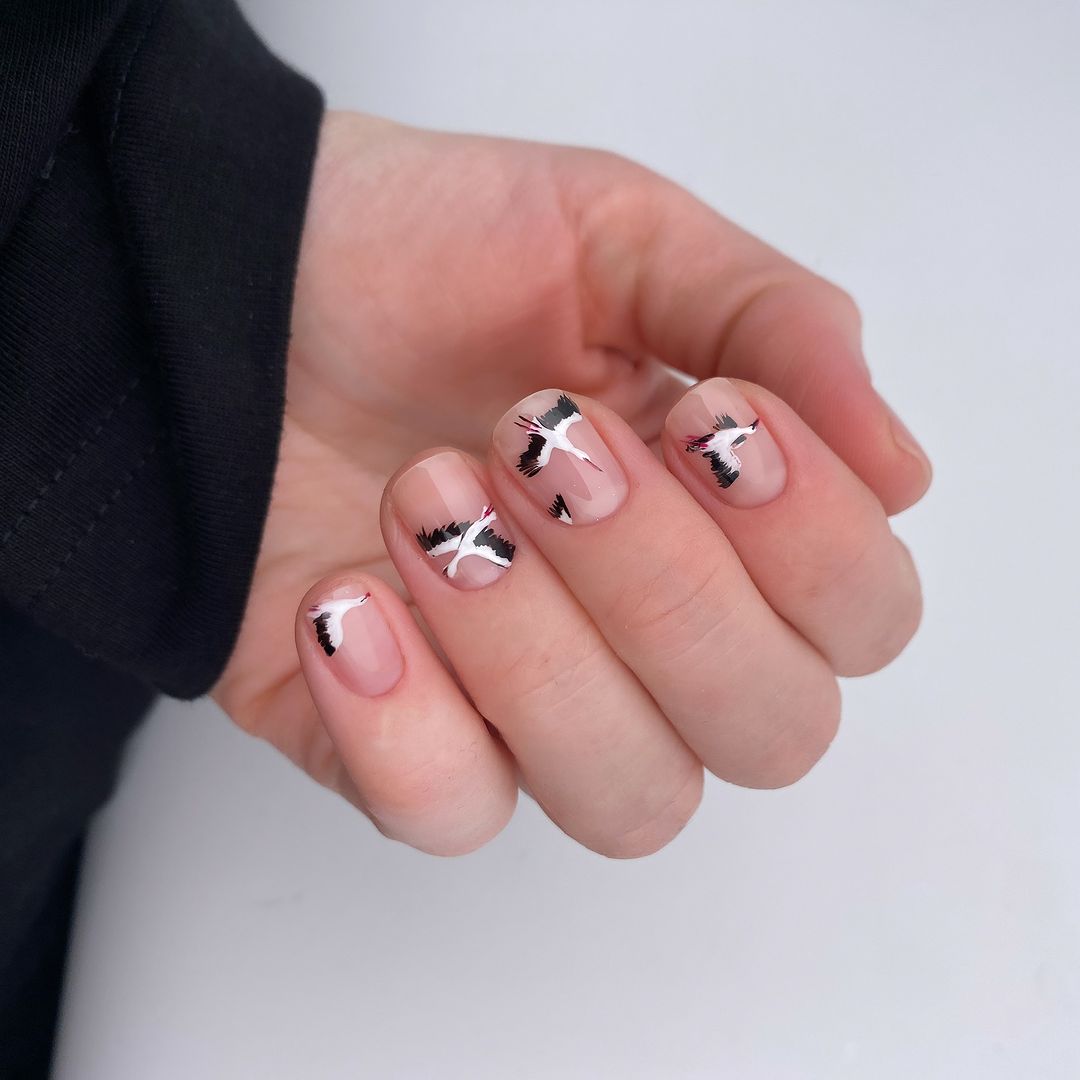
Consumables:
-
- Nude gel polish as a base
- Black gel paint for the silhouettes
- Thin detail brush
- Matte topcoat for a contemporary finish
The matte topcoat is not just a style choice but a storyteller, adding depth to the silhouettes.
DIY Tips:
-
- Apply a nude gel polish as your base and cure it.
- With a detail brush, paint the bird silhouettes using black gel paint.
- Cure after each silhouette to prevent smudging.
- A matte topcoat gives an elegant finish that celebrates the artistry.
Pastel Sheep Parade
Summer isn’t only about the bright and the bold; it’s also about the playfully soft and fun. This gel manicure, with its adorable sheep designs against a pastel backdrop, is like a gentle summer breeze in a meadow. It’s a whimsical take on animal motifs, suited for the playful at heart.
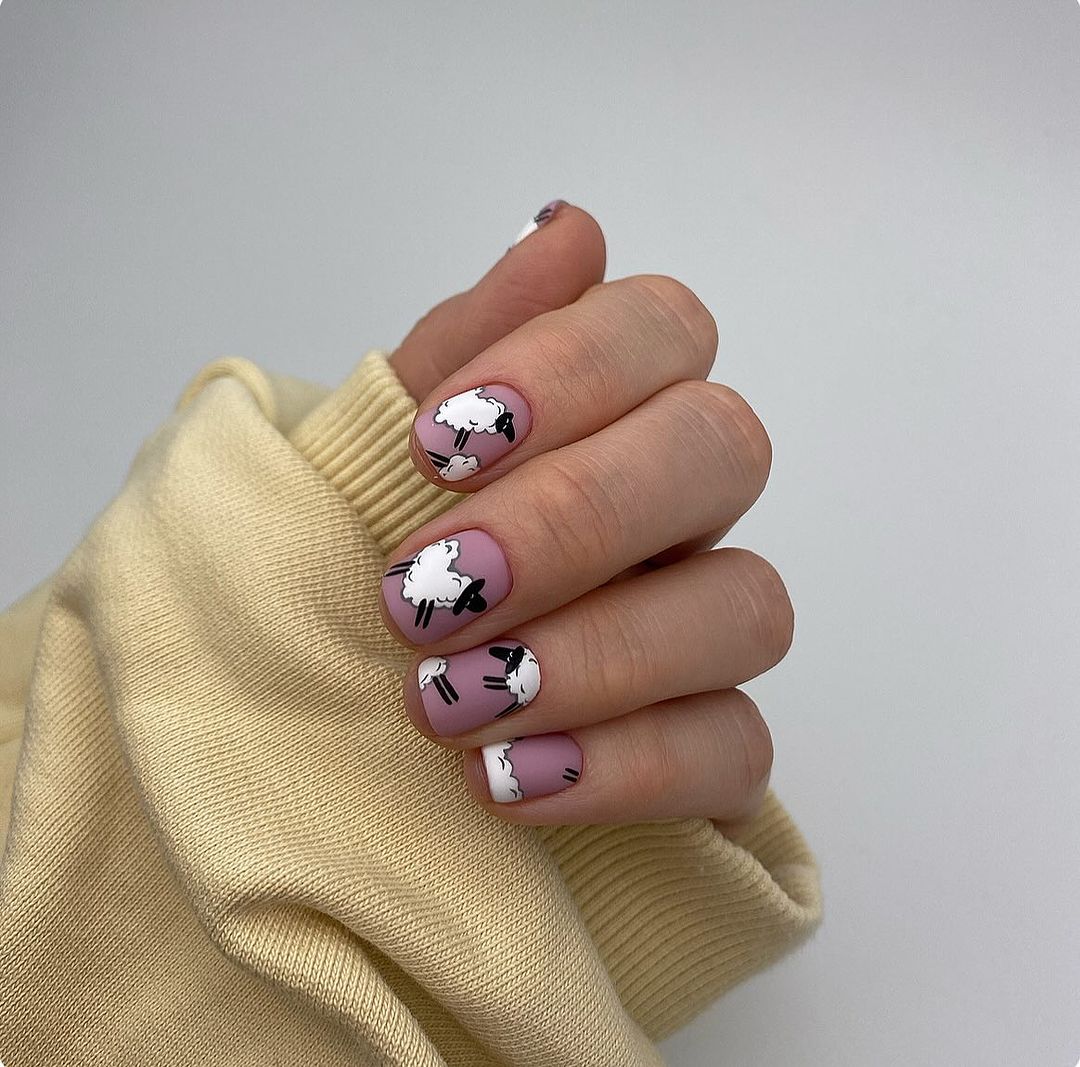
Consumables:
-
- Pastel lavender gel polish
- White and black gel paint for the sheep
- Dotting tool for spots
- Glossy topcoat for a smooth finish
A gel polish in pastel hues creates the perfect summery foundation for playful designs.
DIY Tips:
-
- Paint your nails with a pastel lavender gel polish and cure.
- Use white gel paint and a dotting tool to create the sheep’s fluffy bodies.
- Add details with black gel paint and cure again.
- Finish with a glossy topcoat for durability and shine.
Olive Elegance with Floral Accents
Summer elegance is redefined with this gel manicure, featuring an olive hue that’s a nod to nature’s solid, earthy tones. Adorned with delicate floral accents, this design is perfect for those summer evenings where sophistication meets a touch of whimsy.
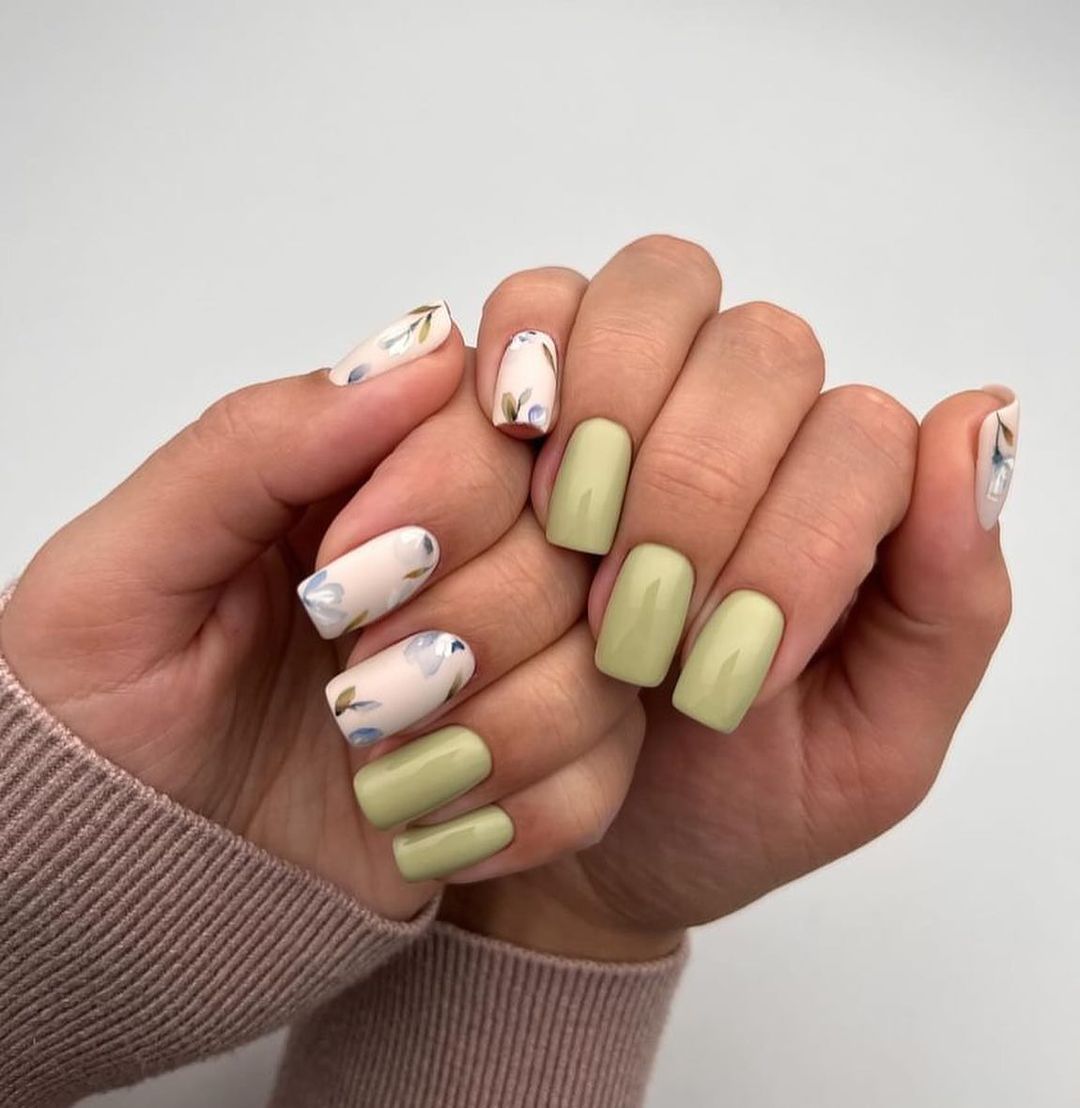
Consumables:
-
- Olive green gel polish
- White and blue gel paints for the flowers
- Fine detail brush
- Glossy topcoat to seal the design
This design pairs well with trends in earth-toned apparel, making it a versatile choice for various summer occasions.
DIY Tips:
-
- Apply two coats of olive green gel polish, curing after each.
- Paint small, simple flowers on selected nails using white and blue gel paints.
- A detail brush helps in creating precise floral patterns.
- A final layer of glossy topcoat will ensure your design lasts through your summer escapades.
Save Pin
Golden Heart Accents
Imagine a whisper of romance captured on your fingertips – that’s the charm of these nails. Each short nail is adorned with a tiny golden heart, standing out against a solid, pale backdrop. This manicure speaks to those who hold a penchant for minimalism, with just a touch of luxurious trend.
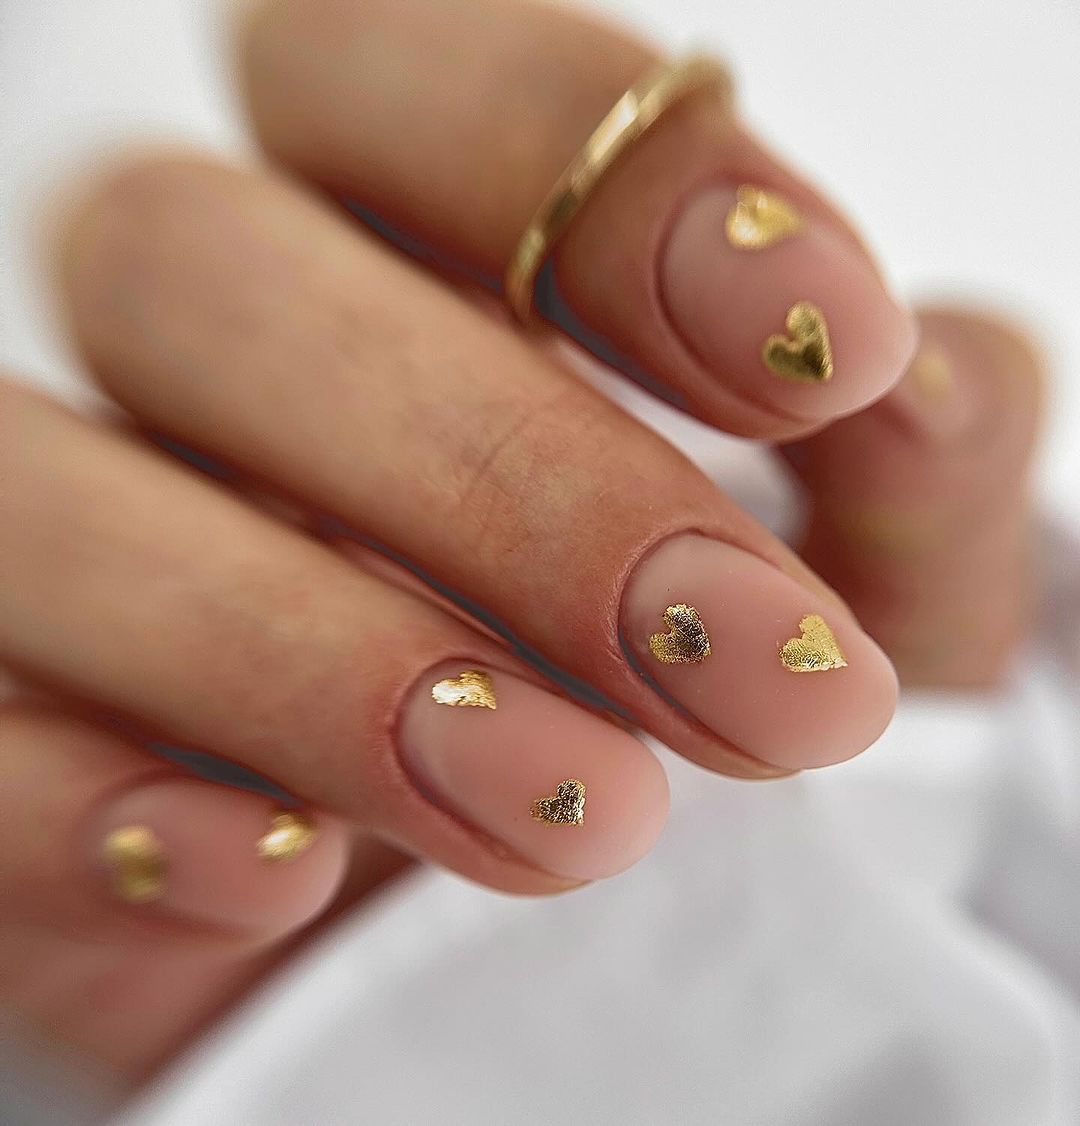
Consumables:
-
- Nude gel polish
- Gold foil or gold leaf
- Precision tweezers
- Glossy topcoat
The key to this look is precision and patience when placing your gold accents.
DIY Tips:
-
- Start with a gel nude base and cure.
- Using tweezers, apply the gold leaf in heart shapes.
- Apply a glossy topcoat to secure the gold leaf and add a luminous finish.
Molten Gold Elegance
This design is nothing short of striking – a bold, molten gold pattern over a short and simple nail. It’s a trend-forward take that echoes the richness of summer sunsets. For the fashion-forward, it’s a statement of luxury and boldness, ideal for summer’s more glamorous moments.
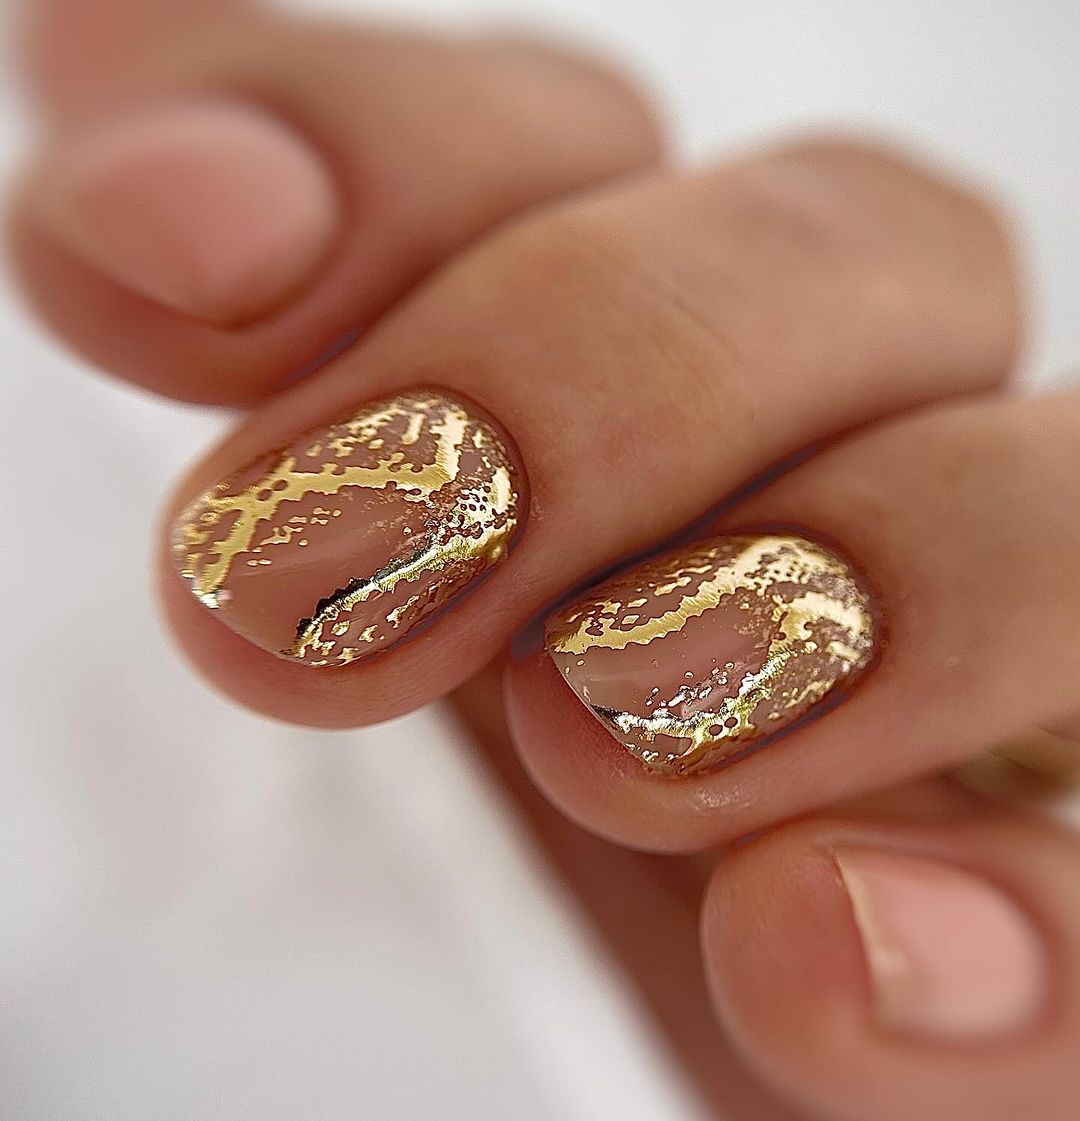
Consumables:
-
- Gel topcoat as adhesive
- Gold leaf flakes
- Tweezers
- Glossy topcoat
The random application of gold leaf flakes creates a unique, abstract art piece on each nail.
DIY Tips:
-
- After your base coat, apply a layer of gel topcoat but do not cure.
- Place gold leaf flakes using tweezers for the molten effect.
- Cure under UV light and seal with another layer of topcoat for durability.
Abstract Gold Flair
For those who love to merge simple sophistication with an artistic touch, this gel manicure is a dream. The abstract gold leaf pattern against a neutral base is effortlessly chic and perfectly trending. Each nail becomes a canvas showcasing a unique piece of wearable art.
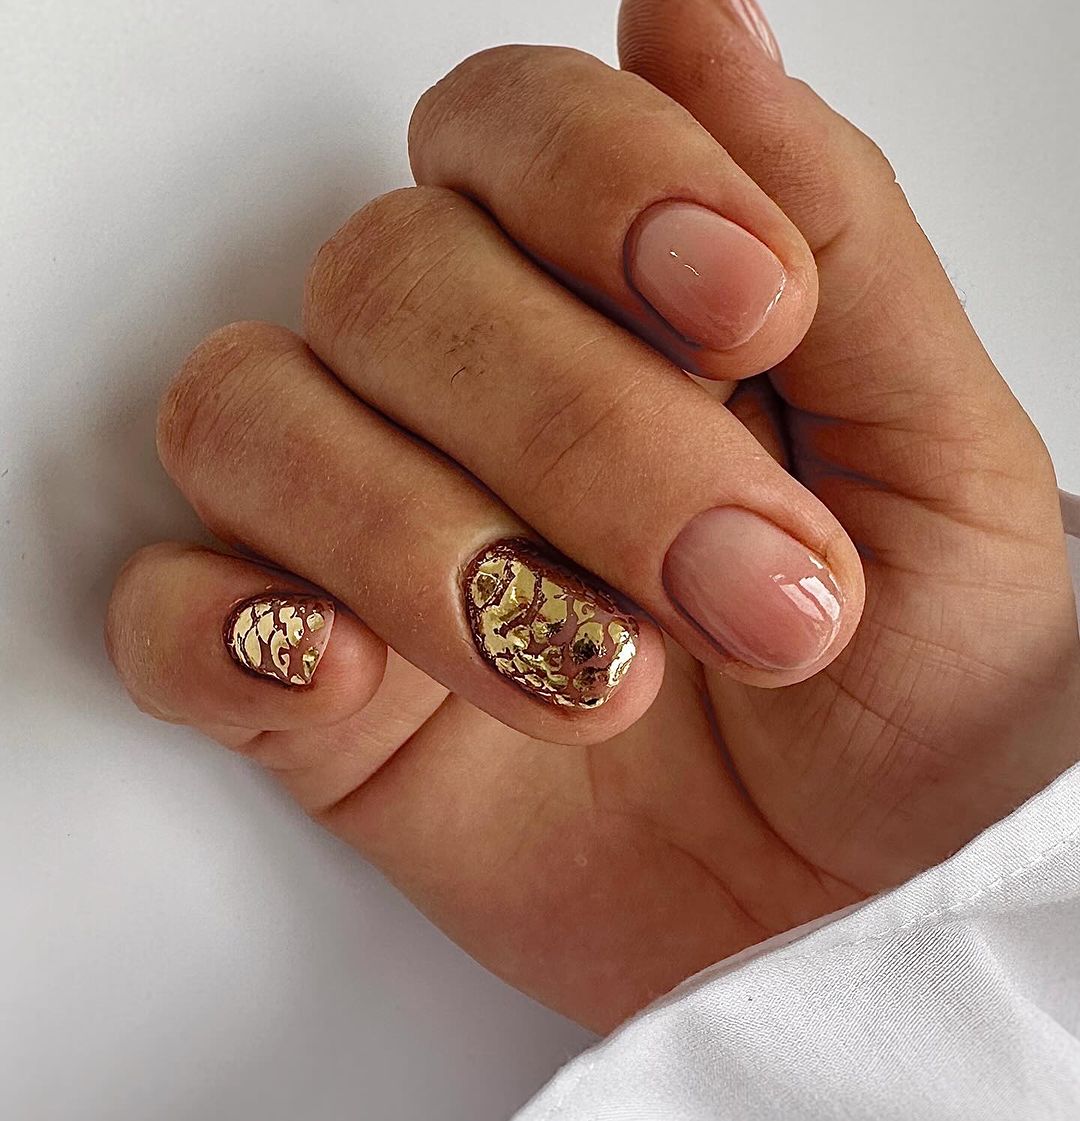
Consumables:
-
- Nude gel polish
- Gold leaf
- Tweezers
- Matte topcoat for a modern twist
Matte and metallic is a combination that’s both modern and timeless.
DIY Tips:
-
- Apply your nude gel polish and cure.
- Place gold leaf in abstract patterns with tweezers.
- A matte topcoat adds an unexpected and very current finish.
Ombre Sunrise
The soft gradient of an early morning sky is artfully captured in this gel manicure, echoing the subtle beauty of dawn. The single, purple airplane silhouette adds a whimsical touch, suggesting the joy of summer travels. This look is for those who prefer their style statement to whisper rather than shout.
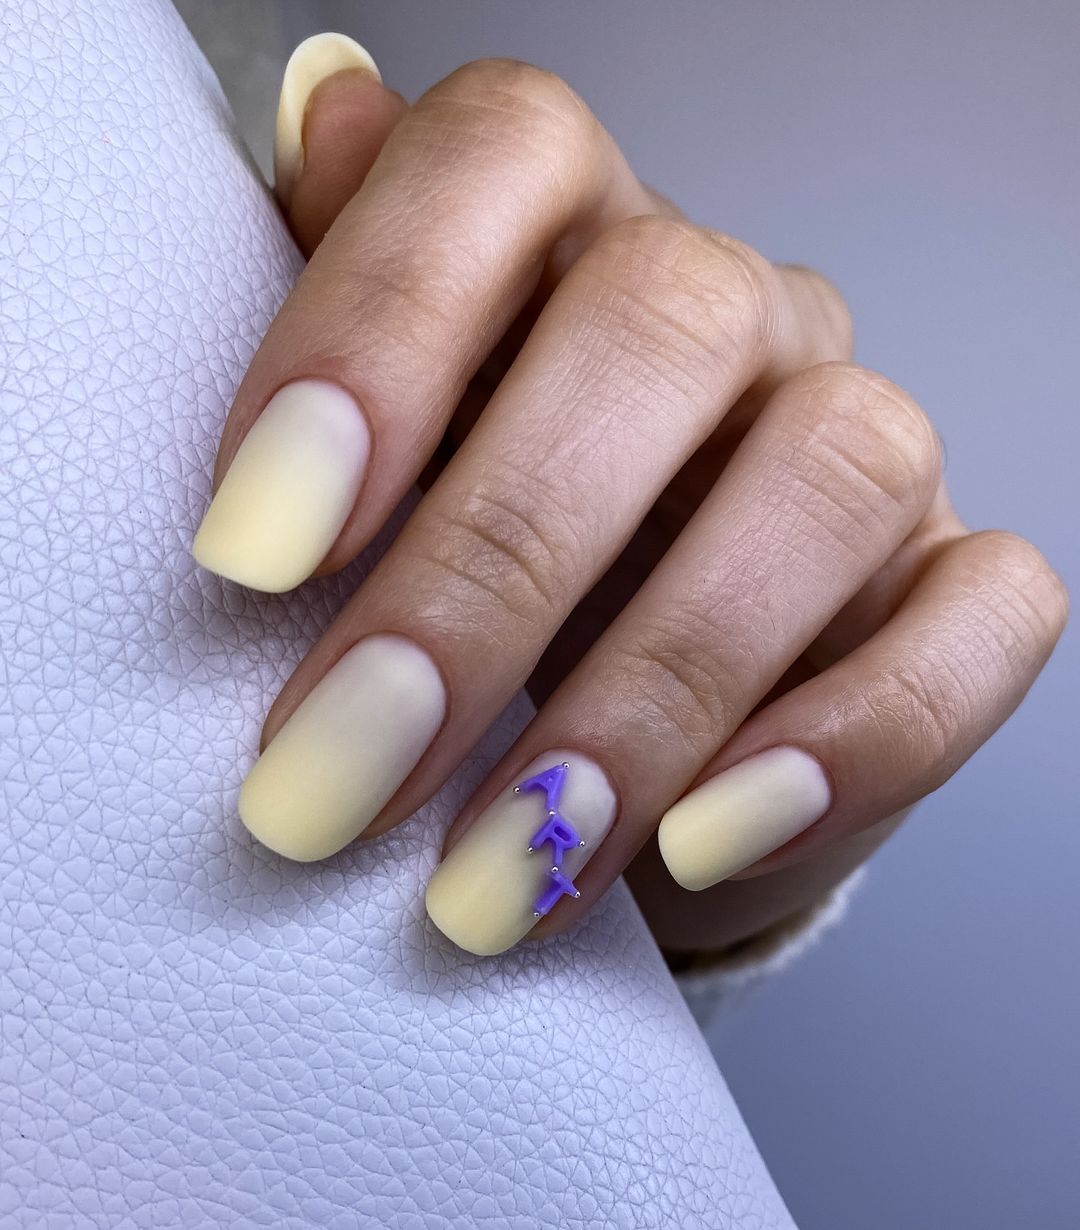
Consumables:
-
- Pale yellow to white ombre gel polish
- Purple gel paint
- Detail brush
- Glossy topcoat
A gel topcoat is essential to achieve that smooth transition of the ombre effect.
DIY Tips:
-
- Apply the pale yellow gel polish at the base of your nails, blending it upward.
- Before curing, blend in white gel polish from the tip downward to create the ombre.
- Use purple gel paint and a detail brush to draw the airplane.
- A glossy topcoat seals in the design and adds a dewy sheen, reminiscent of a sunrise.
Psychedelic Waves
Dive into the vibrant spirit of summer with these gel nails that boast a psychedelic swirl of colors, adorned with elegant pearl accents. It’s a bold and artistic expression of summer’s playful side, perfect for those who love to stand out with bright, fun nail art that catches the eye.
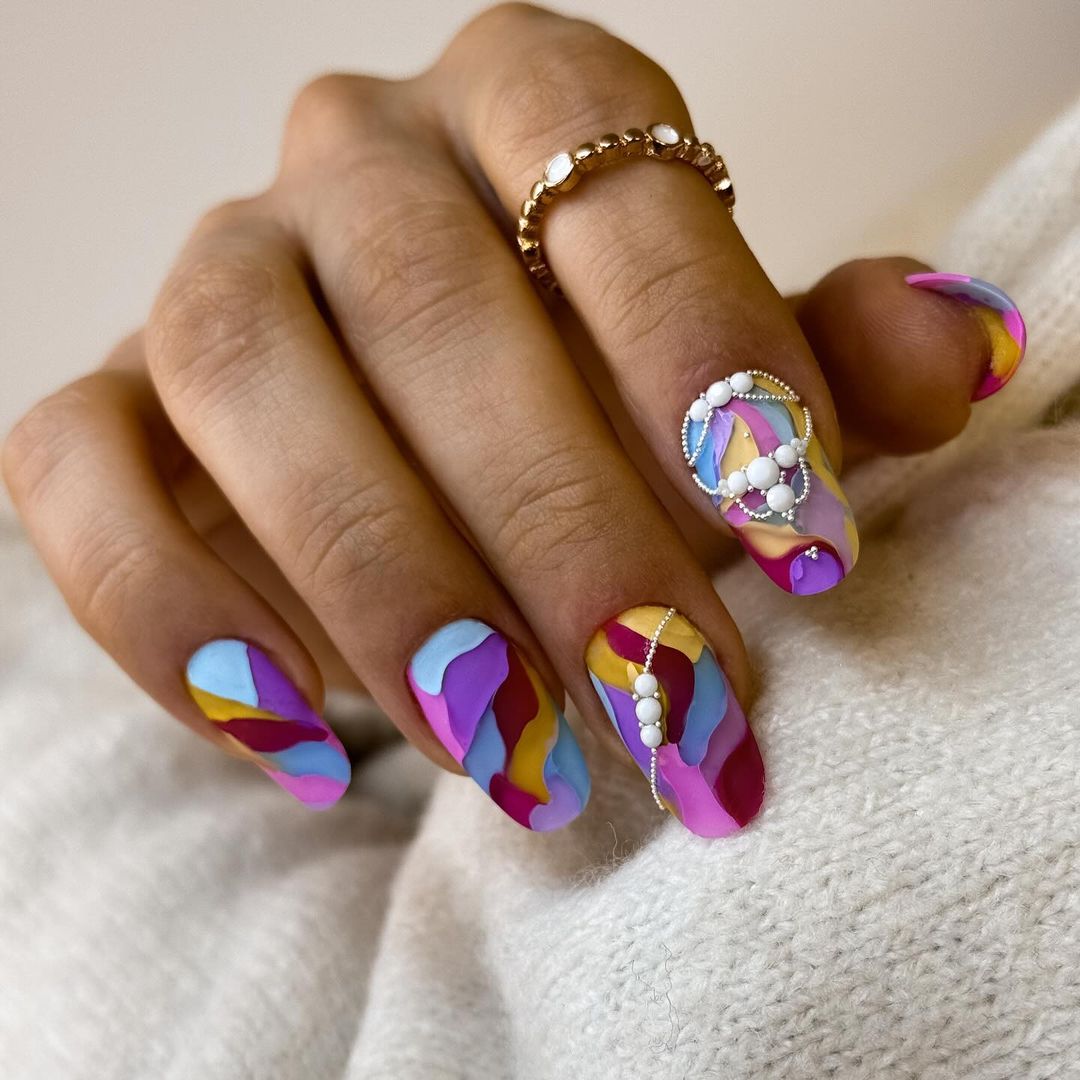
Consumables:
-
- A range of bright gel polishes for the base
- Pearls and jewels for embellishment
- Detail brush
- Glossy topcoat
The pearls add a touch of sophistication to the whimsical color palette.
DIY Tips:
-
- Apply a base coat and cure it.
- Swirl your chosen bright gel polishes on the nail, blending them with a detail brush.
- While the polish is tacky, place pearls and jewels as desired.
- A glossy topcoat ensures your design sparkles as much as your summer adventures.
Noir Zebra Stripes
For those who love a classic with a twist, these gel nails feature the timeless elegance of black enhanced with zebra stripes for an added edge. It’s a design that exudes confidence and sophistication, fitting for the nights when summer’s darkness comes alive with mystery and glamour.
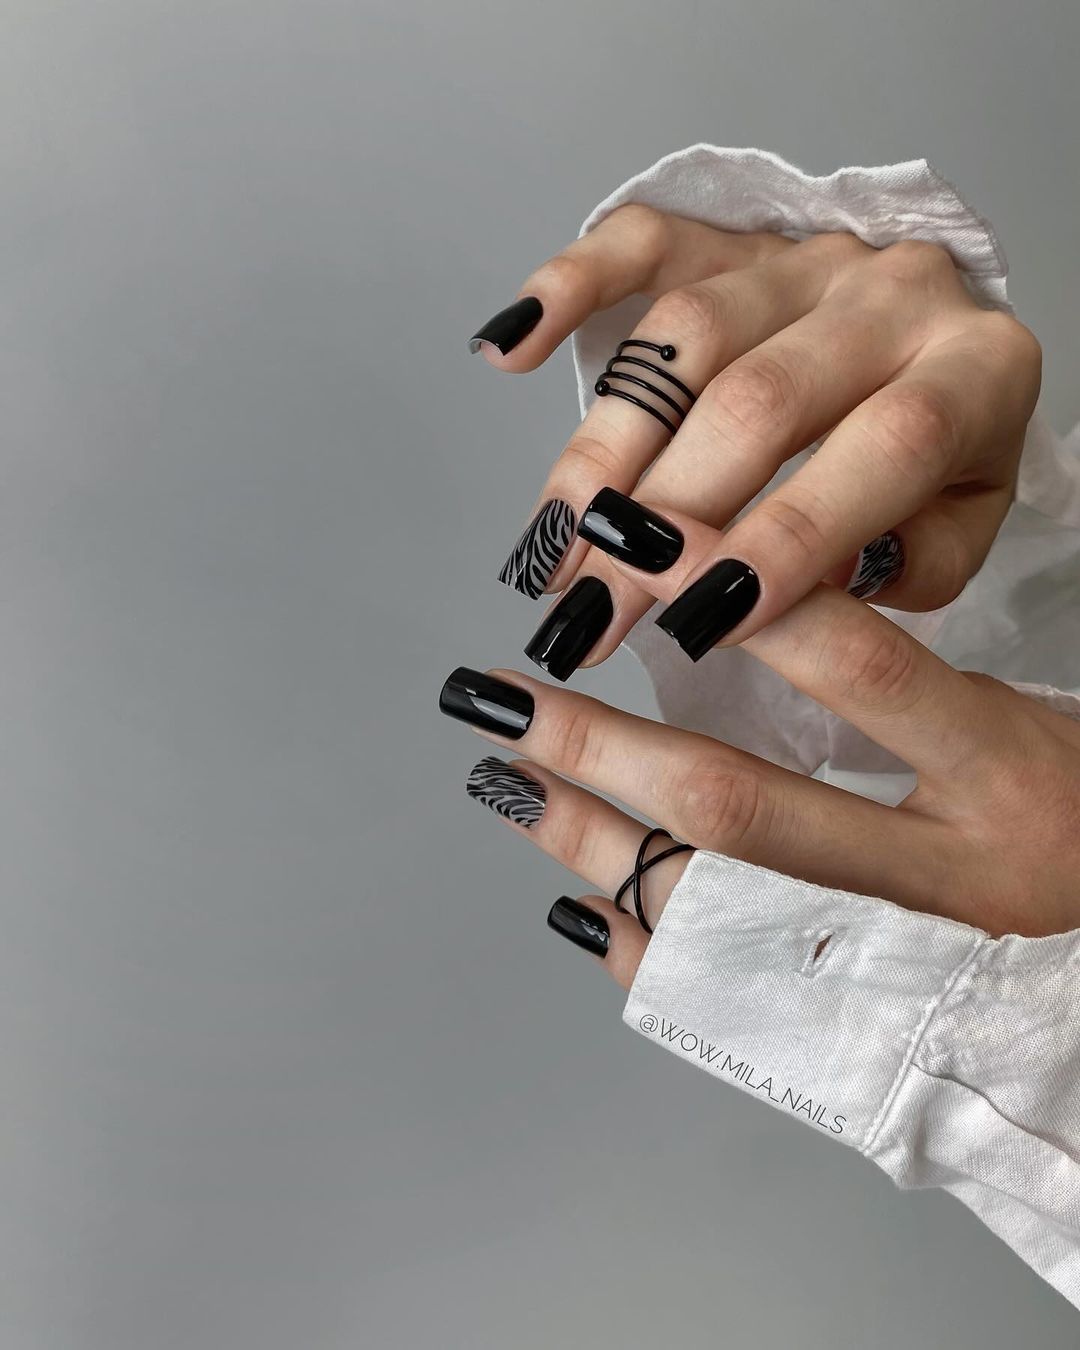
Consumables:
-
- Black gel polish
- White gel paint for the stripes
- Fine detail brush
- Matte topcoat
The matte topcoat gives an unexpected modern finish to the classic animal print.
DIY Tips:
-
- Apply two coats of black gel polish, curing between each.
- Use a fine brush and white gel paint to draw zebra stripes on select nails.
- Cure and apply a matte topcoat for a contemporary matte finish.
Floral Whispers
This design whispers of summer meadows and gentle breezes, with delicate flowers scattered across a soft pink base. It’s a serene celebration of nature’s simplest pleasures, ideal for those who seek a simple, understated elegance in their nail art.
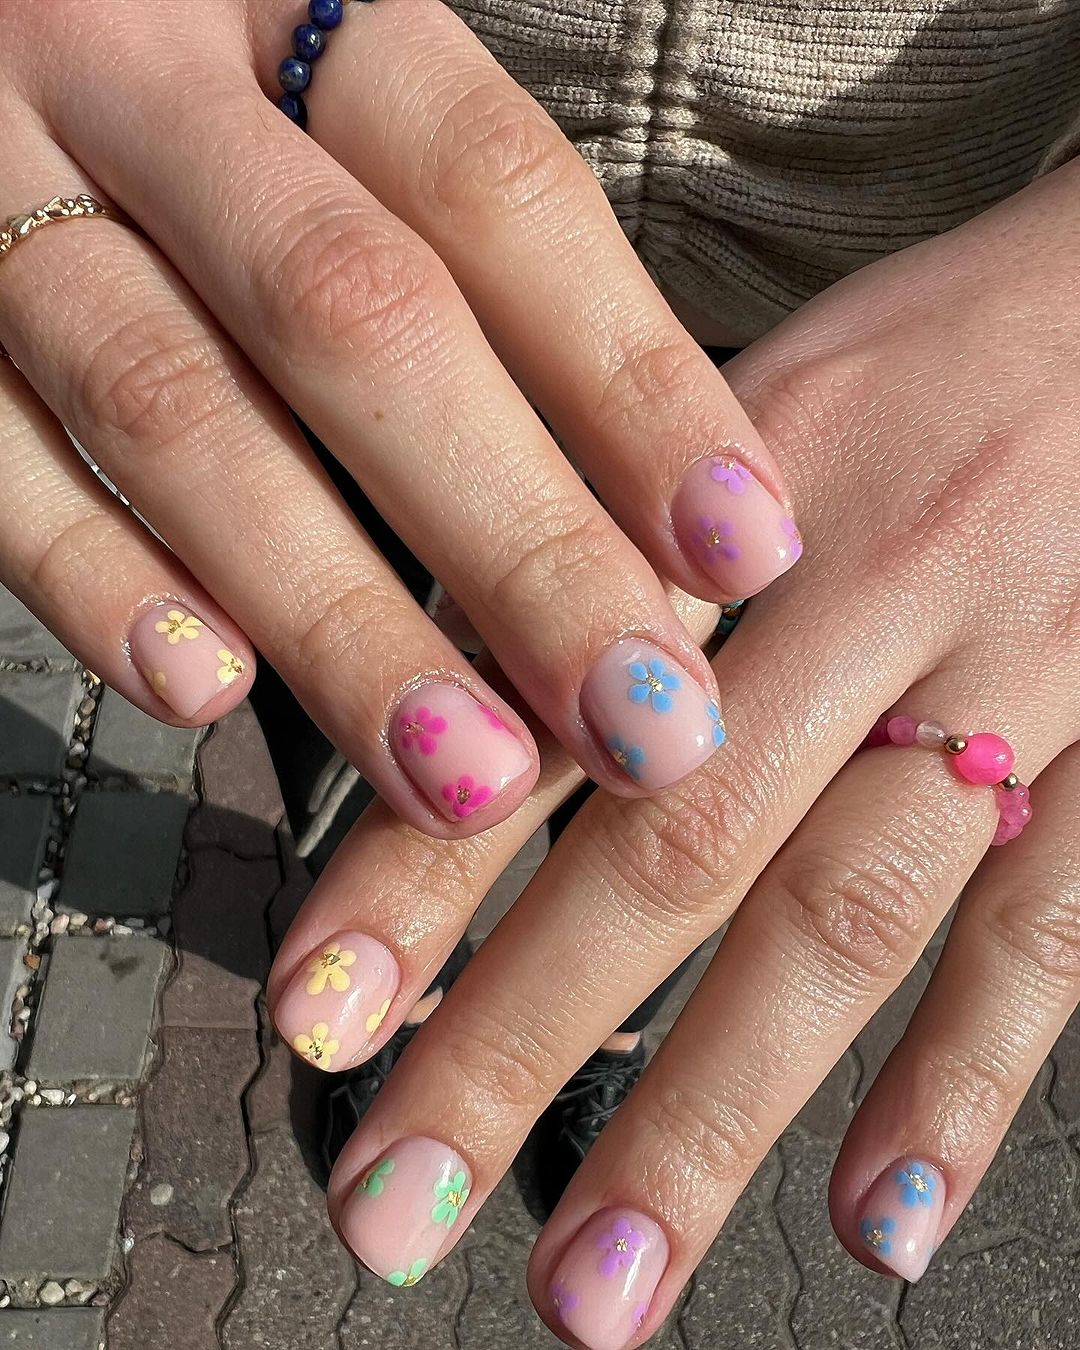
Consumables:
-
- Soft pink gel polish
- Various colors of gel paint for the flowers
- Fine detail brush
- Gold foil for accents
- Glossy topcoat
The addition of tiny gold foil accents gives a touch of luxury to the pastoral charm.
DIY Tips:
-
- Lay down your soft pink gel polish base and cure.
- Use a fine brush to hand-paint each flower in contrasting hues.
- Apply gold foil sparingly for a subtle sparkle.
- Seal with a glossy topcoat to protect your floral design.
Sweet Summer Waves
Dive into summer’s vibrant palette with this wave-inspired nail art. Bold stripes of color mimic the playful undulations of ocean waves, complemented by whimsical pearls and gems that evoke treasures from the deep. It’s a fun, trendy design for the bold and the beautiful.
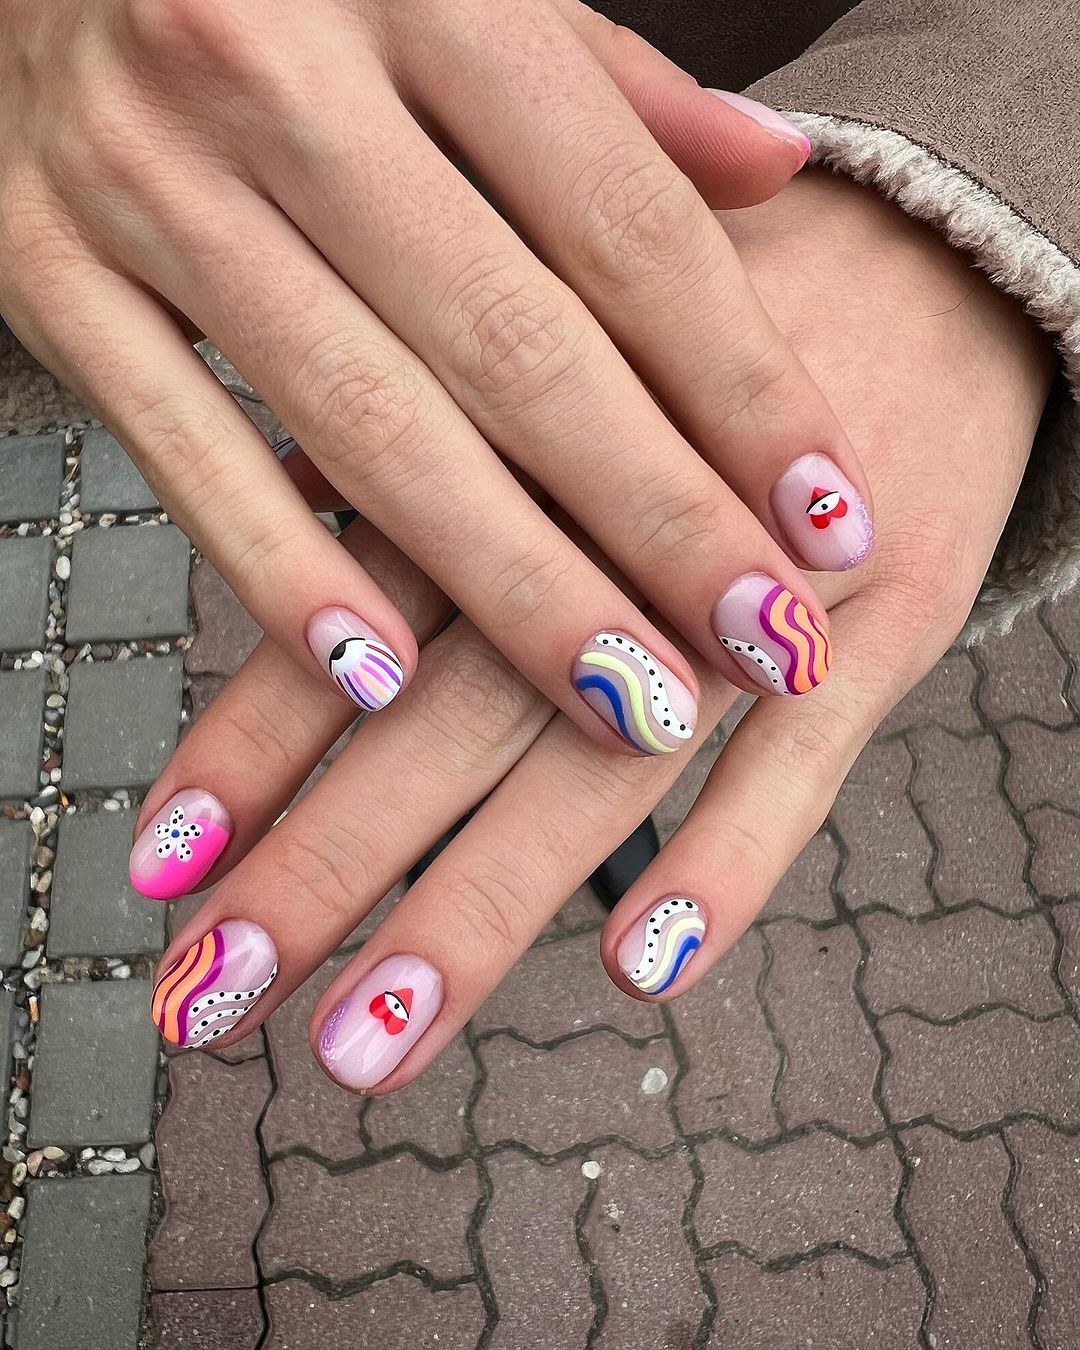
Consumables:
-
- Bright gel polishes in various colors
- Pearls and rhinestones for decoration
- Dotting tool or tweezers for application
- Glossy topcoat
Aim for contrast and curvature in your lines to truly capture the fluidity of waves.
DIY Tips:
-
- After a neutral base, paint wavy lines with different colors, curing after each.
- Embellish with pearls and rhinestones while the polish is still tacky.
- A glossy topcoat brings out the colors and secures the adornments.
Abstract Poppy Fields
Evocative of summer’s vivid poppy fields, this gel manicure balances translucence with bold floral accents. It’s an abstract approach to nature-inspired nail art, where each stroke and color placement is freeform, resulting in a unique masterpiece on every nail.
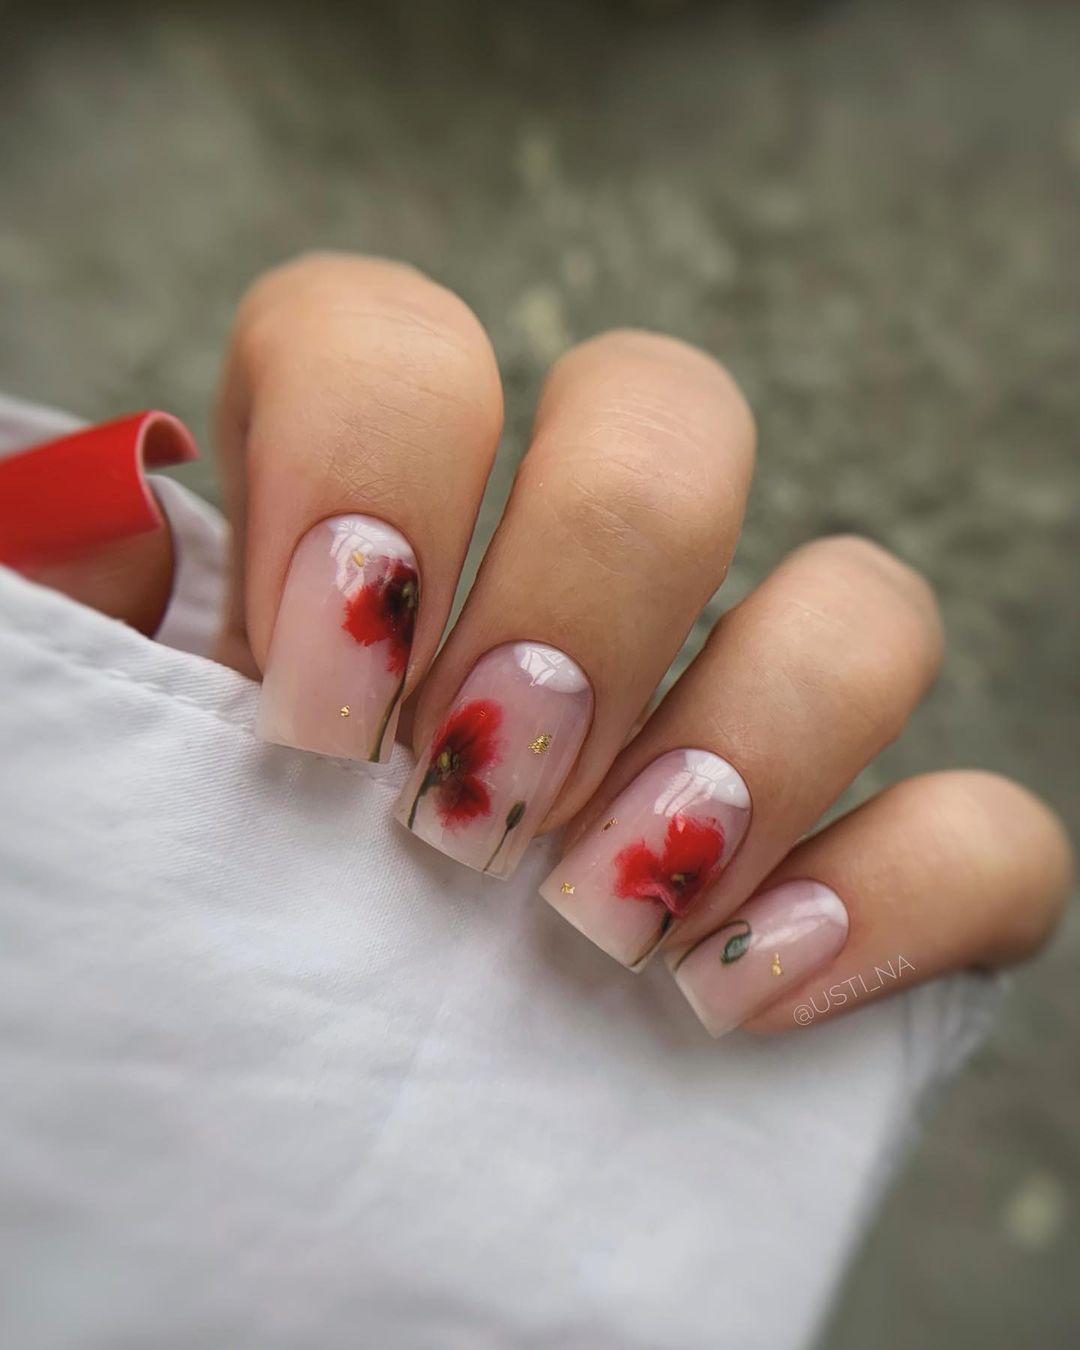
Consumables:
-
- Clear gel polish for the base
- Red and black gel paints for the poppies
- Gold foil for embellishment
- Glossy topcoat
The gold foil interspersed among the poppies adds a touch of whimsy and luxury.
DIY Tips:
-
- Apply a clear gel polish as a base and cure.
- Paint abstract poppies using red and black gel paints.
- Add small touches of gold foil for a refined look.
- A glossy topcoat ensures your art stays as fresh as a summer bloom.
Emerald Swirls and Golden Sparkles
Amidst the lighthearted days of summer, these nails bring a touch of sophistication with their emerald green swirls and glimmering golden sparkles. It’s a design that speaks of evening garden parties and elegant summer nights.
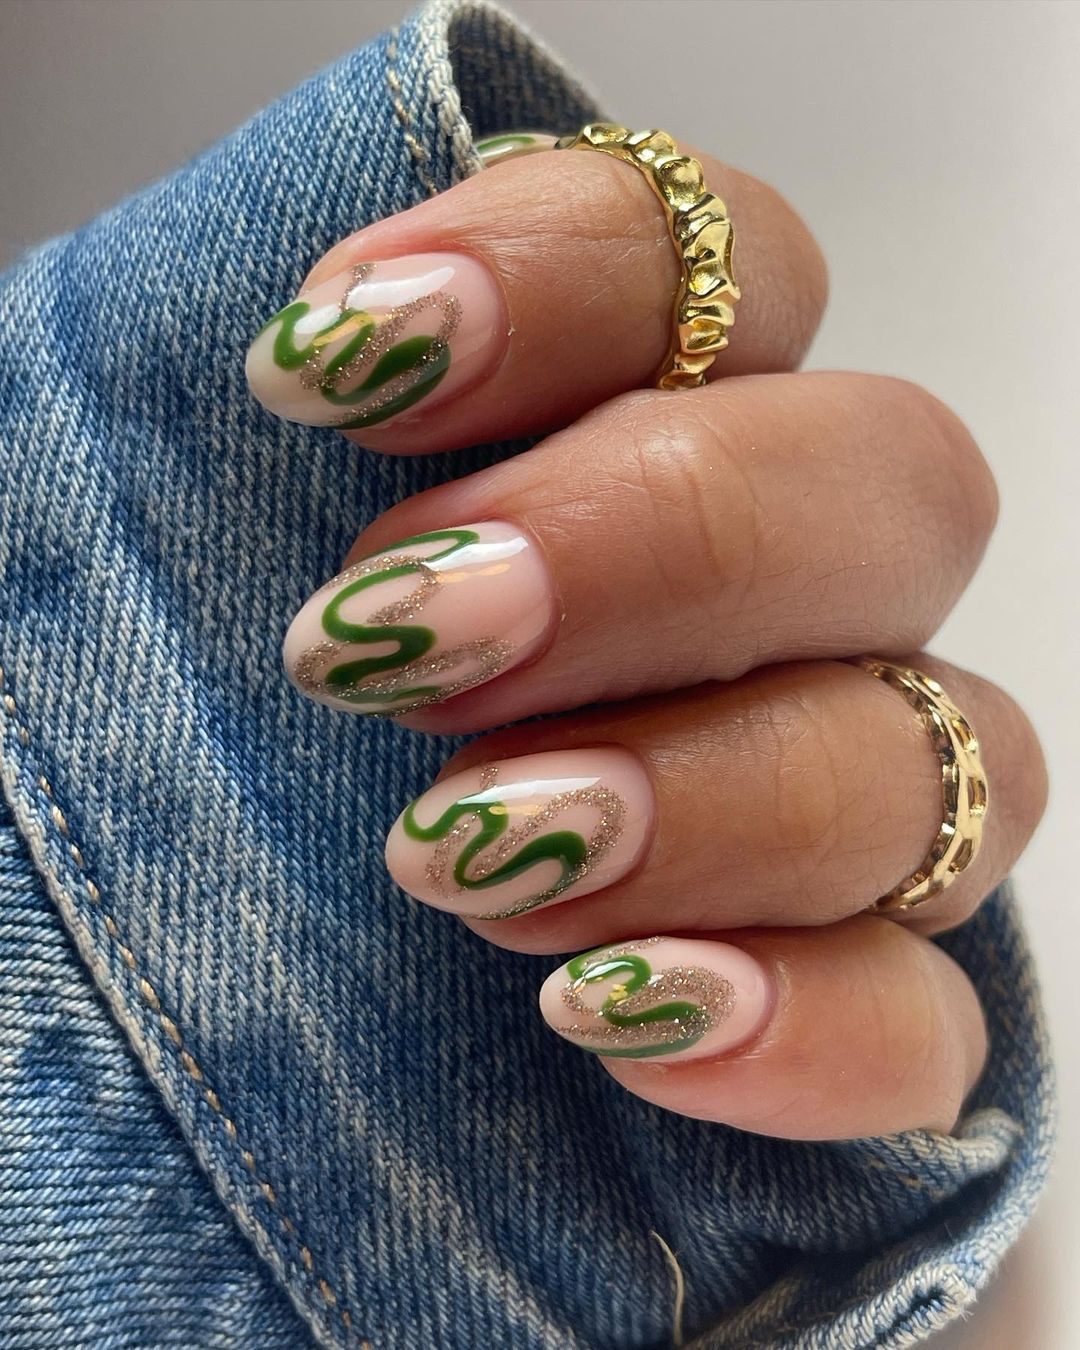
Consumables:
-
- Sheer nude gel polish
- Emerald green gel paint
- Gold glitter or foil
- Fine detail brush
- Glossy topcoat
The trick is to pair the boldness of the swirls with the subtlety of the sheer base for a balanced look.
DIY Tips:
-
- Apply a sheer nude gel polish as your base and cure.
- Paint elegant swirls with emerald green gel paint using a fine brush.
- Add touches of gold glitter or foil for a hint of sparkle.
- Seal with a glossy topcoat to enhance the shine and ensure longevity.
Nautical Stripes with a Twist
Celebrate the classic summer theme with a nautical-inspired design, featuring crisp white nails accented with bold blue stripes. It’s a fresh take on the maritime trend, ideal for days spent sailing the sea or strolling along the dock.
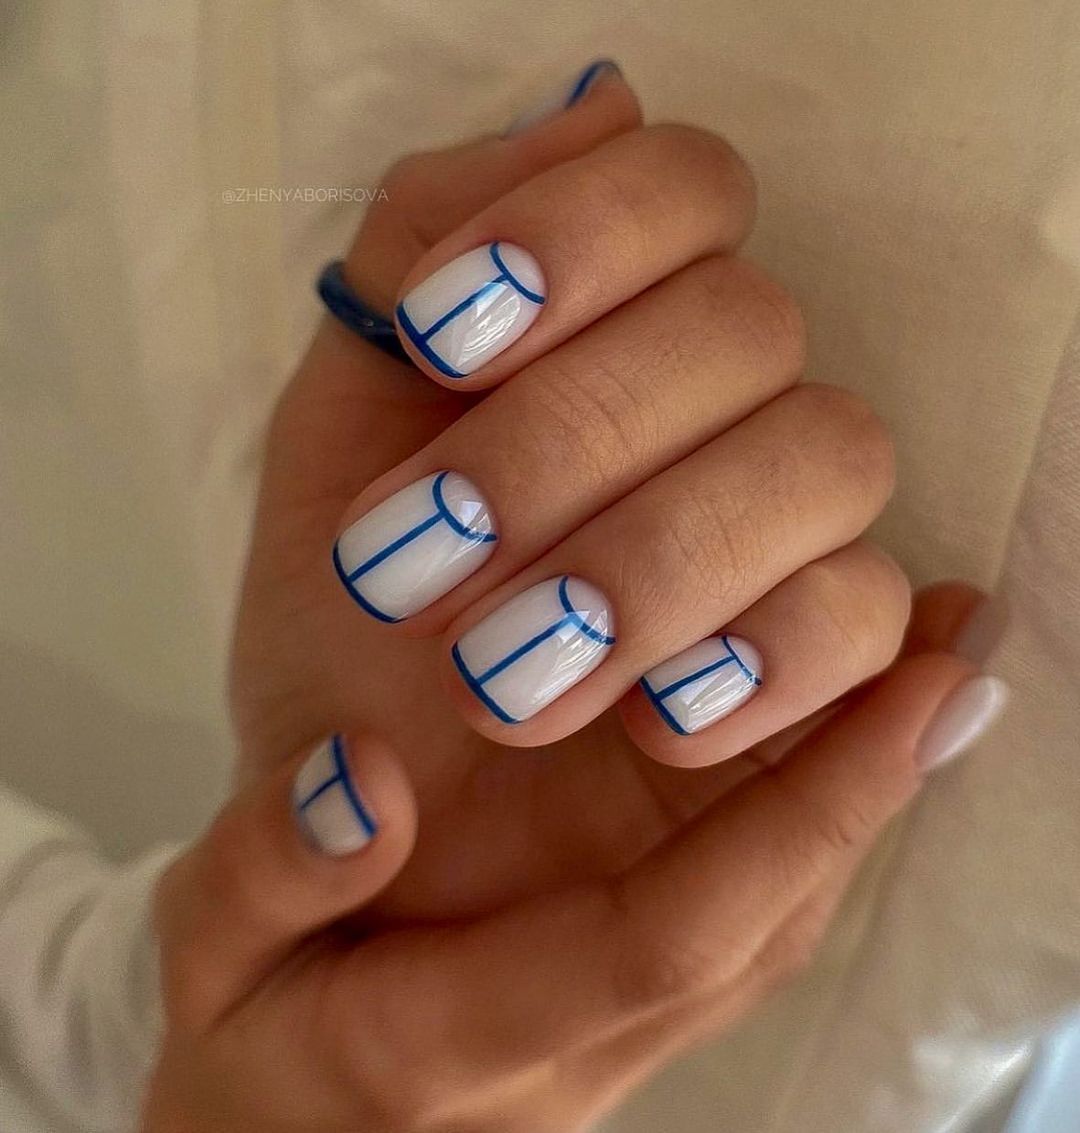
Consumables:
-
- White gel polish
- Blue gel paint
- Striping tape or a steady hand for freehand lines
- Glossy topcoat
Use striping tape for precise lines, or freehand for a more relaxed, sea-breezed look.
DIY Tips:
-
- Coat your nails with white gel polish and cure.
- Apply blue gel paint in stripes, using tape or a detail brush for precision.
- Cure and apply a glossy topcoat for a smooth, protective finish.
Botanical Elegance
Invoke the serene beauty of a greenhouse with this botanical-themed nail art. The white base serves as a canvas for delicate green leaves and golden accents, creating a manicure that’s both stylish and soothing.
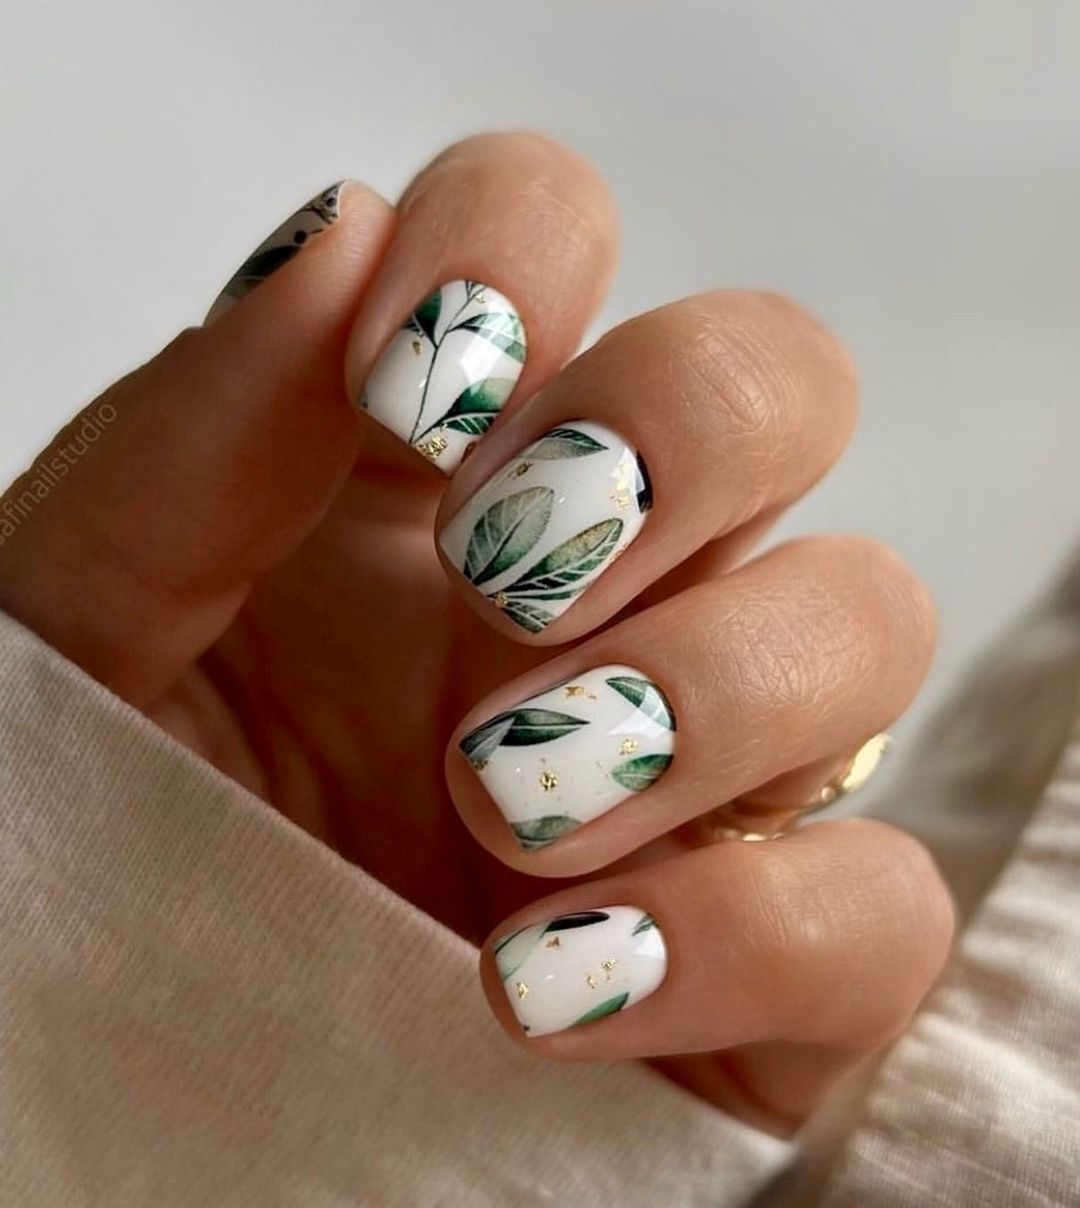
Consumables:
-
- White gel polish
- Green gel paint for leaves
- Gold foil for accents
- Fine detail brush
- Glossy topcoat
Adding gold foil to botanical prints elevates the design, giving it a luxurious feel.
DIY Tips:
-
- Begin with a white gel polish as your base and cure.
- Use a fine brush to paint intricate leaves with green gel paint.
- Apply small pieces of gold foil to accentuate the design.
- Finish with a glossy topcoat for a polished, long-lasting look.
Deep Blue Resonance
The mystery of the deep blue sea is captured in these enchanting nails, where each nail resembles a slice of the ocean’s depth. The marble effect is both alluring and calming, echoing the undulating waves and the serene underwater world.
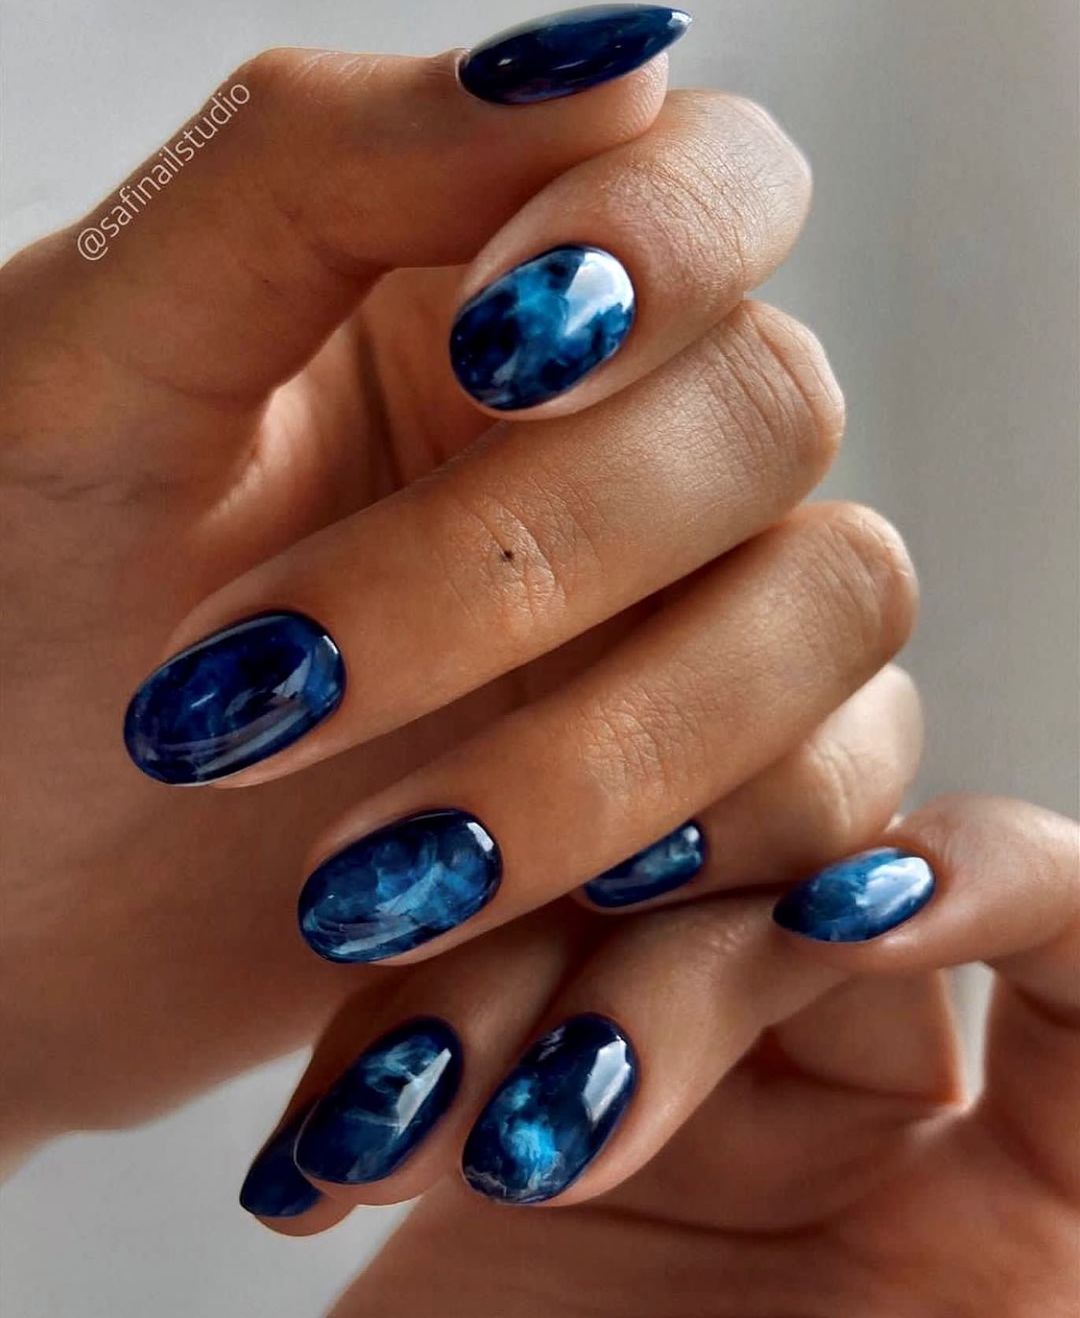
Consumables:
-
- Deep blue gel polish
- Lighter blue and white gel polish for marbling
- Dotting tool or toothpick for the marbling effect
- Glossy topcoat
To achieve the marble look, swirl your shades of blue together with a light touch.
DIY Tips:
-
- Apply a base of deep blue gel polish and don’t cure it yet.
- Add drops of lighter blue and white gel polish.
- Use a dotting tool or toothpick to gently swirl the colors.
- Cure and apply a glossy topcoat to capture the depth of the ocean on your nails.
Soaring Swallows
These nails tell a tale of freedom and grace with elegant swallows in flight, their silver outlines gleaming against a pastel backdrop. It’s a design that speaks of open skies and the freedom of summer days stretching ahead.
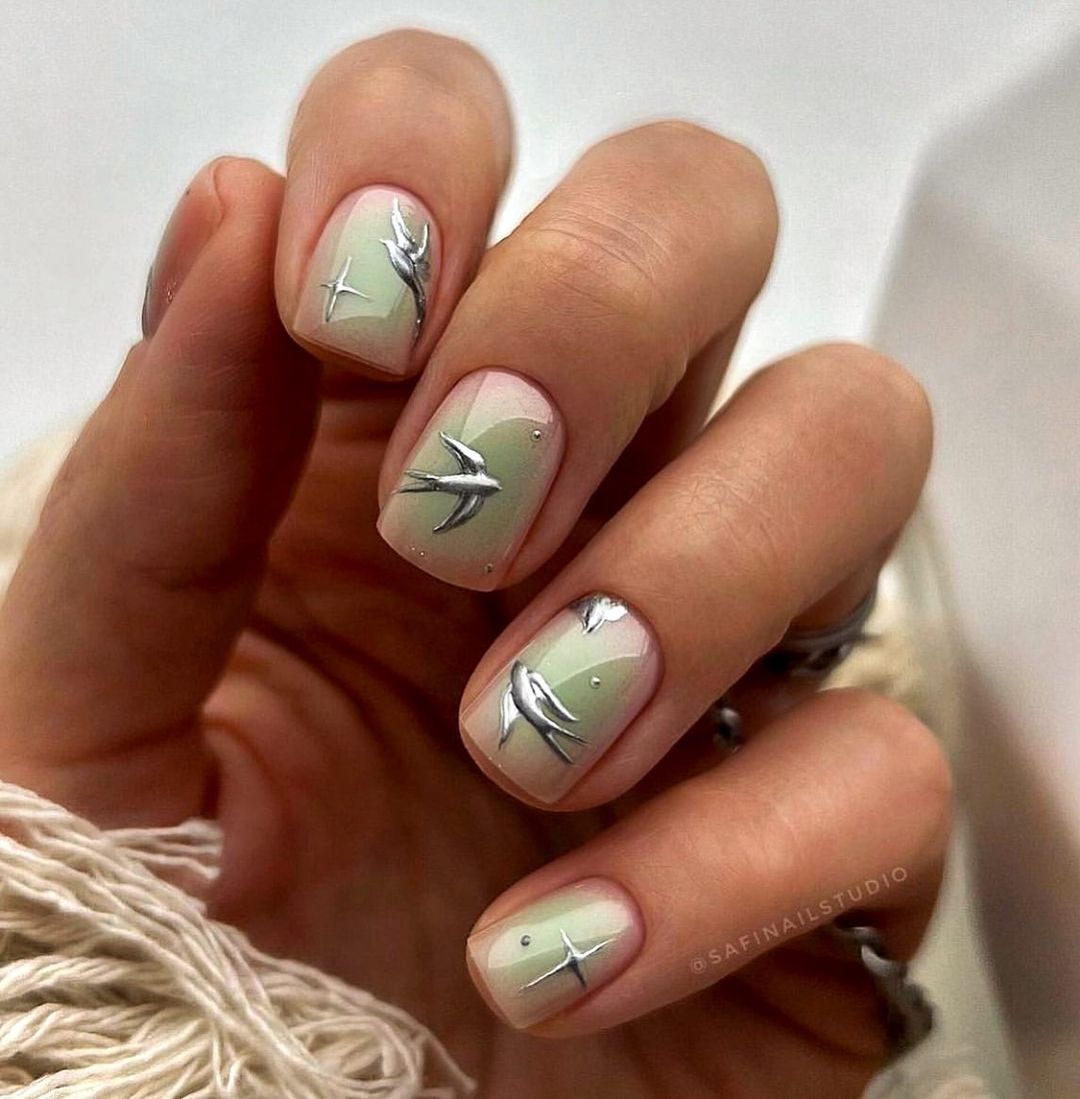
Consumables:
-
- Pastel green gel polish
- Silver gel paint
- Detail brush for precise lines
- Glossy topcoat
Silver birds need a steady hand and a fine brush to create fluid lines that convey movement.
DIY Tips:
-
- Begin with a pastel green gel polish as your canvas and cure.
- Paint each swallow with silver gel paint using a fine brush for detail.
- Cure and finish with a glossy topcoat for a smooth, flying finish.
Marble Elegance with Gold Flakes
Combining the earthy tones of marble with the luxury of gold, these nails are a masterpiece of sophistication. Each nail is a unique expression of natural beauty, adorned with golden accents that catch the light and draw the eye.
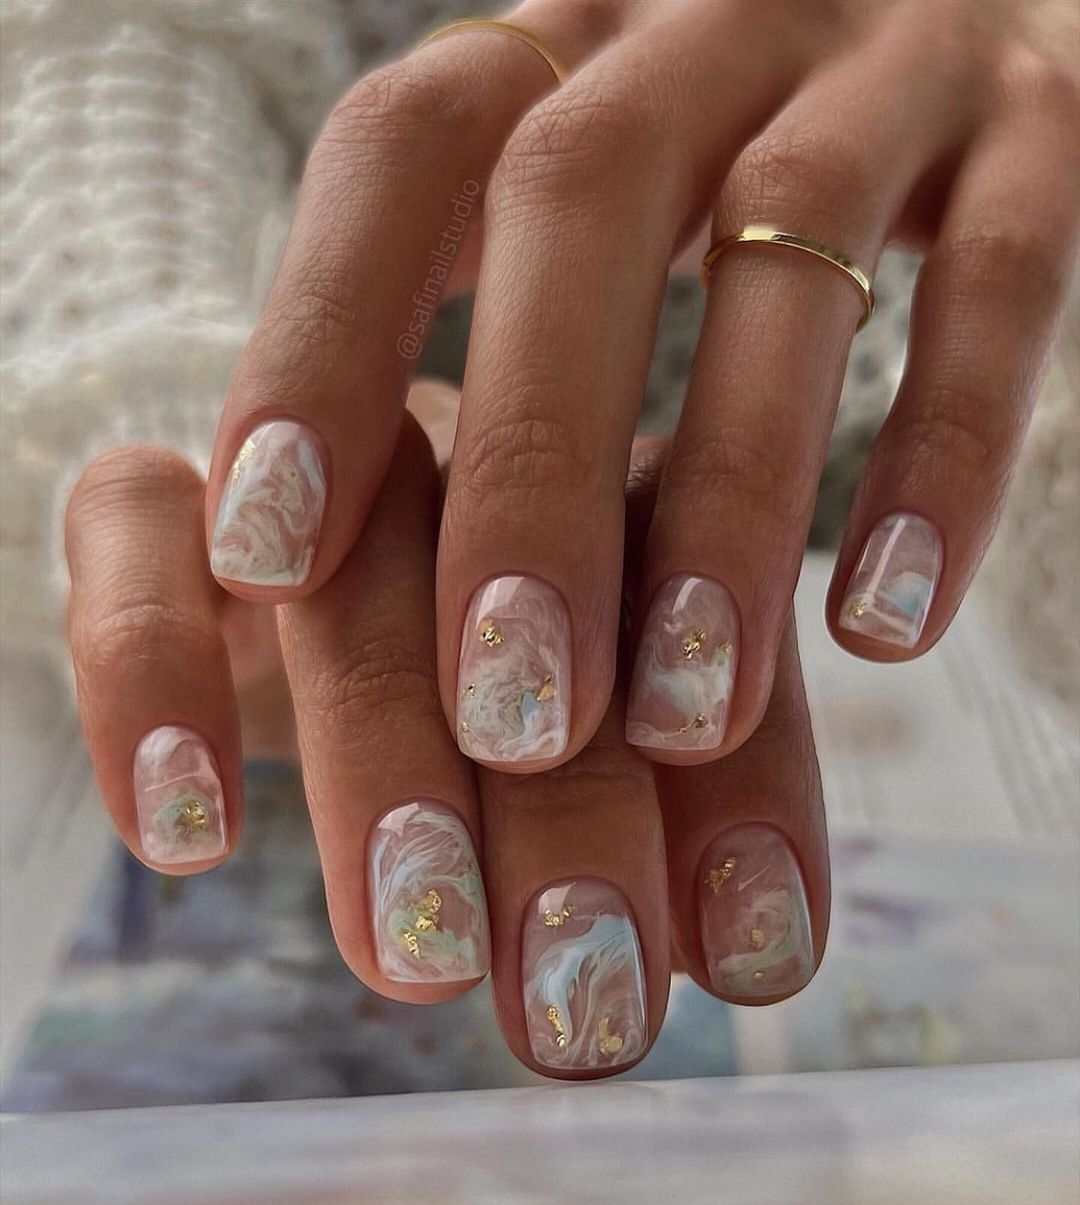
Consumables:
-
- White gel polish for the base
- Nude and brown gel polish for the marble effect
- Gold foil or glitter
- Glossy topcoat
Marbling with gel polish requires blending colors softly to mimic the natural veins of stone.
DIY Tips:
-
- Apply a white gel base coat and partially cure.
- Add drops of nude and brown polish, then swirl gently for the marble effect.
- Apply gold foil or glitter for a touch of opulence.
- Seal with a glossy topcoat for enduring beauty.
Radiant Pink Blooms
These nails exude a youthful charm with their radiant pink base, accented with sparkling stones and floral motifs. It’s a playful and girly design that’s perfect for summer picnics and daytime gatherings.
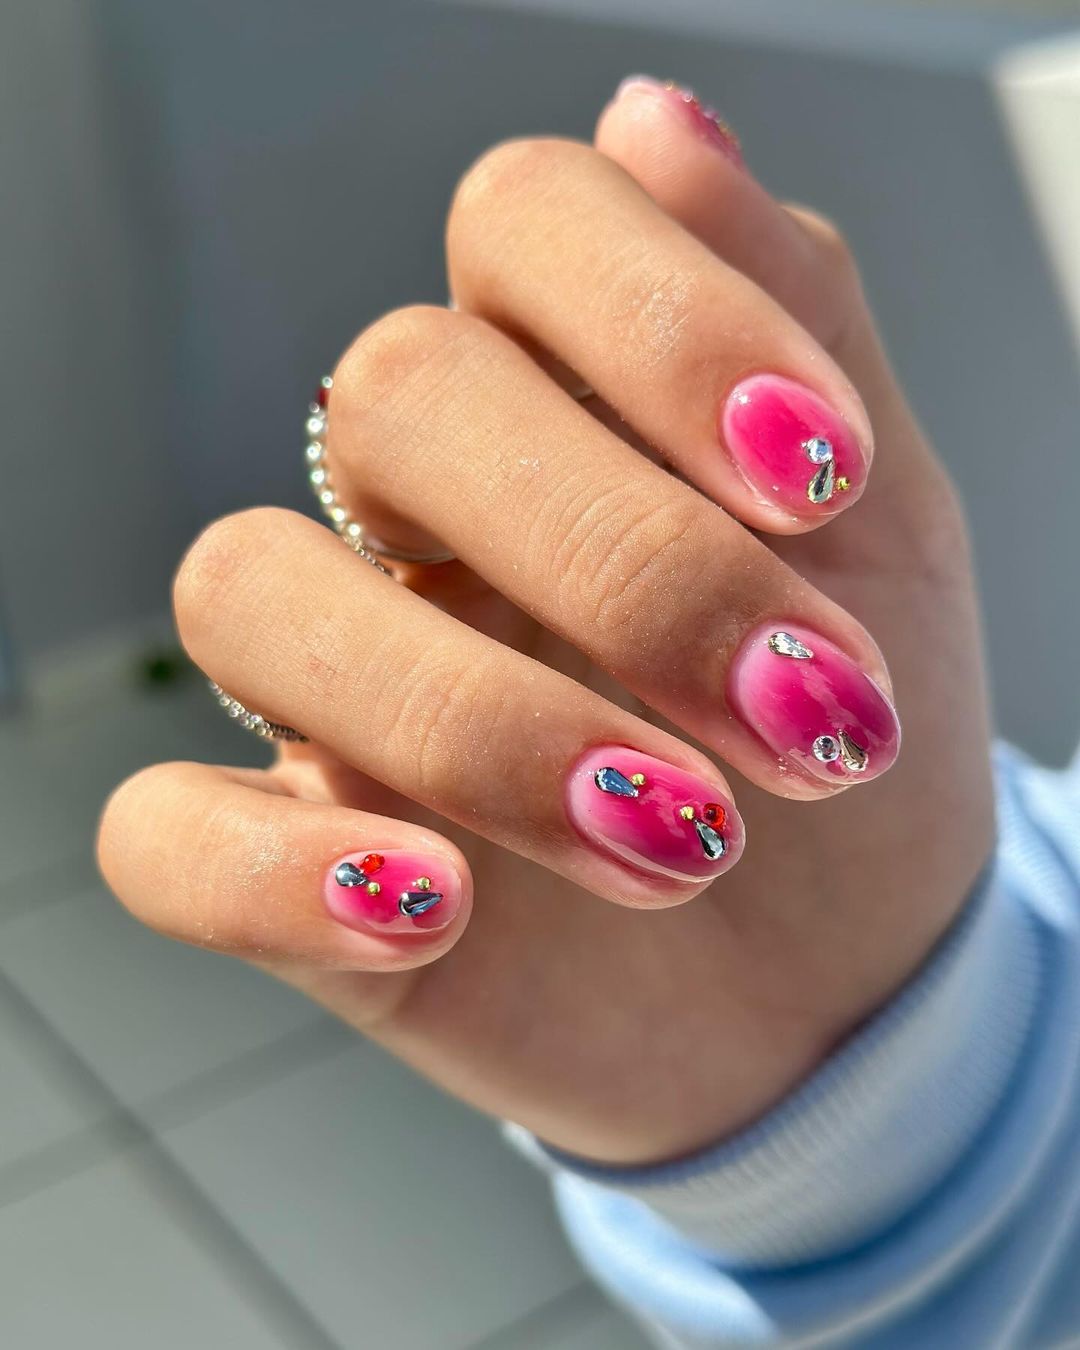
Consumables:
-
- Bright pink gel polish
- Rhinestones and embellishments
- Nail glue or a strong topcoat to secure stones
- Glossy topcoat
The application of rhinestones should be strategic to complement the nail’s natural shape.
DIY Tips:
-
- Apply the pink gel polish as your base and cure.
- Arrange rhinestones and floral embellishments on the tacky layer of the cured polish.
- Secure with nail glue or an additional layer of topcoat for extra hold.
- A final glossy topcoat adds shine and ensures the longevity of the design.
Neon and Noir Elegance
Bold and striking, this design combines the edginess of noir with the bright, unstoppable energy of neon green. The wavy black patterns add a sophisticated touch, making these nails suitable for those who love to make a statement.
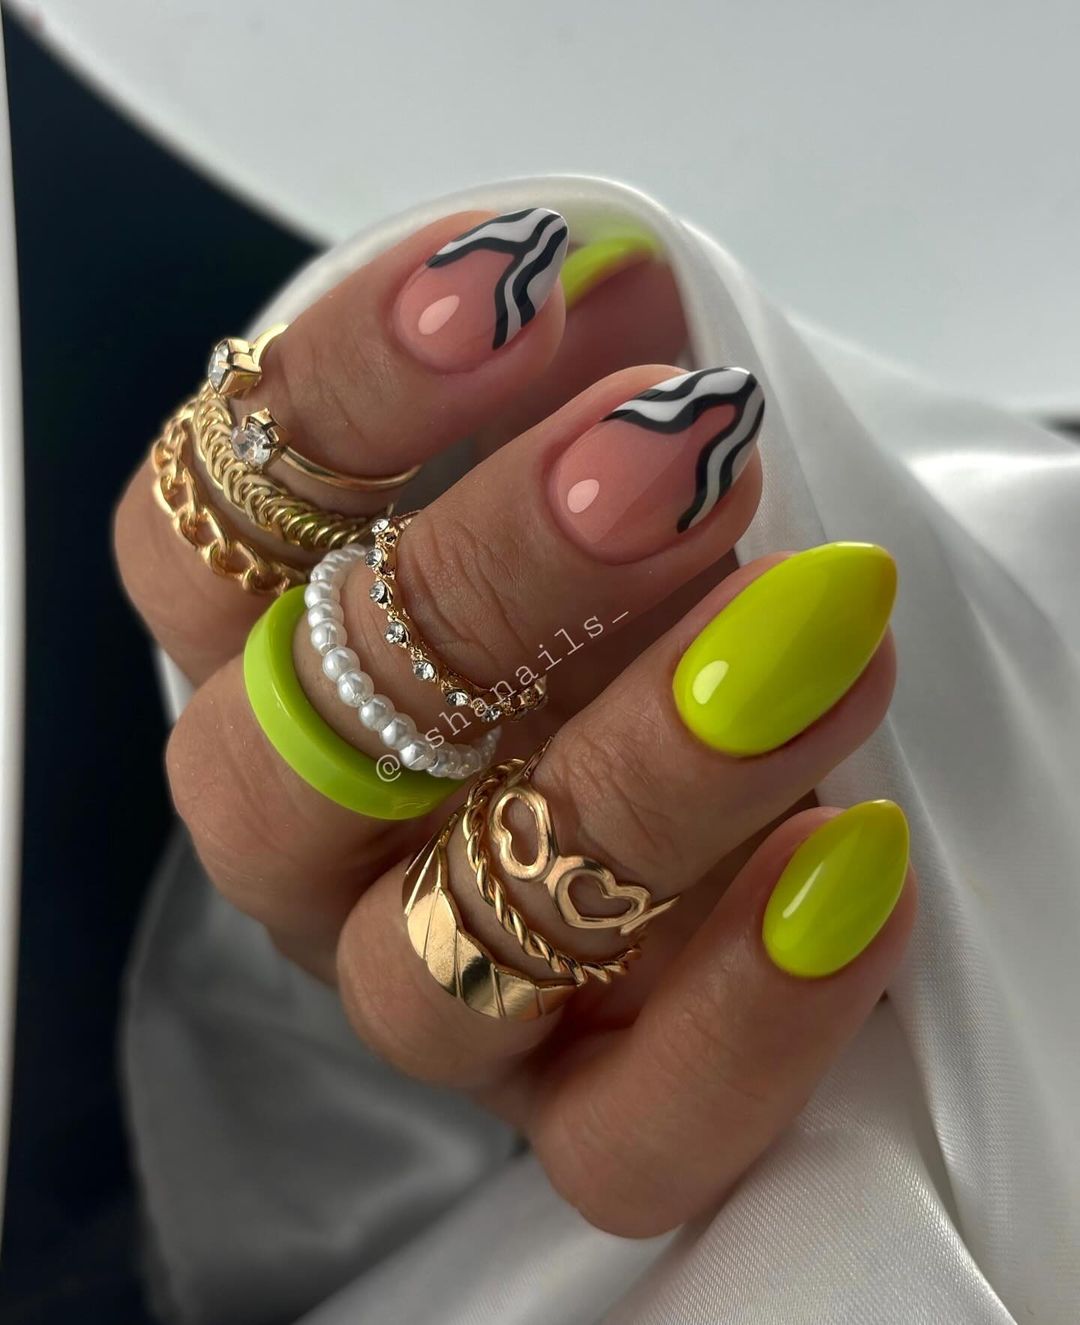
Consumables:
-
- Neon green gel polish
- Black gel paint
- Matte and glossy topcoat for contrast
- Fine detail brush
The contrast between matte and glossy finishes adds depth and interest to the design.
DIY Tips:
-
- Paint your nails with neon green gel polish and cure.
- Use black gel paint and a detail brush to create wavy, noir patterns.
- Apply a matte topcoat over the neon green and a glossy topcoat over the black patterns.
- Cure to set the design, enjoying the modern, textural finish.
Sunny-Side Up Design
These charming nails bring a smile with their whimsical ‘sunny-side up’ egg design, sprinkled across a milky white canvas. It’s a playful look that’s bound to be a conversation starter at your next brunch or casual meet-up.
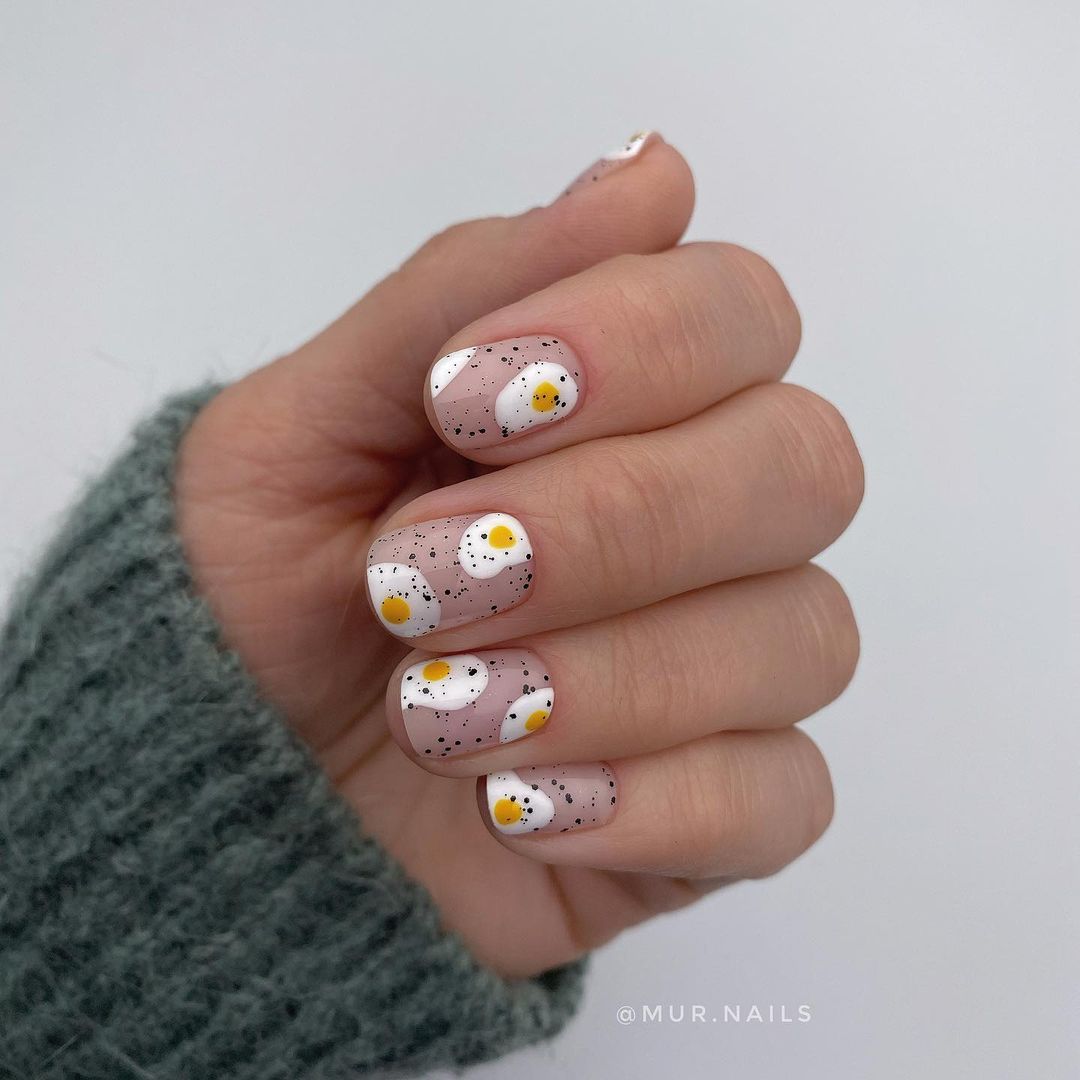
Consumables:
-
- Milky white gel polish
- Yellow and black gel paint for the eggs
- Dotting tool or small brush for details
- Glossy topcoat
A dotting tool can help achieve the perfect round yolk every time.
DIY Tips:
-
- Apply a milky white gel polish as the base and cure it.
- Dot on the yellow gel paint to create the yolks.
- Add small black dots to mimic pepper flecks.
- Finish with a glossy topcoat for a deliciously shiny look.
Sky Blue Ombre Dreams
This design captures the essence of a clear summer sky, with a gentle ombre transition from a soft white to a dreamy sky blue. It’s an airy and light look that speaks of lazy afternoons lying on the grass, gazing up at the clouds.
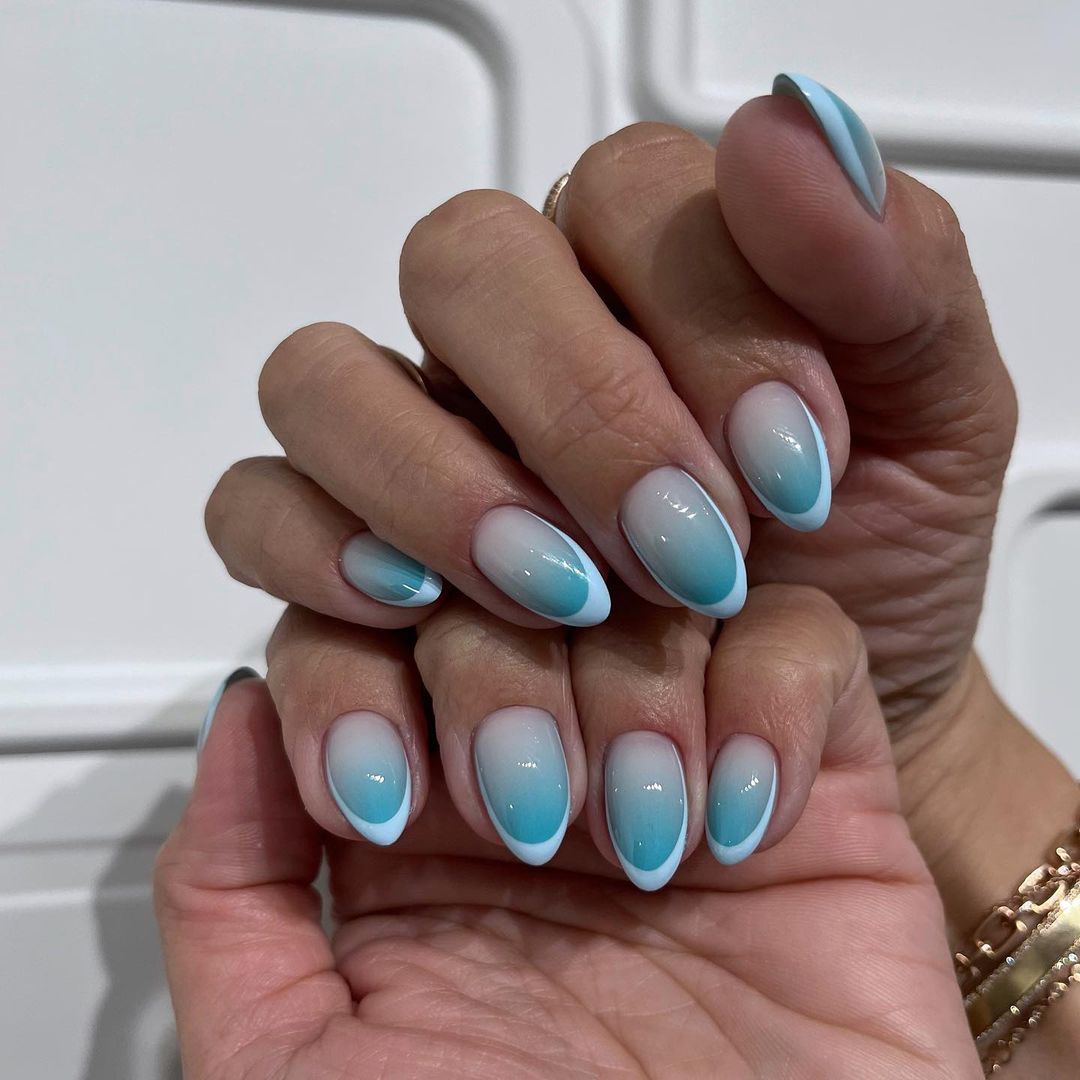
Consumables:
-
- White and sky blue gel polish for the ombre effect
- A sponge for the ombre dabbing technique
- Glossy topcoat
The ombre technique requires a sponge to dab and blend the colors seamlessly on the nail.
DIY Tips:
-
- Start with a white gel polish base and cure.
- Apply sky blue gel polish on a sponge and gently dab onto the nail, creating a gradient effect.
- Cure between layers if needed and finish with a glossy topcoat for a smooth, seamless look.
Midnight Florals
Embrace the enchanting beauty of a midnight garden with this design. Bold, black nails serve as the canvas for delicate, colorful floral accents that seem to glow against the dark background. It’s a sophisticated choice for evening events and moonlit walks.
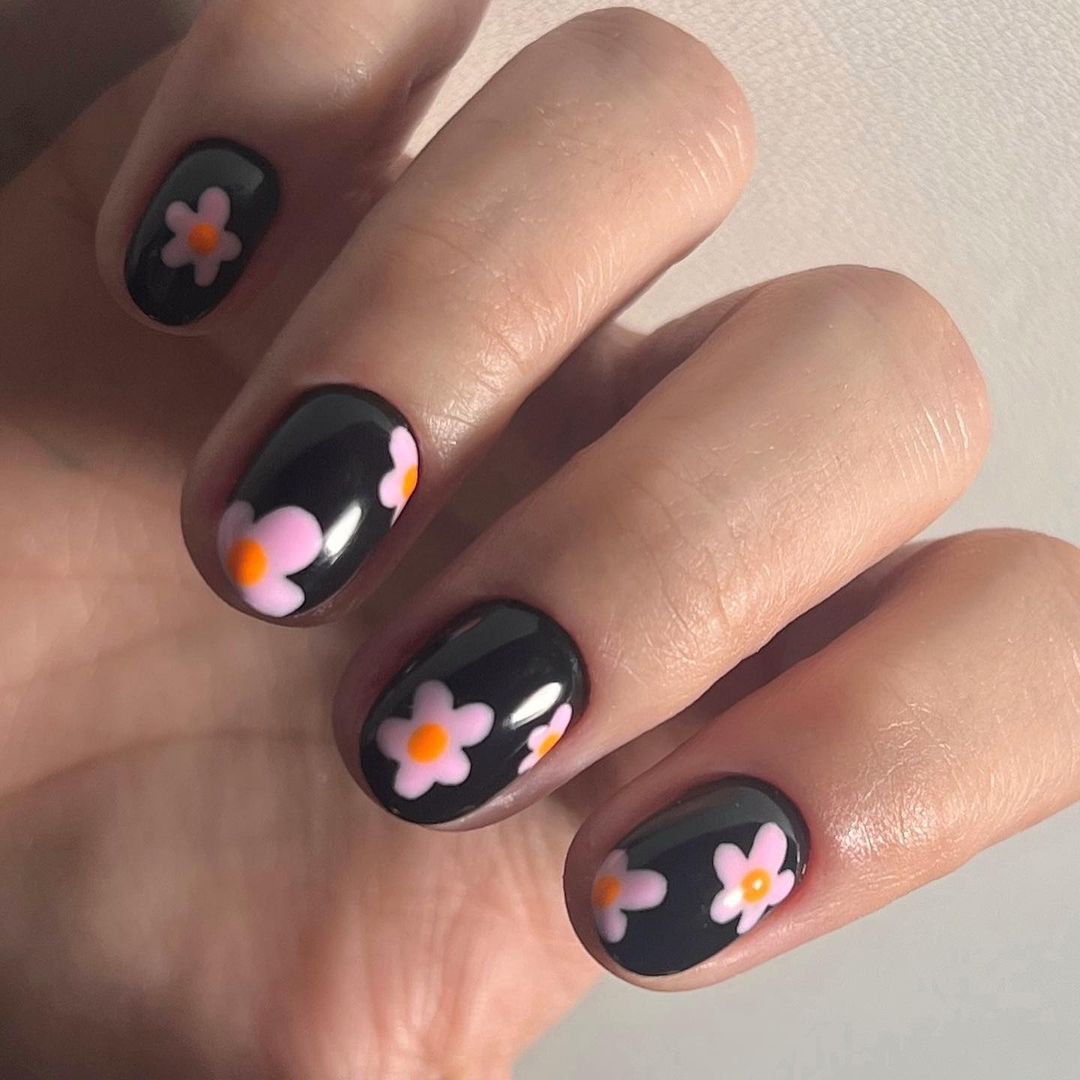
Consumables:
-
- Black gel polish
- White, pink, and orange gel paints for the flowers
- Fine detail brush
- Glossy topcoat
Painting delicate flowers on a dark base can be challenging but offers a stunning visual contrast.
DIY Tips:
-
- Apply black gel polish as the base and cure.
- Use a fine brush to paint small, simple flowers in various colors.
- Cure after painting the florals and finish with a glossy topcoat to make the design stand out.
Soft Ombré with Golden Lace
The soft gradient from transparent to pink on these nails evokes the tender blush of a summer dawn. The delicate golden lace detail on the accent nail adds a touch of vintage luxury, reminiscent of the intricate patterns on fine summer linens.

Consumables:
-
- Clear and pink gel polish for the ombré
- Gold lace decals or gold foil
- Sponge for the ombré technique
- Glossy topcoat
Achieving a smooth ombré effect requires a dabbing motion that softly blends the two polishes on the nail.
DIY Tips:
-
- Start with a clear gel polish at the base of the nails, blending into pink towards the tips.
- Use a sponge to softly dab the colors together for the ombré effect.
- Apply the gold lace decal or foil to the accent nail for an elegant touch.
- Seal with a glossy topcoat for a smooth finish that enhances the gradient and metallic detail.
Modern Noir with Subtle Sparkle
In stark contrast, these nails make a bold statement with their deep, matte black finish. The tiny white accents add a modern twist to the classic look, suggesting a starlit night sky in summer.
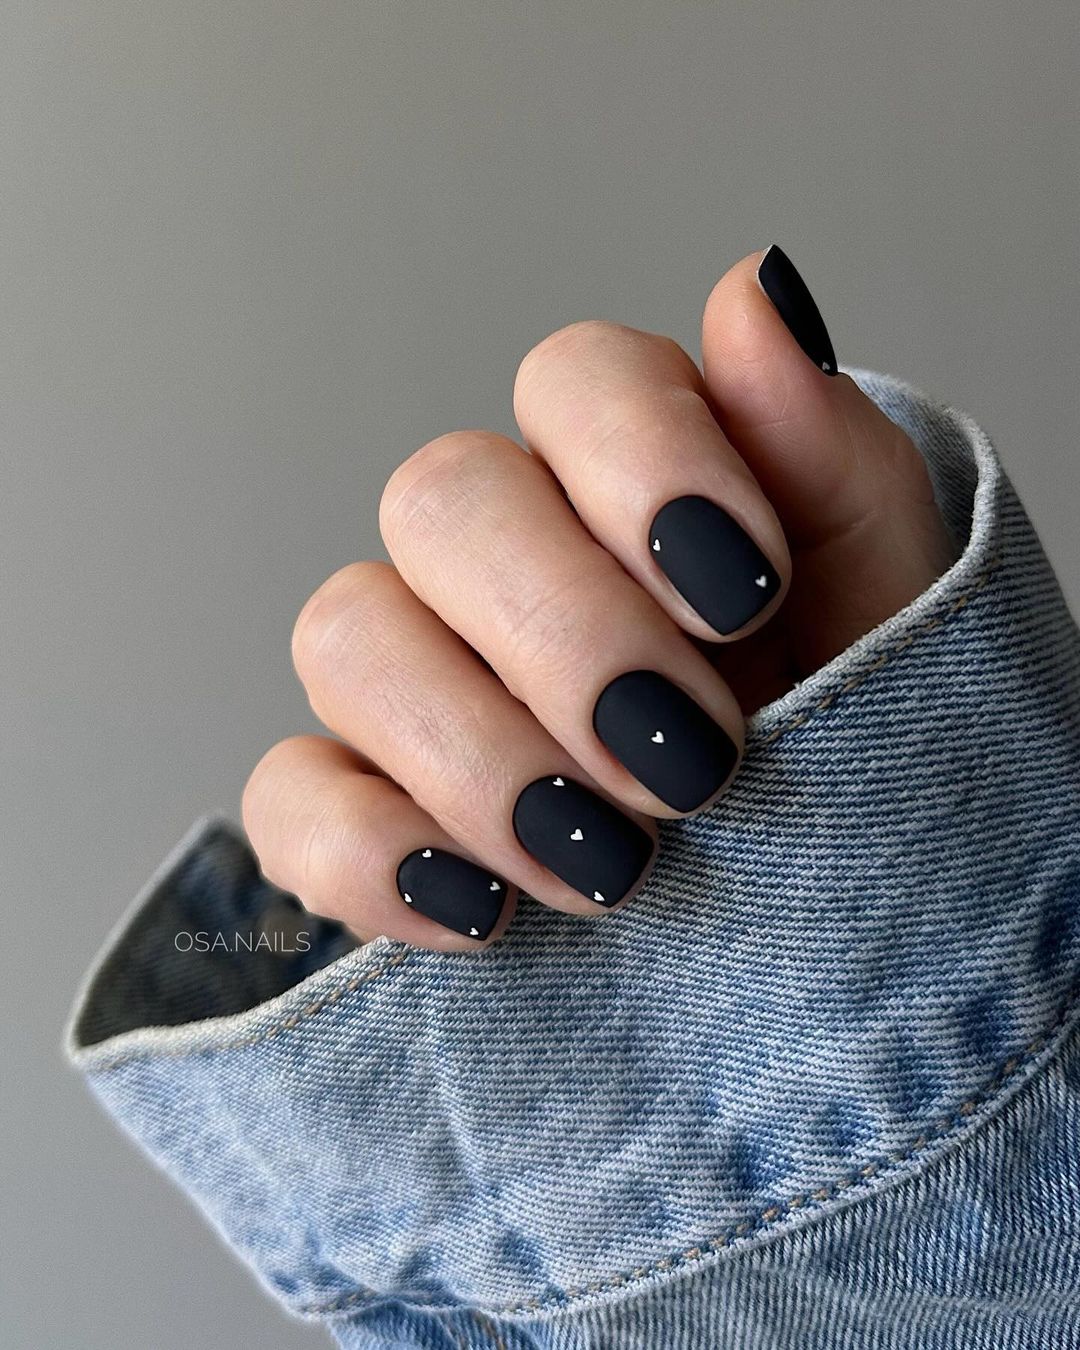
Consumables:
-
- Black gel polish
- White gel paint or polish for the accents
- Matte topcoat
- Fine detail brush or dotting tool
A matte finish transforms the classic black manicure into a contemporary piece of art.
DIY Tips:
-
- Apply black gel polish as the base and cure.
- Use a fine brush or a dotting tool to add small white dots, representing stars or lights in the night.
FAQ
Q: Can short nails pull off any design? A: Certainly! Short nails are a fantastic canvas for creativity. With the right colors and techniques, any design can look chic and trendy.
Q: How do I choose the right color for my skin tone? A: For pale skin, opt for pastels and vibrant brights. For tan skin, earthy tones and bold hues work beautifully. But remember, the best color is the one that makes you feel fabulous!
Q: Is gel polish better for nail art? A: Gel polish offers longevity and a pristine finish, making it a preferred choice for intricate designs. Plus, the no-dry-time benefit means your nail art is smudge-free from the get-go.
Save Pin
