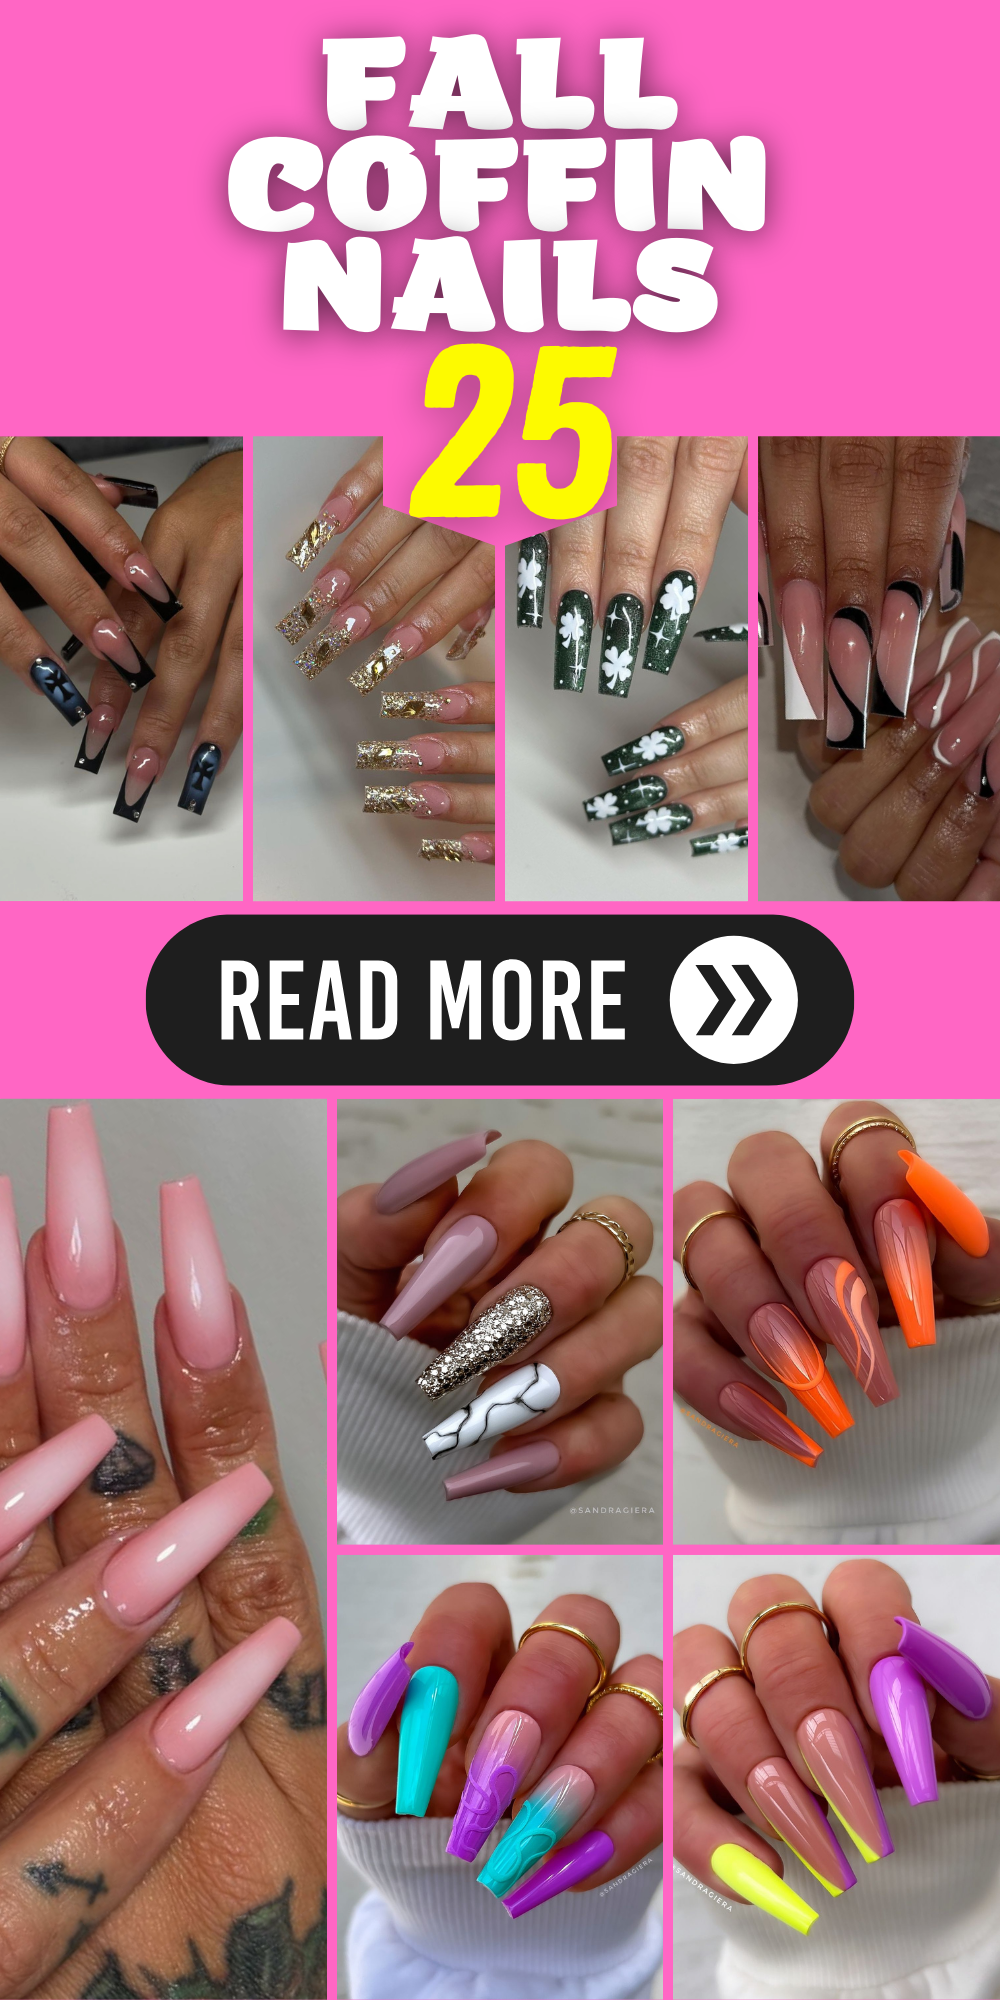
Fall Coffin Nails: 25 Stunning Designs to Try This Season
When it comes to nail art, fall coffin nails are the perfect canvas to showcase the season’s best designs. Whether you’re looking for cute, simple, or bold styles, there’s something for everyone. In this guide, we’ll explore a variety of fall coffin nail designs, detailing each look and providing tips on how to achieve them. Get ready to be inspired by these fabulous ideas that will keep your nails looking stylish all season long.
Mesmerizing Blue Elegance
The first design in our collection is a breathtaking blue-themed nail art. This look combines a rich, shimmering blue base with intricate gold embellishments, creating a regal and sophisticated appearance. The contrast between the deep blue and the metallic gold accents makes this design truly stand out.

-
- Blue nail polish: Sally Hansen Miracle Gel in “Tidal Wave”
- Gold embellishments: Born Pretty Store Gold Nail Art Charms
- Top coat: Seche Vite Dry Fast Top Nail Coat
Instructions:
-
- Start with clean, filed nails and apply a base coat.
- Apply two coats of blue nail polish, allowing each layer to dry thoroughly.
- Using nail glue, attach the gold charms to your nails in a pattern that suits your style.
- Seal the design with a generous layer of top coat to ensure longevity.
Sparkling Pink Perfection
Next up, we have a delicate and dazzling pink design that combines the softness of baby pink with the sparkle of rhinestones. This look is perfect for those who want a feminine yet glamorous manicure.

-
- Pink nail polish: OPI Nail Lacquer in “Bubble Bath”
- Rhinestones: Swarovski Flatback Crystals
- Nail glue: KISS Maximum Speed Nail Glue
- Top coat: Essie Gel Setter Top Coat
Instructions:
-
- Begin with a base coat to protect your nails.
- Apply two coats of pink nail polish, letting each coat dry completely.
- Carefully place rhinestones along the cuticle line and in desired patterns using nail glue.
- Finish with a top coat to secure the rhinestones and add a glossy finish.
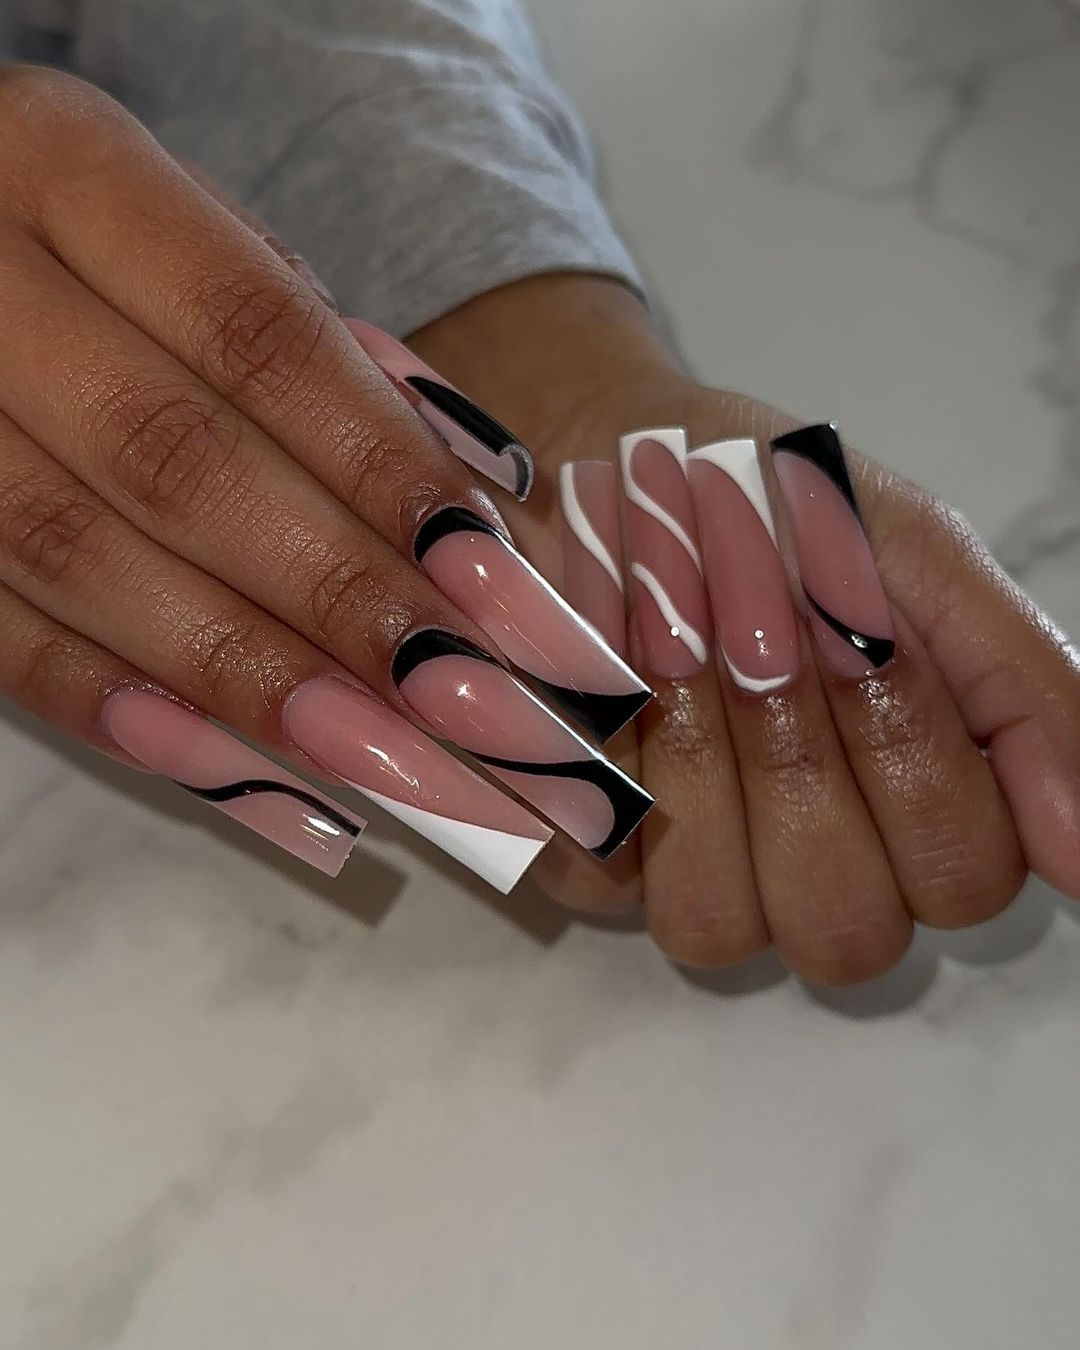
Monochrome Magic
For a sleek and modern look, try this monochrome design that features a blend of black and white patterns. This bold and striking design is perfect for those who love a minimalist yet impactful style.
-
- Black nail polish: Essie Nail Polish in “Licorice”
- White nail polish: OPI Nail Lacquer in “Alpine Snow”
- Thin nail art brush: Winstonia Nail Art Brushes
- Top coat: Sally Hansen Insta-Dri Anti-Chip Top Coat
Instructions:
-
- Apply a base coat to your nails.
- Paint alternating nails with black and white polish, applying two coats of each color.
- Use a thin nail art brush to create intricate black and white patterns on each nail.
- Seal the design with a top coat to protect your artwork.
Edgy Black French Tips
These fall coffin nails are a modern twist on the classic French tip, featuring a bold black design with an intriguing smoky effect on two accent nails. The clear base with black tips and subtle rhinestone details creates a striking and edgy look perfect for fall.

-
- Clear base coat: OPI Natural Nail Base Coat
- Black nail polish: Essie Nail Polish in “Licorice”
- Smoky effect polish: China Glaze Nail Lacquer in “Smoke and Ashes”
- Rhinestones: Swarovski Flatback Crystals
- Top coat: Sally Hansen Insta-Dri Anti-Chip Top Coat
Instructions:
-
- Apply a clear base coat to protect your nails.
- Paint the tips of your nails with black polish, creating a French tip effect.
- For the smoky effect, use a makeup sponge to dab on the smoky black polish on the accent nails.
- Place rhinestones at the base of each nail using nail glue.
- Seal the design with a top coat to ensure longevity and shine.
Save Pin

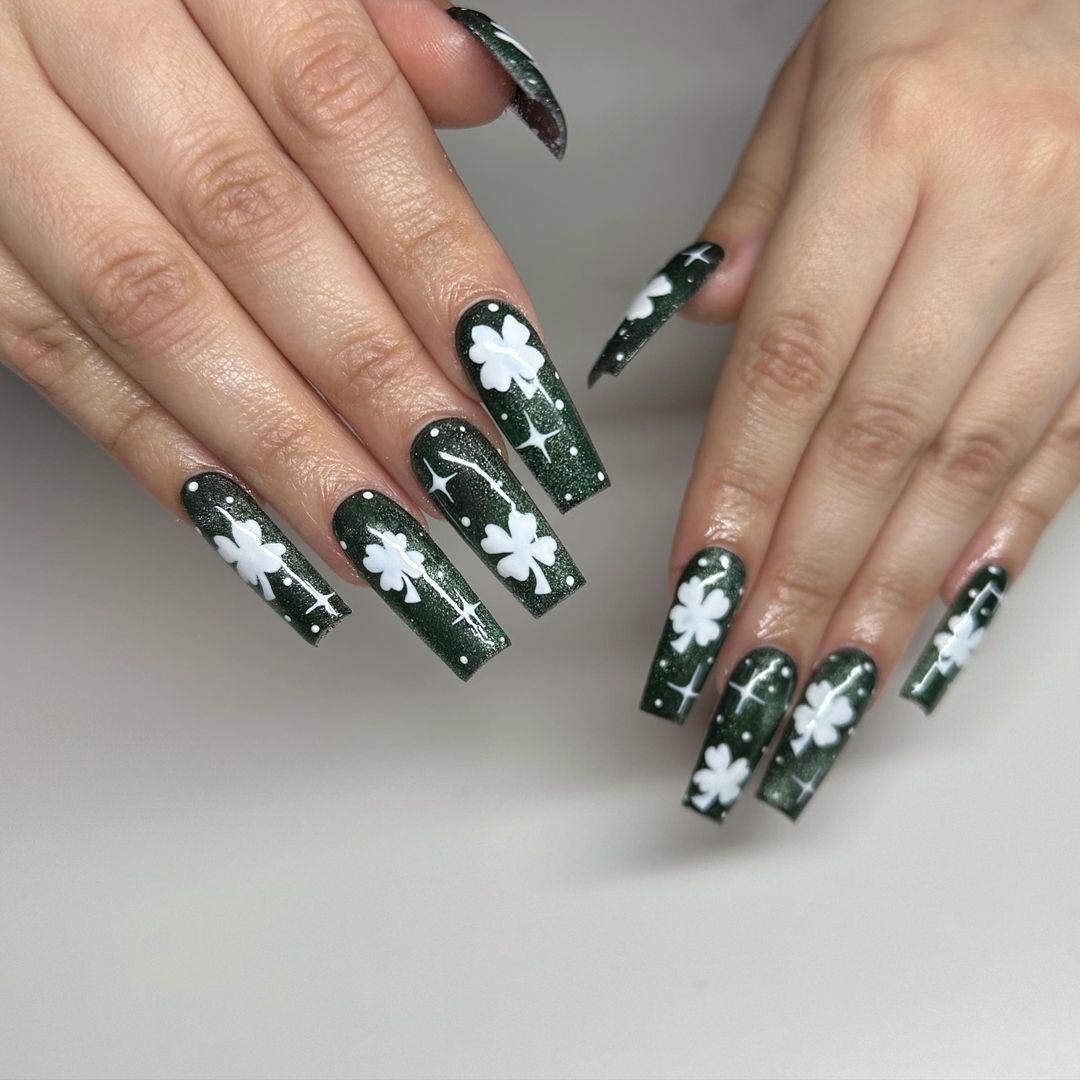
Enchanting Green with Floral Accents
This enchanting green design features a deep, shimmery green base adorned with delicate white floral accents. The glittery finish and intricate flowers make these nails a perfect choice for adding a touch of nature-inspired beauty to your fall look.
-
- Green nail polish: Essie Nail Polish in “Off Tropic”
- White nail polish: OPI Nail Lacquer in “Alpine Snow”
- Glitter top coat: Zoya Nail Polish in “PixieDust”
- Nail art brush: Winstonia Nail Art Brushes
- Top coat: Essie Gel Setter Top Coat
Instructions:
-
- Start with a base coat to protect your nails.
- Apply two coats of green nail polish, allowing each coat to dry thoroughly.
- Using a nail art brush, paint white floral designs on each nail.
- Add a layer of glitter top coat for a sparkling finish.
- Seal the design with a top coat to ensure it lasts.
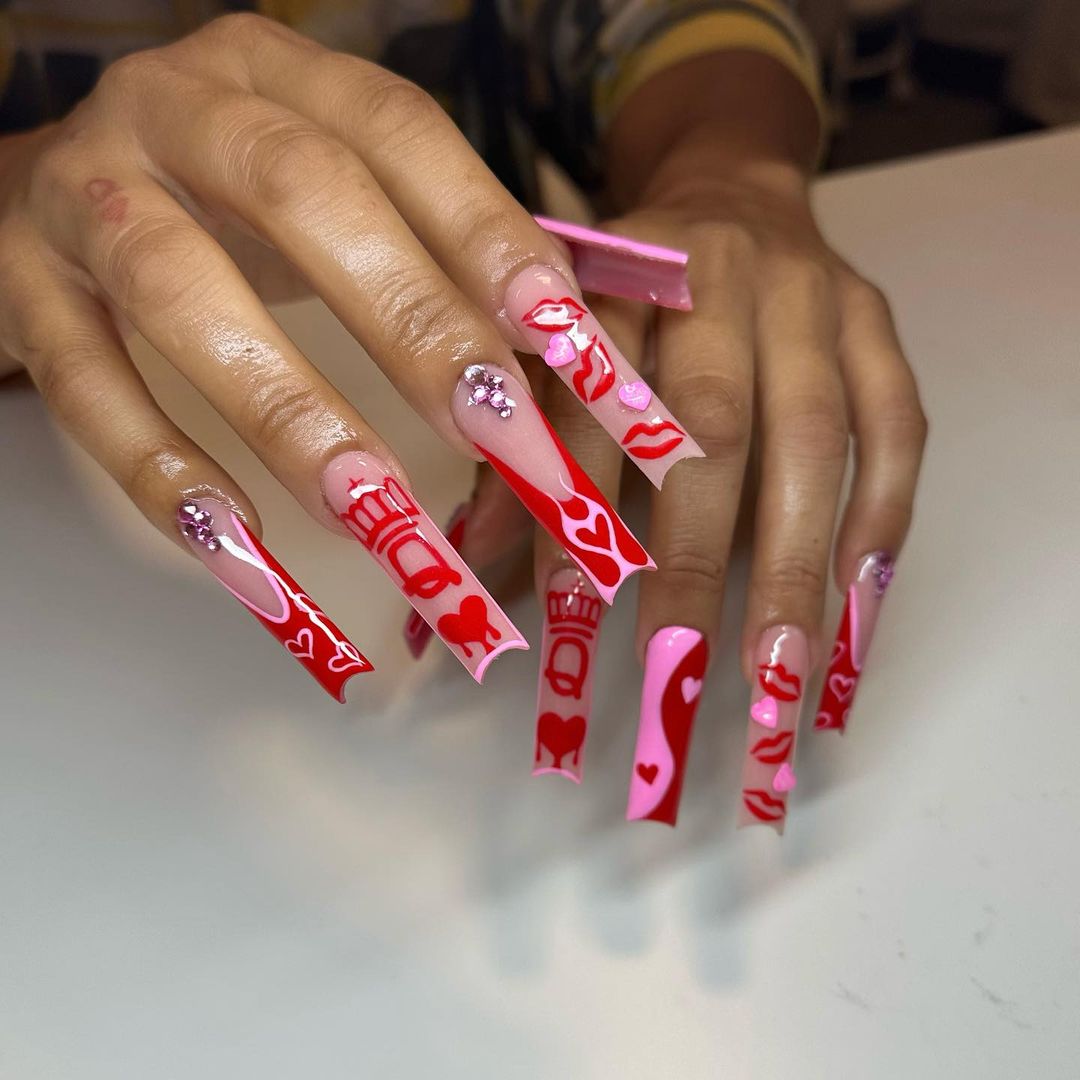
Bold Red and Pink Love
This vibrant design combines bold red and pink hues with playful love-themed accents. Featuring lips, hearts, and rhinestones, these nails are perfect for making a statement and expressing your fun, romantic side.
-
- Red nail polish: OPI Nail Lacquer in “Big Apple Red”
- Pink nail polish: Essie Nail Polish in “Ballet Slippers”
- Rhinestones: Swarovski Flatback Crystals
- Nail art brush: Winstonia Nail Art Brushes
- Top coat: Seche Vite Dry Fast Top Nail Coat
Instructions:
-
- Apply a base coat to your nails.
- Paint alternating nails with red and pink polish, applying two coats of each color.
- Using a nail art brush, create love-themed designs such as lips and hearts on each nail.
- Add rhinestones for extra sparkle.
- Finish with a top coat to protect your design and add shine.
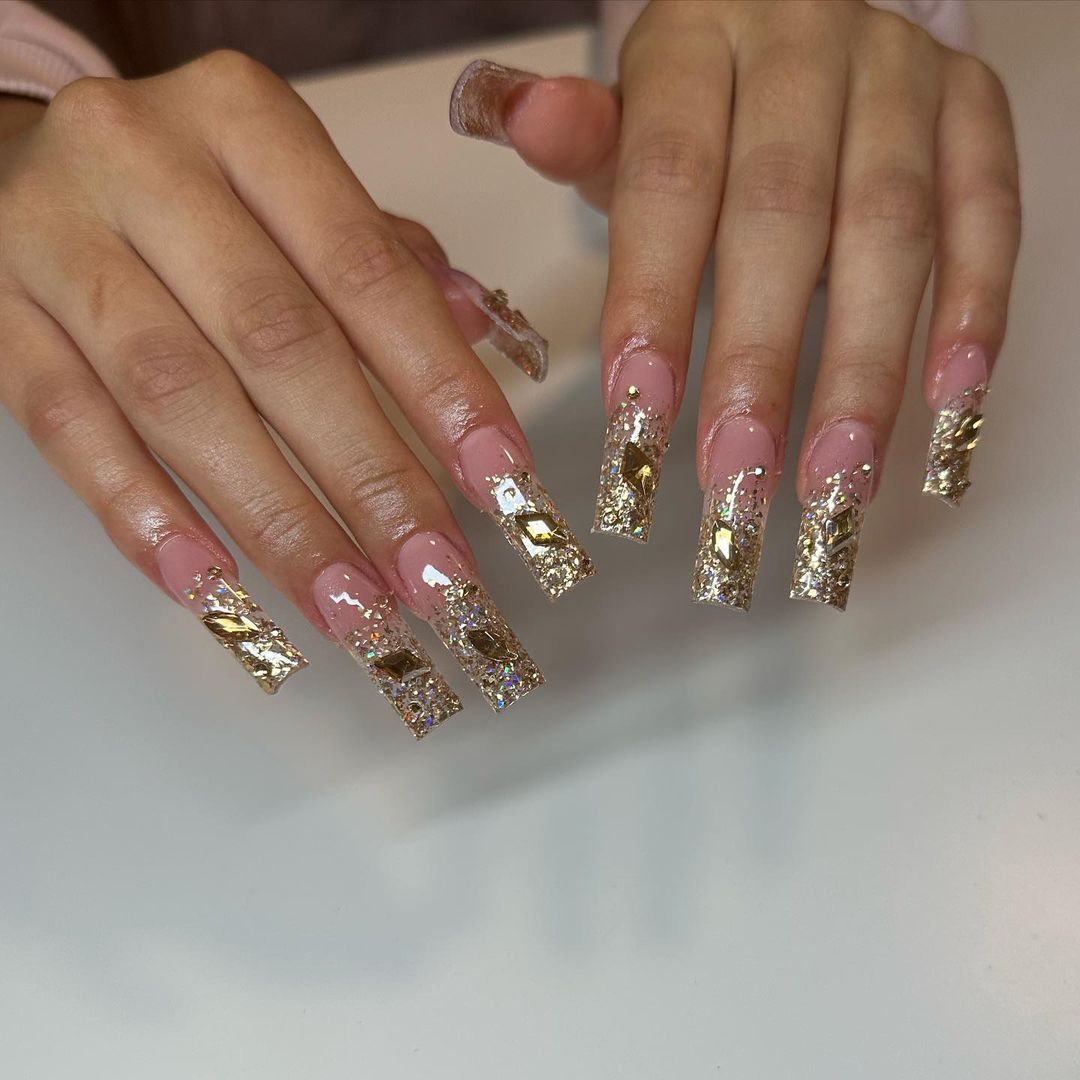
Dazzling Gold Foil Glam
These fall coffin nails are all about opulence and sparkle. The clear base serves as a canvas for the stunning gold foil, creating a luxurious and eye-catching design. Each nail is adorned with gold flakes that catch the light beautifully, making this look perfect for special occasions or when you just want to feel extra glamorous.
-
- Clear base coat: OPI Natural Nail Base Coat
- Gold foil: Modelones Nail Art Foil Flakes
- Top coat: Seche Vite Dry Fast Top Nail Coat
Instructions:
-
- Apply a clear base coat to protect your nails.
- Using tweezers, carefully place the gold foil pieces onto your nails, arranging them as desired.
- Gently press the foil down to ensure it adheres properly.
- Seal the design with a top coat to add shine and protect the foil.
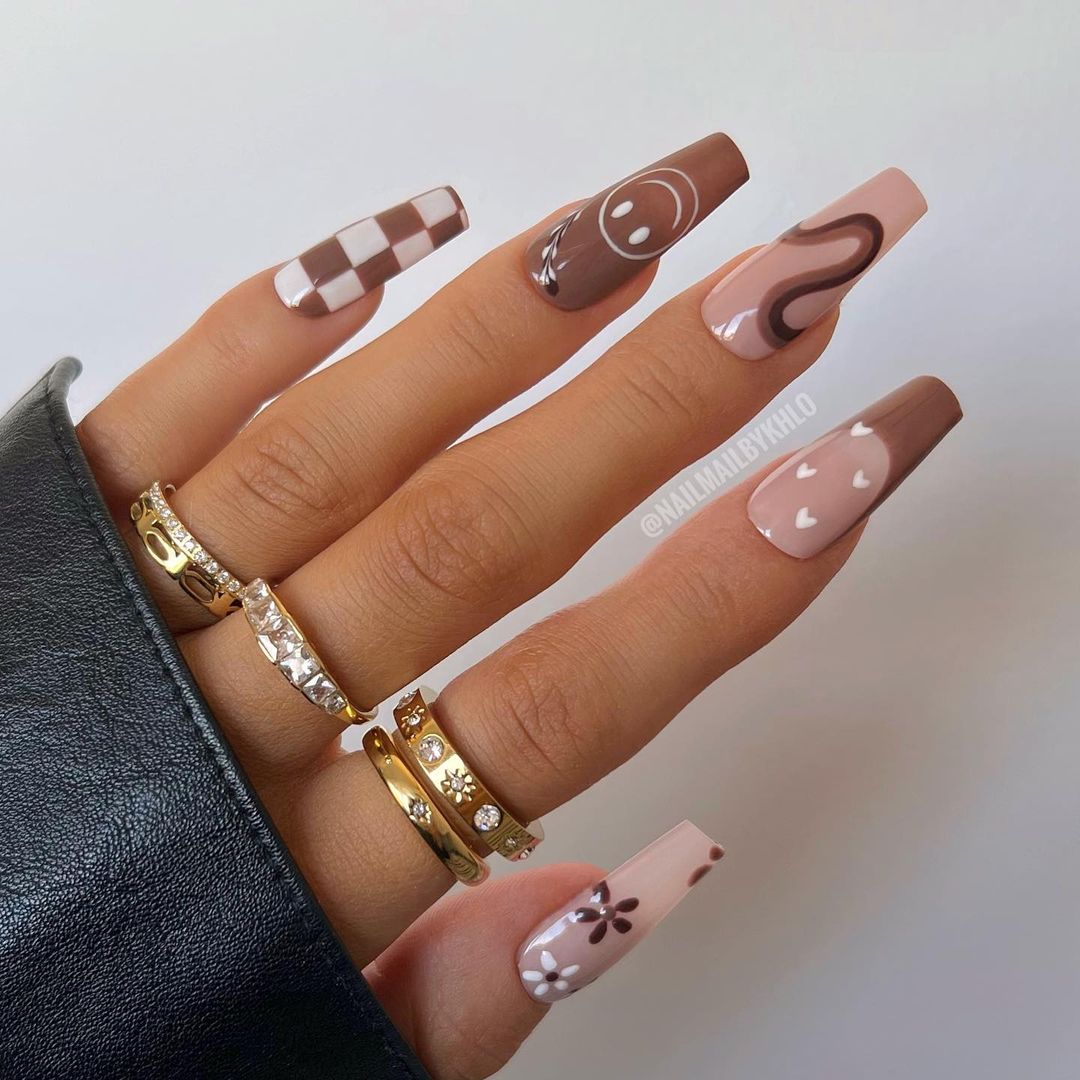
Chic Brown Abstract Art
These nails feature a sophisticated brown color palette with a mix of abstract designs, including checkerboard patterns, swirls, and tiny hearts. The varying shades of brown create a warm, autumnal look that’s both trendy and elegant.
-
- Light brown nail polish: Essie Nail Polish in “Clothing Optional”
- Dark brown nail polish: OPI Nail Lacquer in “Espresso Your Inner Self”
- White nail polish: OPI Nail Lacquer in “Alpine Snow”
- Nail art brush: Winstonia Nail Art Brushes
- Top coat: Essie Gel Setter Top Coat
Instructions:
-
- Apply a base coat to your nails.
- Paint your nails with alternating shades of brown.
- Using a nail art brush, create abstract designs on each nail with the white polish.
- Add tiny hearts and flowers for extra detail.
- Seal the design with a top coat to ensure it lasts.
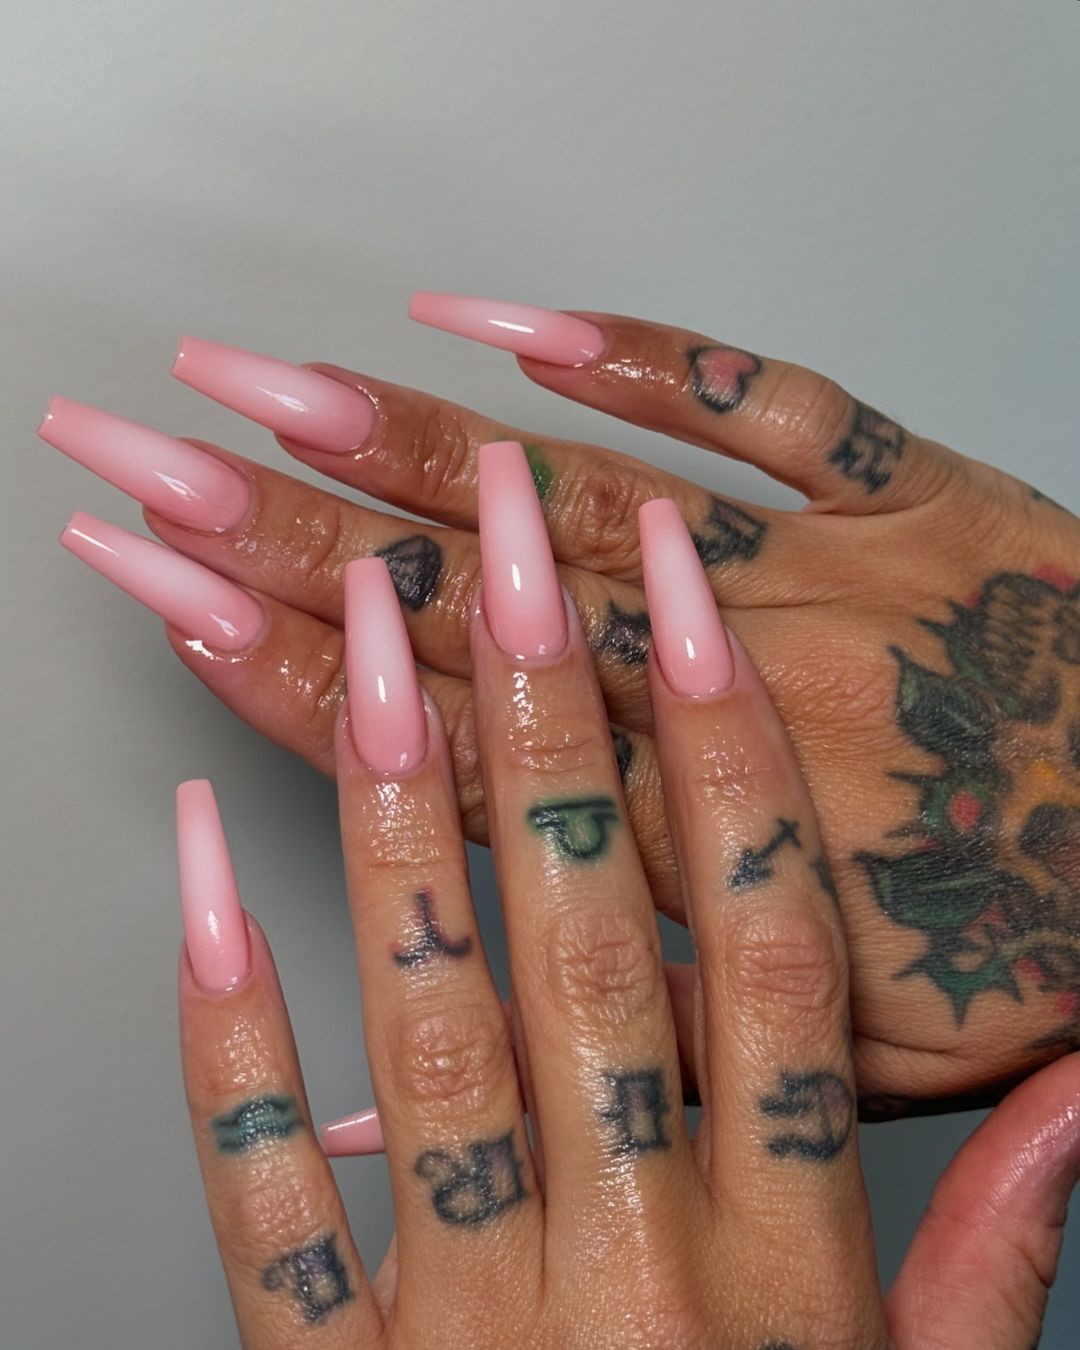
Elegant Pink Perfection
These nails showcase a soft and elegant baby pink shade, perfect for a minimalist yet chic look. The solid pink color is timeless and versatile, making it a great choice for any occasion.
-
- Baby pink nail polish: Essie Nail Polish in “Ballet Slippers”
- Top coat: Sally Hansen Insta-Dri Anti-Chip Top Coat
Instructions:
-
- Start with a base coat to protect your nails.
- Apply two coats of baby pink nail polish, allowing each coat to dry thoroughly.
- Finish with a top coat to add shine and protect the polish.
Save Pin
Vibrant Gradient with Floral Accents
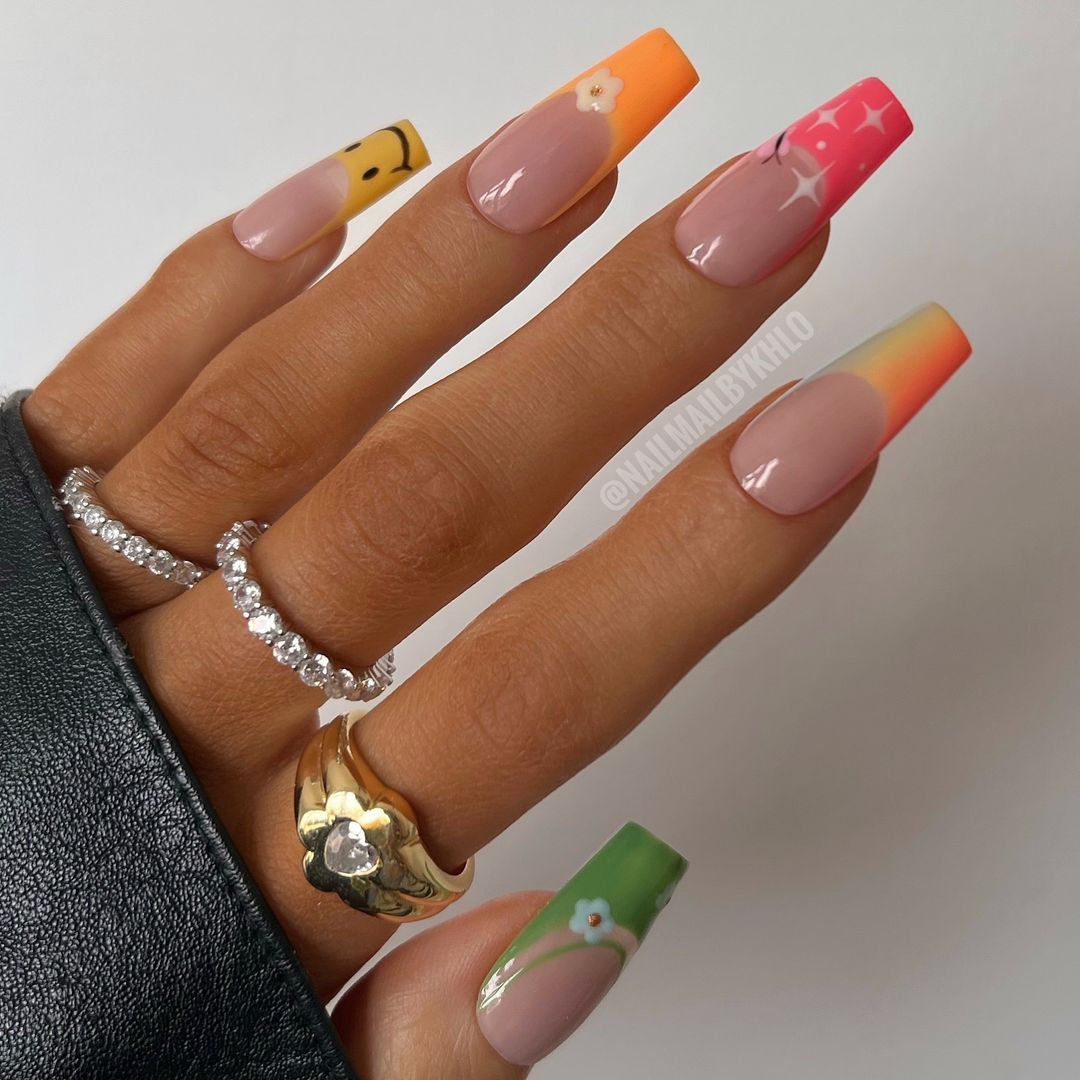
This vibrant design features a stunning gradient from teal to purple, with intricate 3D floral accents on a nude base. The bold colors and detailed flowers create a striking and playful look that’s perfect for making a statement.
-
- Teal nail polish: China Glaze Nail Lacquer in “Turned Up Turquoise”
- Purple nail polish: OPI Nail Lacquer in “Do You Lilac It?”
- Nude nail polish: Essie Nail Polish in “Topless & Barefoot”
- 3D nail art flowers: Born Pretty 3D Nail Art Stickers
- Top coat: Seche Vite Dry Fast Top Nail Coat
Instructions:
-
- Apply a base coat to your nails.
- Create the gradient effect using a makeup sponge to blend the teal and purple polishes.
- Add the 3D floral accents to each nail.
- Seal the design with a top coat to ensure durability and shine.
Bold Orange Ombre
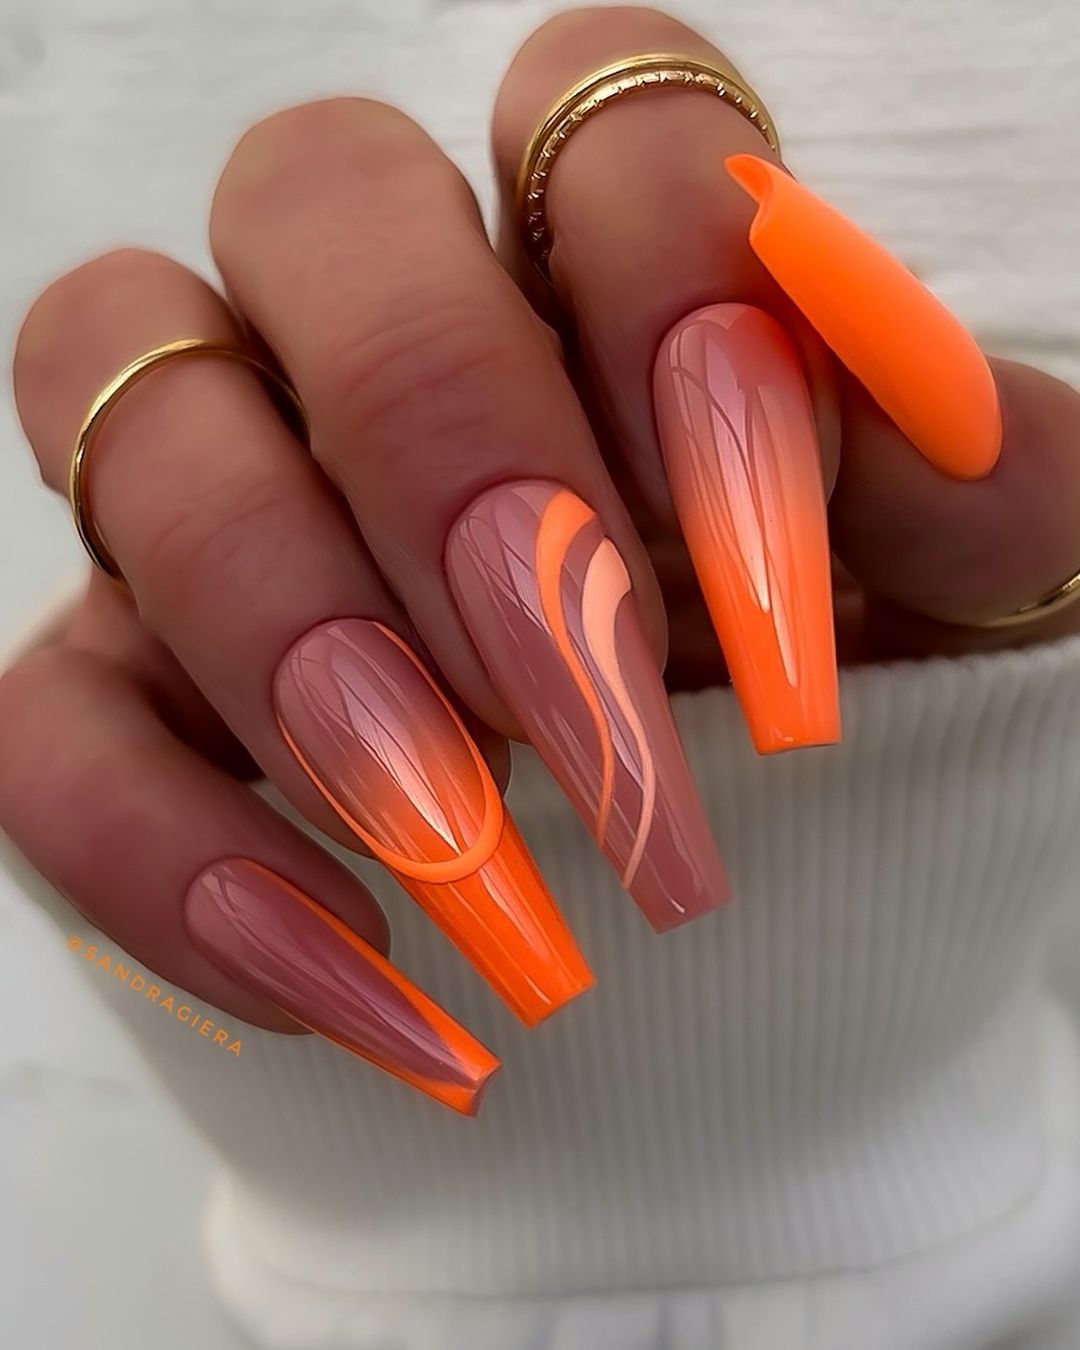
These nails feature a bold orange ombre design, transitioning from a nude base to a vibrant orange tip. The sleek and modern look is perfect for adding a pop of color to your fall wardrobe.
-
- Nude nail polish: OPI Nail Lacquer in “Samoan Sand”
- Orange nail polish: Essie Nail Polish in “Tangerine Tease”
- Top coat: Sally Hansen Miracle Gel Top Coat
Instructions:
-
- Start with a base coat to protect your nails.
- Use a makeup sponge to blend the nude and orange polishes, creating the ombre effect.
- Finish with a top coat to add shine and protect the design.
Pastel Delight
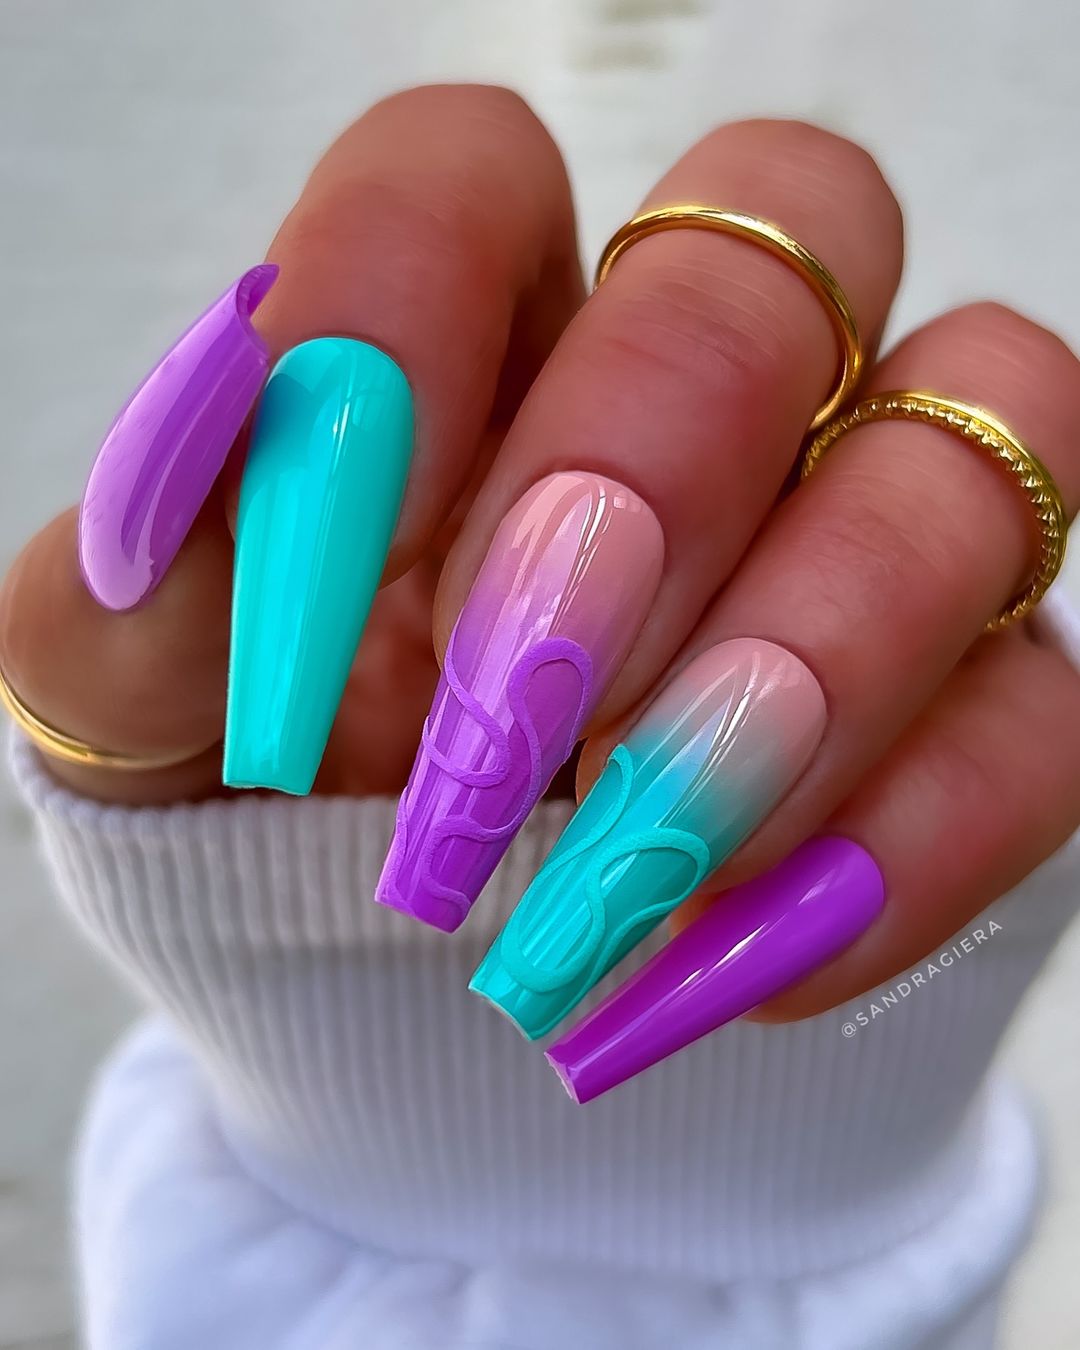
These nails feature a delightful combination of pastel colors with intricate line work. The blend of soft teal and purple with detailed patterns creates a whimsical and charming look.
-
- Teal nail polish: Essie Nail Polish in “Mint Candy Apple”
- Purple nail polish: OPI Nail Lacquer in “Lavendare to Find Courage”
- Nail art brush: Winstonia Nail Art Brushes
- Top coat: Essie Gel Setter Top Coat
Instructions:
-
- Apply a base coat to your nails.
- Paint your nails with alternating pastel colors.
- Use a nail art brush to create detailed line work on each nail.
- Seal the design with a top coat to ensure it lasts.
Neon Dreams
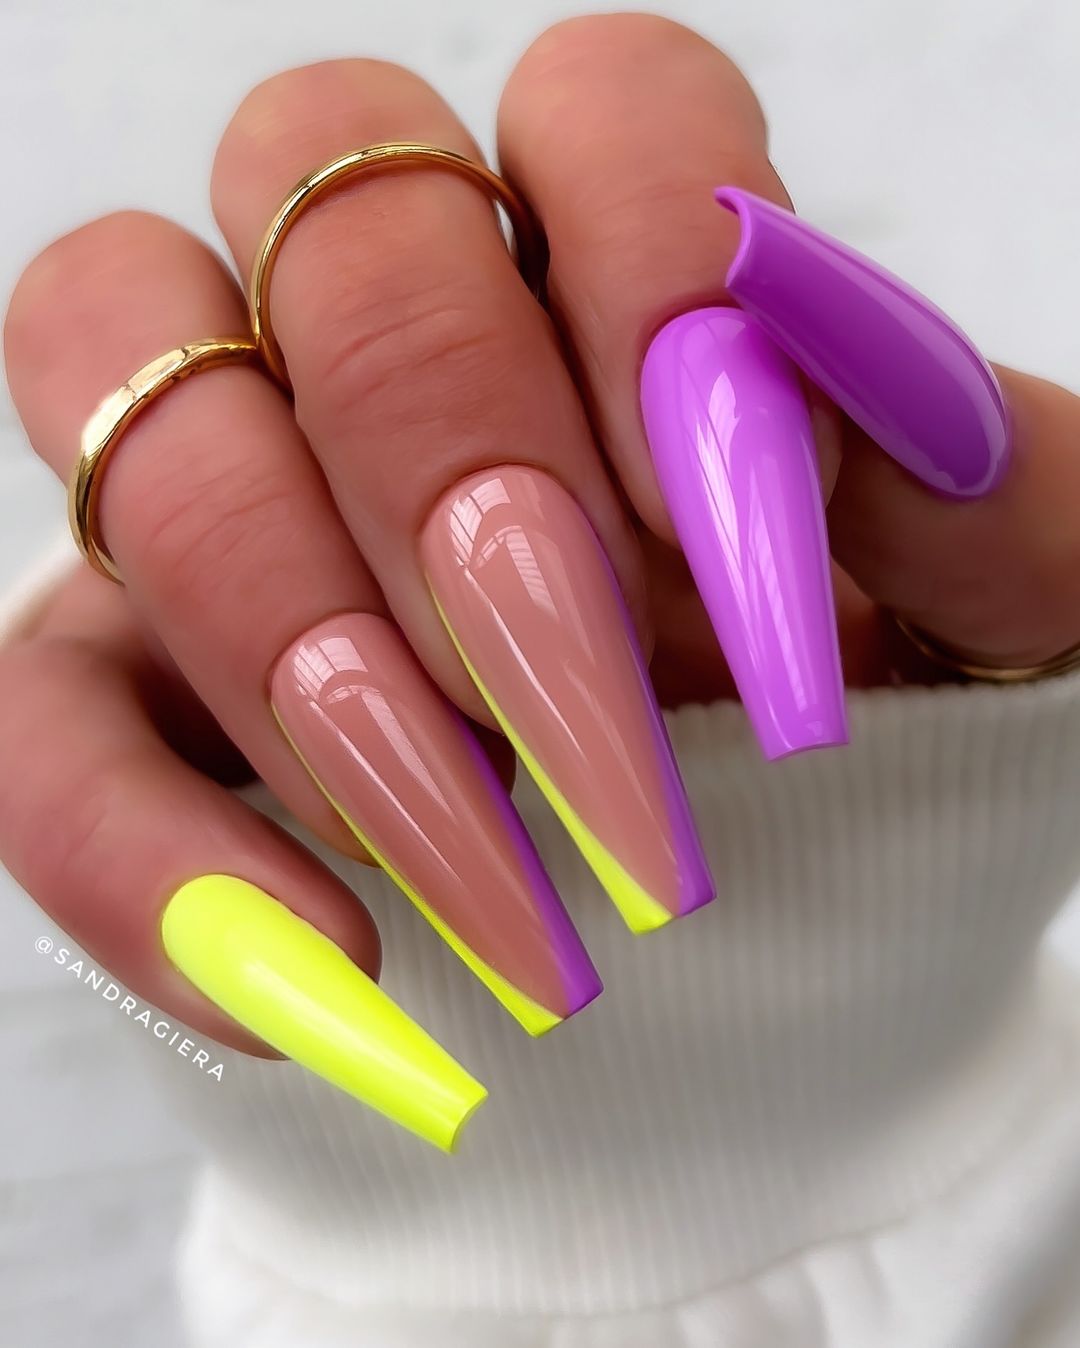
These vibrant nails feature a bold combination of neon yellow and purple. The striking colors create a fun and energetic look, perfect for making a statement. The nude base with neon accents adds a modern twist to the design.
-
- Nude nail polish: OPI Nail Lacquer in “Samoan Sand”
- Neon yellow nail polish: China Glaze Nail Lacquer in “Yellow Polka Dot Bikini”
- Purple nail polish: Essie Nail Polish in “Play Date”
- Top coat: Sally Hansen Insta-Dri Anti-Chip Top Coat
Instructions:
-
- Apply a base coat to your nails.
- Paint your nails with the nude polish and let it dry.
- Use a fine brush to create neon yellow and purple accents on the tips.
- Seal the design with a top coat to add shine and protect the polish.
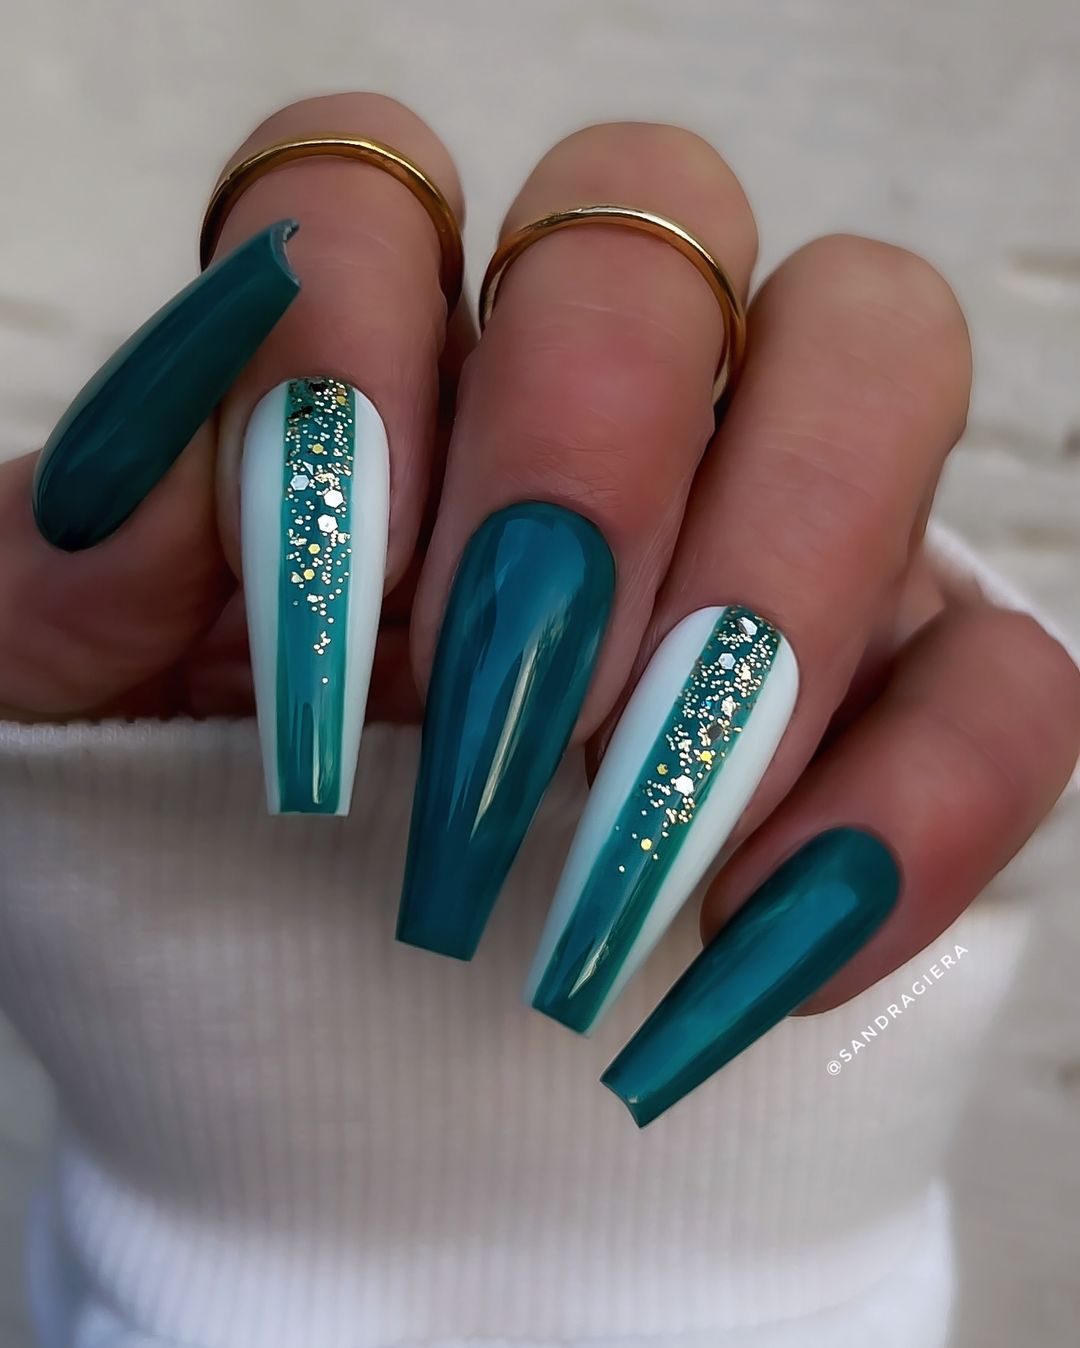
Teal and Glitter Glam
This elegant design features a rich teal color paired with white and a touch of glitter. The vertical glitter stripe adds a touch of glamour, making these nails perfect for any festive occasion.
-
- Teal nail polish: Essie Nail Polish in “Go Overboard”
- White nail polish: OPI Nail Lacquer in “Alpine Snow”
- Gold glitter polish: Zoya Nail Polish in “Astra”
- Top coat: Seche Vite Dry Fast Top Nail Coat
Instructions:
-
- Start with a base coat to protect your nails.
- Apply teal polish on the nails, leaving one nail white for the accent.
- Use a fine brush to apply the glitter stripe vertically on the white nail.
- Finish with a top coat to ensure the design lasts.
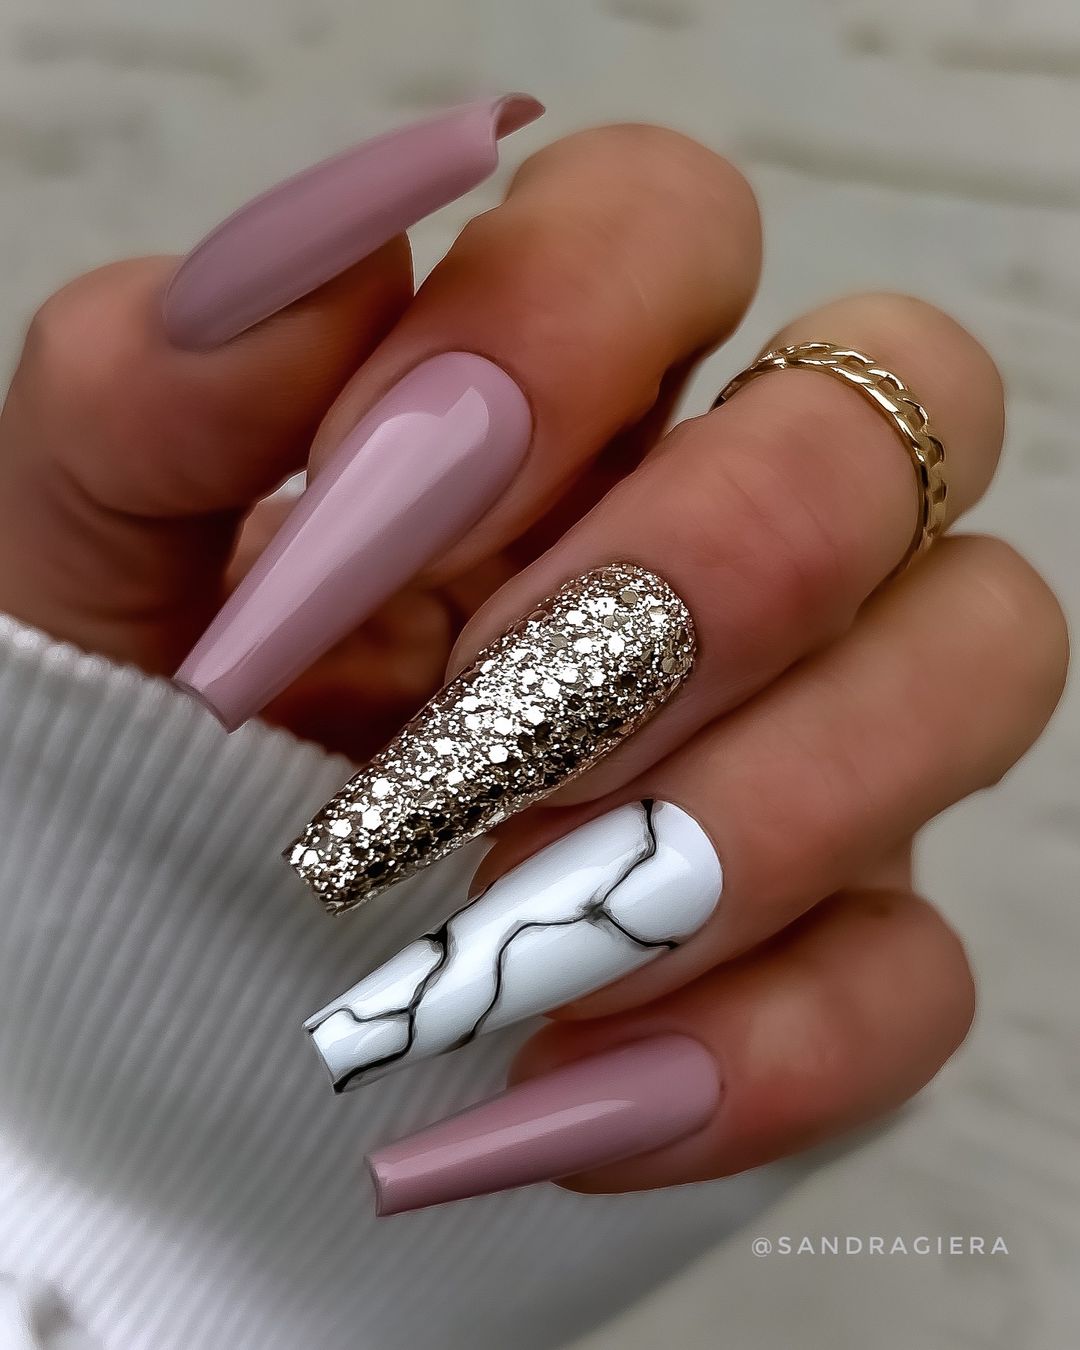
Mauve and Marble Elegance
This sophisticated design combines mauve, glitter, and marble accents. The combination of textures and patterns creates a chic and modern look that’s perfect for any occasion.
-
- Mauve nail polish: OPI Nail Lacquer in “Tickle My France-y”
- White nail polish: Essie Nail Polish in “Blanc”
- Black nail art pen: Sally Hansen I Heart Nail Art Pen
- Silver glitter polish: Zoya Nail Polish in “Cosmo”
- Top coat: Essie Gel Setter Top Coat
Instructions:
-
- Apply a base coat to your nails.
- Paint alternating nails with mauve and white polish.
- Use the nail art pen to create the marble effect on the white nails.
- Apply glitter polish to one accent nail.
- Seal the design with a top coat for durability and shine.
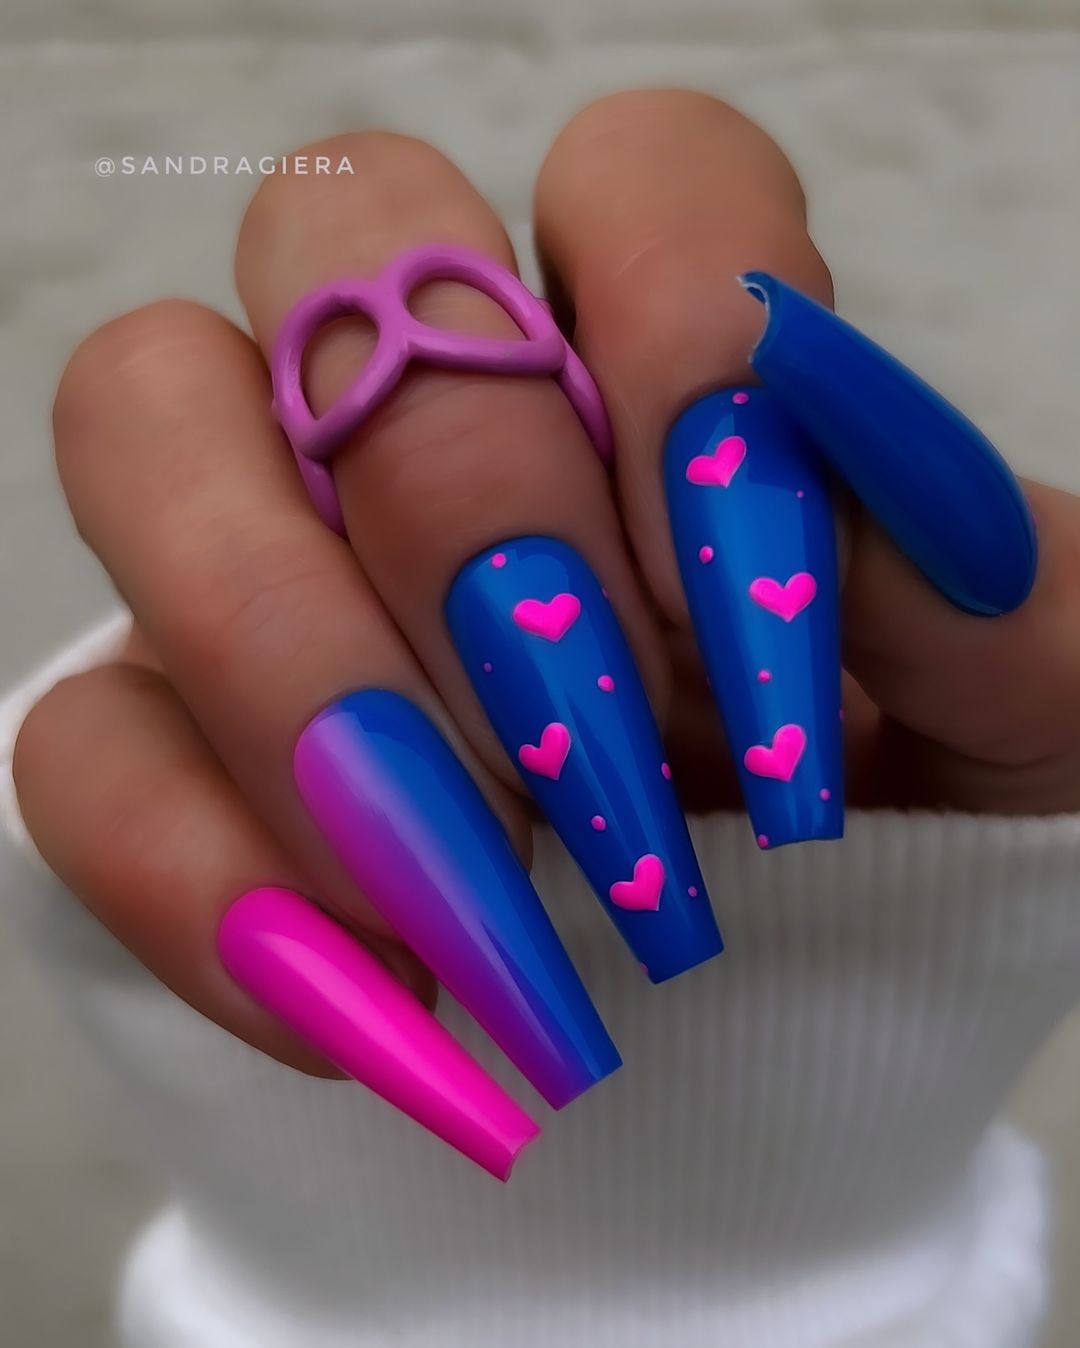
Blue Hearts and Neon Pink
These nails feature a playful combination of blue and neon pink with cute heart accents. The bold colors and fun design make these nails perfect for someone who loves to stand out.
-
- Blue nail polish: Essie Nail Polish in “Butler Please”
- Neon pink nail polish: China Glaze Nail Lacquer in “Flip Flop Fantasy”
- Pink nail art pen: Sally Hansen I Heart Nail Art Pen
- Top coat: Seche Vite Dry Fast Top Nail Coat
Instructions:
-
- Start with a base coat to protect your nails.
- Paint your nails with blue and pink polish in alternating patterns.
- Use the nail art pen to draw small pink hearts on the blue nails.
- Finish with a top coat to add shine and protect the design.
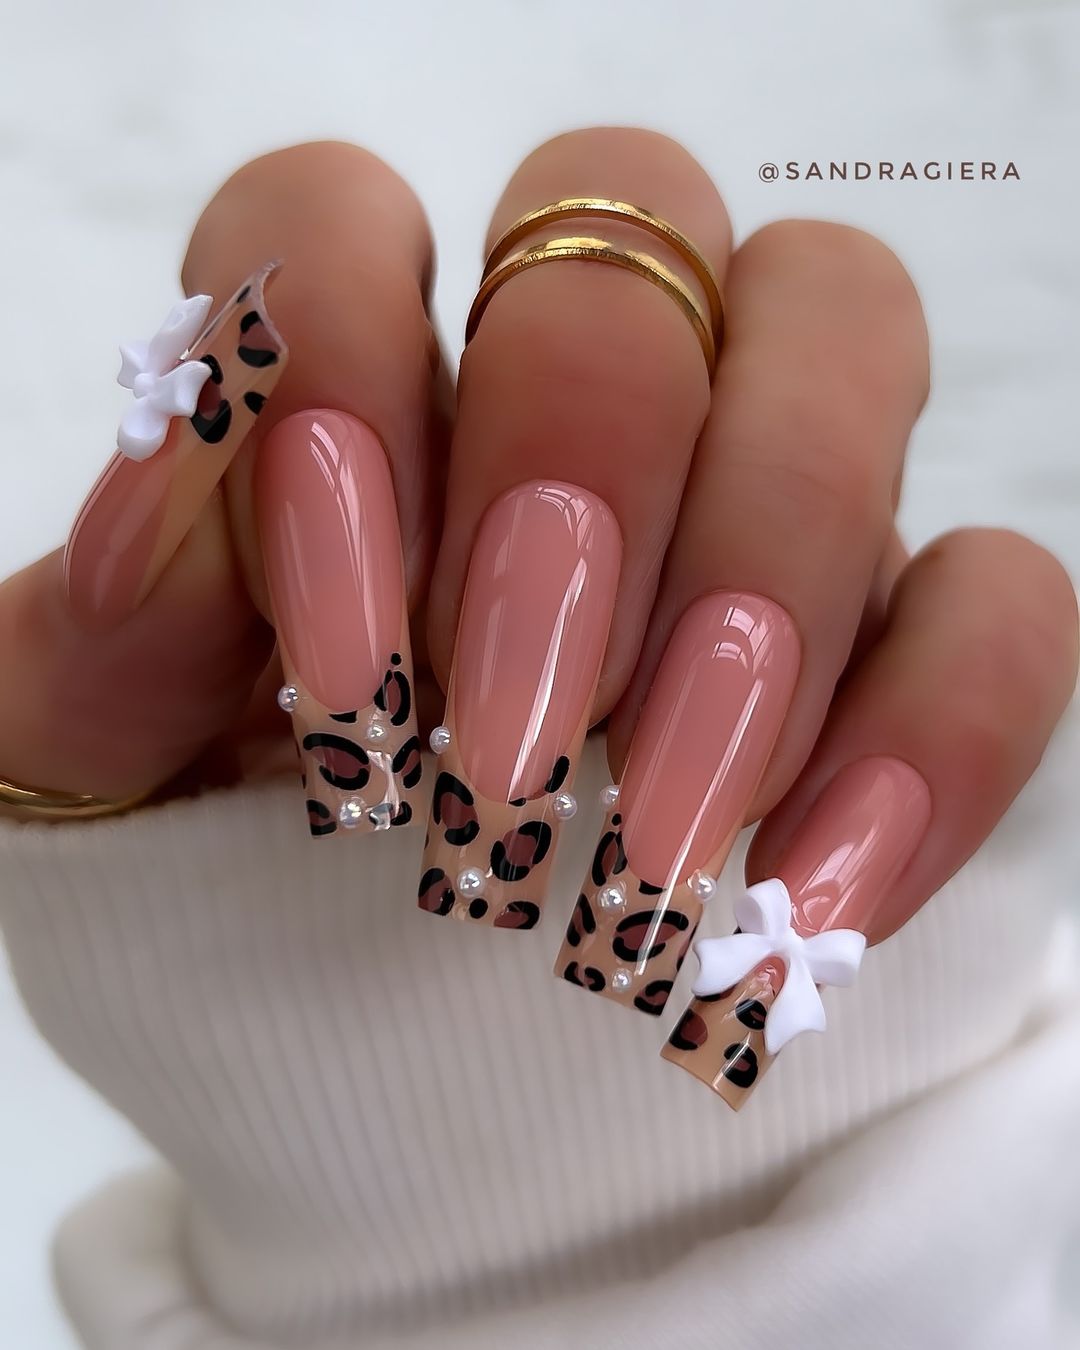
Leopard Print and Bows
This design features a nude base with chic leopard print tips and 3D white bows. The combination of animal print and delicate bows creates a stylish and sophisticated look.
-
- Nude nail polish: OPI Nail Lacquer in “Dulce de Leche”
- Black nail polish: Essie Nail Polish in “Licorice”
- White 3D bows: Born Pretty 3D Nail Art Bows
- Top coat: Sally Hansen Insta-Dri Anti-Chip Top Coat
Instructions:
-
- Apply a base coat to your nails.
- Paint your nails with nude polish and let it dry.
- Use black polish to create leopard print tips.
- Attach the 3D bows using nail glue.
- Seal the design with a top coat for a glossy finish.
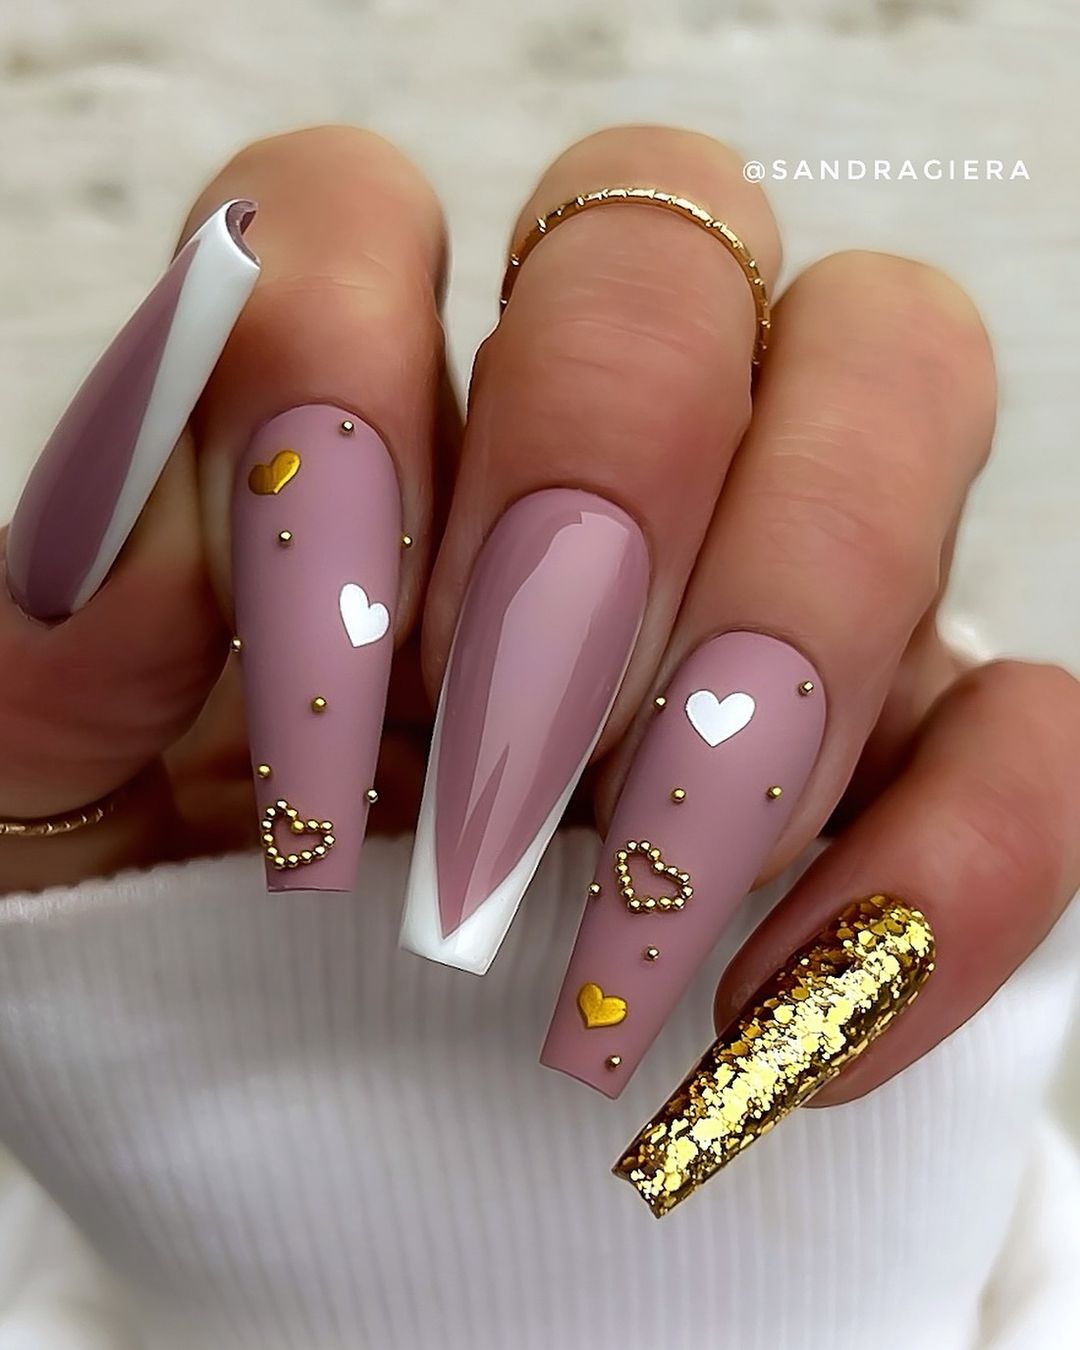
Pink and Gold Hearts
These nails combine a soft pink base with gold heart accents and a touch of white. The elegant color palette and delicate details make this design perfect for those who love a refined and classy look.
-
- Pink nail polish: Essie Nail Polish in “Ballet Slippers”
- Gold nail polish: Zoya Nail Polish in “Ziv”
- White nail polish: OPI Nail Lacquer in “Alpine Snow”
- Gold heart decals: Born Pretty Store Gold Nail Art Stickers
- Top coat: Essie Gel Setter Top Coat
Instructions:
-
- Start with a base coat to protect your nails.
- Apply pink polish to your nails and let it dry.
- Use white polish to create a French tip on one nail.
- Apply gold heart decals and add gold polish to one accent nail.
- Finish with a top coat to add shine and protect the design.
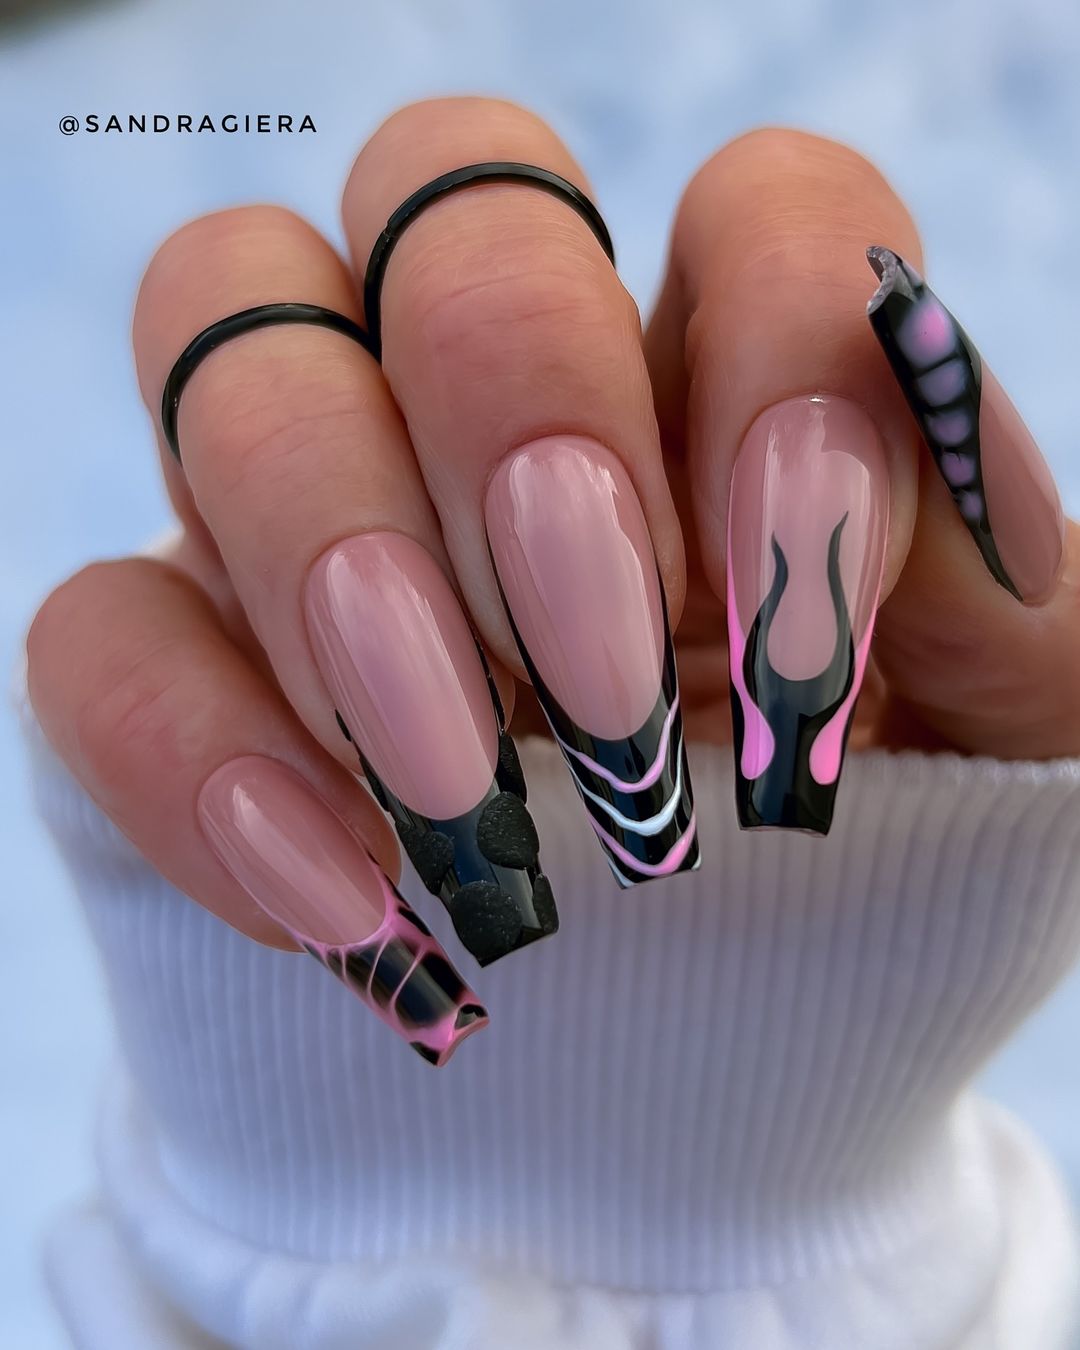
Black and Pink Flames
These nails feature a sleek and edgy design with black and pink flames over a nude base. The combination of the classic flame motif with modern colors makes this manicure stand out.
-
- Nude nail polish: OPI Nail Lacquer in “Samoan Sand”
- Black nail polish: Essie Nail Polish in “Licorice”
- Pink nail polish: China Glaze Nail Lacquer in “Pink Voltage”
- Thin nail art brush: Winstonia Nail Art Brushes
- Top coat: Sally Hansen Insta-Dri Anti-Chip Top Coat
Instructions:
-
- Apply a base coat to your nails.
- Paint your nails with the nude polish and let it dry.
- Use the thin nail art brush to paint black and pink flames starting from the tips.
- Seal the design with a top coat to add shine and protect the artwork.
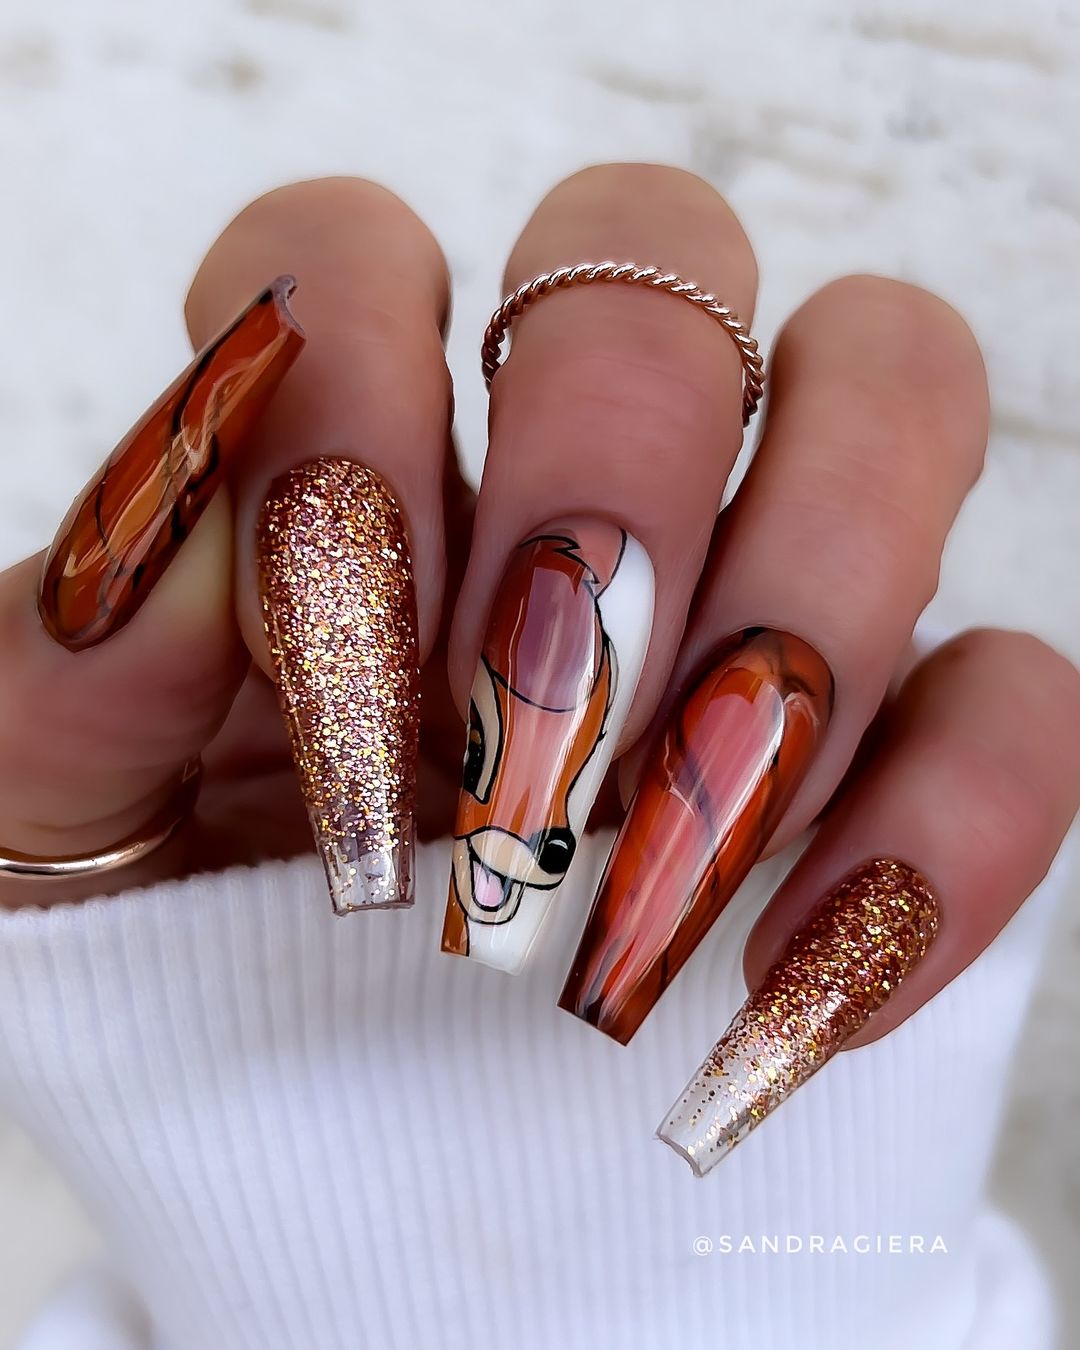
Autumn Glitter and Marbling
This design brings together warm autumnal colors with a touch of glitter and artistic marbling. The golden glitter and marbled accents create a cozy and festive look for fall.
-
- Brown nail polish: Essie Nail Polish in “Cliff Hanger”
- White nail polish: OPI Nail Lacquer in “Alpine Snow”
- Gold glitter polish: Zoya Nail Polish in “Astra”
- Nail art brush: Winstonia Nail Art Brushes
- Top coat: Seche Vite Dry Fast Top Nail Coat
Instructions:
-
- Apply a base coat to your nails.
- Use brown polish for the base color.
- Create marbling effects with the white polish using a nail art brush.
- Apply gold glitter polish to accent nails.
- Finish with a top coat to seal and protect the design.
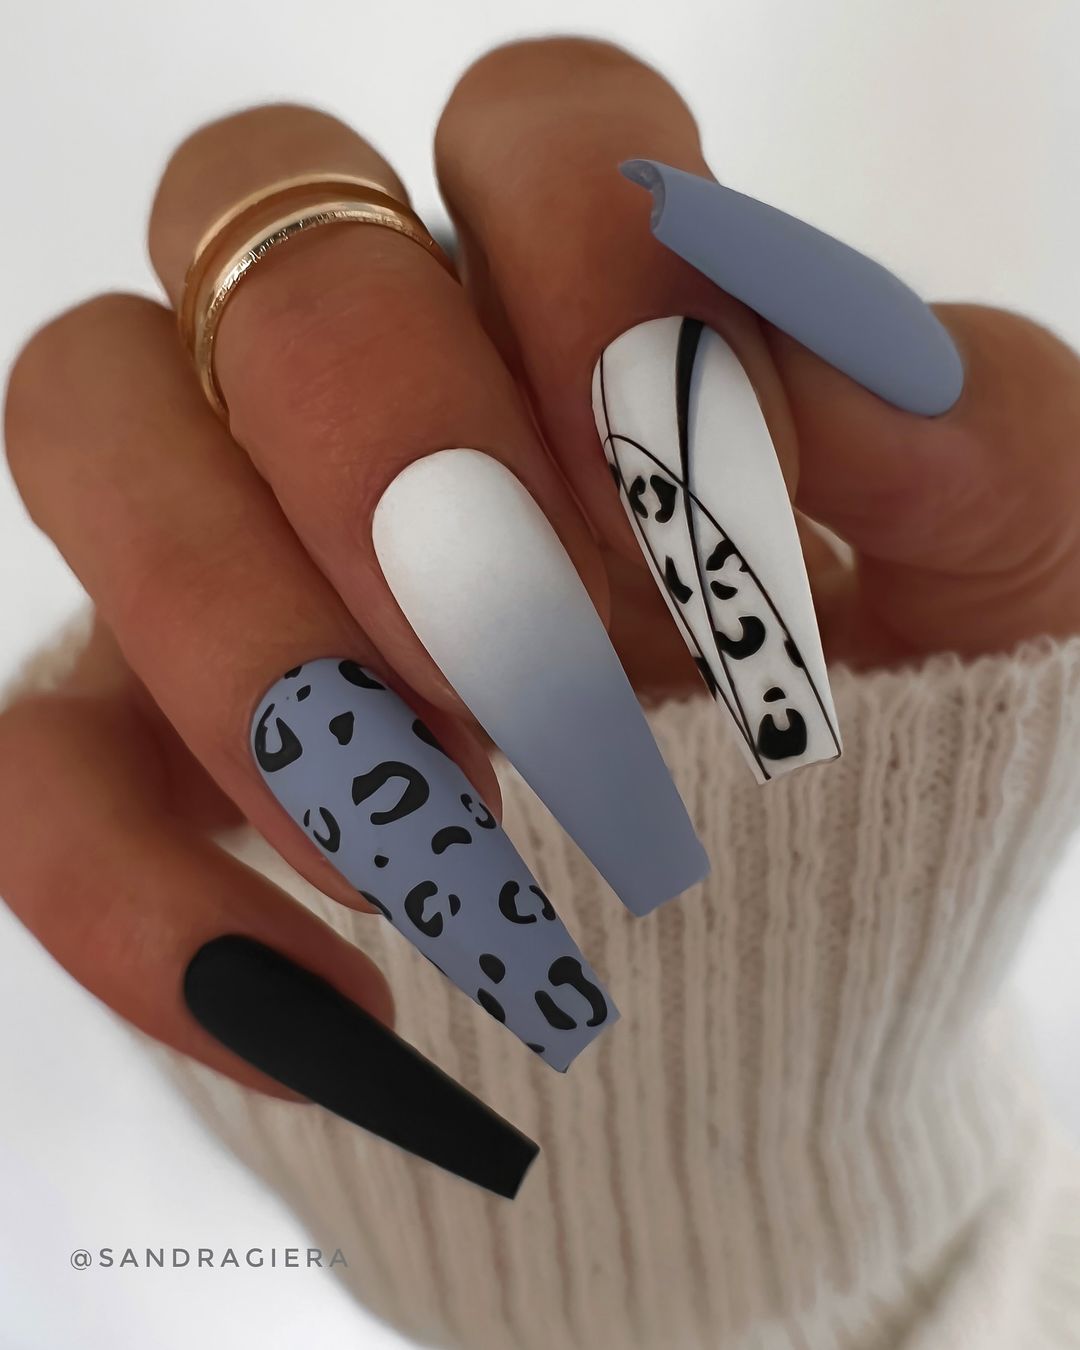
Monochrome Leopard and Ombre
This chic design combines a monochrome leopard pattern with a stylish ombre effect. The matte finish adds a modern touch to this already sophisticated look.
-
- White nail polish: OPI Nail Lacquer in “Alpine Snow”
- Grey nail polish: Essie Nail Polish in “Chinchilly”
- Black nail polish: Essie Nail Polish in “Licorice”
- Matte top coat: OPI Matte Top Coat
- Nail art brush: Winstonia Nail Art Brushes
Instructions:
-
- Apply a base coat to your nails.
- Create an ombre effect using white and grey polish.
- Use a nail art brush to add leopard spots with black polish.
- Seal with a matte top coat for a modern finish.
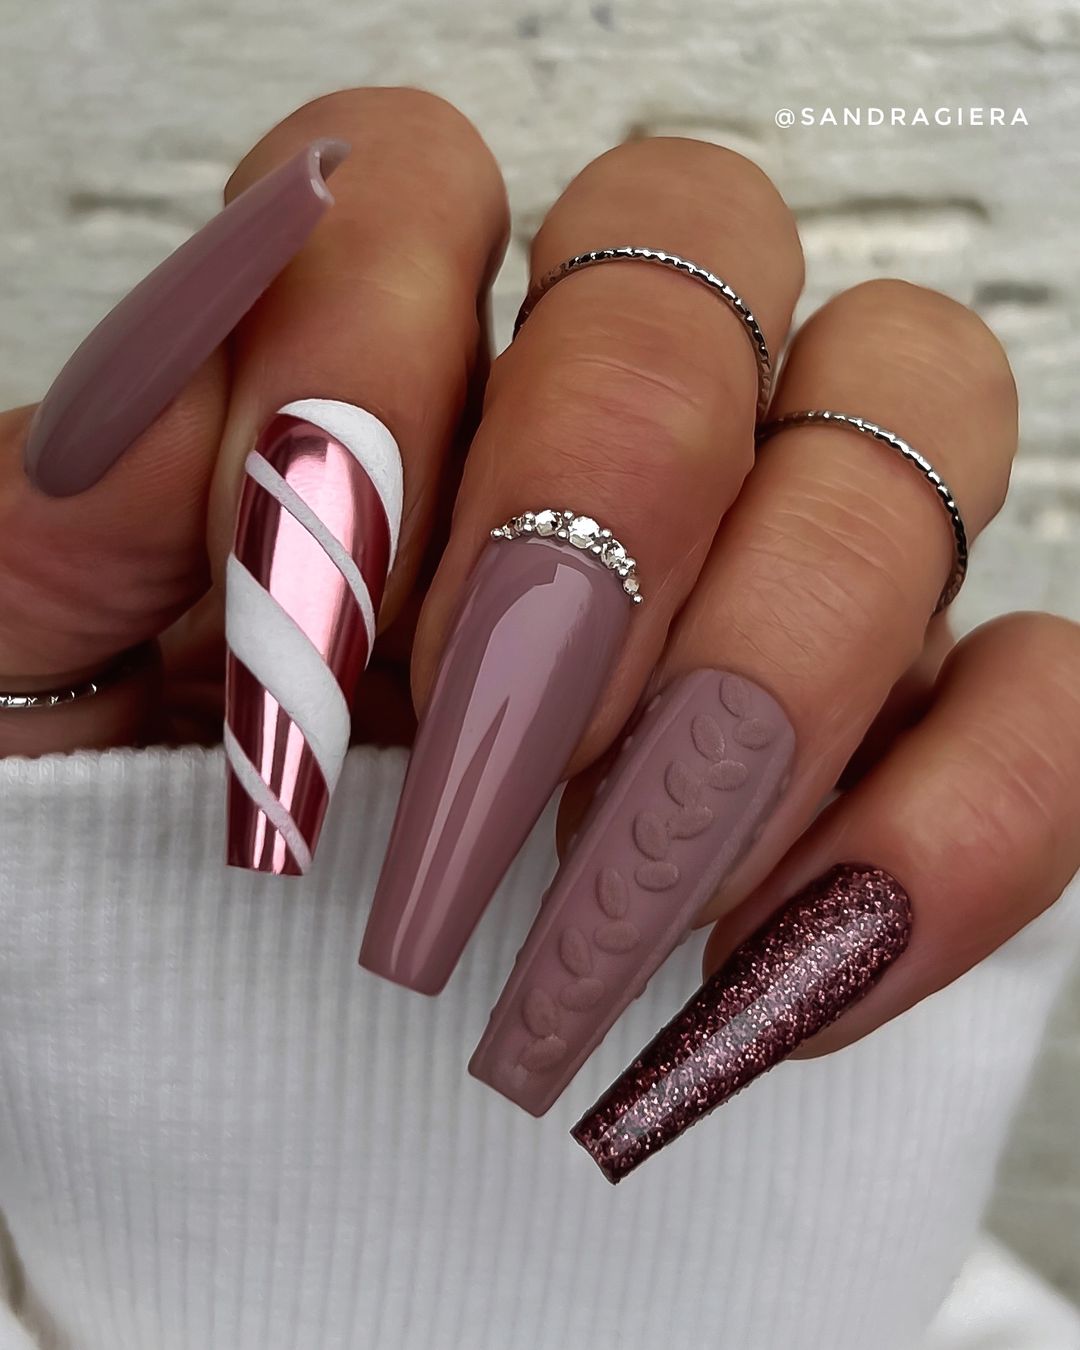
Candy Cane Stripes
These nails feature a delightful combination of candy cane stripes, matte mauve, and glitter. The festive design is perfect for the holiday season, bringing a playful and joyful vibe.
:
-
- Mauve nail polish: OPI Nail Lacquer in “Tickle My France-y”
- White nail polish: OPI Nail Lacquer in “Alpine Snow”
- Rose gold foil: Modelones Nail Art Foil Flakes
- Matte top coat: OPI Matte Top Coat
- Top coat: Essie Gel Setter Top Coat
Instructions:
-
- Apply a base coat to your nails.
- Paint your nails with mauve polish.
- Use white polish and a nail art brush to create candy cane stripes.
- Apply rose gold foil to accent nails.
- Seal with a matte top coat for the matte nails and a regular top coat for the foil nails.
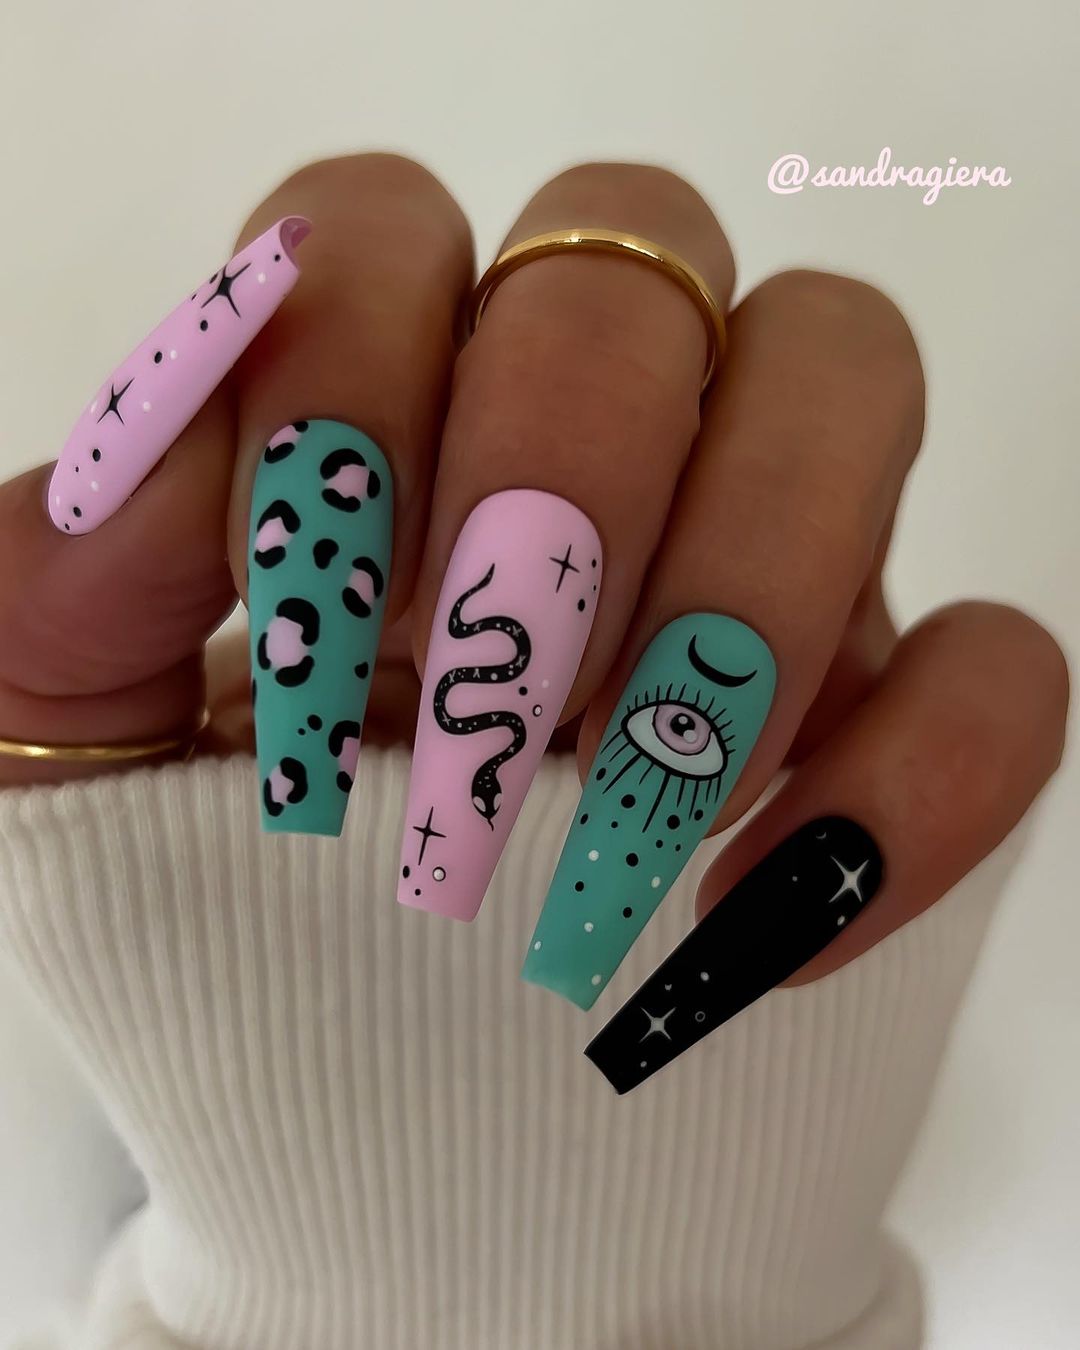
Pastel Pop Art
This fun and quirky design features a mix of pastel colors with bold black accents. The designs include leopard spots, a snake, and an eye, creating a unique and artistic manicure.
-
- Pastel pink nail polish: Essie Nail Polish in “Fiji”
- Pastel green nail polish: Essie Nail Polish in “Mint Candy Apple”
- Black nail polish: Essie Nail Polish in “Licorice”
- Nail art brush: Winstonia Nail Art Brushes
- Matte top coat: OPI Matte Top Coat
Instructions:
-
- Apply a base coat to your nails.
- Paint your nails with alternating pastel colors.
- Use a nail art brush to create the black designs.
- Seal with a matte top coat for a modern finish.
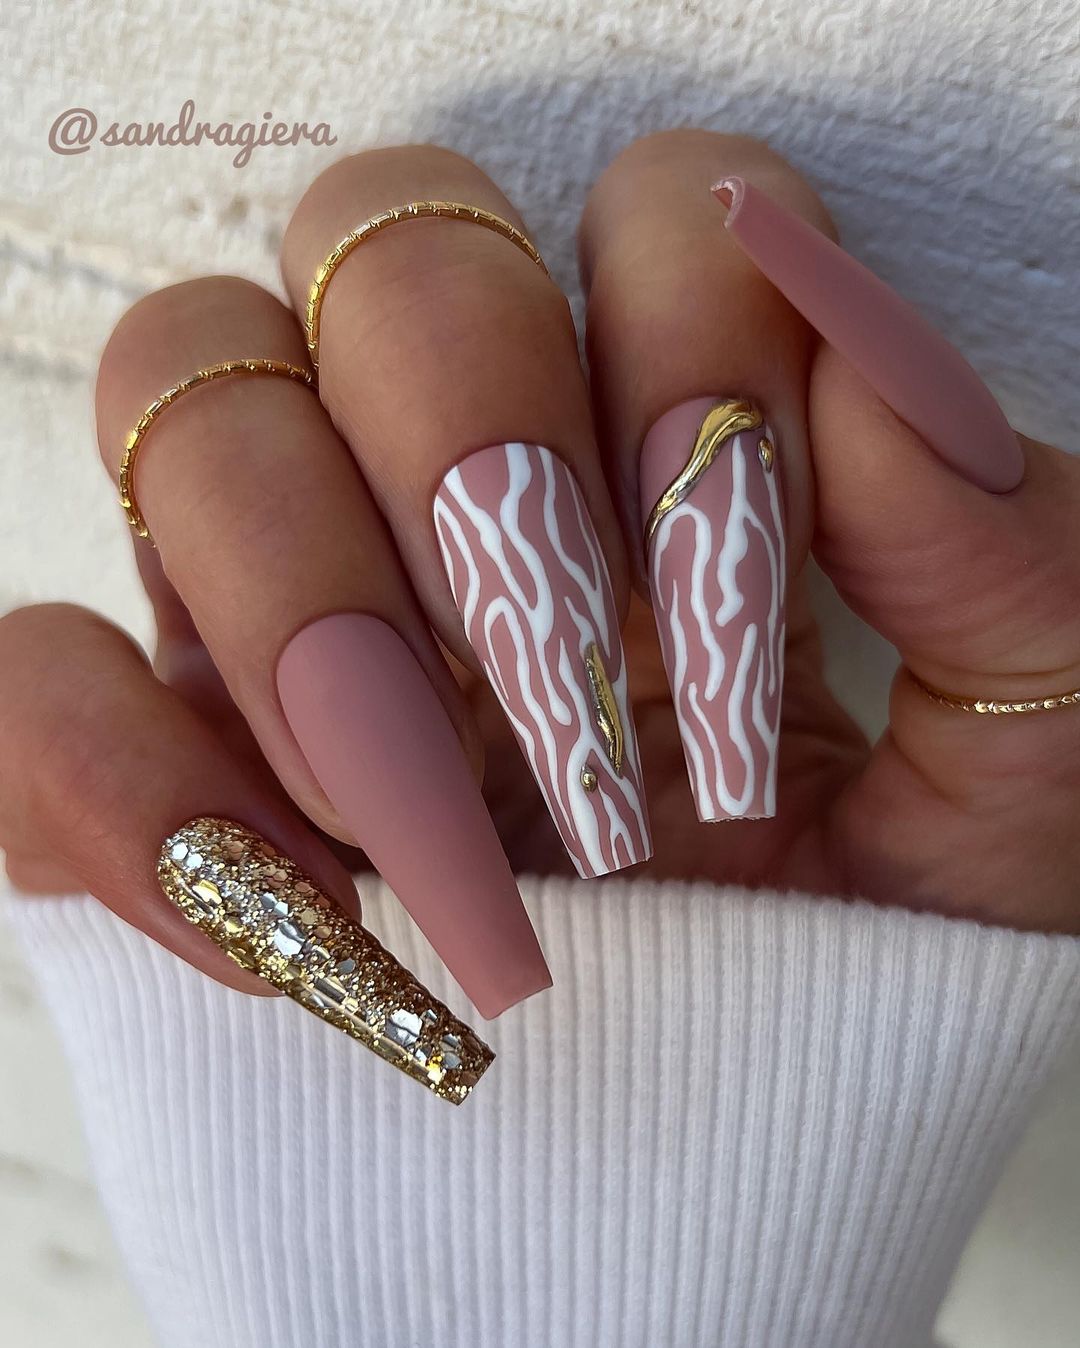
Neutral Gold Glam
These nails combine a soft mauve base with gold foil and intricate white patterns. The blend of textures and colors creates an elegant and luxurious look, perfect for special occasions.
-
- Mauve nail polish: Essie Nail Polish in “Mademoiselle”
- White nail polish: OPI Nail Lacquer in “Alpine Snow”
- Gold foil: Modelones Nail Art Foil Flakes
- Top coat: Seche Vite Dry Fast Top Nail Coat
Instructions:
-
- Apply a base coat to your nails.
- Paint your nails with mauve polish.
- Use a nail art brush to add white patterns.
- Apply gold foil to accent nails.
- Seal with a top coat for shine and protection.
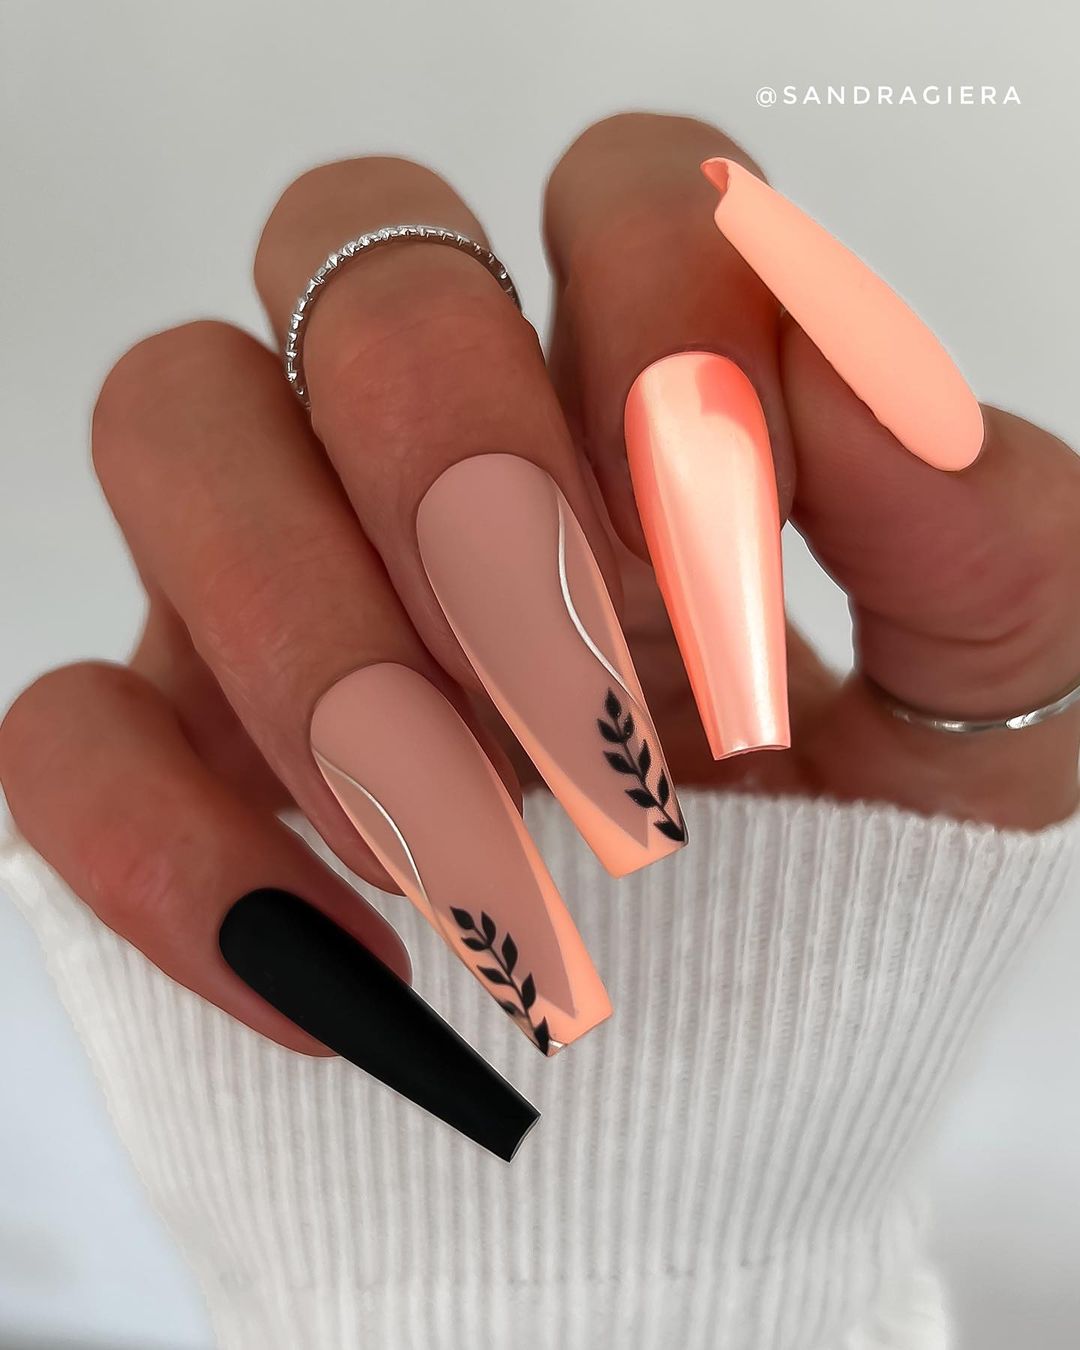
Peach and Black Elegance
This design features a chic combination of peach, black, and metallic orange. The sleek and modern look is perfect for those who love understated yet sophisticated nail art.
-
- Peach nail polish: Essie Nail Polish in “Peach Side Babe”
- Black nail polish: Essie Nail Polish in “Licorice”
- Metallic orange polish: China Glaze Nail Lacquer in “Orange Knockout”
- Nail art brush: Winstonia Nail Art Brushes
- Top coat: Essie Gel Setter Top Coat
Instructions:
-
- Apply a base coat to your nails.
- Paint your nails with peach polish.
- Use a nail art brush to add black and metallic orange details.
- Seal with a top coat for a glossy finish.
FAQ
Q: How do I keep my fall coffin nails looking fresh for longer? A: Regularly apply a top coat to prevent chipping and extend the life of your manicure. Additionally, avoid using your nails as tools and wear gloves when doing household chores.
Q: Can I achieve these designs on short nails? A: Absolutely! While coffin nails are typically longer, these designs can be adapted for shorter nails. Just scale down the embellishments and patterns to fit your nail length.
Q: What are the best colors for fall coffin nails? A: Fall is all about rich, warm colors like burgundy, mustard yellow, forest green, and burnt orange. However, don’t be afraid to experiment with cooler shades like navy blue and metallics for a unique twist.
Save Pin
