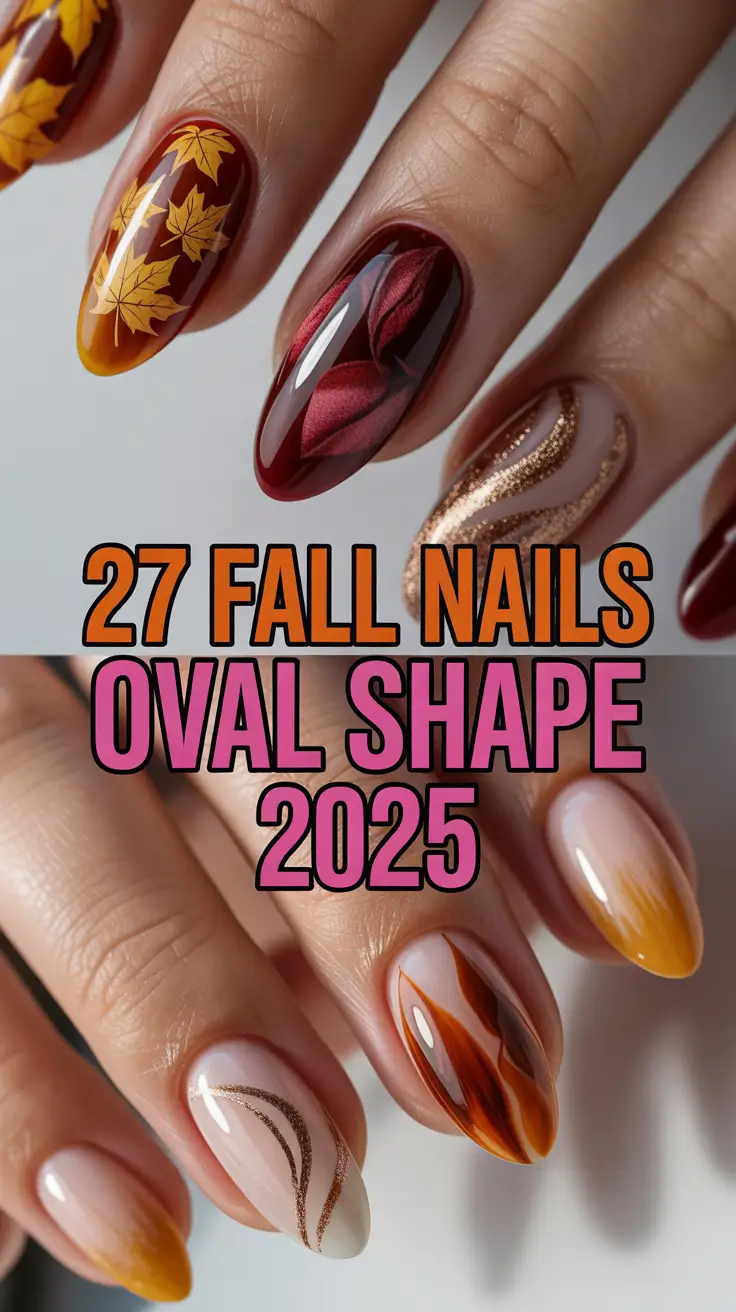
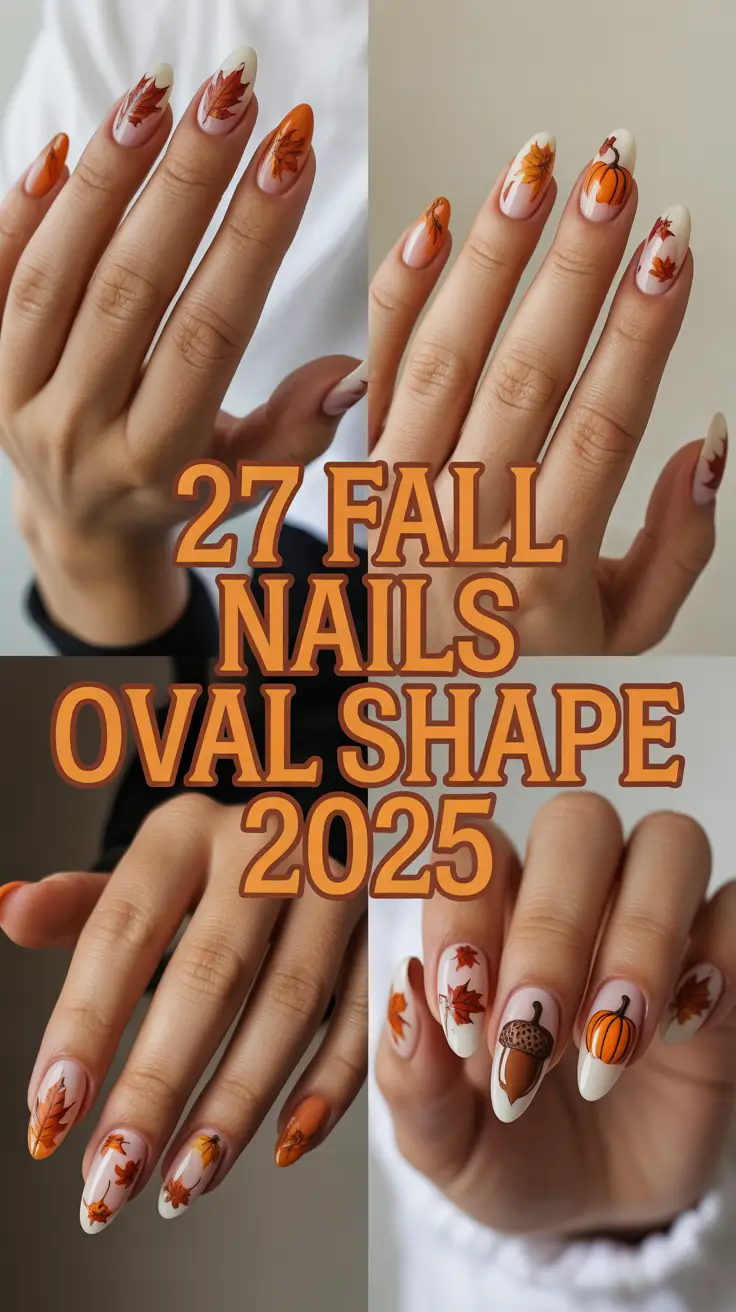
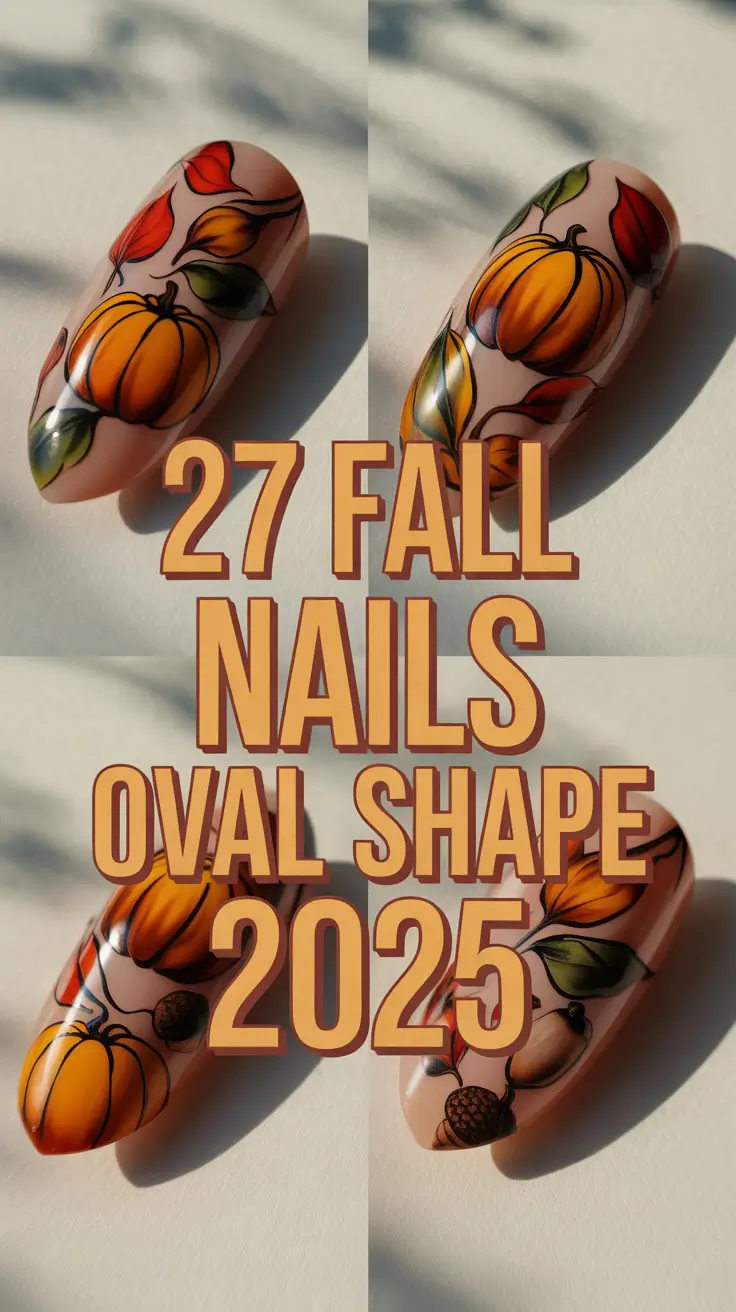
What would you do with nails that could tell you chic before you could say hello? Suppose fall was not a season–but a mood your hands could touch? This year, the oval-shaped nails are stealing by stealth, and fall 2025 is all about that clean curve, muted drama and a little bit of detail to turn heads. Whether you’re a minimal queen or the kind who zooms in on nail inspo boards at 2am (guilty), there’s a look here waiting to match your sweater weather soul.
Deep French tips to golden mustard statements and matte forest vibes, we are ready to jump in. You will get nail designs that are wearable and memorable at the same time, not spicy but new.
Chic Contrast in Deep Cocoa
The high-gloss espresso tips against creamy nude bases are impossibly cool. This minimalist French design isn’t loud, but it doesn’t have to be—it’s confident. The deep brown is made soft by the oval shape, which makes it ideal both in a meeting room and during a wine party. The intricate negative space cuticle detailing gives it a mature touch that is fall ready. You could call it simple—but it’s anything but basic.
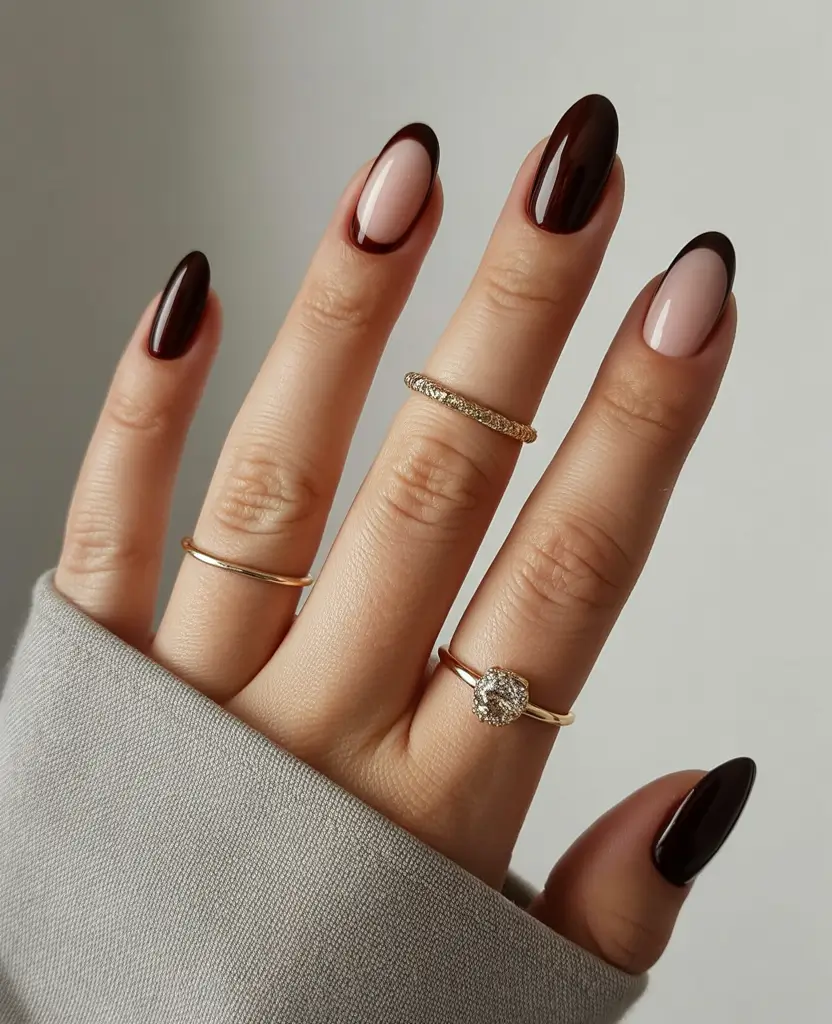
In a bid to recreate this effect, I am inclined towards OPI Lincoln Park After Dark to achieve that shine that is brown-black and Essies Ballet Slippers as a base. Then how to keep the French line crisp and clean: the magic is a super-fine detail brush. Top coat, such as Seche Vite, maintains it salon level shiny and days to come.
This design does not require a steady hand, but a steady plan. I always start with the nude base and then nail tape the French shape then brush the dark tip on it. According to celebrity nail artist Tom Bachik, the best way to fill in French tips is with short, upward motions to prevent streakiness, and it indeed does the trick.
I love this manicure for transitional weather. It is kind of a trench coat but on your hands, classic, structured, and never out of place. When I went to brunch last week with this on, my friend asked, Is that gel, or normal polish? Which is code for: you nailed it.
Golden Mustard With a Touch of Whimsy
This look tastes like pumpkin spice. This mustard manicure is bright but earthy-like an October afternoon when the leaves have not quite yet lost their green. The botanical effect of the white and gold leafy embellishments are added without tipping into the realm of crafty. The small oval design is casual, cute, and infinitely wearable.
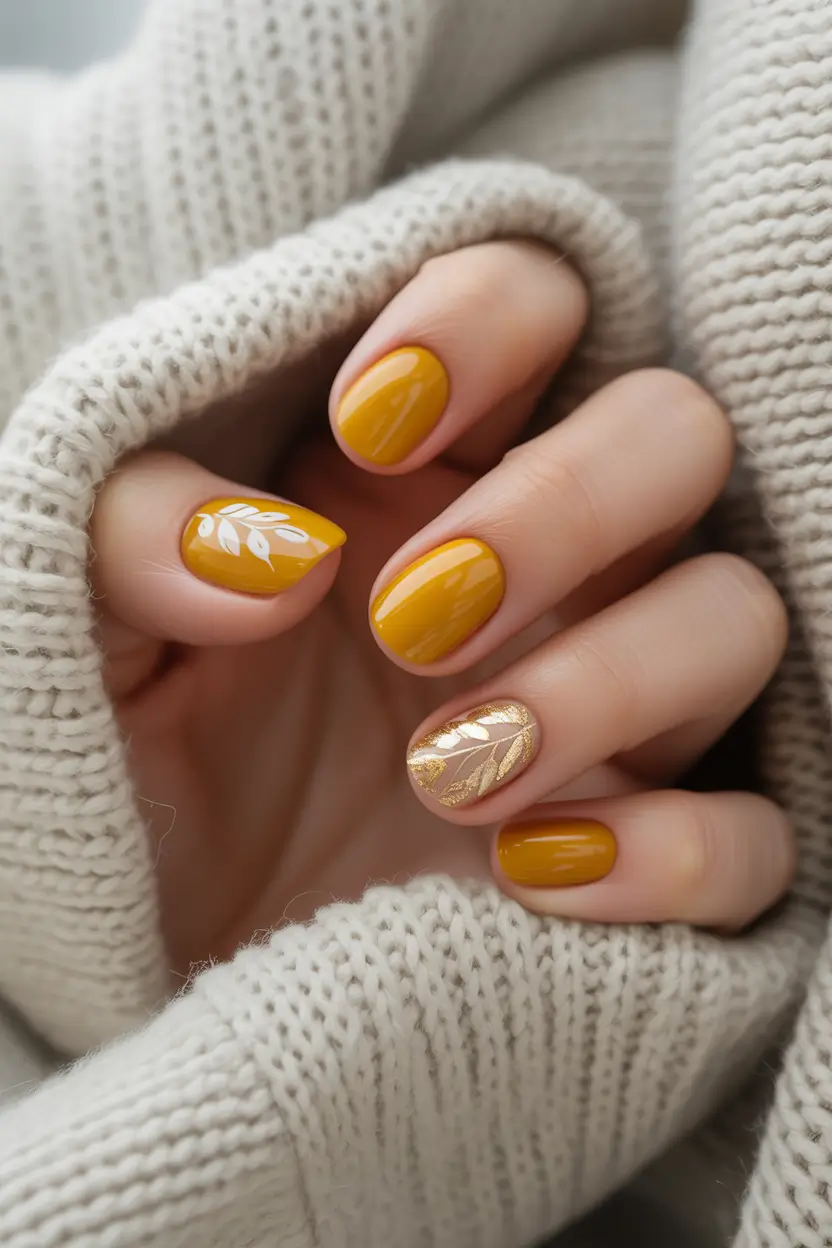
I recommend Olive & June Yes Please or Zoya Marigold, both of which have outstanding coverage after just two coats of polish, in order to achieve that lush yellow color. I just drew on the white leaf with a fine brush, but nail stickers will also do in a pinch. On the metallic accent nail, Orly Rage in rose gold is the same effect, but without a gel lamp.
This style is surprisingly easy to DIY. Simply paint a base and allow it to dry, stick on leaves or using a detail brush hand-paint the leaves. Finish with a matte/glossy finish depending on your vibe. I would go glossy always, because I like the warmth, although matte would make it look more editorial.
It is my favorite outfit when I am looking something light but not too feminine. It feels earthy. Playful. Like if your favorite knit sweater could smile.
Moody Autumn Blooms
It’s giving cozy-cabin-in-the-woods, but make it chic. The design combines the matte chocolate brown with muted green and floral details and the outcome is a moody masterpiece. The “autumn bloom” letter detail? Pure poetry. The oval form is soft and wearable, but the combination of textures provides that little bit of surprise.
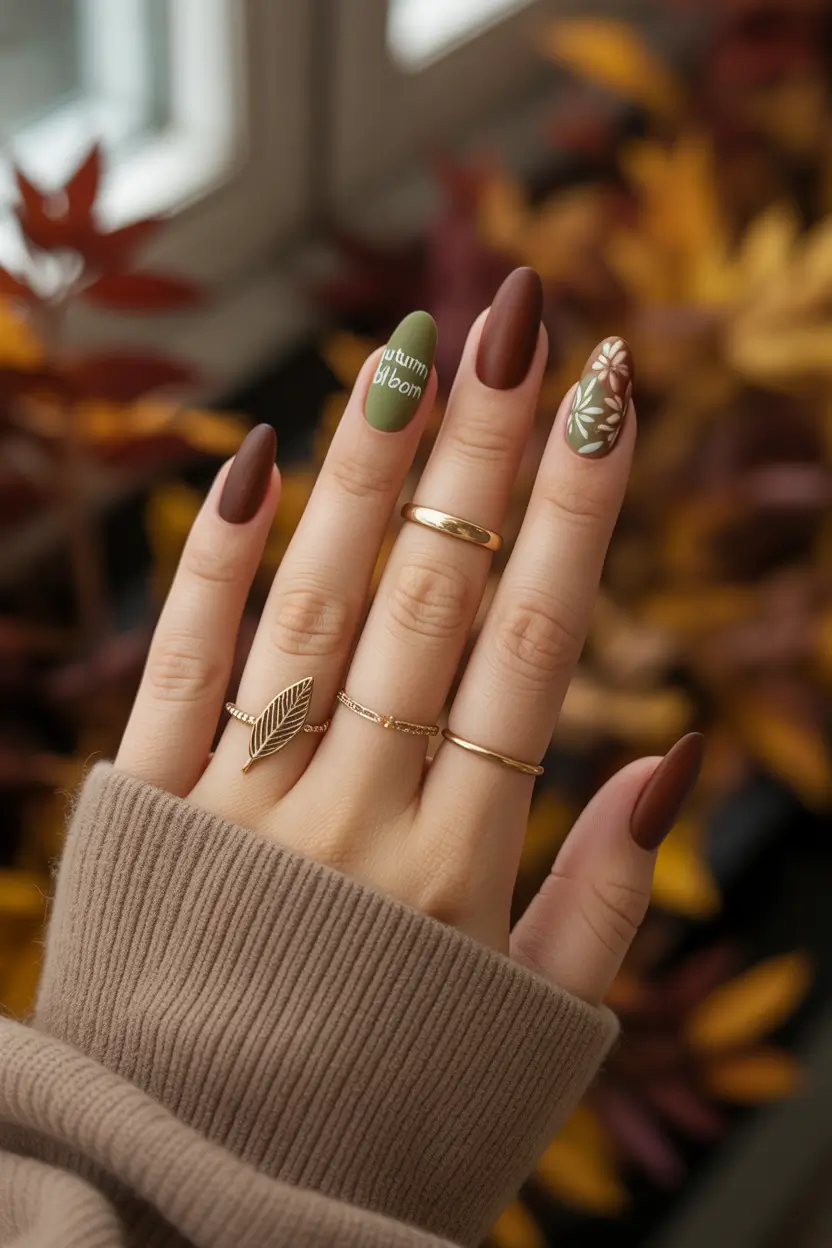
I recreated it with Essie Wicked (that near-black brown) and Sundays Studio No. 29 (that sage green). They were hand-painted with a micro brush and white acrylic paint, but in the interest of full disclosure, floral decals on Etsy will do the trick, too. Don t forget a matte top coat so you can have that velvet finish- it transforms it all.
This type of design requires some patience, particularly when you are hand-drawing the type. I painted the letters with a toothpick dipped in polish. Celebrity manicurist Julie Kandalec advises: be sure to keep your pinky finger anchored on the table so your strokes are steadier.
I wore this for a leaf-peeping trip in Vermont (yes, really), and it matched the vibe perfectly. The matte and shine combination caused my hands to feel a part of the season rather than a mere accessory to it.
Berry-Tipped Elegance With a Twist
It is an adult version of fall red–cranberry rather than candy, velvet rather than glossy. The long oval shape and deep berry French tip is a sophisticated shape, but the soft blush base balances everything out. But that tiny gold-and-burgundy accent? A quiet flex. It is as though you are saying yes, I do see the details.
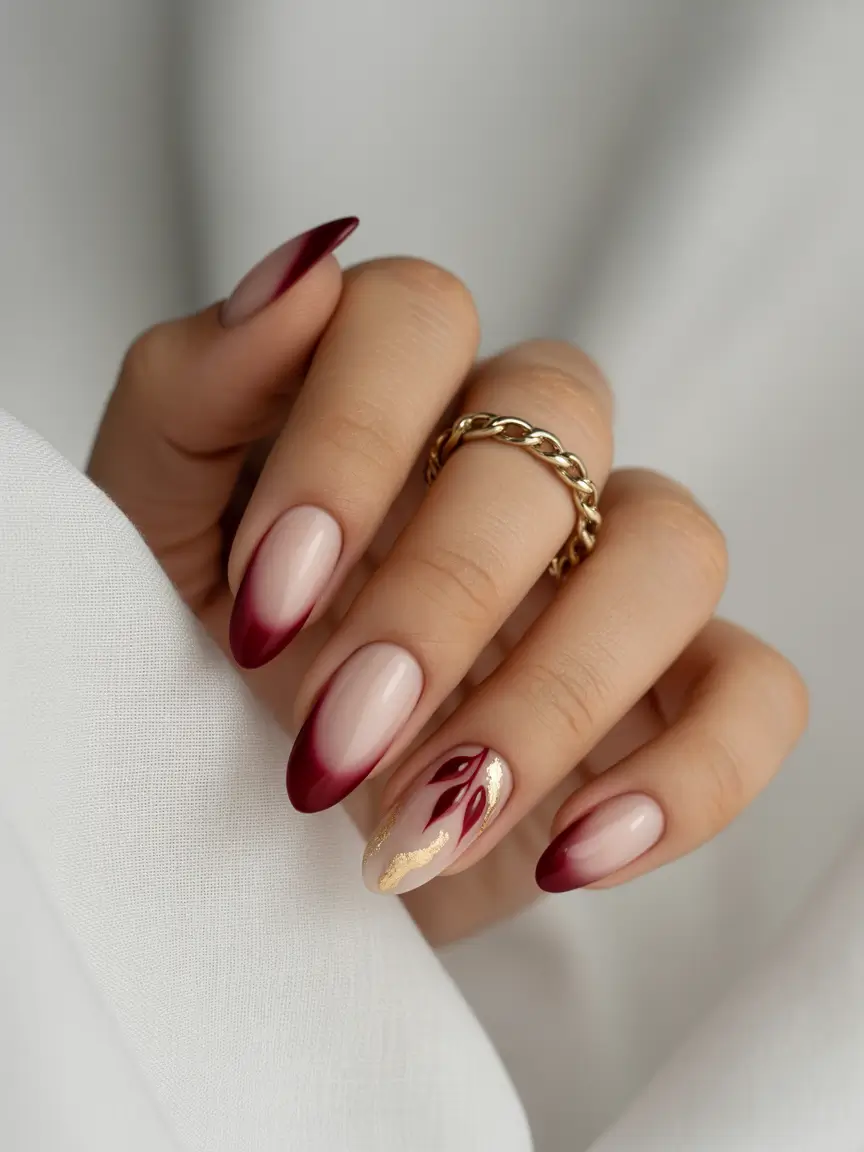
This style goes beautifully with Deborah Lippmanns Single ladies or OPI Malaga wine on the tip and a soft pink such as Essies bare with me on the base. The addition of a small gilded flourish can be achieved by gold foil or gel stamping, which does not overwhelm the appearance.
I am always anxious to do French tips at home, and recently I started using silicone nail guides and it really makes the difference. Just place, paint, and peel. A liner brush and metallic gold polish will help you achieve the accent design.
This is the one when I want to feel a little luxe. Like I’ve got a secret reservation somewhere fancy. There’s a quiet confidence in red—but this red? She doesn’t need to be loud to get noticed.
Coffee Swirls and Caramel Cream
Here’s one for the latte lovers. The design is a mix of soft blush with glossy mocha swirls to produce a caffeinated, dreamy color story that is ideal to wear during the fall. The painterly swirl on the accent nail provides motion and the full-coat chocolatey brown provides depth. It’s warm, cozy, and still a little flirty. Oval shape? Non-negotiable here—it ties everything together.
My base colors were Butter London and Beetles Gel in Afternoon Mocha and Nude Pink. In the swirl, both colors are easy to apply using a striping brush dipped in both shades and you can create that movement. Do not be concerned with being too accurate–that is the beauty of it.
This mani is surprisingly quick to DIY. Blend the base with a sponge (use this to create some extra softness) and swirl on the accent when the polish is still a bit tacky. Top with a glassy coat to lock it in.
When I put this on, someone will always say, did you have that done professionally? Which is sort of my favorite question to be asked, because the answer is always: nope, just my kitchen table and a good playlist.
Soft Neutrals in a Tone-on-Tone Symphony
This monotone, gradation of mocha taupe, milky blush, and sandy beige is a hint of elegance. The tones blend with each other so harmoniously that they seem to be melted. The oval shape nails provide that smooth sophistication, and the tonal change-up of finger to finger makes it look current and new. This is the manicure you put on when you need your nails to tell people that you have your life together, even when you are simply drinking tea in sweats.
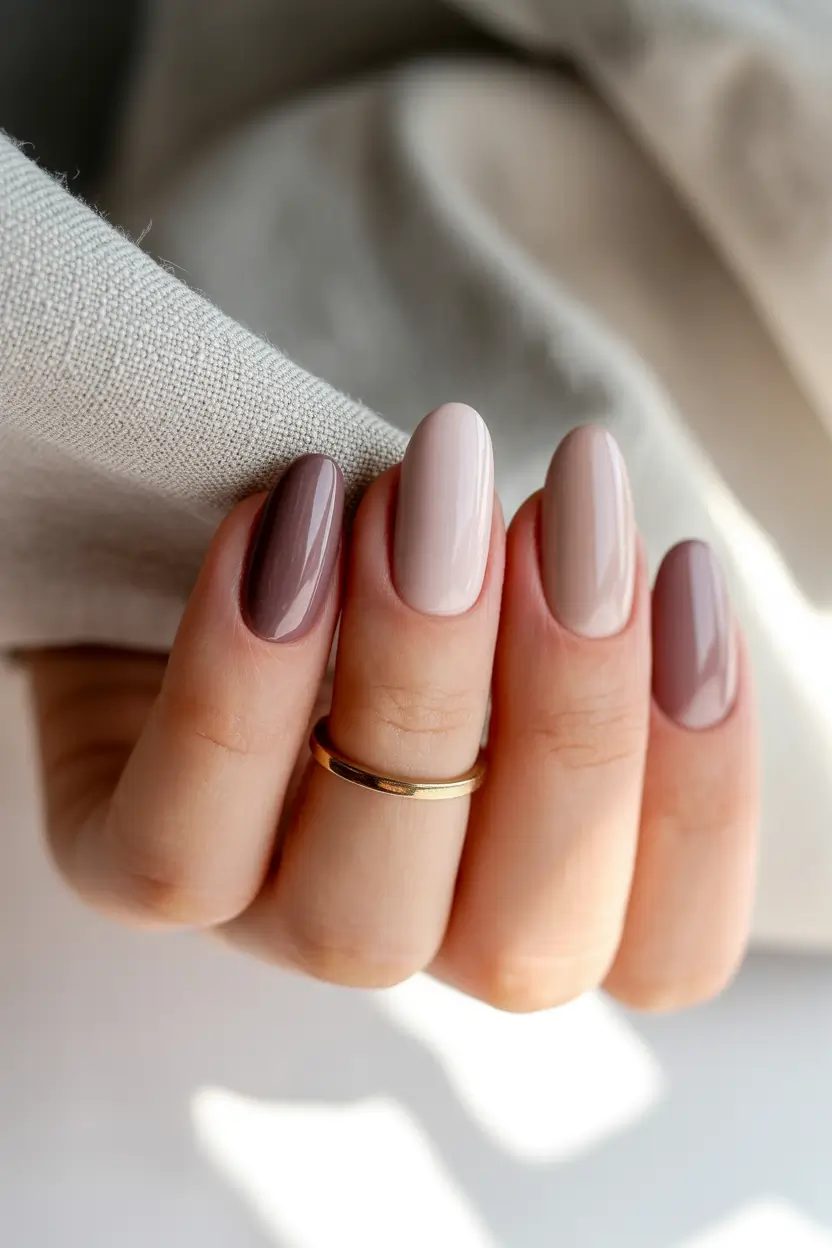
I reach for OPI “You Don’t Know Jacques!”, Zoya “Rue”, and Essie “Topless & Barefoot” to pull this off. Each shade plays beautifully together in a monochromatic scheme. They need a thick glossy top coat to give them that smooth, light-reflective finish.
This look is super beginner-friendly. No equipment, no painting, just an excellent choice of colors and waiting between coats. When I do it at home I put the colors out in advance to plan the sequence. If you are a visual planner like me, you can use swatch sticks of nail polish. It makes the entire process a small intimate ritual.
I always turn to this style when I want to feel calm. It’s subtle, but trust me—people notice. Imagine cashmere scarves and late afternoon light through the window. It’s a vibe.
Glossy Plum Florals With a Hint of Drama
This design is ideal when fall has cooled, but is not yet dark enough to be winter. The standout here? A flower accent nail painted with dainty leaves and small dots, almost like morning dew in a gloomy garden. The darker tones are softened by the oval shape, and the gloss on this mani is such that a few stares are bound to be cast when passing by.
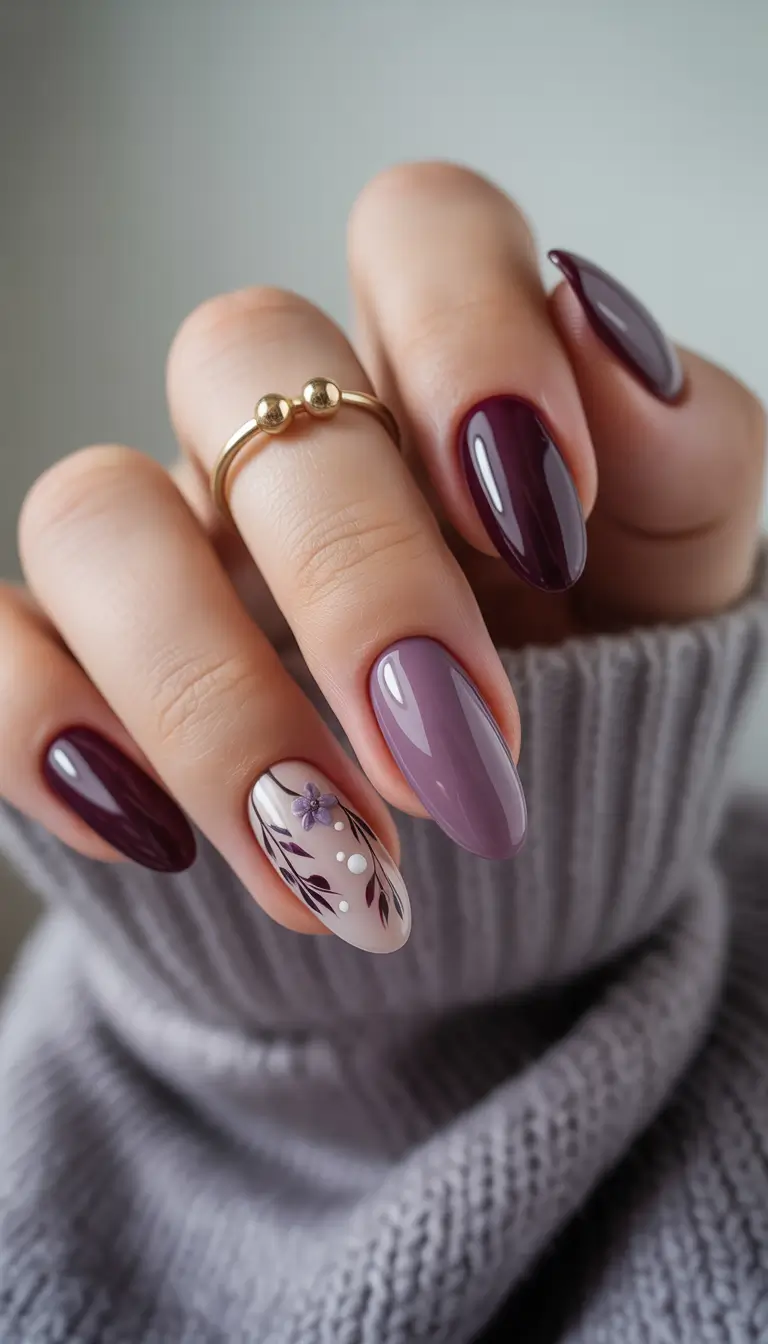
I used the color Beetles Gel, Plum Wine, and OPI Do You Lilac It? so that I could achieve that darker mood base. In the case of the floral nail, I applied acrylic paint in a fine liner brush so I could have more control. A tiny dotting tool helps with the white accents.
The floral work is time consuming, and this is not a rush job. I begin with the lightest and apply darker colors over them. I have learned this much: cure your foundation first before beginning any detal–it is far easier to correct. A tip from @nailthoughts on IG I always follow? Use a fine-tipped gel pen for perfect petals.
This is one to be enjoyed during that initial cool weekend in October. I wore it to a winery last year and someone I did not know complimented me between glasses. That’s when I knew this one was a keeper.
Cozy Sage and Pink Mix
What an unusual combination you have here–and that is why it does work. Ballerina pink nails and soft sage green is like a hug in colors. The combination is surprisingly unbiased, having a cool tone, which emphasizes each color to the best. One nail gets its moment here but they all come together so beautifully. Shorter ovals make this look even more wearable.
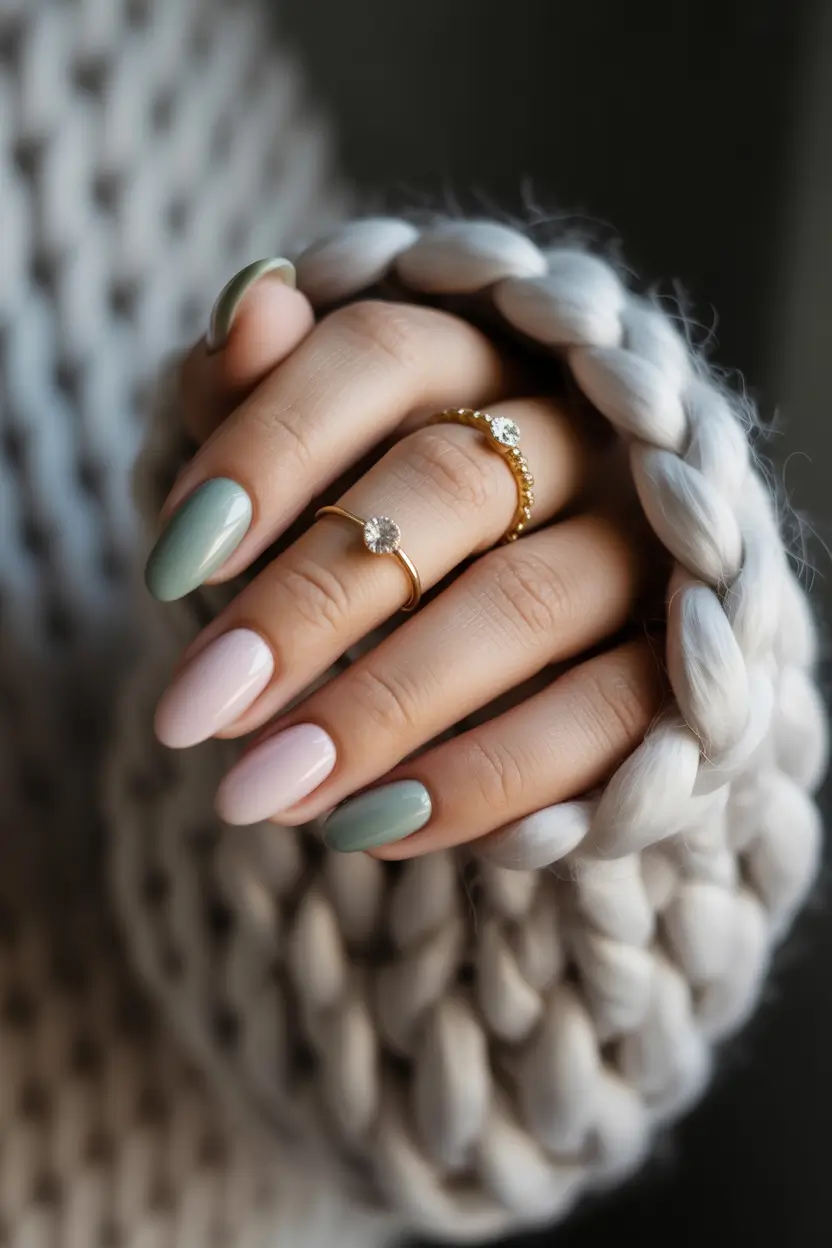
My sage polish of choice is Olive & June WKF and Essie Fiji delivers that pink payoff with only two coats. I love how these shades do not need any additional design- they simply glimmer because they are matched intelligently.
Not much prep is required to do this one. I tend to switch colors back and forth, so I do not spend too much time thinking about the pattern. A clear cuticle line truly takes this to the next level so take the edges with a flat cleanup brush and some acetone.
This appearance makes me think about wool blankets and chai lattes. It is soft, somewhat surprising and so incredibly comfortable to wear. It is ideal when you want to look put-together but not fuss over a low-key fall weekend.
Botanical Lace Meets Nude Perfection
Fine black florals on a translucent nude base is so poetic. It is botanical lace, classy and subtle but striking in the right light. The oval form maintains a graceful and the transparent background makes the design breathe. It is feminine but not fussy- in short the tattooed poet of nail looks.

On the base, I apply either Essie in Mademoiselle or Zoya in Erika, depending on how sheer I would like it. The flowery lace may be created using nail stamping plates or fine art decals-I came across an amazing set by MoYou London that has delicate botanical linework.
The trick with this one is patience. You would like the nude base to dry completely before you can apply the design. And top off with a top coat that is not thick so as not to smudge. Sally Hansen’s Insta-Dri top coat is great for this.
This manicure is a black and white filter on your fingers. It is the one I wear when I want to feel romantic but not out of control- as though I am going to a fall dinner party by candlelight.
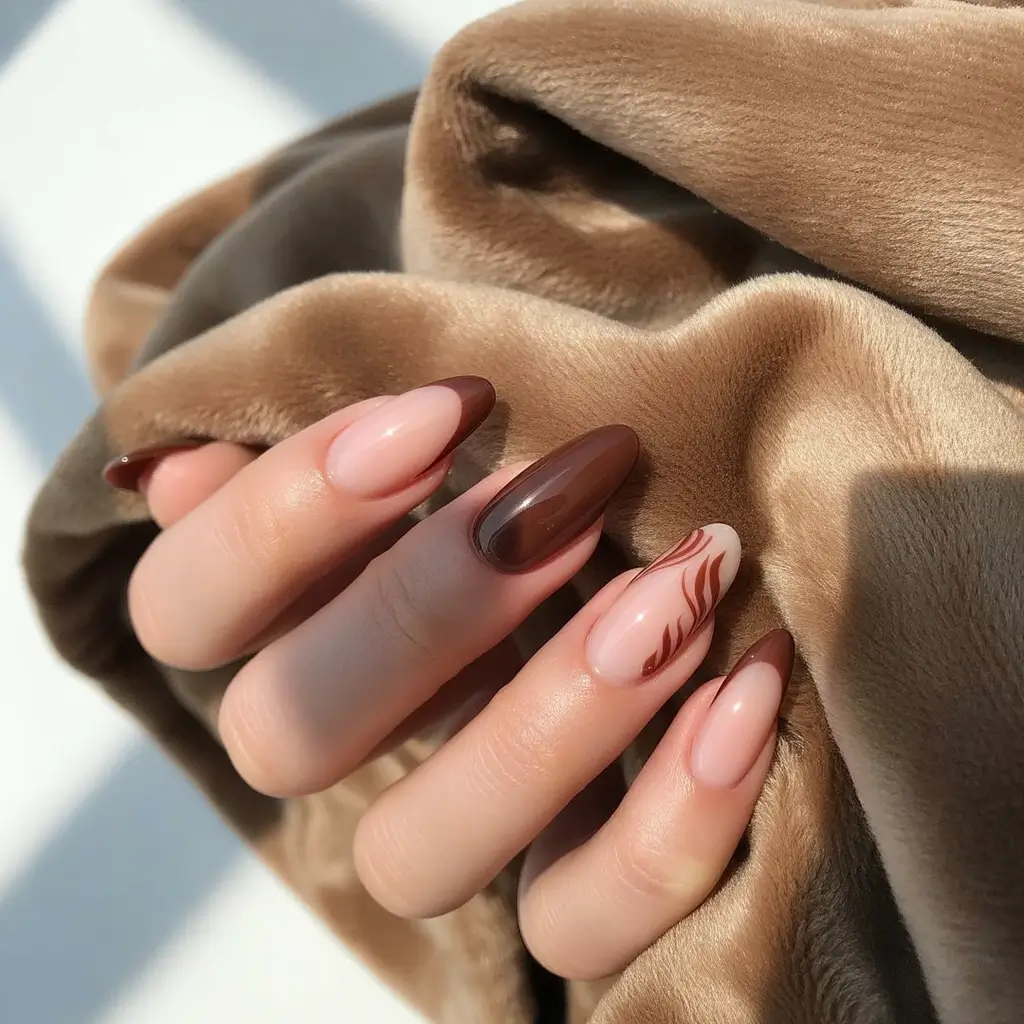
Glazed Mocha Gradient
This is your latte order—just served on your nails. The glossy brown French fade is melted onto a light pink-beige base and the ombr French appearance has reached impossible wearability. The gloss? Next-level. The oval shape provides the whole look with elegance and the smooth gradient makes the eye attracted. It’s chic, low-key, and totally fall-coded.
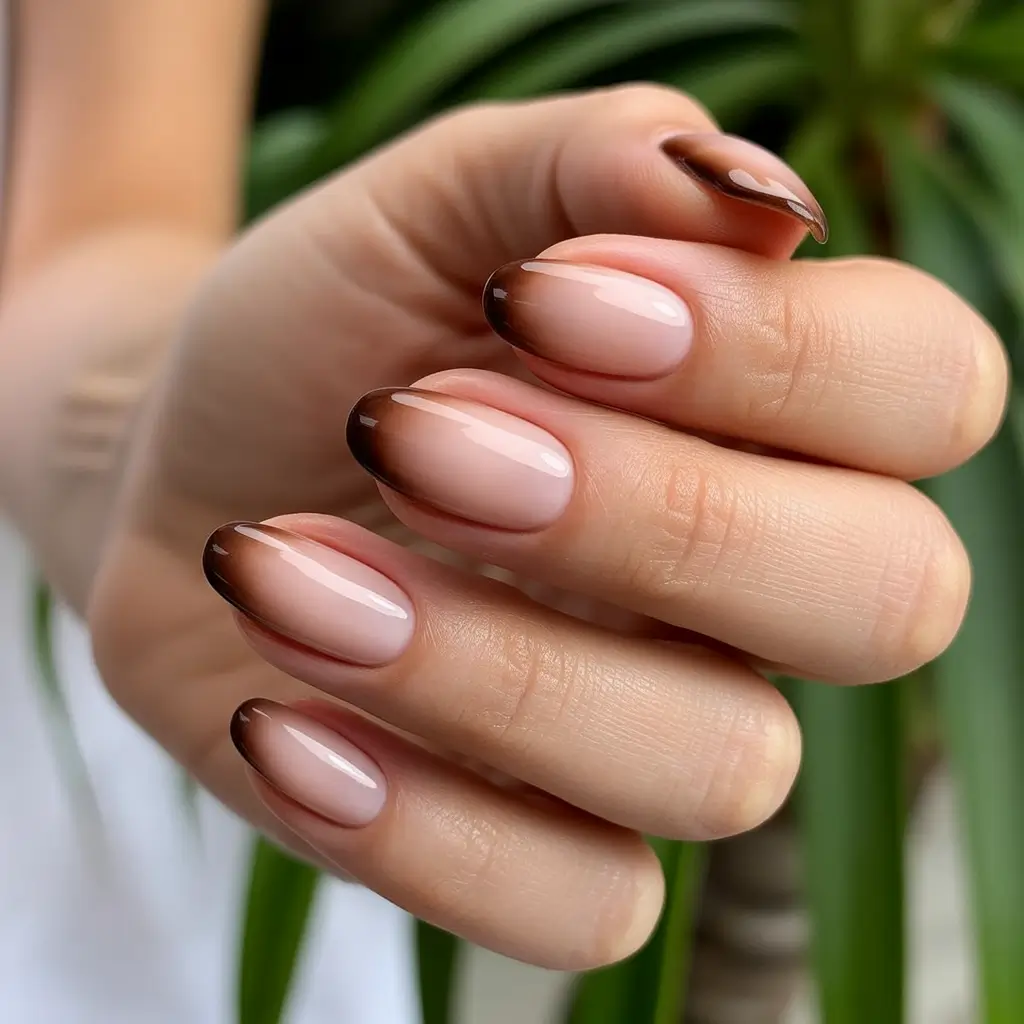
The ombr light tip is done perfectly with Madam Glam Perfect Brown, which is feathered over OPI Put It In Neutral. Apply the gradient with a makeup sponge tapping it on or simply use an ombr brush to apply it more blended.
This design takes a steady rhythm. I use the base, cure or dry fully, and then add the brown in layers. According to celebrity nail tech Chaun Legend, you should start the gradient lower than you would expect–it will make it easier to blend upwards.
This one’s become my fall classic. I have matched it with trench coats, teddy jackets and even the plain hoodie. It adapts. Like a PSL in nail form—but far more elevated.
Mocha French With a Modern Curve
If you’re looking for a French tip that doesn’t play by the rules, this one’s for you. These oval shaped nails are coated with rich chocolate tips on a soft, milky pink base, however rather than the traditional straight across line, the tips curl in a beautiful side curve that is completely new. It’s sculptural, stylish, and gives just enough edge without losing any polish (pun fully intended).
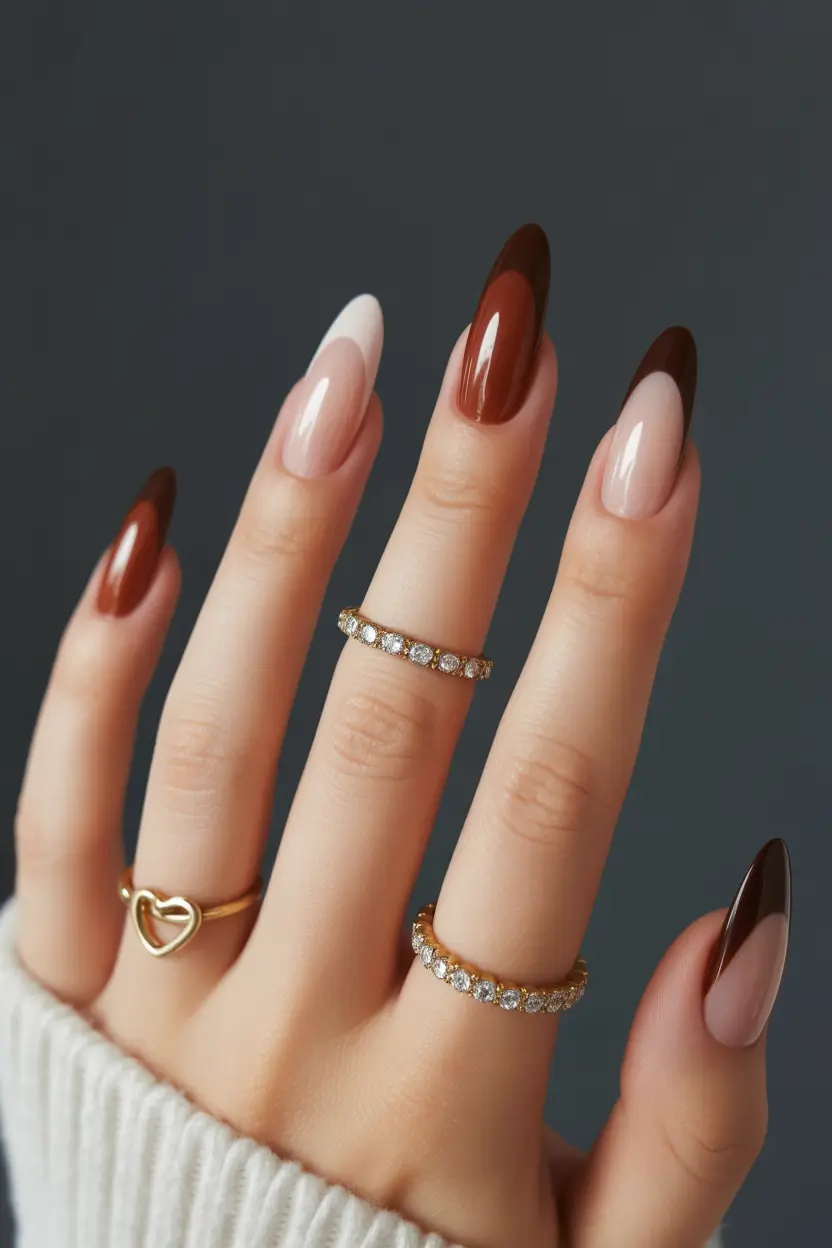
To do this I usually apply Bio Seaweed Gel in Cocoa Bean or CND Vinylux in Negligee as a clear base. The curve? You can freehand it if you’re confident—or cheat it with French tip vinyl guides placed at a diagonal.
The best way to do this style is to all your base coats and cure or dry them and then go back in with a detail brush on the curved tips. Nail teacher Lauren Wireman recommends starting with the middle of the tip and working outward to create a more symmetrical arc, and I promise it will help you keep things clean.
I had this design on a weekend trip and wore it with a camel coat and oversized sunnies. It gave effortless energy. It is this combination of shape and color that makes you feel immediately pulled together.
Golden Hour Glaze
Sometimes you want sparkle, but grown-up. This design does exactly that. The look is anchored by a sheer pink polish, but the glam is added by two accent nails: one with a high-shine gold foil and the other in a brushed metallic finish. It’s a subtle statement, like golden light slipping through your window at 4 p.m. in November.
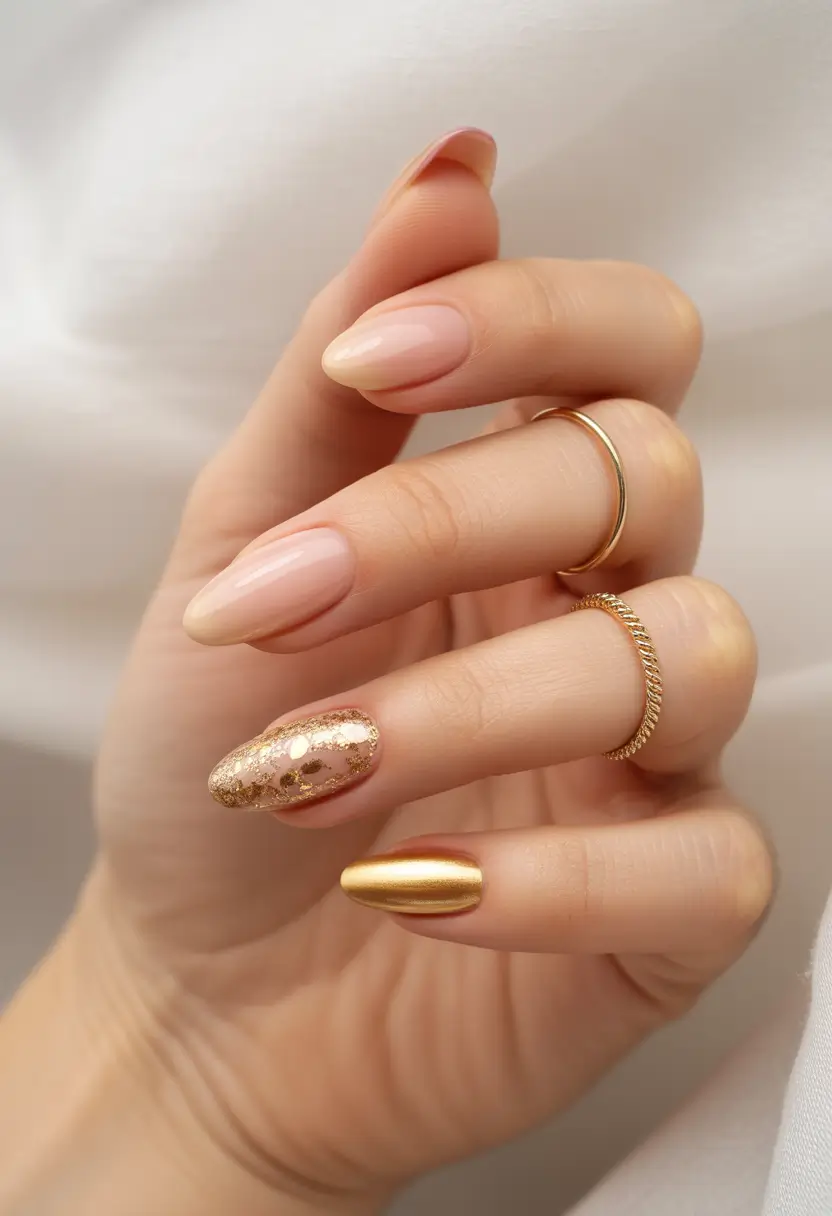
The shimmer here is all about layering. I layered Essie Sheer Luck with JinSoon Spice on top as the warm chrome. On the foil nail, I tapped real gold leaf flakes lightly into a semi-dry polish layer and finished off with Orly GelFX Builder Top Coat.
Foil is something you should work slowly on- tweezers are your best mate. Apply a tacky layer (not fully dry), press gently, and don’t worry if it’s not perfect. That’s part of the charm.
When I first tried this, I wore it to a friend’s engagement dinner. It held the candle-light like jewelry–and more than one person believed it was a salon set. I just smiled and sipped my prosecco.
Berry & Cherry Ombré Clash
This is my favorite punchy fall gradient: wine red, cherry, and hot pink. Not cartoonish, but not tame either, it applies conventional tones and introduces a twist in a single gloss-finish accent. The rest remain matte, making the entire design a texture narrative as much as a color one. And yes, oval nails give it balance. In their absence, it might be too intense-but oval makes it wearable.
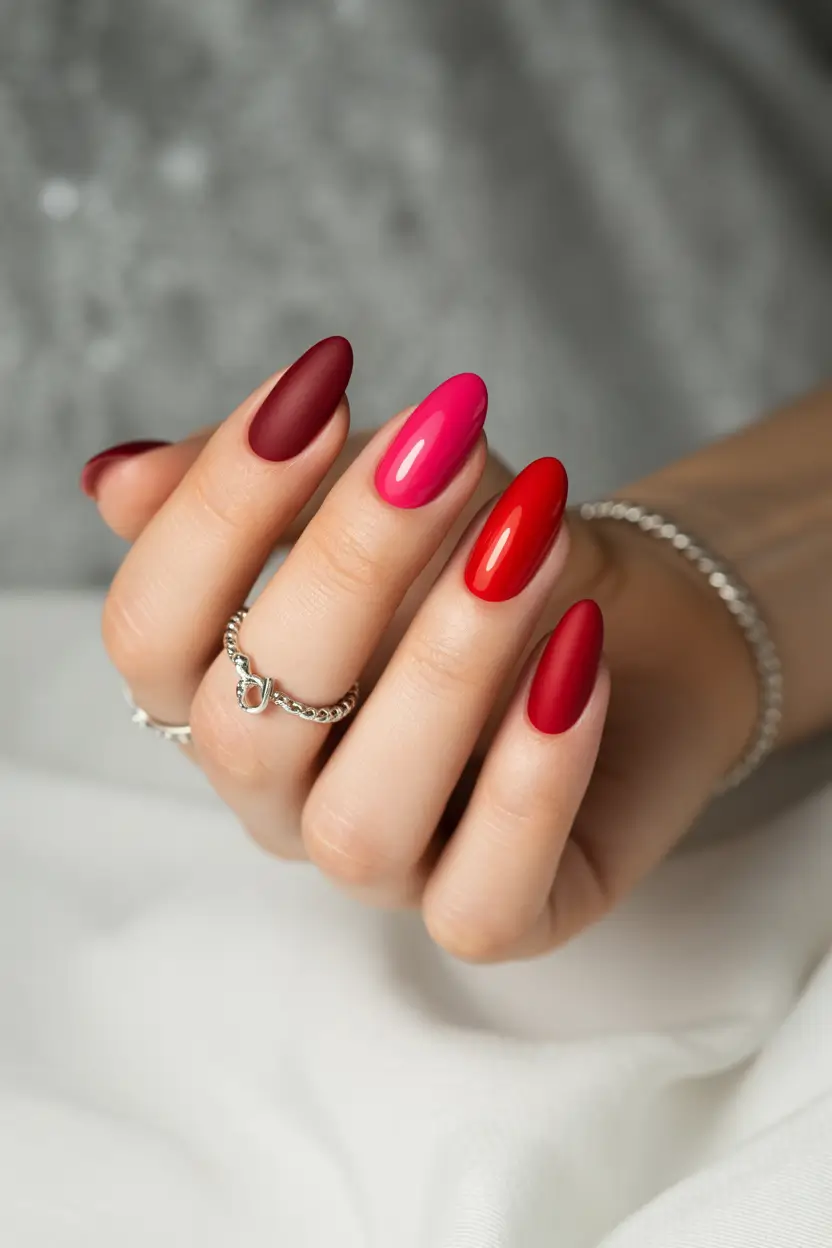
You will be tempted to reach out to OPI Got the Blues for Red, Essie watermelon and Olive and June Wild Orchid to get that hot pink accent. Your favorite top coats can be used to get the mix of matte and gloss you desire, I adore Zoya MatteVelvet to get that powdery finish.
I alternate shades on each finger, starting darkest on the pinky and lightening toward the index to apply. Apply a matte top coat on every nail except one to create the texture clash- this is what makes it look so addictively good.
When I am in a don t mess with me mood, I love this one. It is the best nail design to get some head at the apple orchard or to slay your casual Monday at the office.
Teal That Feels Like Velvet
Here’s one that flew under the radar—and shouldn’t have. This deep saturated teal is the fall interpretation of melancholic sophistication. The oval shape and the gloss finish give it a soft feeling, rather than heavy. It is deep, dramatic and surprisingly versatile with all kinds of denim, dark florals. It is providing indie bookshop girl and read runway reports.
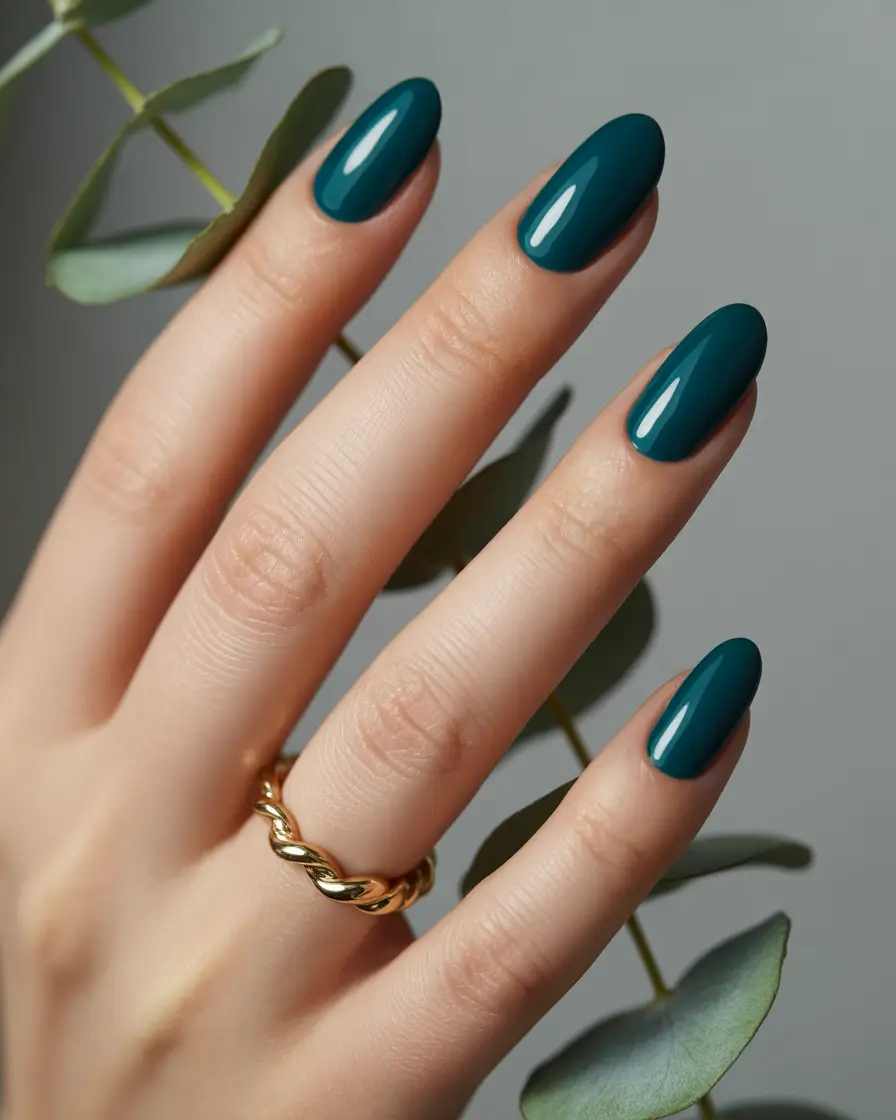
The best match I have found is Cirque Colors Succulent Garden, which is creamy and opaque in two coats. No art, no accents, just a high-gloss top coat such as Seche Vite to seal the deal.
This is the easy one that makes a big statement. I form the nails then apply one base coat followed by layering the teal color. Edges are important with this deep a color–so I keep a cleanup brush at hand.
I put this on a dreary Sunday and it strangely made me feel better. It is not obnoxious, and I am loving the way it makes my hands look- as though they belong to a well put together lady.
Earthy Green Meets Copper Chic
Olive matte, rose gold shimmer, and soft nude all in one design that somehow is both earthy and futuristic. The angular stripe lines provide it with a structure, whereas the colors make it part of nature. This is what you put on when you want something neutral-but make it fashion.
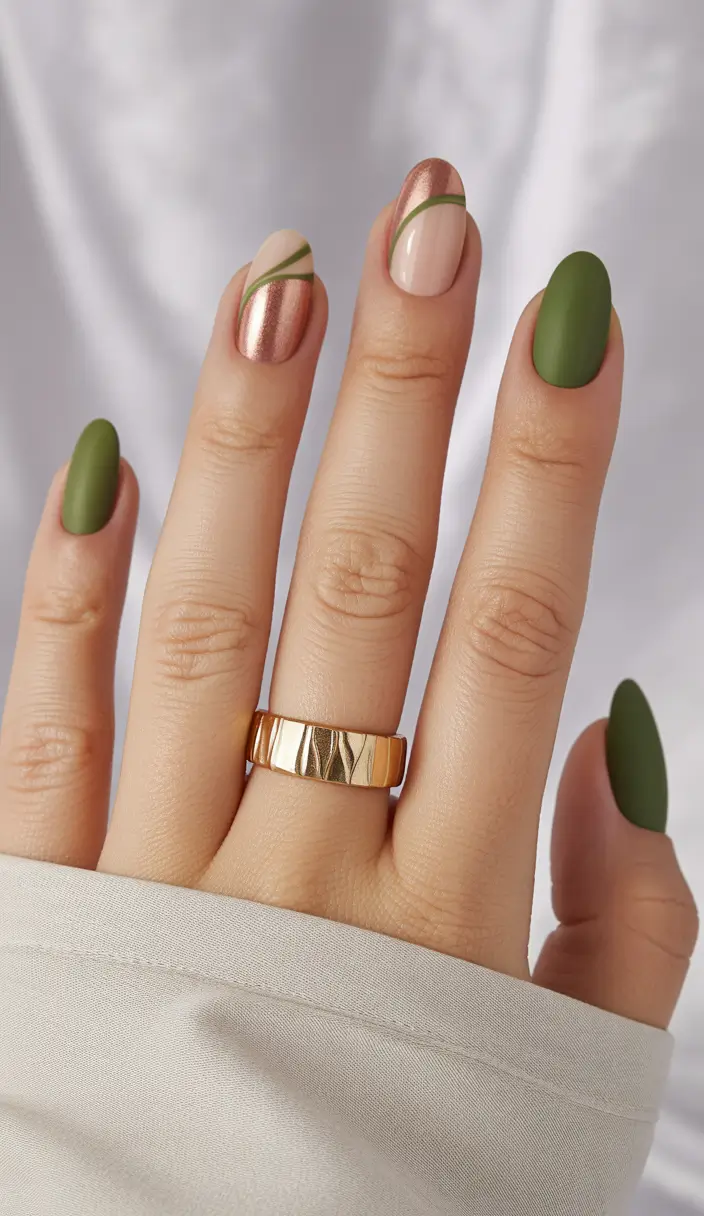
I applied Sally Hansen Leaf Me Be matte green, ILNP Juliette that metallic rose gold and OPI Bubble Bath as the creamy base. The most painless way to achieve that smooth angled line is with nail tape, but you must ensure that the polish beneath is totally dry before doing so.
Once you have laid down your foundation shades, then tape down at a slant and paint your accent stripe. Hold the tape in place and carefully remove it when polish is wet to get clean line. Where needed, apply a matte top coat, and gloss the metallics to give contrast.
This is the type of nail design that I would take out in fall weddings or dinner parties when I want something really interesting but not so overwhelming. It is stylish, contemporary and simply unexpected enough to be memorable.
Dreamy Dusty Skies
Something very magical about this one – muted pinks, satin mauves, and those 3D cloudy details combined with a dainty golden crescent. It whispers fall fantasy without screaming seasonal cliché. The oval shape contributes to the softness, which allows every little detail of the design to breathe. The creamy background and the elevated white clouds give an impression of early October mornings, refreshing, relaxing, before you get your coffee. And let’s be honest — that tiny gold moon? I’ve already saved it to my camera roll twice.
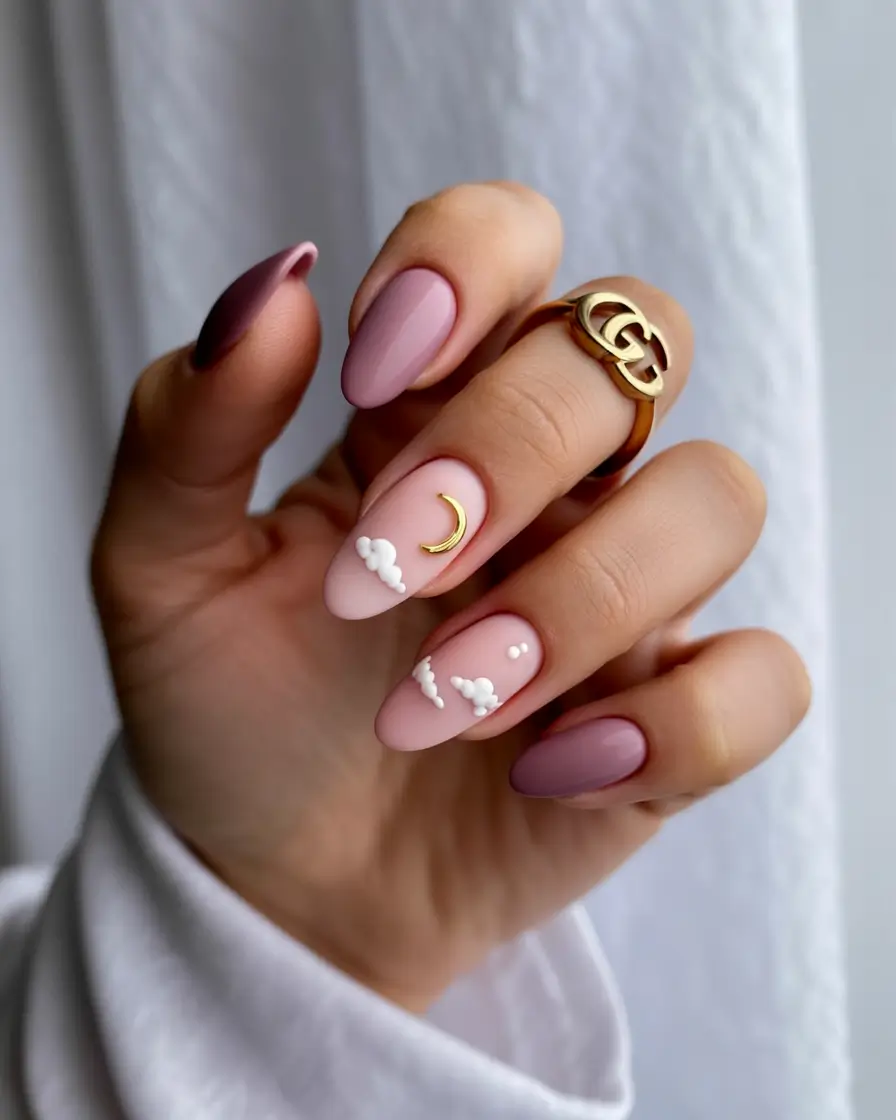
This kind of nail art leans on a few staples: a dusty rose gel base (try OPI’s “You Sustain Me”) and a matte top coat like Essie Matte About You. For the clouds, I’ve seen nail artists use 3D gel like Daily Charme’s Sculpting Gel. The crescent moon? That is typically a nail charm which you can stick on using builder gel or a little bit of resin.
I have not yet attempted to do full-on 3D clouds, but I have watched enough tutorials to know it can be done. First, make your nails soft ovals, gentle buff, and then base color. Cure under a lamp, then layer the matte top. In the case of the 3D clouds, dot on the sculpting gel and tease it into shape with a dotting tool. Then complete with the moon charm- a small metal sticker or a real charm will suffice.
It is the type of design I would wear when going to a mountain cabin or a fall brunch with friends. It’s cozy and unique, but not trying too hard. I showed this look to my friend Amelia (the one who never strays from French tips), and even she paused and went, “Okay, wait — that’s cute.”
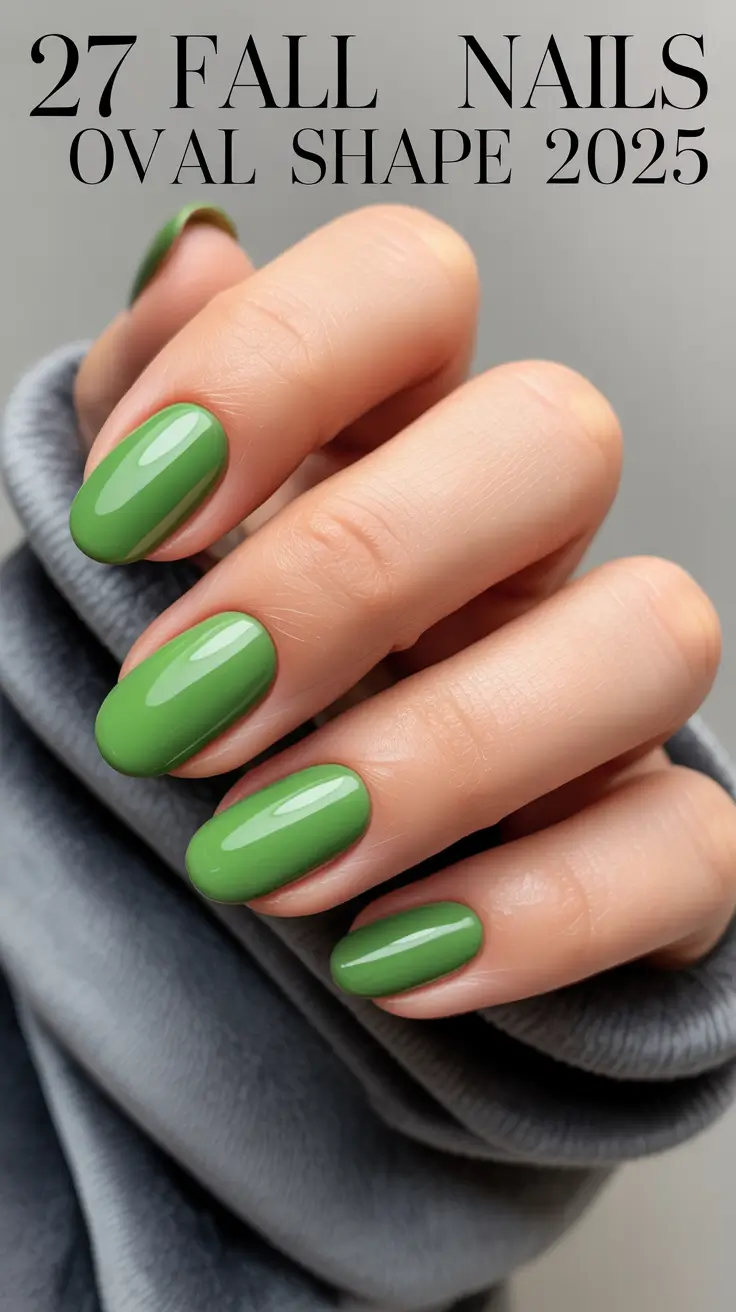
Botanical Power Move
Green is rarely on fall nail lists- and I will never know why. This deep glamorous green is smacking me with deep forest and a touch of urban chic. The oval shape is short, which is suitable to wear on a daily basis, and the color? Bold. Confident. Unapologetically fresh. Like moss on rock, or leaves just before they get golden, that in-between time that nobody tells about, but everybody knows.
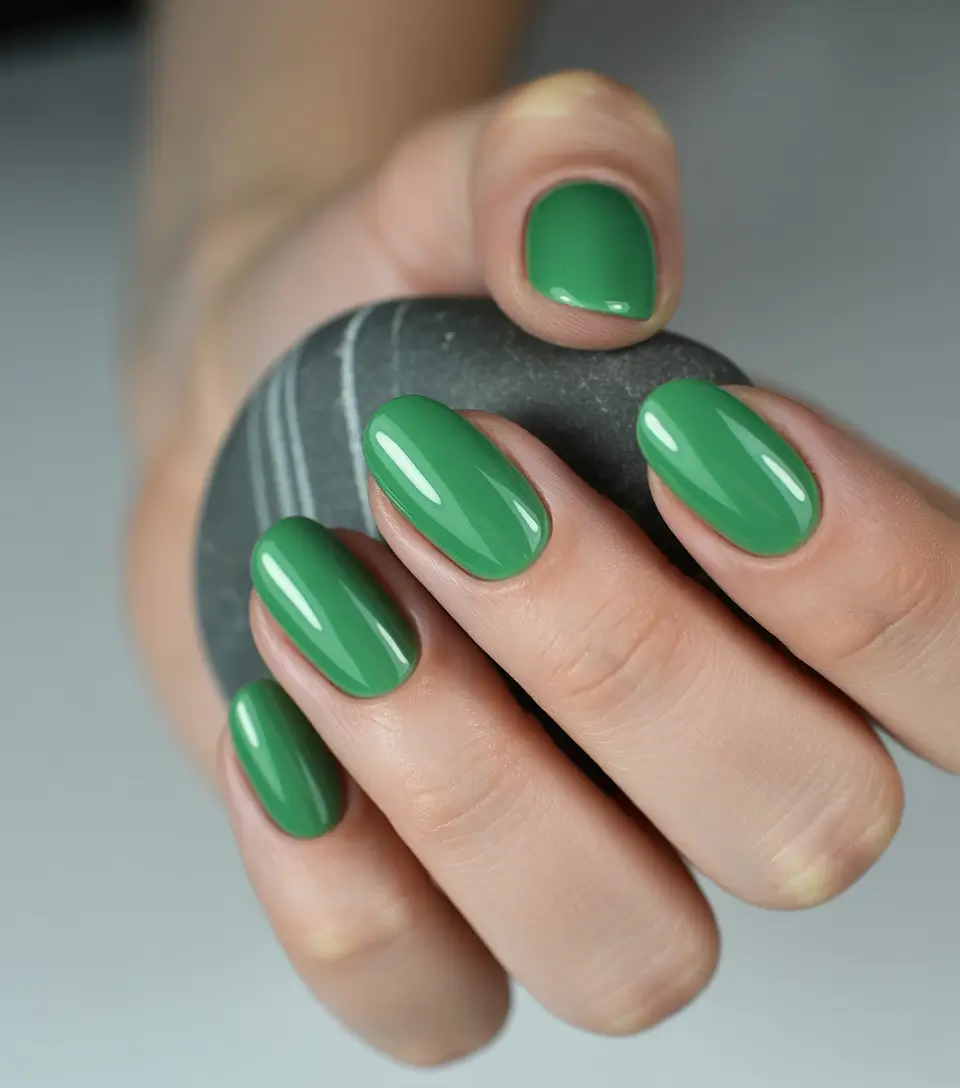
To achieve this very green, I would grab Olive & June in either their “WKF” or Dazzle Dry in their “Green Meadow” quick-dry polishes. The shine? Non-negotiable. Apply a shiny top coat such as Seche Vite or Essie Gel Couture Top Coat (something that will give the glass-like effect).
Honestly, this is probably the easiest look to recreate. Shape, base coat, two coats of color, top coat – done. And because the color is the star, you do not require accents. But if you’re feeling extra, a gold foil detail on one nail wouldn’t hurt.
Back in October when I wore a similar green, my barista even literally stopped mid-latte to ask me what colour it was. That never happens with nude polish. I mean, I am only saying this, when you want your nails to do all the talking and keep it minimal, this one has got you covered.
Espresso Sparkle
Chocolate brown is a ride-or-die fall color, but this combo of shiny cocoa and one glitter nail makes it even better. That glitter? No ordinary glitz, we mean rich glitter that is more of a luxury scarf, as compared to New Year Eve. This is not too much but rather luxurious because metallic studs are used. The drama is eased up by the oval form, which works both in desk work and dinner reservations.
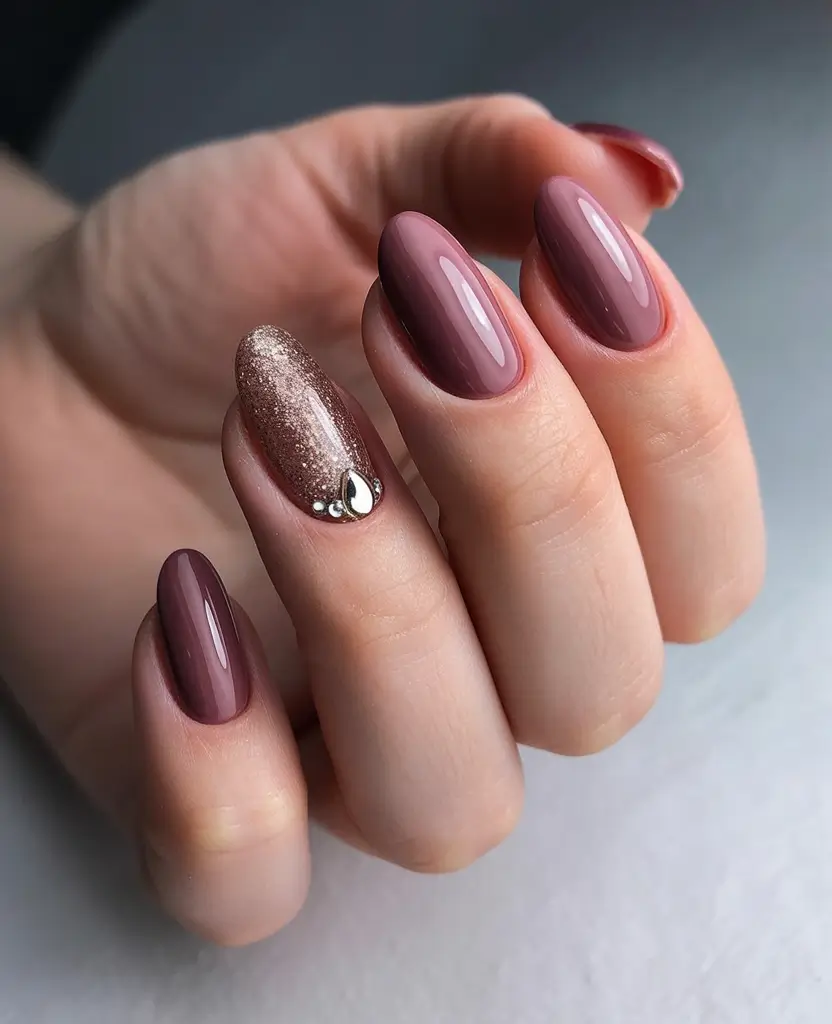
A dark brown polish such as Zoya Louise and bronze-gold glitter gel/powder of your choice will be needed. ORLY Gold Rush is gorgeous on top of a taupe base. In the case of the studs, nail gems are sought in silver or gunmetal, which are applied using a powerful gel adhesive.
To do this yourself, paint two coats of brown polish on all but your accent nail. There is the glitter one, where you lay down a nude or gold base then press the glitter when it is still tacky or apply a shimmer polish straight away. Add studs before curing your top coat. Tip: Place with tweezers — fingers will only make you insane.
My friend (one of my best friends) wore a similar set to a fall wedding last year, with a velvet wrap dress and some soft waves. Her nails, solely, made her appear to have her life in order. We all deserve that kind of energy in October.
Mauve Made Modern
This pink is perfectly between fun and refined. It is somewhere in between rosewood and dusty peony, the sort of color that says, I have regular pedicures, and I drink oat milk. It is the glossy finish that makes it super versatile, wear to the office, to a baby shower, or enjoy cider under a plaid blanket. It’s cozy, clean, and quietly captivating.
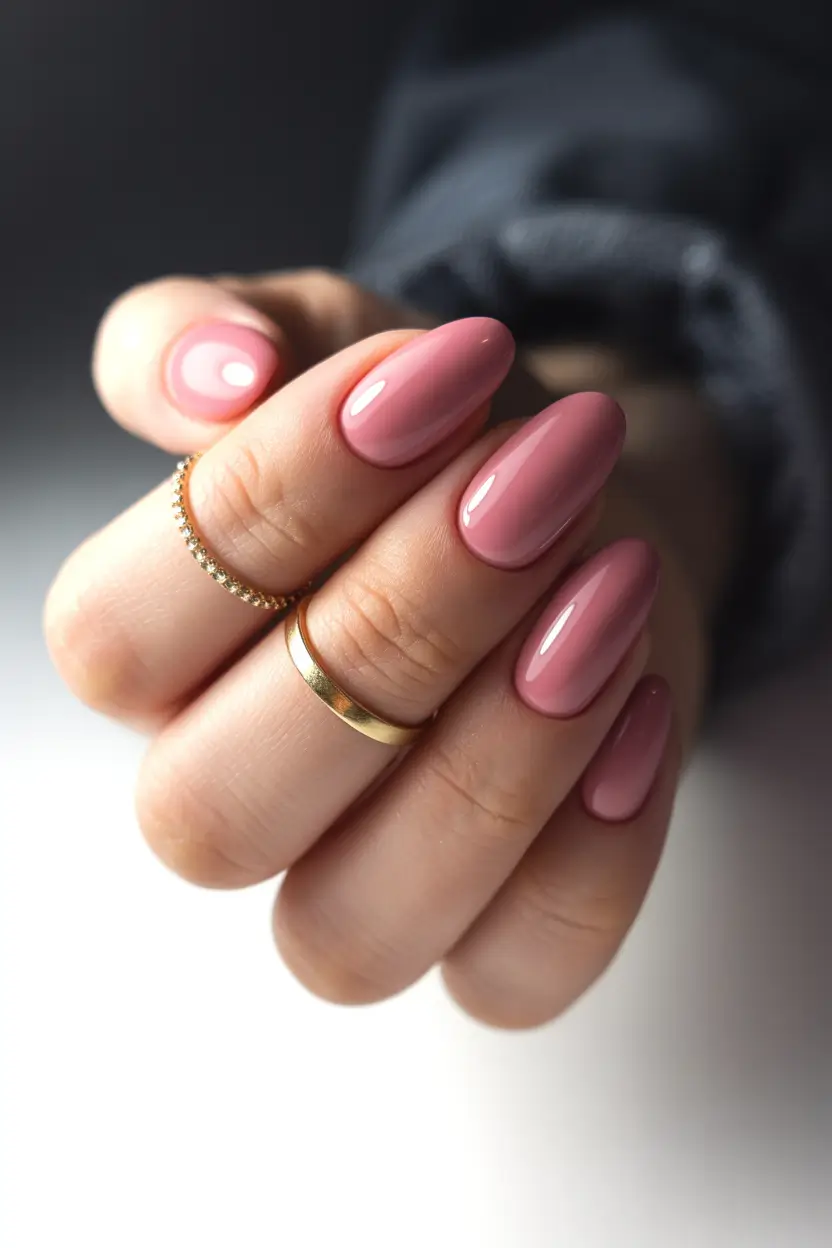
Try OPI’s “Mauve-lous Memories” or Deborah Lippmann’s “Love Hangover”. No extra is necessary with this color- the gloss is its own testimony. When you are working with the normal polish, do buff the surface of the nail just before you apply that mirror finish.
I personally adore wearing the color when I do not feel like thinking about the outfits to match my nails. It pairs with denim, camel, black and even those strange in-between greens we dig out in fall. Bonus? It looks good on short or long ovals, and it makes your hands appear well-groomed with very little effort.
I went to upstate New York over the weekend and wore a similar mauve and not a single chip appeared after three days of firewood, hiking, and s mores. Low maintenance, high reward — always a win.
Truffle Dipped Neutrals
Let’s talk tonal perfection. This mani is a mix of espresso to soft almond browns- essentially, it is your fall coffee order in a manicure. The oval shape is short, keeping everything on the ground and wearable, and the color combination provides depth. There is no need to decide whether it should be bold or subtle, this style is the solution to the question of why not both.
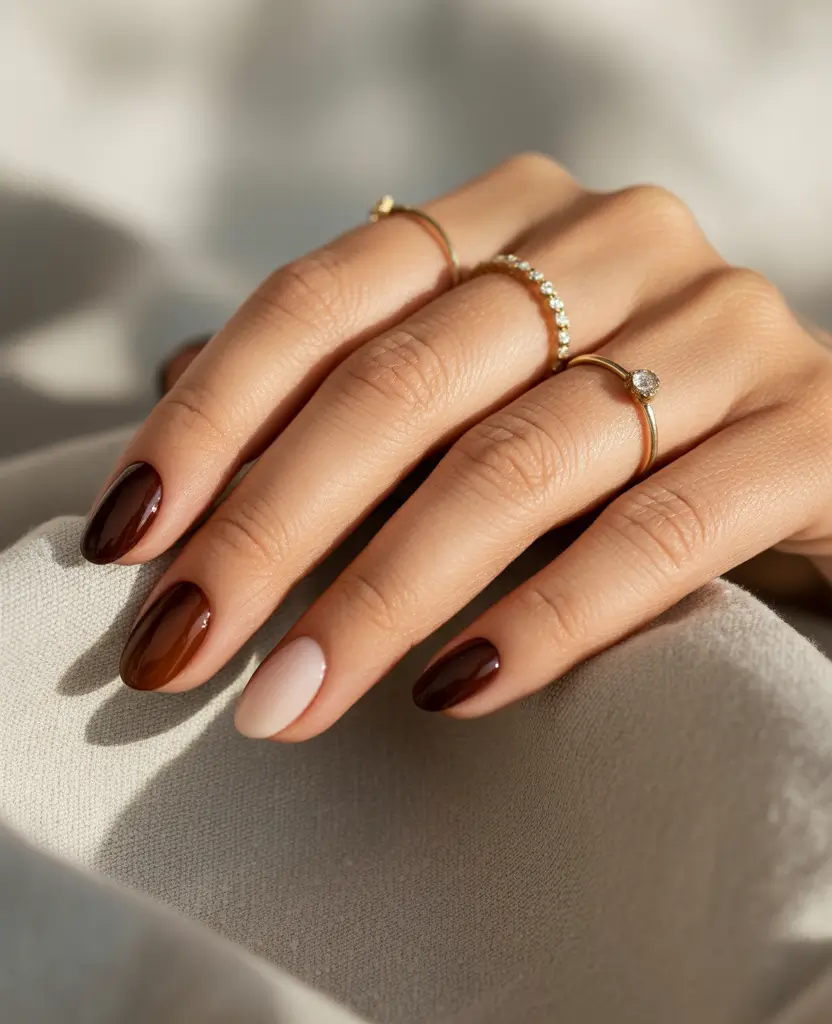
In order to achieve this vibe, you will need various shades of brown. My go-to set would be Lights Lacquer’s “YHLQMDLG” collection or mix and match from Holo Taco’s chocolate box set. Seek a creamy finish and not something too sheer as you want to get rich payoff with every shade.
In case you are doing it at home, begin with shaping and preparing all nails. Paint your fingers in different colours, dark to light, or interchange, depending on your mood. It is preferable to use the same color family to avoid a clash. Finish with a high-gloss top coat and you’re golden.
This set makes me think of lazy mornings, cinnamon oatmeal, and that one giant knit sweater I pull out the second temps dip below 70. And warm on your hands–and surprisingly stylish with a gold ring or two.
Tiger Stripe Realness
Okay, this combo? Unfairly underrated. The gray is cool, stormy, minimalist city-girl, and then bam, you have a flash of orange tiger stripe on only a few nails. It is fun, a bit of edge, and completely fall appropriate. The oval shape keeps it adult and the animal print pops say, yes I have a personality and no I don’t apologize about it.
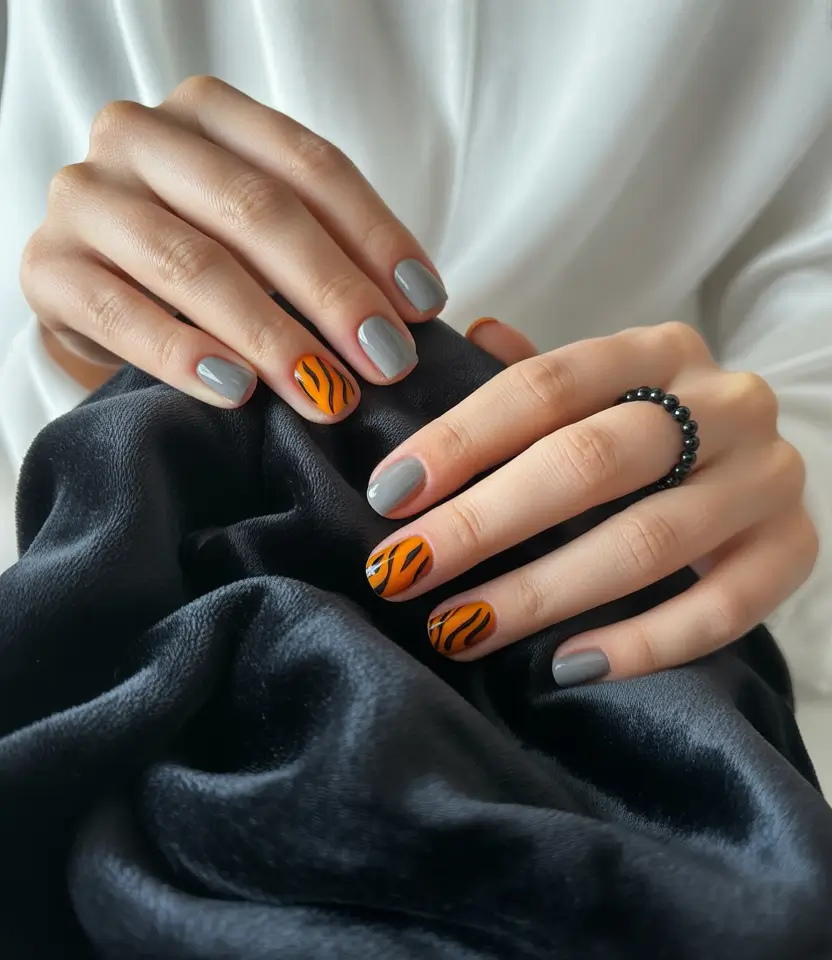
In order to achieve this, you will require a slate gray polish such as Zoya Dove, a hot orange such as OPI Suzi Needs a Loch-smith and a skinny nail art brush to create those zebra striped lines. I have seen artists do this kind of striping with Beetles Gel Art Liners; they are accurate and pigmented.
In case you are doing it yourself, start with the base coat as a gray base on the majority of nails, orange on the accents. When that has dried, use a liner brush with black gel polish and draw those freehand stripes. They do not have to be a perfect fit- the beauty lies in the imperfection. Seal it all with a gloss topcoat for contrast.
I wore something like this the Halloween season last year, but much more toned down, and to be quite frank? I wish I’d gone bolder like this. It gives pumpkin patch, but make it urban — like you’re grabbing chai in a leather trench. I’m obsessed.
Goldenrod Glow-Up
This color? Pure serotonin. The golden yellow is as near to bottled sunshine as you will find in mid-October. And one twinkling star, and that leafy accent? Fall nail design perfection. It reminds me of those autumn leaves, the farmer markets and a last few warm weekends before everything turns gray.
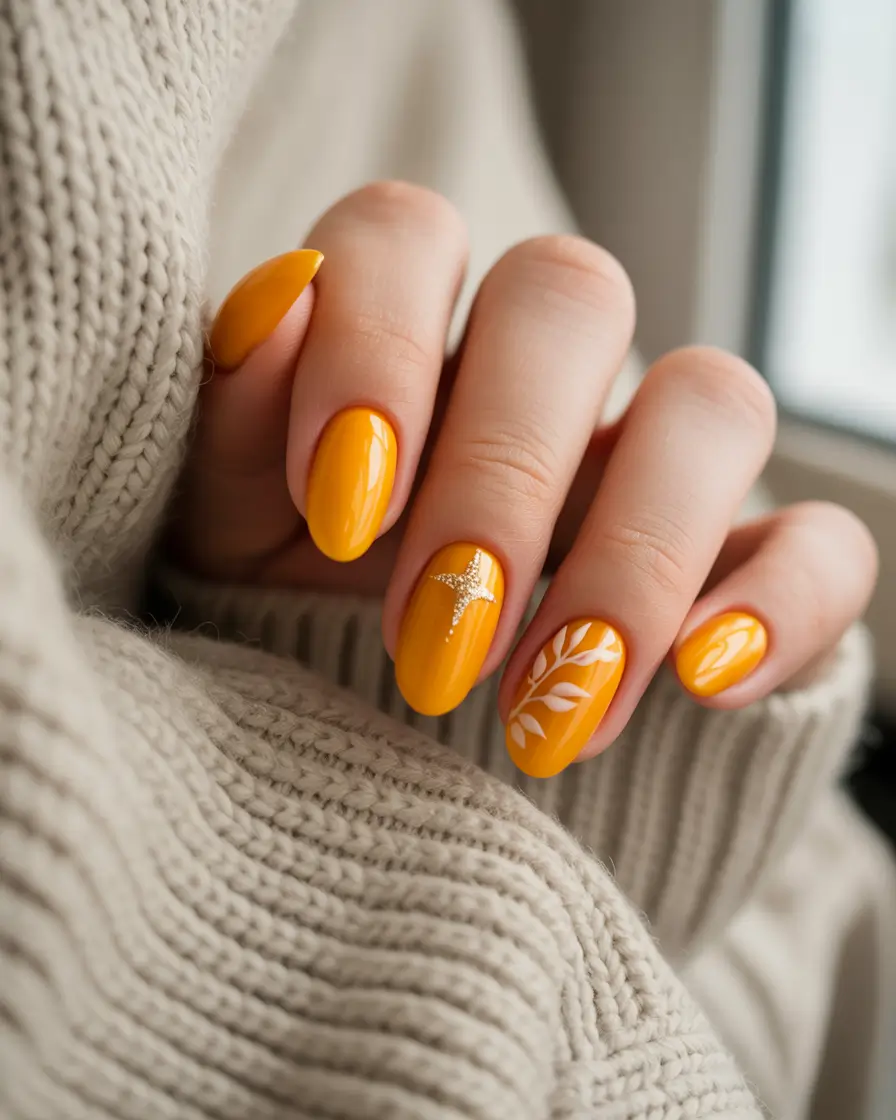
You will desire a deep golden yellow such as Essie Fall for NYC or Butter London Mellow the Yellow. On the white leaf design you can either do it freehand using a nail art brush or stamping plates, in case precision is not your forte. You could do the star in tiny glitter or foil – Born Pretty have some great gold nail decals.
DIY: start with your yellow base and then when that is cured, draw the leaf veins with a detail brush and white gel. Replace with a star accent on a different nail and seal with high-gloss top coat. It is a bit artisanal, a bit glam and fully achievable within a sitting.
I’ve worn yellows before, but not like this. This is different- it is warm, not wild. I would wear it with large sweaters and gold jewelry too, particularly when the sun is being difficult.
Leaf Luxe in Olive Tones
Two-toned sage and emerald? A leafy gold accent? This is fall foliage, but make it editorial. I adore the contrast between soft and deep greens that are not clashing. The gold leaves almost seem to have been pressed into the nail itself, as though they were small precious items in a posh botanical garden.
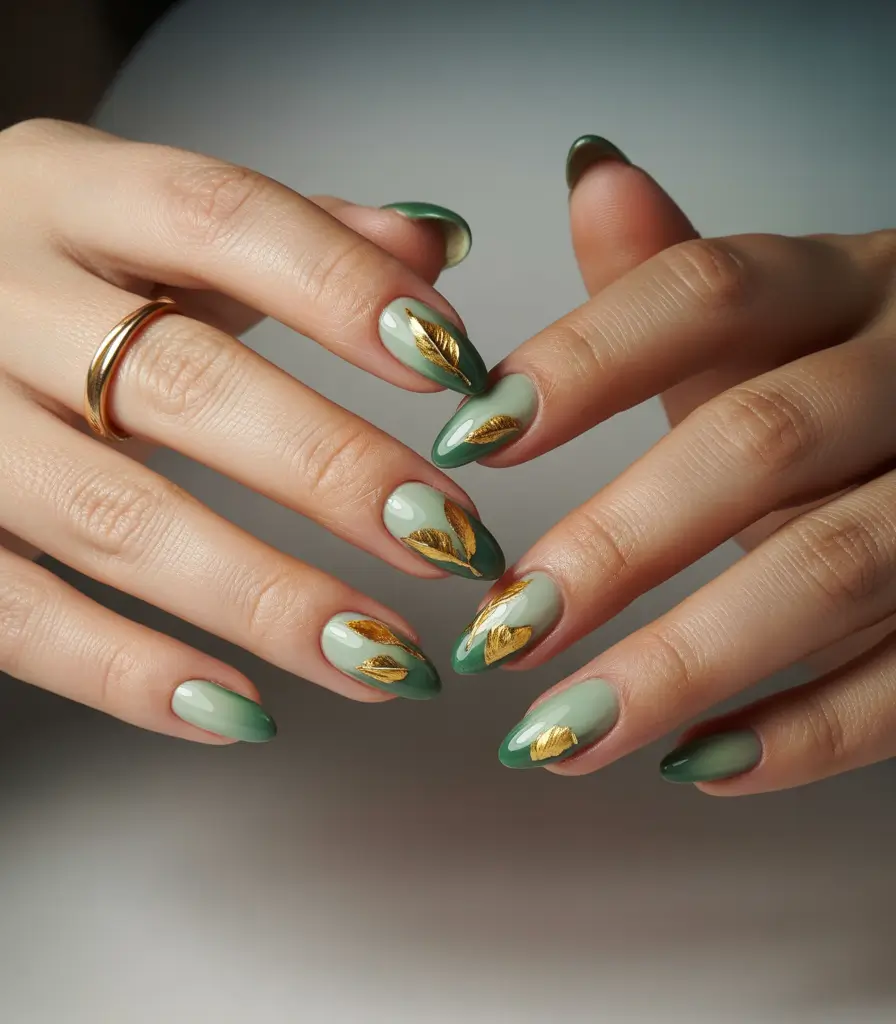
In the case of colors, use OPI This Isn t Greenland on the lighter green, and Zoya Wyatt or Cirque Colors Forest Green to get the depth. The gold accents can be achieved using foil leafing or metallic nail stickers, I swear by Leafgel Gold Foil Sheets when I need this sort of glamour.
This is a bit more complicated to recreate at home you may want to start with a soft green base on some of your nails, then add the darker green in waves or half moons. Place your gold leaf with the help of tweezers, but when the polish is not dry yet. Press lightly and cover it with a sealing gel coat.
This design feels a bit luxe and grown. It is the girls who love fall, and they do not have to have pumpkin prints to show it. Last year I wore a tamed-down version of this to a dinner party, where my friend actually stopped in the middle of toasting me to say how great they were. That’s rare air.
Molten Spice Chrome
This is your fall fantasy if you are someone who is inclined to glam without being glitter-bomb. The burnished copper chrome is deep, reflective and improbably dashing, as though it were lit internally. It is dramatic and sophisticated when combined with sheer, minimalistic art on the accent nails.
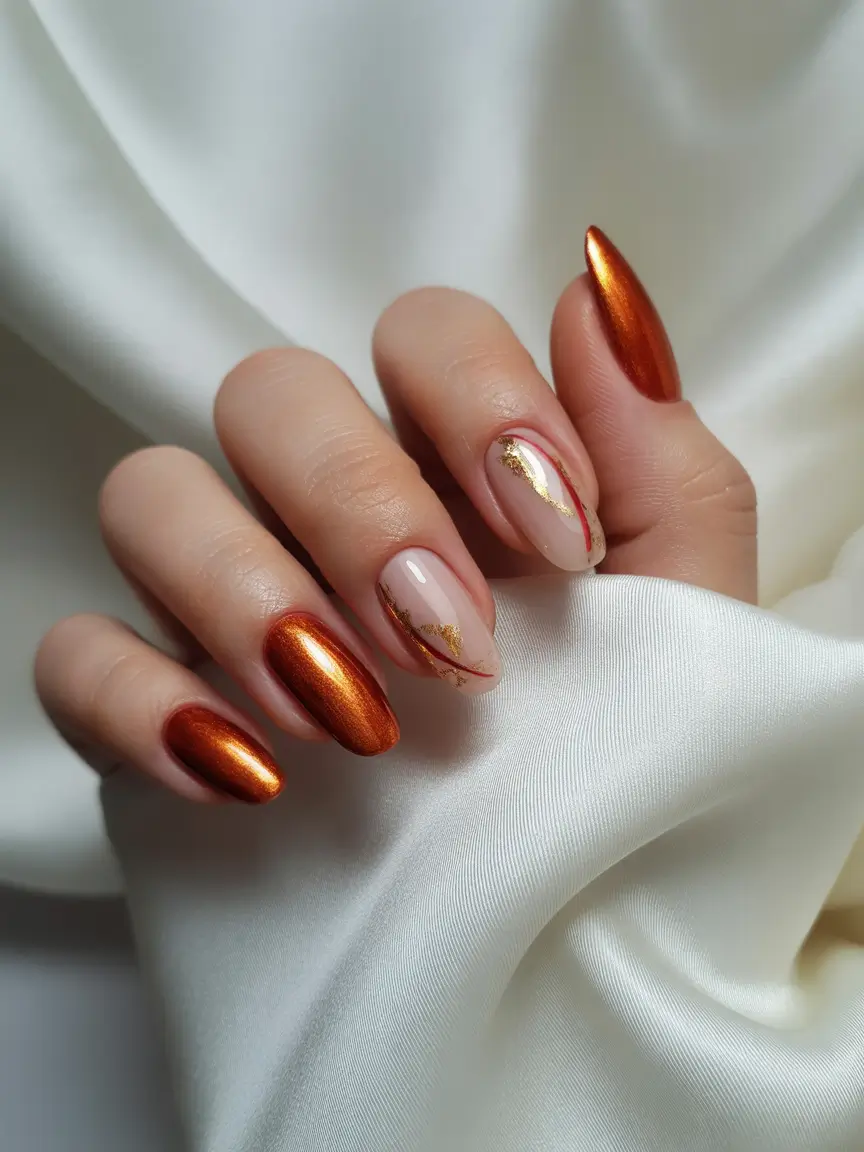
You’ll want a metallic copper like OPI’s “Yes My Condor Can Do!” or use a chrome powder over a rust gel base. The accent nail uses nude or sheer pink polish (Deborah Lippmann’s “Naked” is perfect), a hint of gold foil, and maybe a micro-stripe of red.
Chrome powders are a mess, but the reward is an out-of-this-world. Buff it over cured polish (without a top coat) and seal it in. To do the accent art you will need a striping brush and foil transfer gel, then apply your foil. Finish everything with a top coat for serious dimension.
This is chef kiss manicure to wear to a formal event, Thanksgiving dinner or any time you want to flex at the office and type loud on purpose. It is that kind of rare look that can be read as rich despite you being in Zara head to toe.
Mossy Matte with a Sketchy Twist
This one’s for the minimalist who still wants a little something-something. The moss green ground is so earthy and rooted, yet the finer lines of the black leaf drawings elevate it to curated. The matte finish is the clincher, it feels like velvet, like rain-scented forest air. Understated, but far from forgettable.
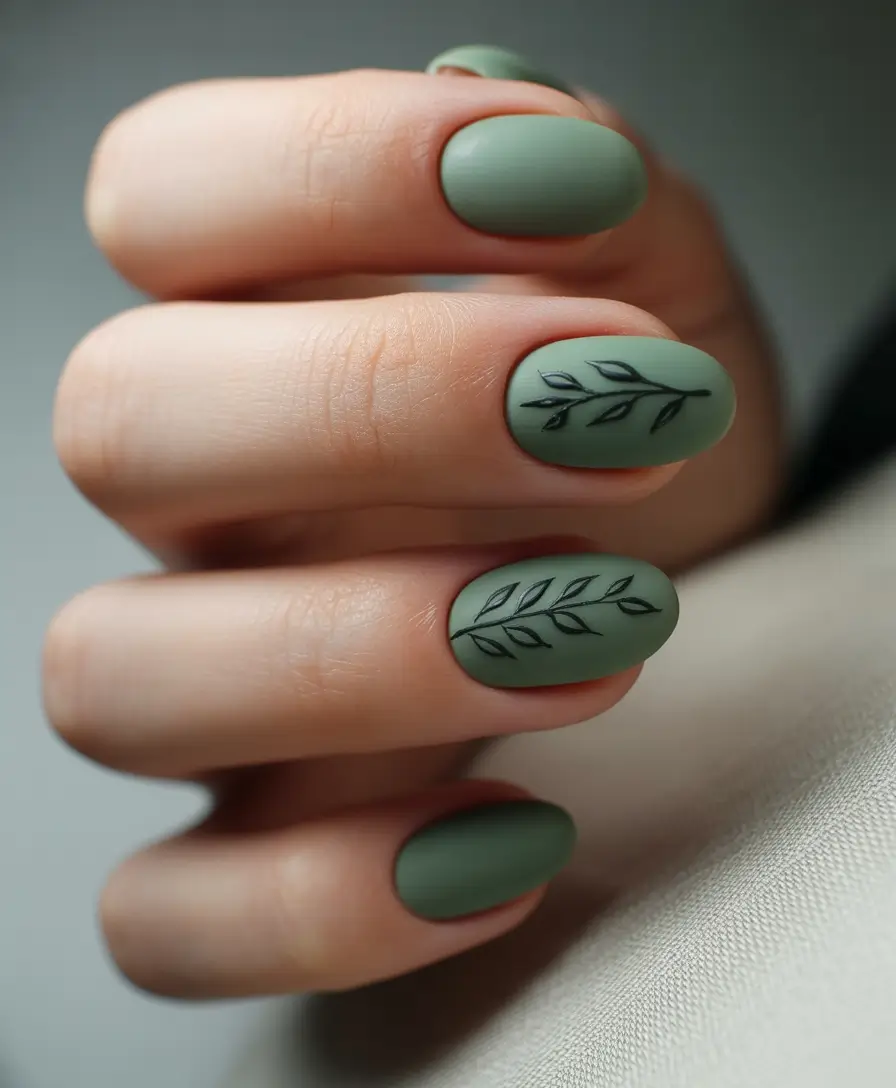
Use Sally Hansen in Rosemary or Zoya in Leif as the base and a matte top coat such as OPI Matte Top. For the leafy sketches, a black nail art pen or ultra-fine brush with gel paint does the job — look for Makartt Nail Art Paint Pens if you’re a beginner.
Skip the shine. Buff nails, put on two coats of green, and leave to dry. When that is established, sketch out your designs gradually, they do not have to be symmetrical. That’s the charm. Apply a matte top coat and see the texture appear.
I have never been a fan of matte nails in the winter months, I just feel like it is more seasonal. And when you add a hand-drawn detail? It is as though saying, I am concerned with the small things. I would combine this with a trench coat, ear buds in, walking under yellowing trees.
Sweetheart Pop
Who says hearts are just for February? These shiny, oval-shaped nails smothered in teeny-tiny red hearts are a fun little surprise for early fall — and I am 100% on board with it. The base is a sheer, almost skin-like nude pink that melts into the skin, and the hearts add the sort of cheeky whimsy you don’t typically associate with sweater weather. It’s cute, yes, but still totally grown.
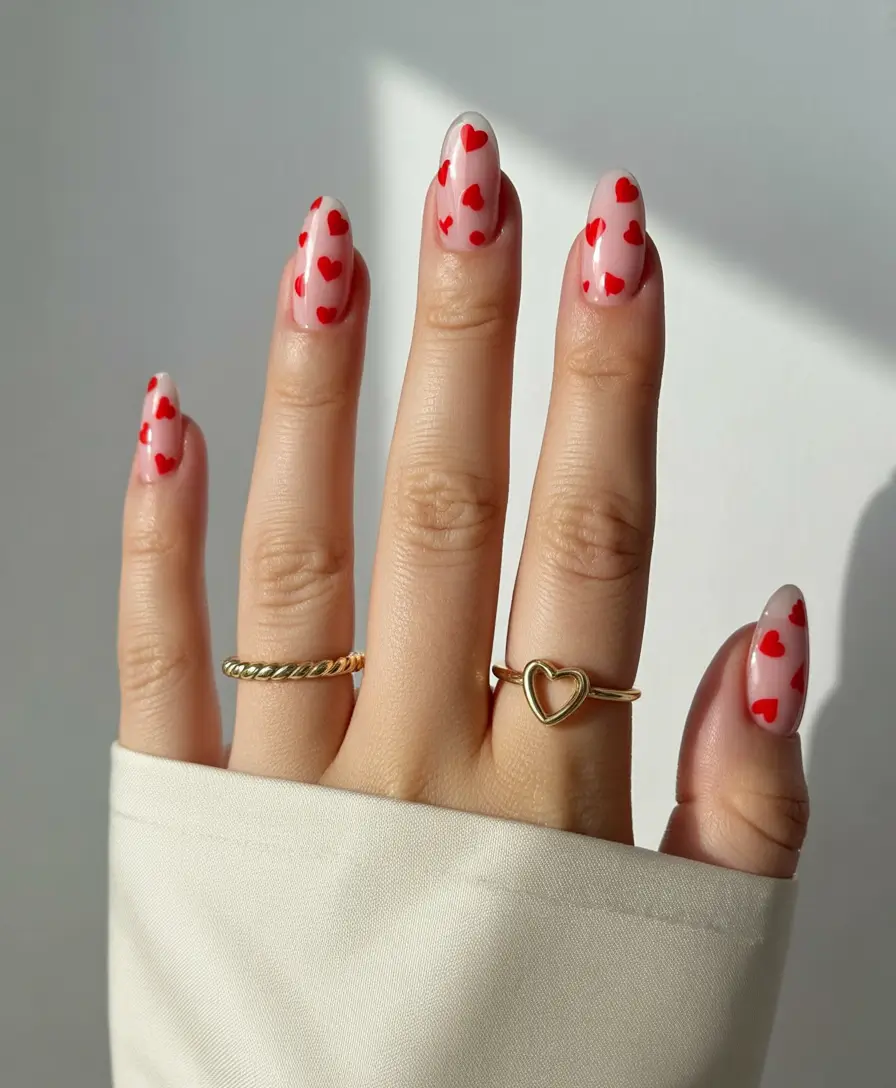
For the base go with OPI’s “Bubble Bath” or Essie’s “Ballet Slippers”. The hearts? You can freehand with a dotting tool and red polish like Olive & June’s “CV”, or use tiny stickers (trust me, SassyNails on Etsy makes great ones that won’t budge). A top coat that is super shiny will make the design seem even more polished.
This design is one of those mood-boosters – it’s great for when you are not quite ready for dark tones but still want something autumnal. It’s also super DIY-friendly. Two coats of the base, dot two little circles for the top of the heart, draw them down to a point — and done. Add top coat and you’re done.
My take? I love how unexpected this is for fall. It is like wearing red lipstick on a gray day, a bit cheeky, a bit naughty. I’d wear this for a weekend brunch, with camel trench and oversized sunnies, telling myself I’m not three coffees in already.
Autumn Prep School Mix
This one’s for my maximalists. If Fall had a fashion week this manicure would be strutting down the catwalk. Each nail is a story: plaid perfection, navy & copper foil, oxblood gloss, and that bit of leafy metallic in blue that holds it all together. It’s designed, but not too matchy-matchy and that oval shape keeps it sophisticated rather then crazy.
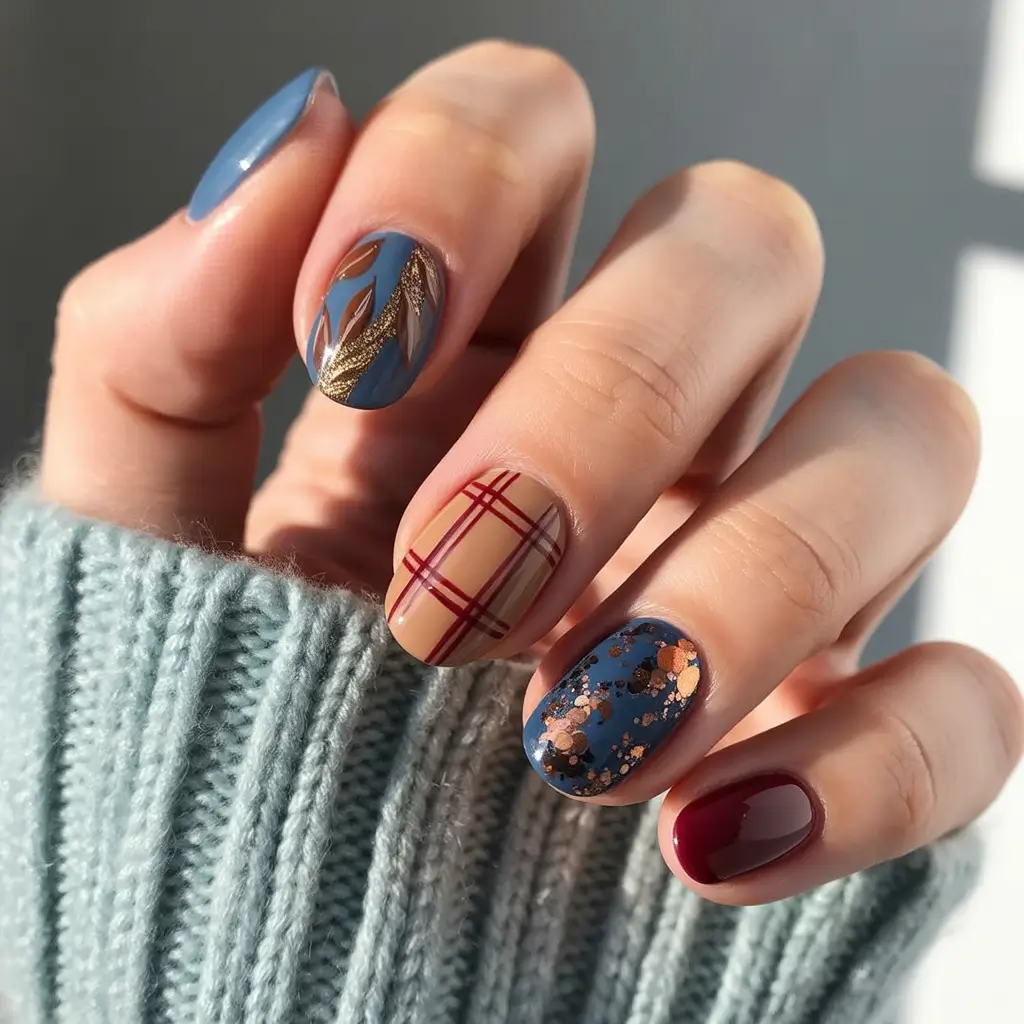
The magic is in sticking to a palette that works well together: navy, tan, burgundy and gold. Try Zoya’s “Sailor”, OPI’s “You Don’t Know Jacques!”, and Essie’s “Berry Naughty”. For the plaid and leaves, nail stripers and gold foil do it all — or rather, a few nail wraps if you want precision with zero stress.
Begin with painting a different base color on each nail, cure or let dry and then add your designs. Use a thin brush to layer the red lines on the tan nail — almost like you’re sketching on lined paper. For the navy foil nail, apply the foil to tacky polish or gel foil glue. Seal it all in with a good thick top coat to level it out.
I am always a sucker for nails that look like you had a million dollars spent on them at a fancy salon but could totally be done at home. This look is that layered, preppy fall feeling think a stack of Vogue and a Pinterest board entitled British Library Chic. Safe to say, I’m a fan.