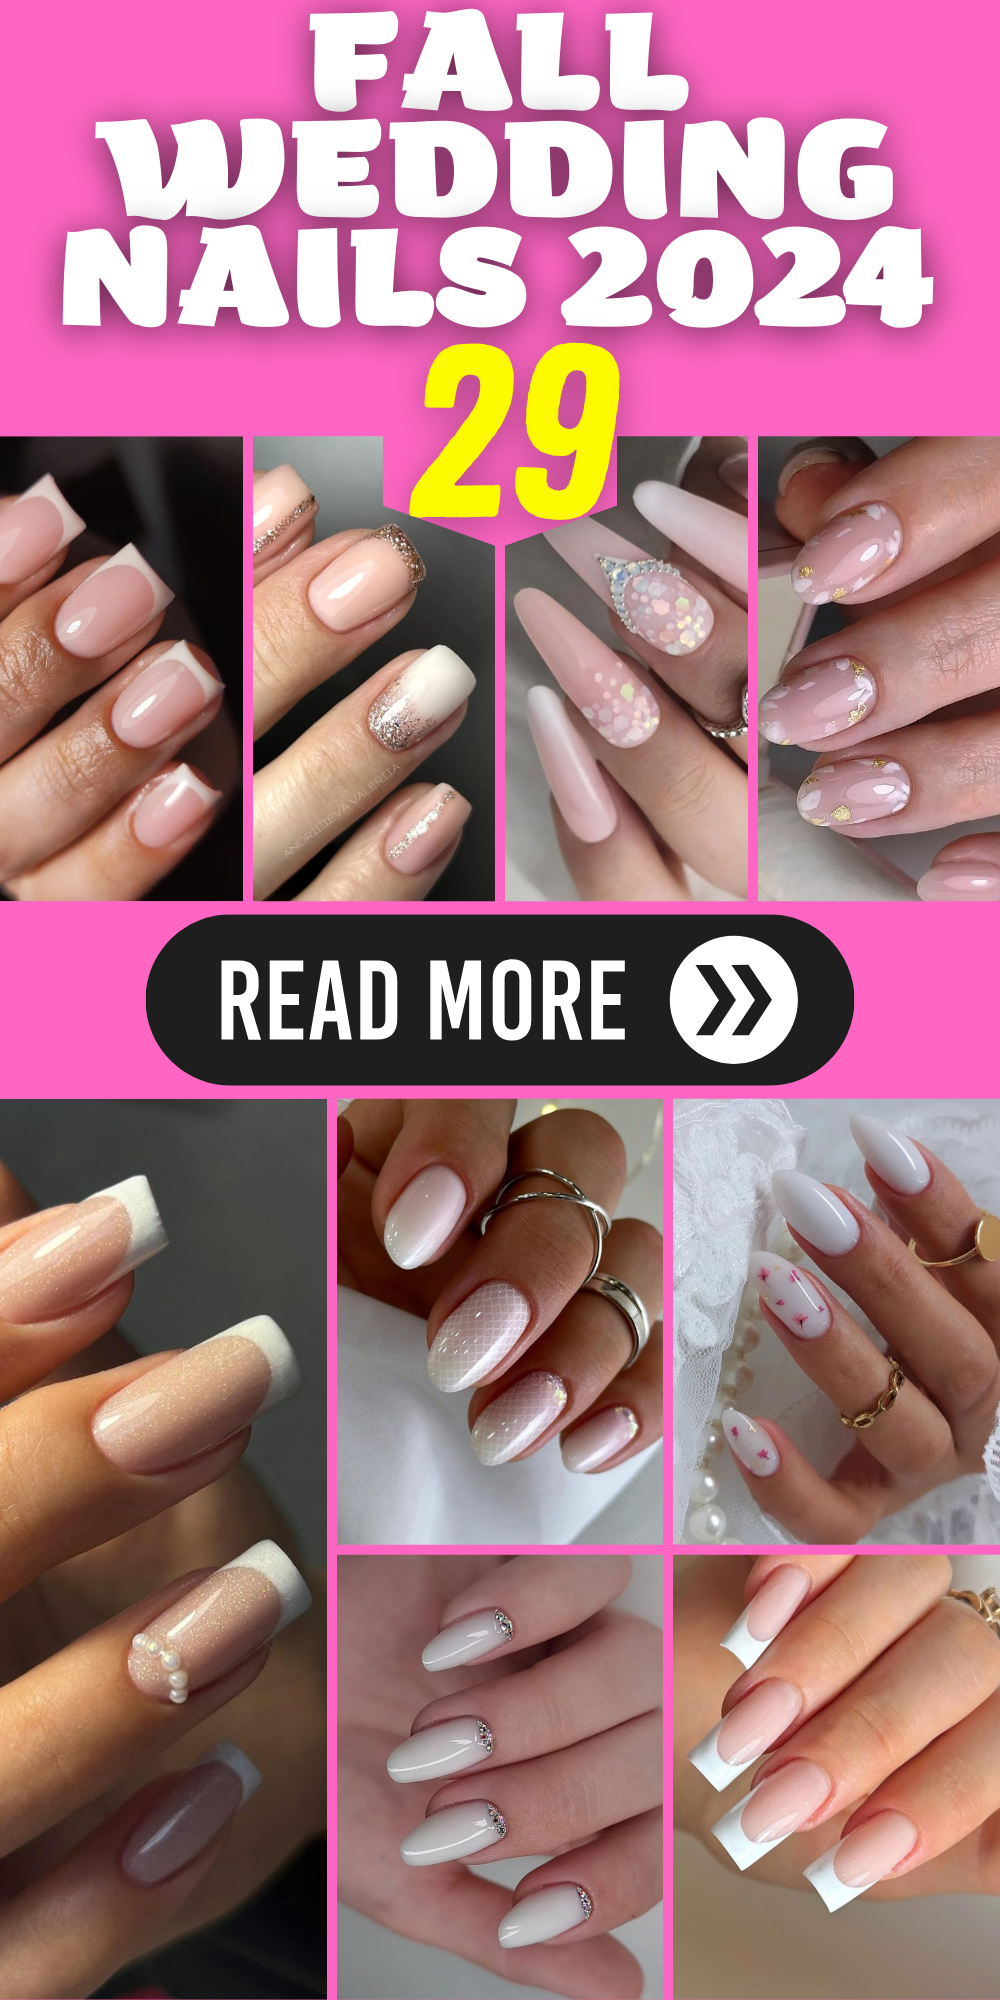
Fall Wedding Nails 2024: 29 Elegant Ideas for Your Big Day
Planning your wedding nails can be as exciting as choosing your dress. Fall wedding nails in 2024 offer a plethora of stunning designs, colors, and styles to complement your bridal look. Whether you’re the bride, bridesmaid, or a guest, there’s a nail design to suit every role and preference. Let’s dive into some of the best nail art ideas for the upcoming season.
Subtle Elegance
This nail design features a soft, neutral palette perfect for any bride seeking understated elegance. The delicate pink and white shades are enhanced by subtle gold accents, making it ideal for both classic and contemporary weddings. The short, almond-shaped nails ensure a comfortable and chic look, allowing the natural beauty of the bride to shine through.
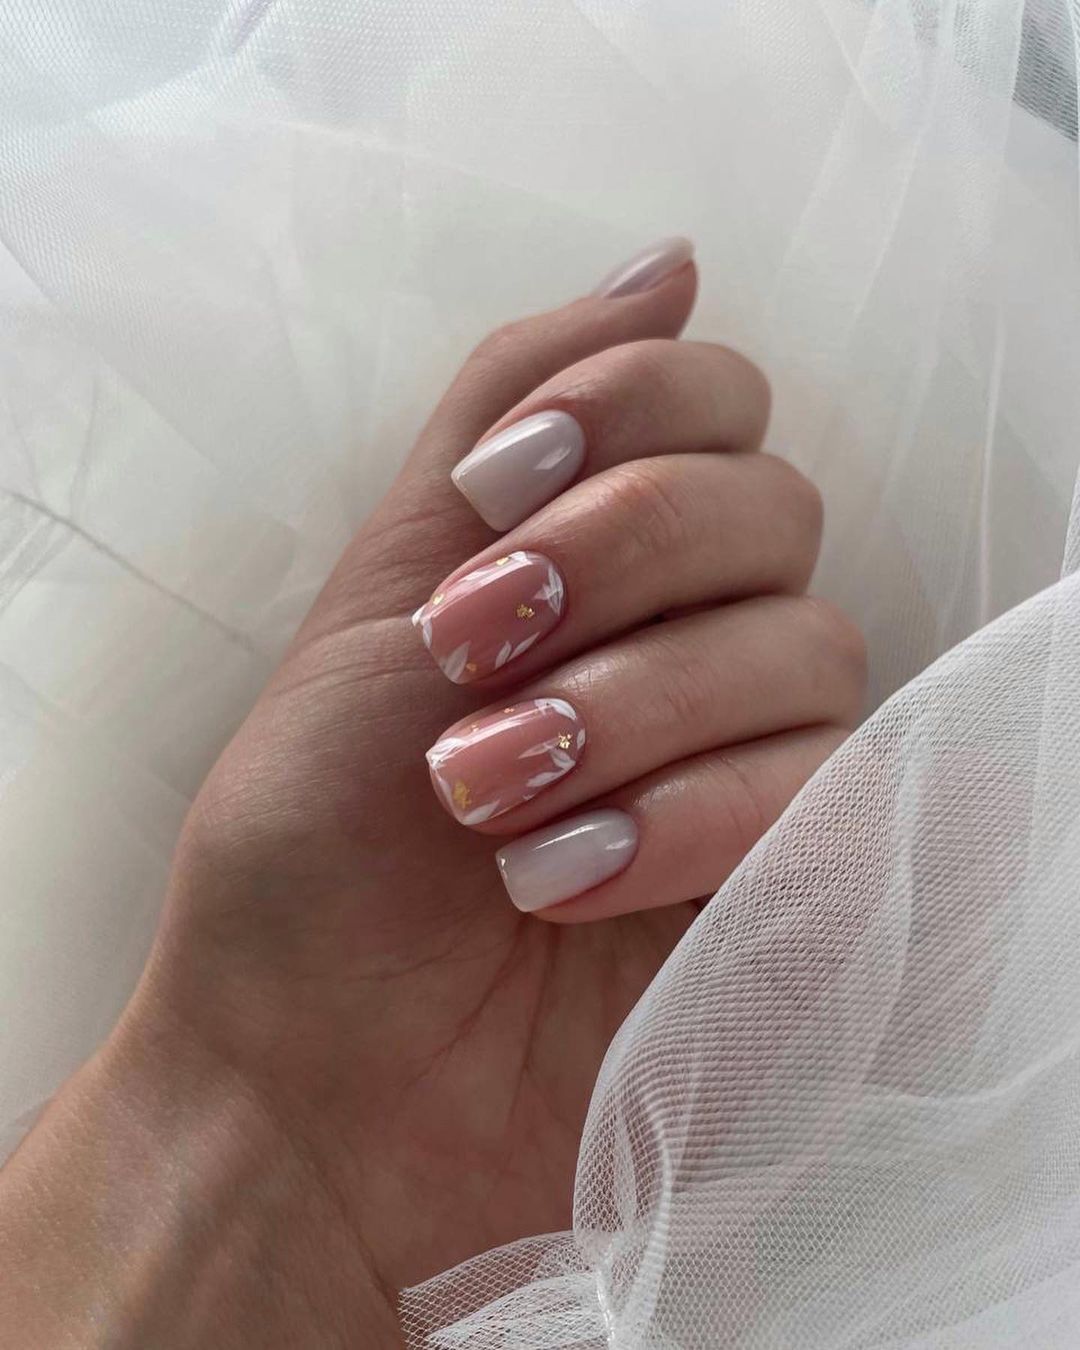
Consumables:
- Base coat: Essie All-In-One Base Coat
- Pink polish: OPI “Bubble Bath”
- White polish: Essie “Blanc”
- Gold foil accents: Born Pretty Gold Nail Foil
- Top coat: Seche Vite Dry Fast Top Coat
Instructions:
- Apply a base coat to protect your natural nails.
- Apply two coats of pink polish on all nails except the ring fingers.
- Paint the ring fingers with white polish.
- Use tweezers to place small pieces of gold foil on the white nails.
- Seal the design with a high-quality top coat to ensure longevity.
Glamorous Glitter
For the bride who loves a touch of glamour, this design combines a creamy nude base with glittery accents on the ring and pinky fingers. The stiletto shape adds drama, while the glitter provides the right amount of sparkle without overpowering the look. This design is perfect for brides wanting a bit of art and shine.
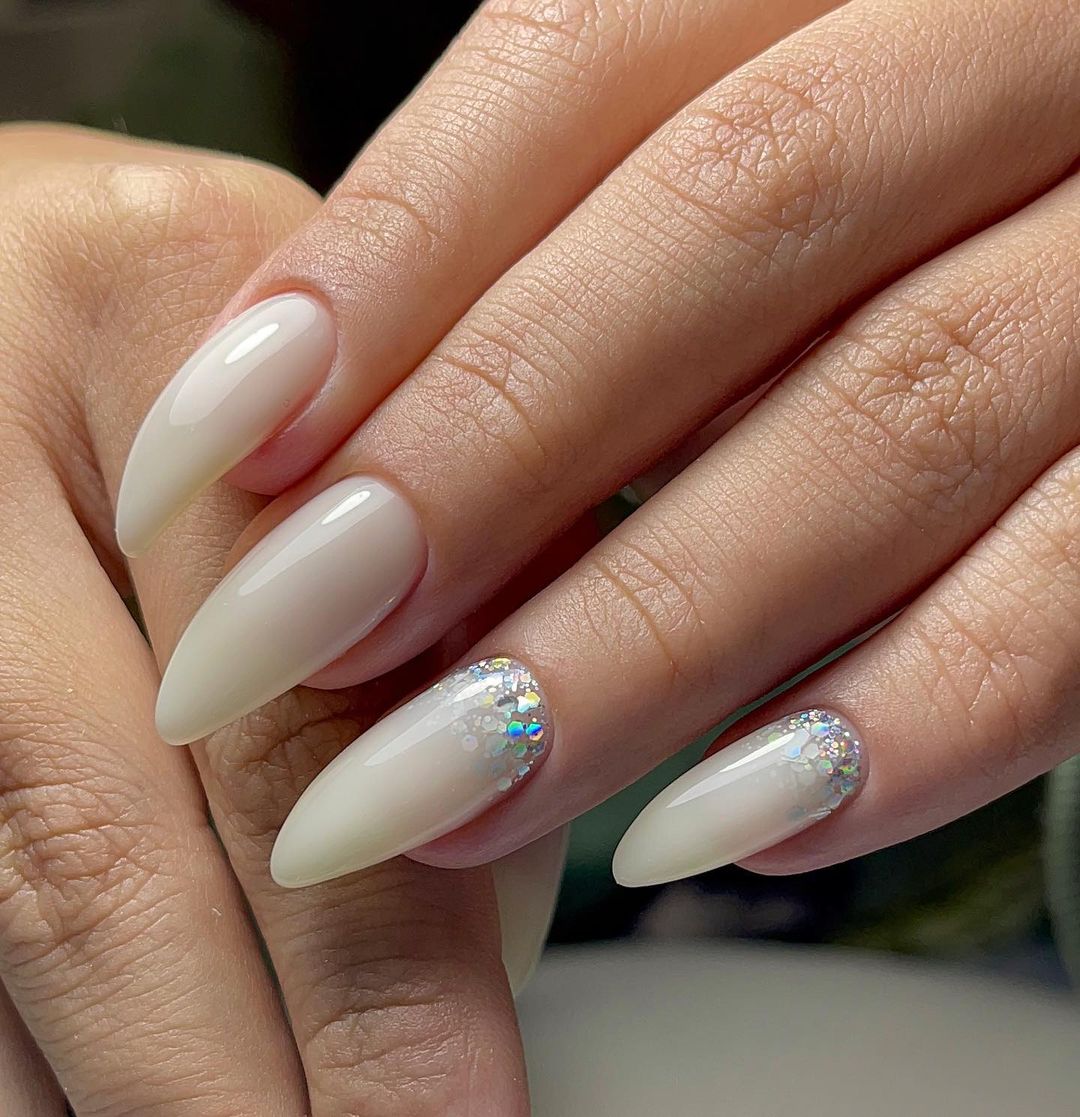
Consumables:
- Base coat: OPI Nail Envy
- Nude polish: Sally Hansen “Bare It All”
- Glitter polish: China Glaze “Glistening Snow”
- Top coat: Gelish Top It Off
Instructions:
- Start with a base coat to strengthen your nails.
- Apply two coats of nude polish.
- On the ring and pinky fingers, apply glitter polish.
- Let the nails dry completely before sealing with a top coat.
Romantic Roses
This intricate design features delicate white roses on a sheer pink base, perfect for a romantic bride. The floral patterns add a touch of whimsy and elegance, making it an ideal choice for those who want a blend of tradition and trendiness. The short, square shape is practical yet stylish, fitting for any bridesmaid or mother of the bride.
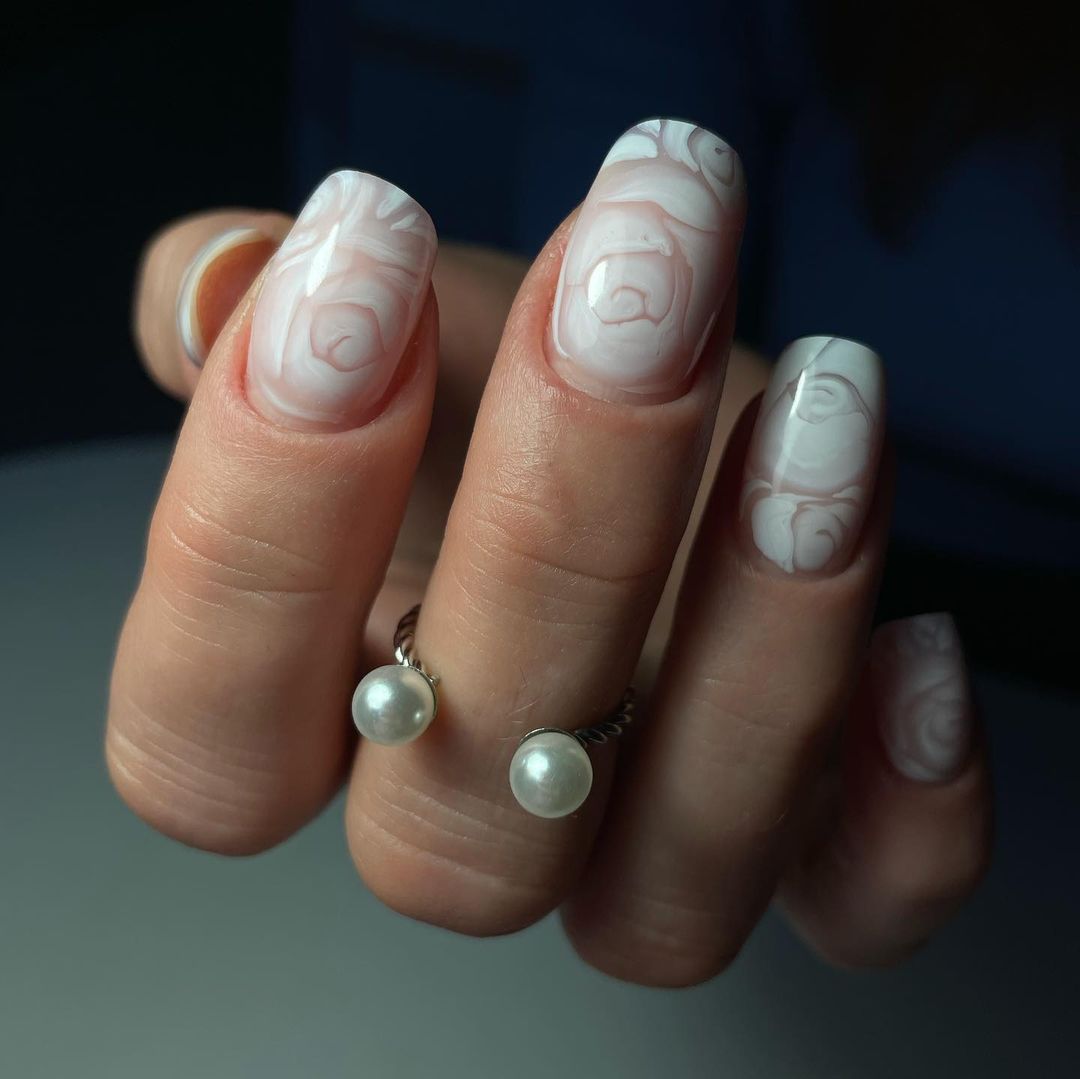
Consumables:
- Base coat: Zoya Anchor Base Coat
- Sheer pink polish: Essie “Ballet Slippers”
- White polish: China Glaze “White on White”
- Nail art brush: Winstonia Fine Liner Brush
- Top coat: Deborah Lippmann Gel Lab Top Coat
Instructions:
- Apply a base coat to all nails.
- Paint nails with two coats of sheer pink polish.
- Using a fine liner brush, draw white rose patterns on each nail.
- Allow the design to dry completely and finish with a top coat.
Iridescent Allure
These iridescent nails are a stunning choice for a bride who wants to add a touch of magic to her wedding look. The nails feature a shimmering white base with a hint of holographic sparkle that catches the light beautifully. The long, stiletto shape adds drama and elegance, making this design perfect for a bride classy bridal look. The iridescent finish offers a trendy twist while maintaining a sophisticated appeal.
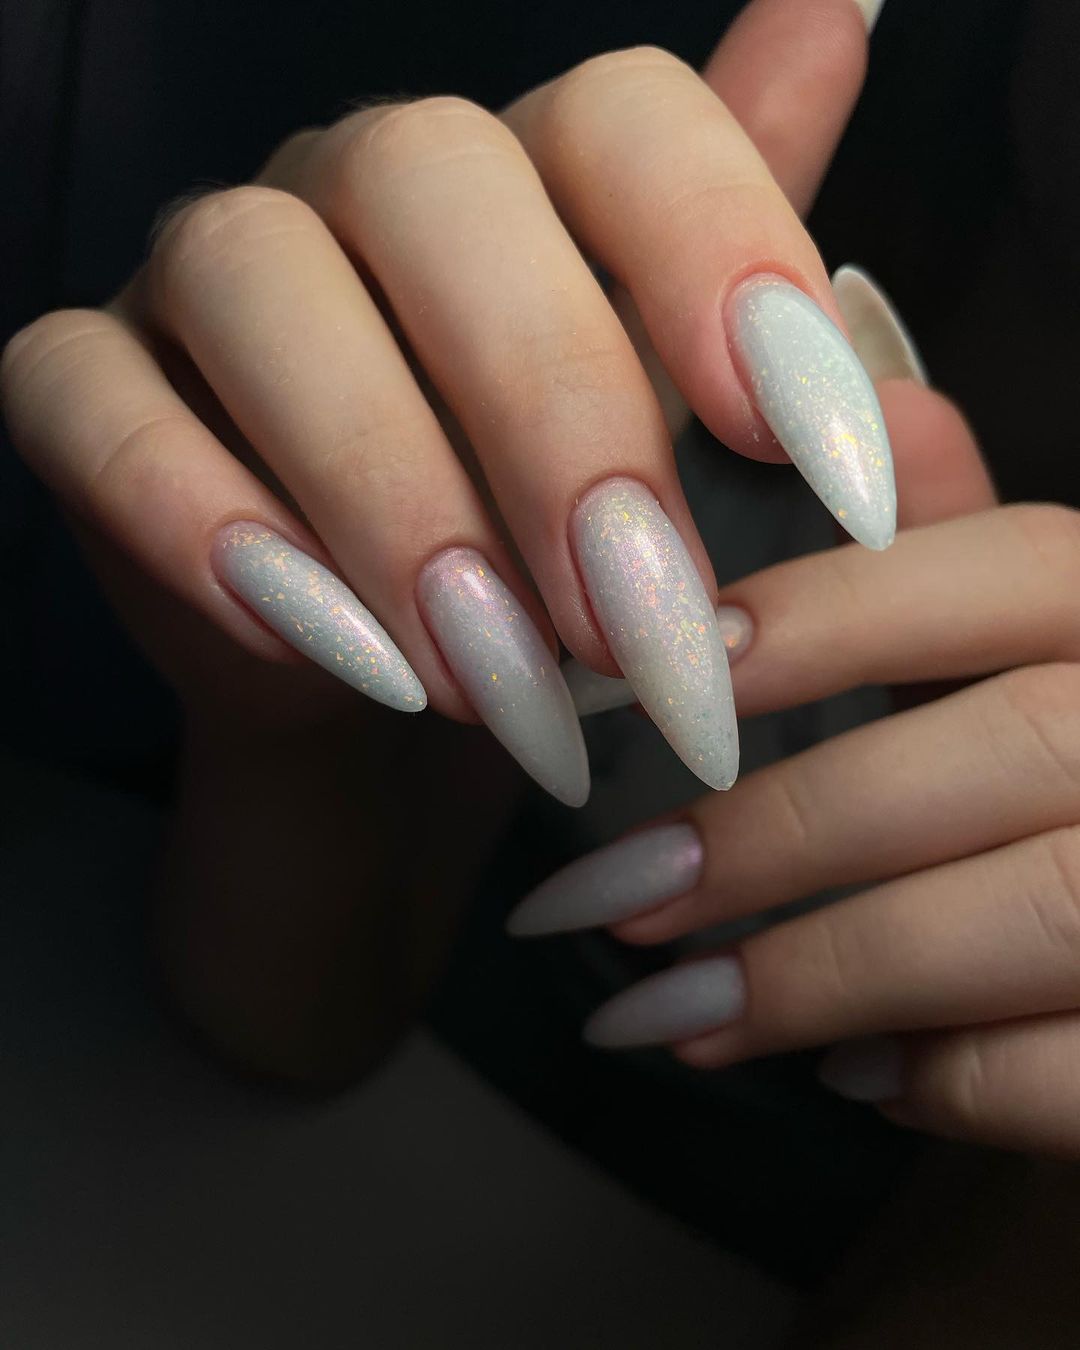
Consumables:
- Base coat: CND Stickey Base Coat
- White polish: Zoya “Snow White”
- Holographic top coat: ILNP “My Private Rainbow”
- Top coat: Essie Gel Couture Top Coat
Instructions:
- Start with a base coat to protect and prep your nails.
- Apply two coats of white polish, allowing each layer to dry completely.
- Add a layer of the holographic top coat for that iridescent shimmer.
- Seal the design with a high-quality top coat to ensure a long-lasting finish.
Save Pin
Soft Pink Ombré
This soft pink ombré design is ideal for a bridesmaid looking for a subtle yet elegant nail art. The gradient effect from a sheer pink to a creamy nude is both delicate and sophisticated. The almond shape adds a touch of modern elegance, making this design suitable for any wedding role, from the mother of the bride to a guest.
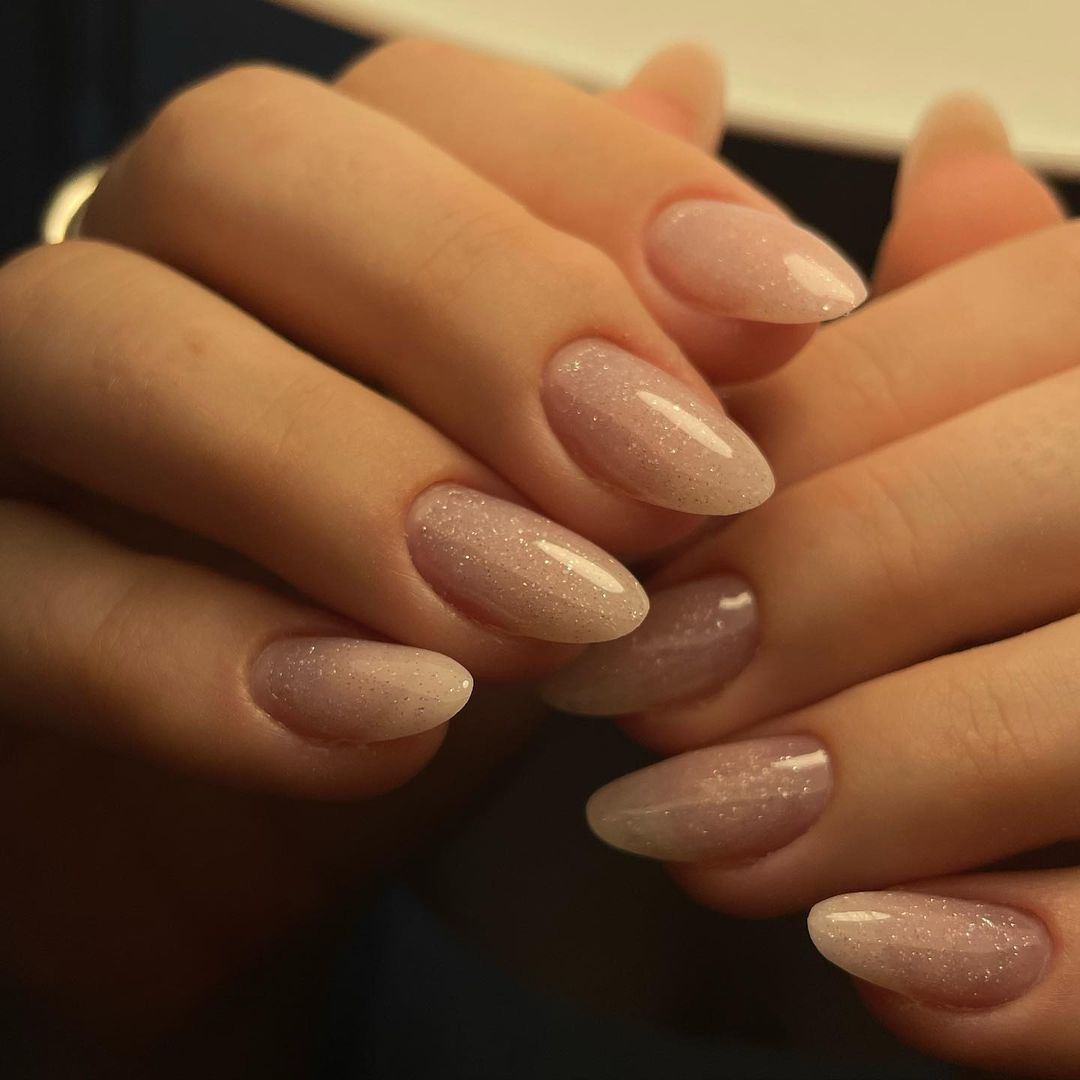
Consumables:
- Base coat: OPI Natural Nail Base Coat
- Sheer pink polish: Essie “Mademoiselle”
- Nude polish: Butter London “Tea With The Queen”
- Makeup sponge for blending
- Top coat: Seche Vite Dry Fast Top Coat
Instructions:
- Apply a base coat to all nails.
- Paint the entire nail with sheer pink polish.
- Dab a small amount of nude polish onto a makeup sponge and gently press it onto the tips of the nails, blending upwards for a seamless ombré effect.
- Repeat until the desired gradient is achieved.
- Seal with a top coat for a smooth and shiny finish.
Botanical Beauty
For those who appreciate intricate art designs, these botanical nails are perfect. The design features delicate white flowers and green leaves on a nude base, creating a fresh and romantic look. This nail art is particularly great for a bride who loves nature-inspired themes or for a bridesmaid elegant enough to complement the overall wedding aesthetic.
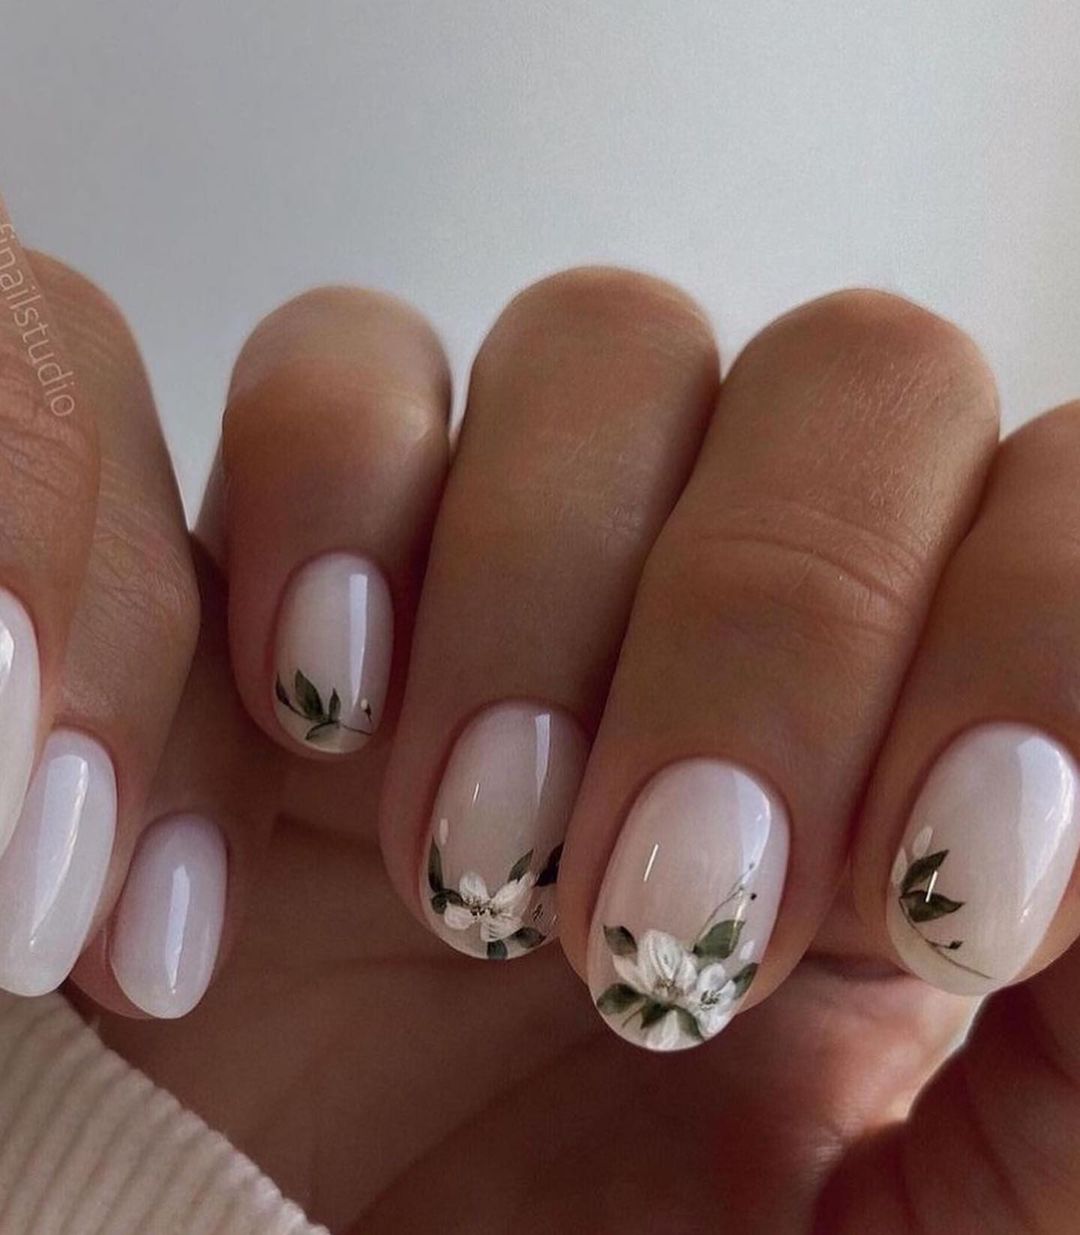
Consumables:
- Base coat: Zoya Anchor Base Coat
- Nude polish: OPI “Samoan Sand”
- White polish: Essie “Blanc”
- Green polish: OPI “Stay Off the Lawn!”
- Nail art brushes for detailed painting
- Top coat: Sally Hansen Miracle Gel Top Coat
Instructions:
- Begin with a base coat to prepare your nails.
- Apply two coats of nude polish as the base color.
- Using fine nail art brushes, paint small white flowers and green leaves on each nail.
- Allow the design to dry completely before applying a top coat to protect and add shine.
Elegant Floral
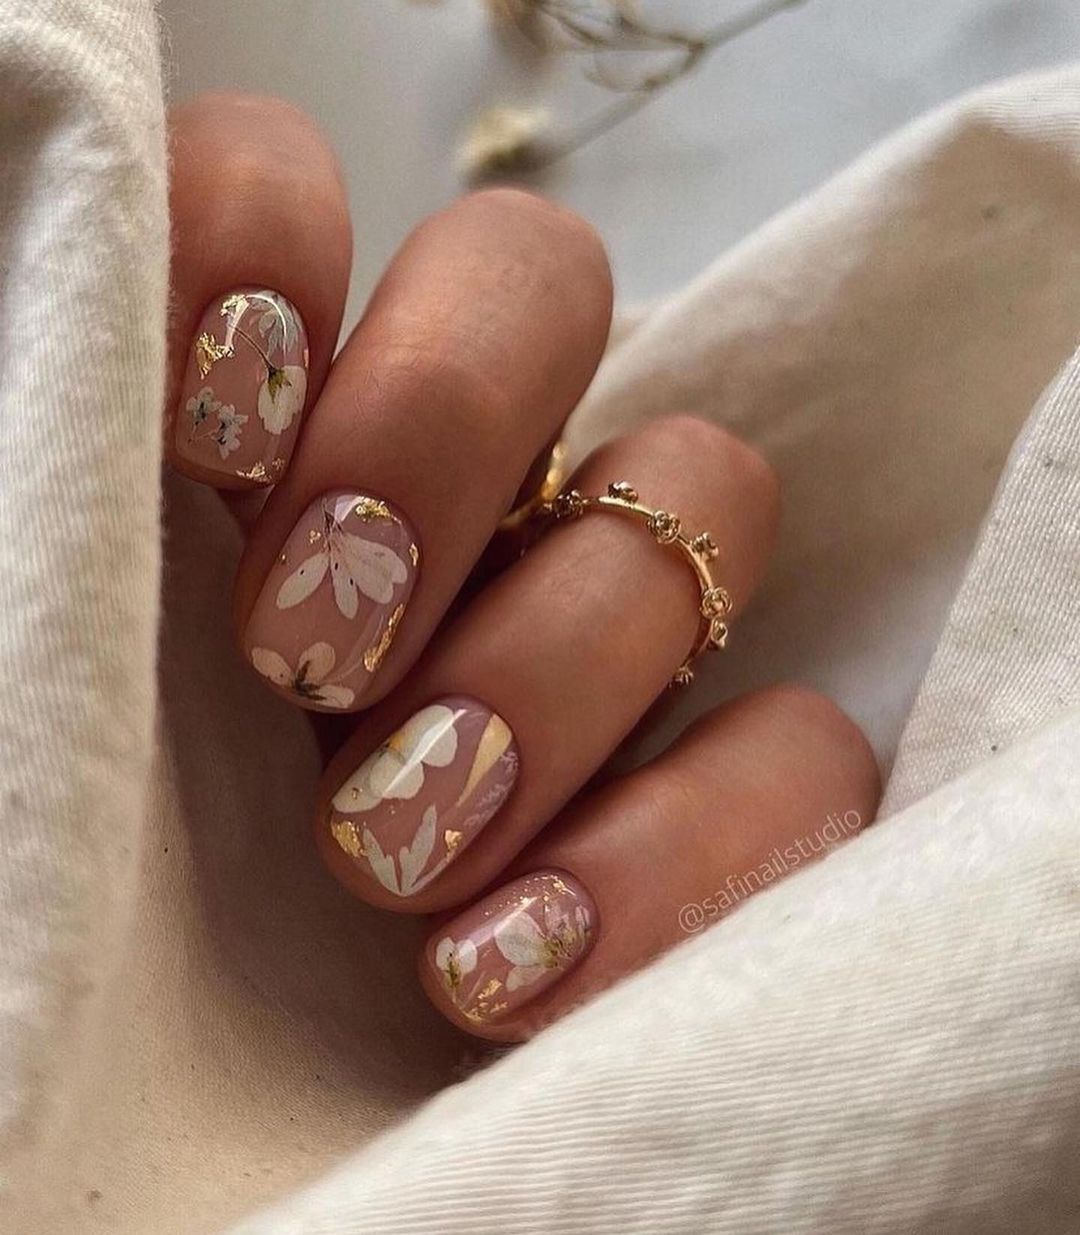
This nail design is a masterpiece for those who adore fall wedding nails 2024 with a touch of nature. The nails feature a delicate floral pattern on a soft pink base, accented with subtle gold foils. The short, rounded shape makes them suitable for both bride and bridesmaid roles, offering a classic yet trendy look. The intricate flowers and leaves bring a romantic and ethereal feel to the manicure, perfect for an autumn wedding.
Consumables:
- Base coat: Orly Bonder Base Coat
- Pink polish: Essie “Mademoiselle”
- White polish: OPI “Alpine Snow”
- Gold foil: Born Pretty Gold Leaf Foil
- Nail art brush for detailing
- Top coat: Seche Vite Dry Fast Top Coat
Instructions:
- Apply a base coat to all nails to ensure a smooth foundation.
- Paint the nails with two coats of pink polish.
- Use a nail art brush to paint white flowers and green leaves on each nail.
- Carefully place pieces of gold foil on the nails to add a touch of shimmer.
- Seal the design with a top coat to protect and add shine.
Marble Magic
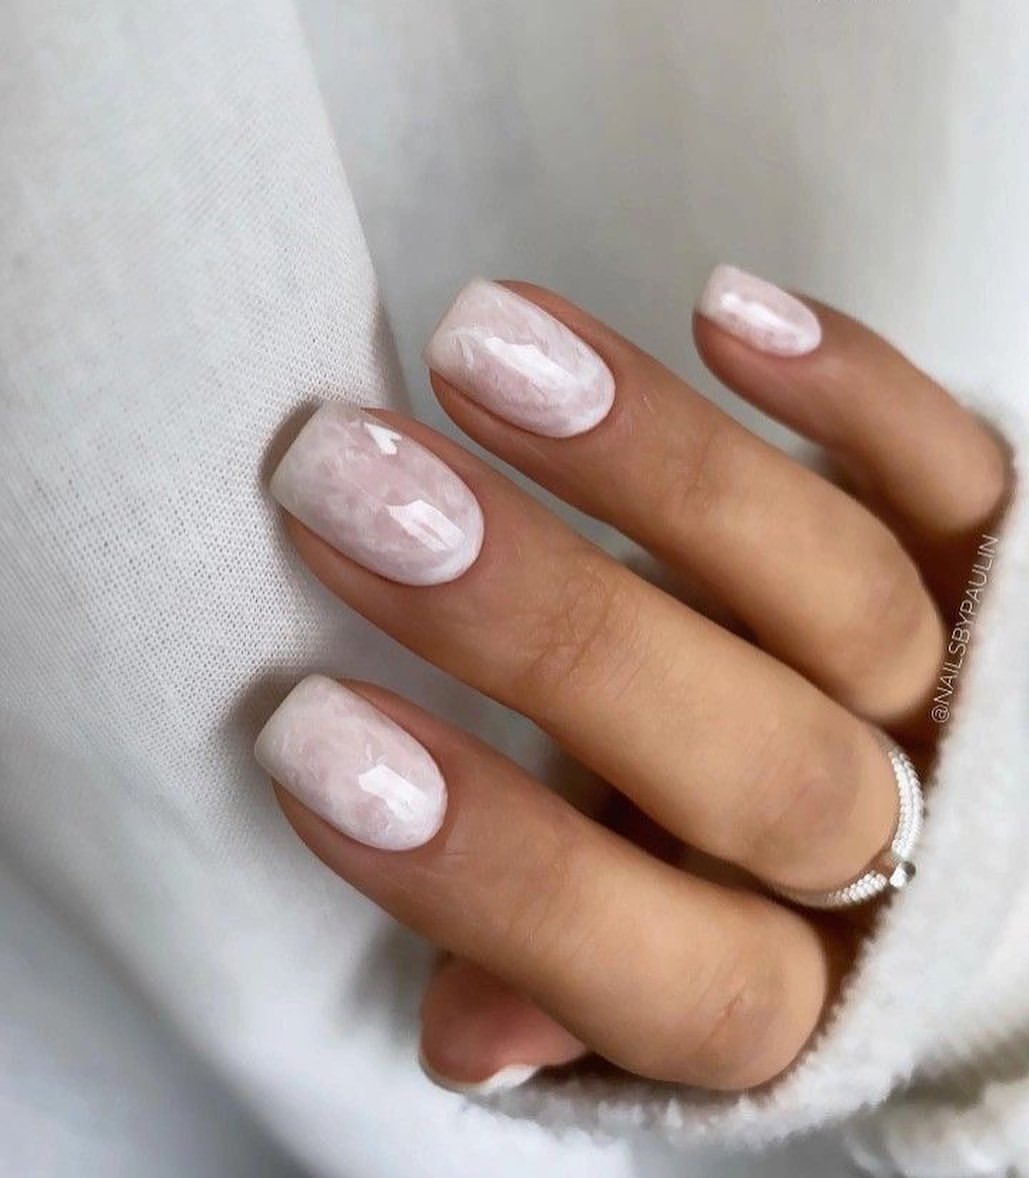
This elegant marble design is ideal for a bride who wants a sophisticated and timeless look. The nails feature a white marble pattern with soft pink veining, creating a luxurious and classic appearance. The short, square shape is perfect for those who prefer a more practical yet chic style. This design is versatile and can easily complement any wedding theme or dress.
Consumables:
- Base coat: CND Stickey Base Coat
- White polish: OPI “Funny Bunny”
- Pink polish: Essie “Fiji”
- Thin nail art brush for creating marble effect
- Top coat: Essie Gel Couture Top Coat
Instructions:
- Apply a base coat to all nails.
- Paint the nails with two coats of white polish.
- Using a thin nail art brush, create delicate pink veins on the nails to mimic marble.
- Allow the design to dry completely before applying a top coat to ensure a glossy and smooth finish.
Flying High
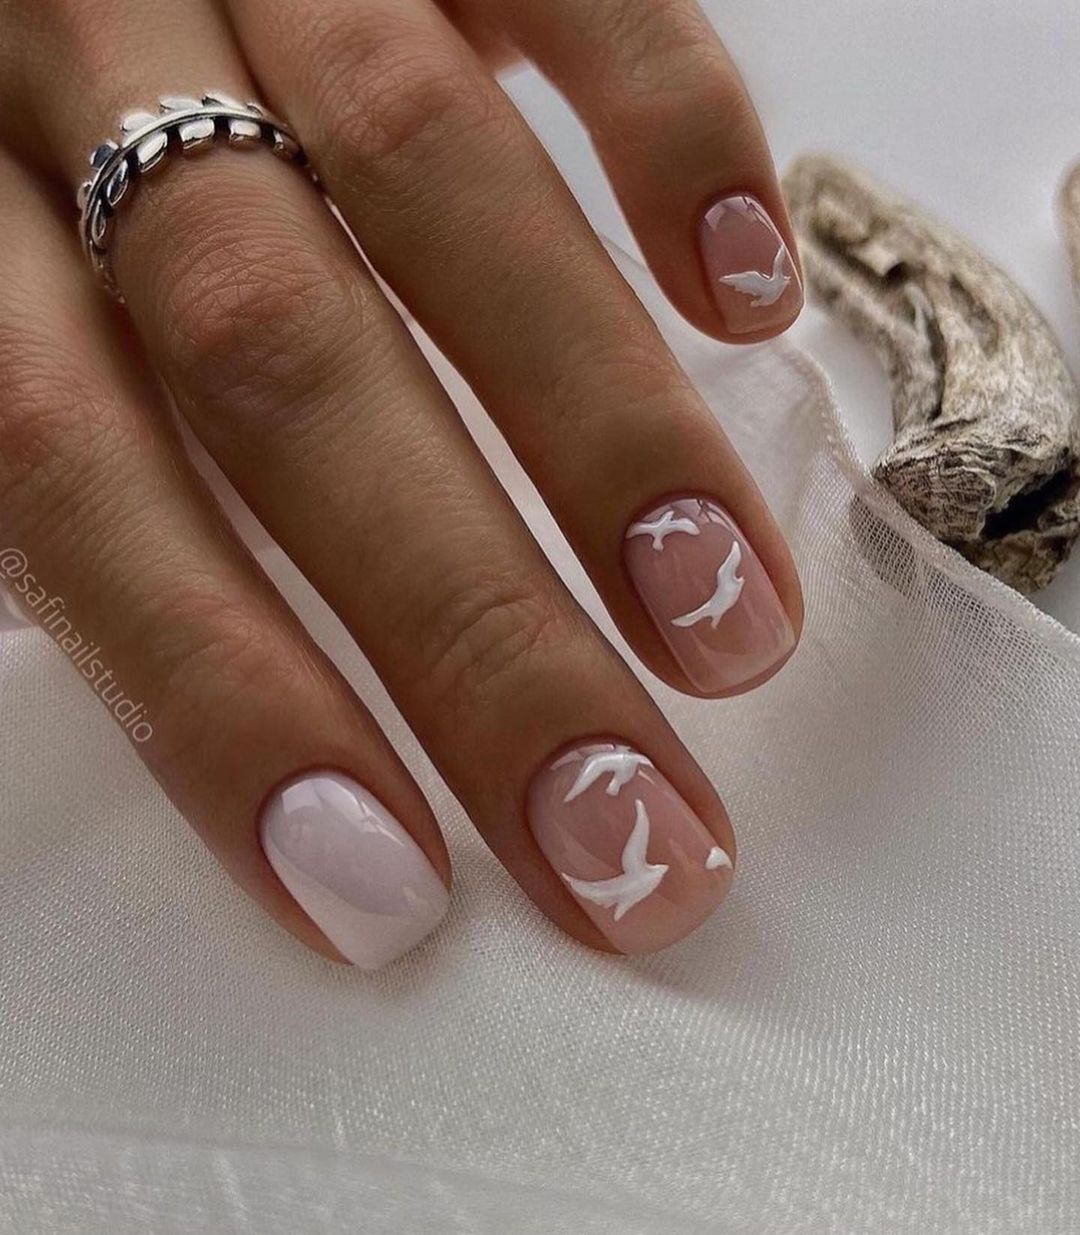
This whimsical nail design features delicate white birds in flight, perfect for a bride or bridesmaid looking for something unique and meaningful. The design is set against a neutral base, allowing the intricate bird motifs to stand out beautifully. The short, square shape adds to the practicality while maintaining elegance and charm.
Consumables:
- Base coat: Zoya Anchor Base Coat
- Nude polish: Butter London “Tea With The Queen”
- White polish: Essie “Blanc”
- Nail art brush for detailing
- Top coat: Deborah Lippmann Gel Lab Top Coat
Instructions:
- Apply a base coat to protect your nails.
- Paint the nails with two coats of nude polish.
- Use a nail art brush to paint white birds on each nail.
- Let the design dry completely and finish with a top coat for a polished look.
Save Pin
Vintage Roses
These vintage-inspired nails are perfect for a bride or bridesmaid who loves classic and romantic designs. The nails feature soft pink roses on a white base, creating a delicate and timeless look. The short, rounded shape ensures practicality while maintaining an elegant appearance. This design is perfect for adding a touch of vintage charm to any wedding ensemble.
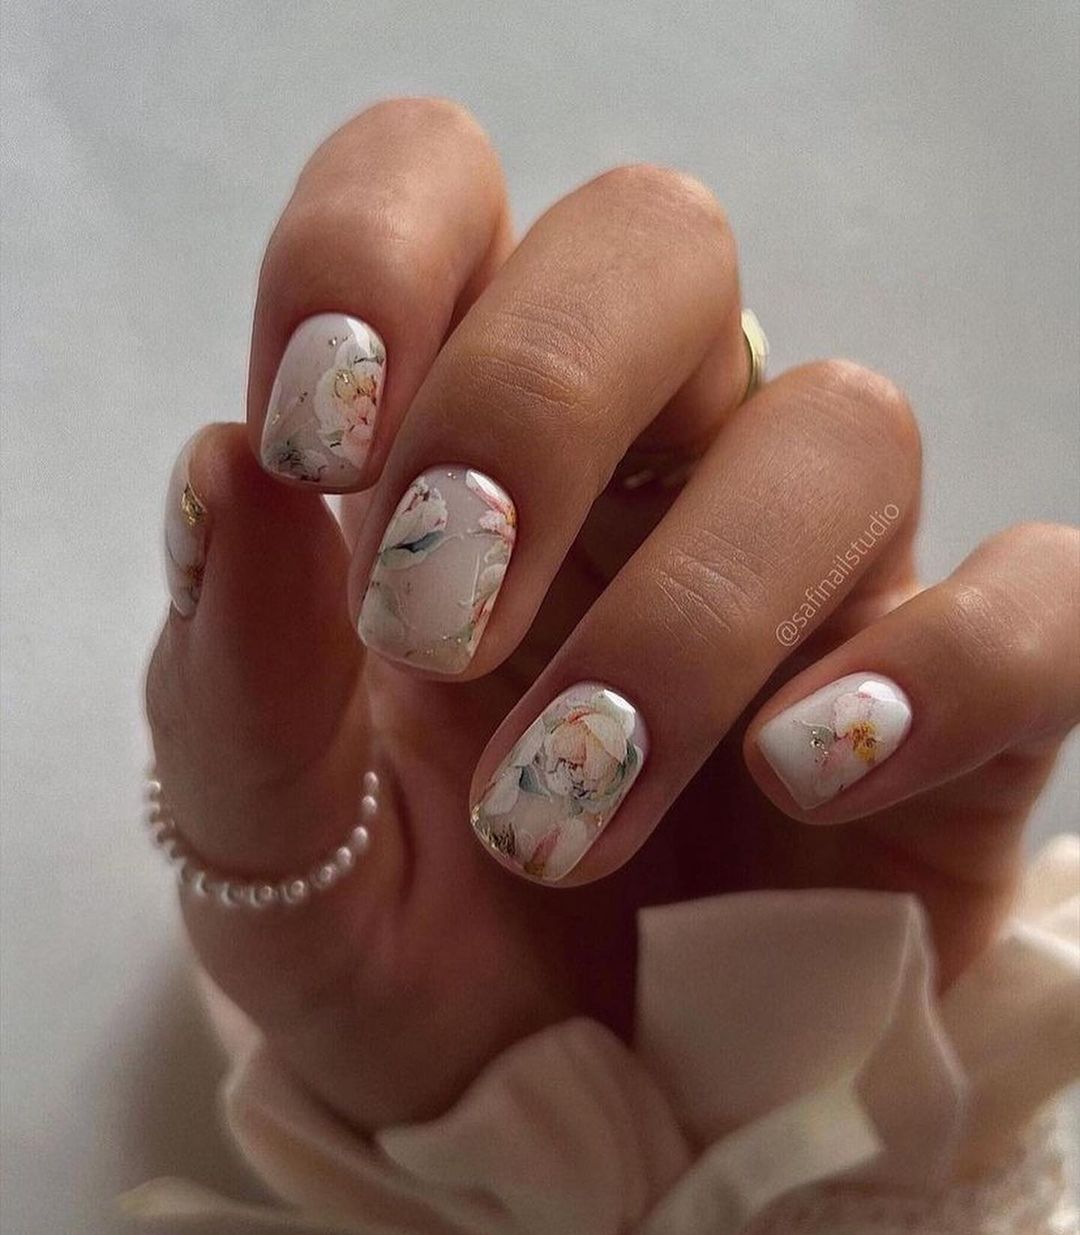
Consumables:
- Base coat: OPI Nail Envy
- White polish: Essie “Blanc”
- Pink polish: China Glaze “Go Go Pink”
- Green polish: OPI “Stay Off the Lawn!”
- Nail art brush for detailing
- Top coat: Seche Vite Dry Fast Top Coat
Instructions:
- Start with a base coat to protect your nails.
- Paint the nails with two coats of white polish.
- Using a nail art brush, paint pink roses and green leaves on each nail.
- Allow the design to dry completely before applying a top coat to ensure a long-lasting finish.
Botanical Bliss
This botanical nail design is perfect for a bride who loves nature-inspired art. The nails feature delicate wildflowers on a white base, creating a fresh and natural look. The almond shape adds elegance and sophistication, making it an ideal choice for a wedding. This design is versatile and can suit both bride and bridesmaid roles.
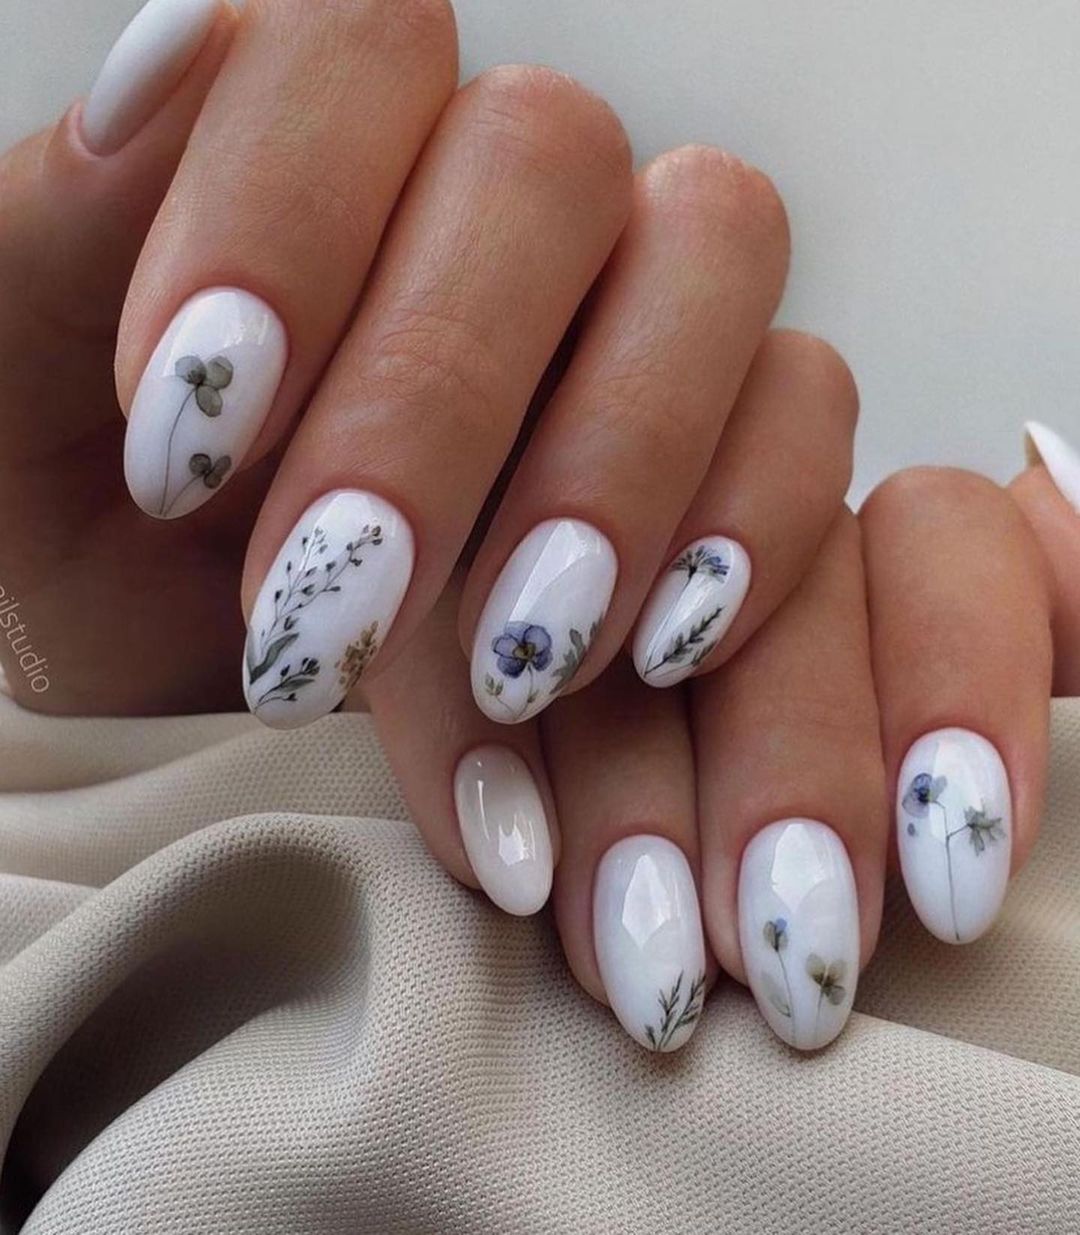
Consumables:
- Base coat: Orly Bonder Base Coat
- White polish: OPI “Alpine Snow”
- Various colors for flowers: Essie “Flowerista”, OPI “Sunrise…Bedtime!”, and Zoya “Tiana”
- Nail art brush for detailing
- Top coat: Sally Hansen Miracle Gel Top Coat
Instructions:
- Apply a base coat to all nails.
- Paint the nails with two coats of white polish.
- Using a nail art brush, paint various flowers and leaves on each nail.
- Let the design dry completely and finish with a top coat to protect and add shine.
Garden Party
This nail design features a charming mix of pastel flowers and leaves, perfect for a bride who loves a touch of whimsy. The nails have a clear base with white tips and intricate floral patterns, creating a fresh and romantic look. The short, rounded shape is practical and stylish, making this design suitable for any wedding role.
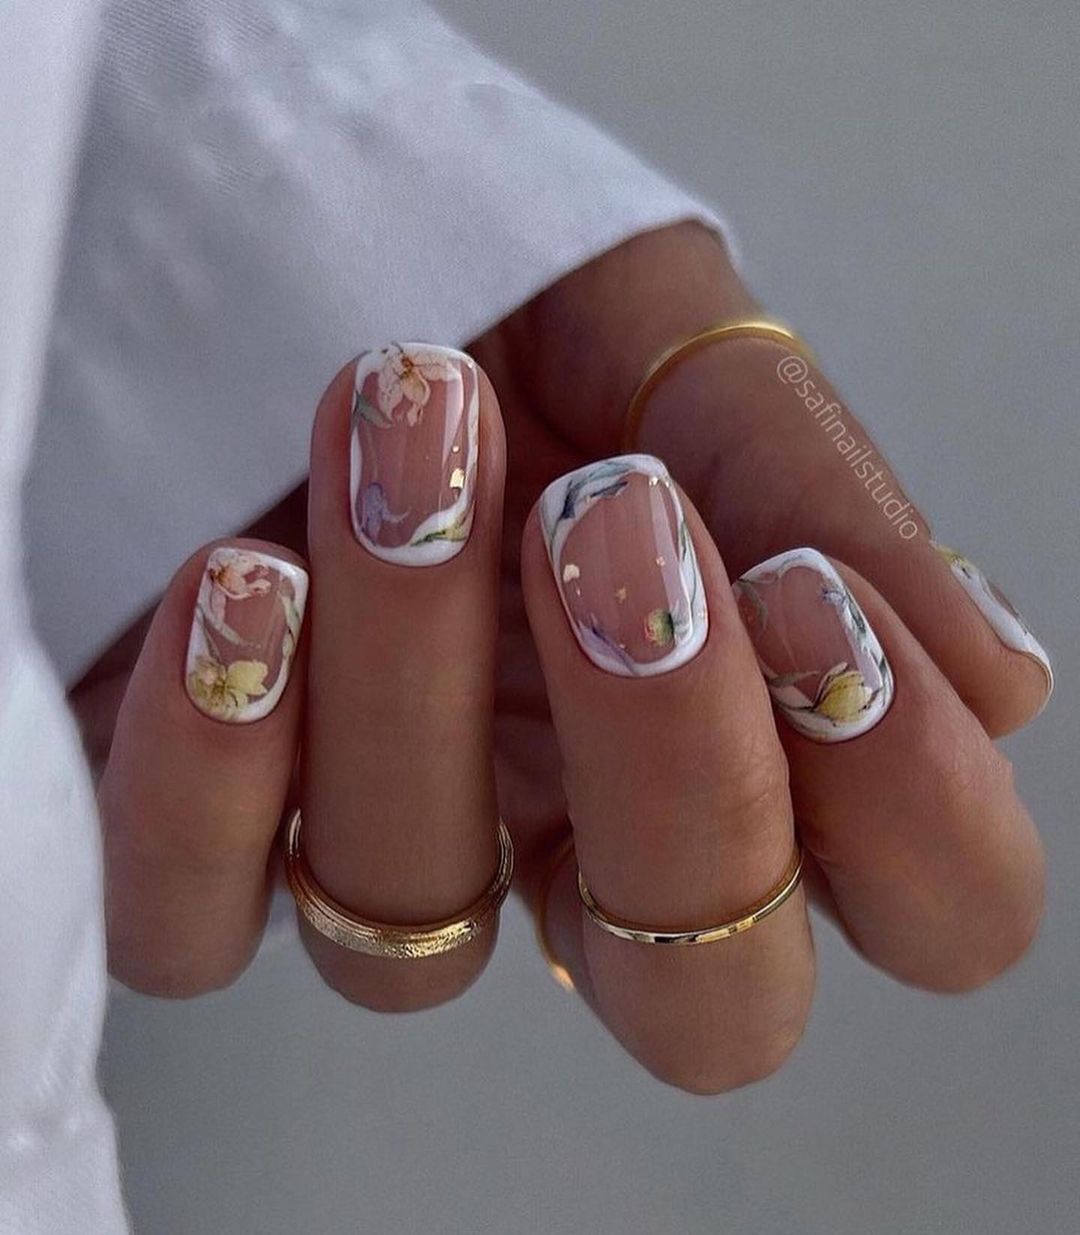
Consumables:
- Base coat: Zoya Anchor Base Coat
- Clear polish: Essie “Ballet Slippers”
- White polish: OPI “Alpine Snow”
- Various colors for flowers: China Glaze “Petal to the Metal”, OPI “Do You Lilac It?”, and Essie “Mint Candy Apple”
- Nail art brush for detailing
- Top coat: Deborah Lippmann Gel Lab Top Coat
Instructions:
- Start with a base coat to protect your nails.
- Apply a clear polish as the base.
- Paint the tips of the nails white.
- Using a nail art brush, create intricate floral patterns on each nail.
- Allow the design to dry completely before applying a top coat to ensure a polished and long-lasting finish.
Glitter French Tips
This elegant nail design features a modern twist on the classic French manicure with a touch of sparkle. The nails are painted with a soft, milky white base and adorned with silver glitter tips. The short, square shape ensures practicality while adding a hint of glamour, making it perfect for a bride who wants to keep things simple yet chic.
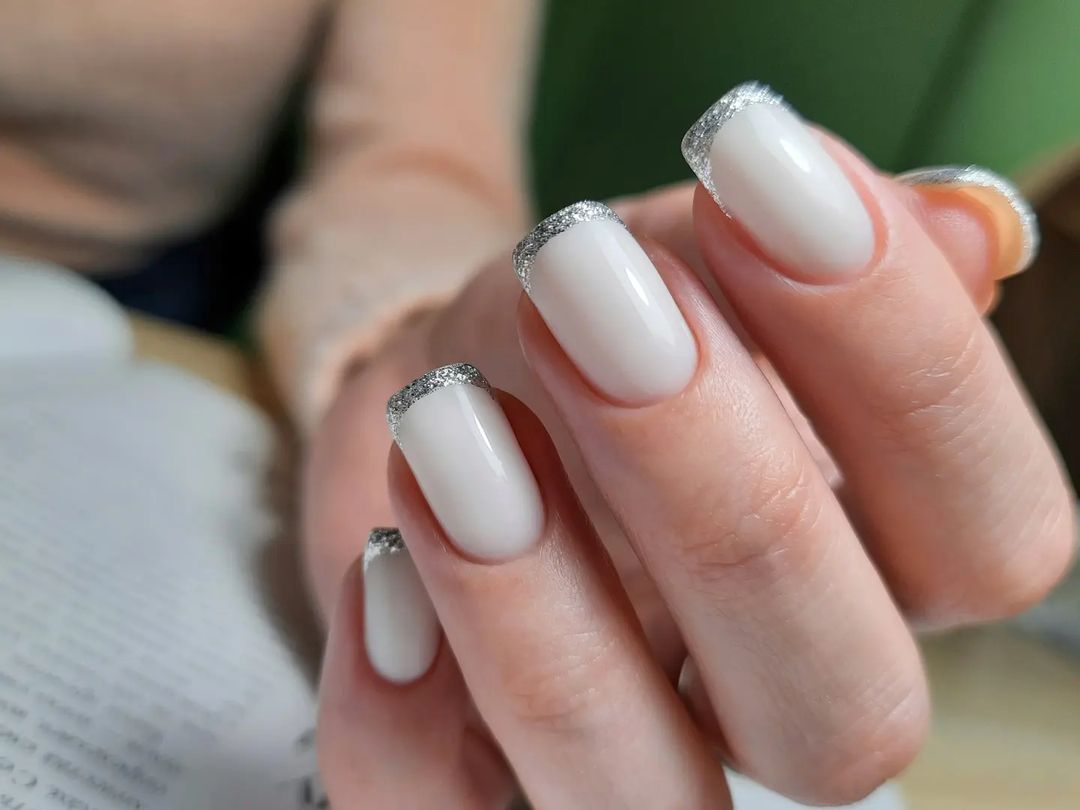
Consumables:
- Base coat: Essie First Base
- White polish: OPI “Funny Bunny”
- Silver glitter: Sally Hansen “Strobe Light”
- Top coat: Seche Vite Dry Fast Top Coat
Instructions:
- Apply a base coat to all nails.
- Paint the nails with two coats of the white polish.
- Use a thin brush to apply silver glitter to the tips of each nail, creating a French tip effect.
- Seal the design with a top coat to ensure a smooth and lasting finish.
Gold Leaf Elegance
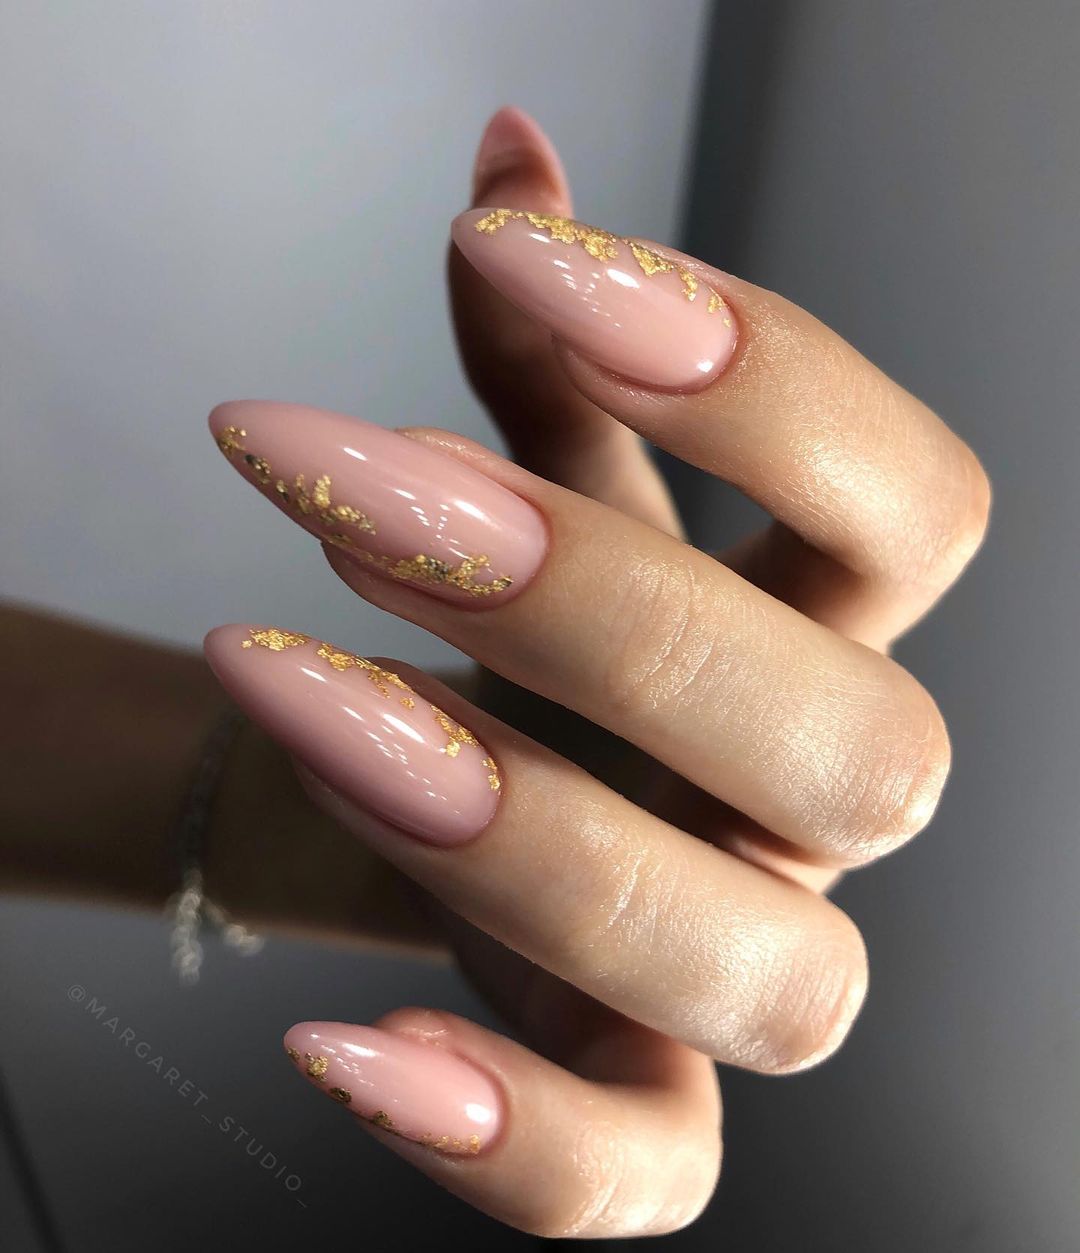
This luxurious nail design is perfect for a bride classy bridal look. The nails feature a nude base with gold leaf accents, creating an elegant and sophisticated appearance. The almond shape adds to the overall graceful aesthetic, making it suitable for a bride or mother of the bride who wants a touch of opulence.
Consumables:
- Base coat: Orly Bonder Base Coat
- Nude polish: OPI “Samoan Sand”
- Gold leaf: Born Pretty Gold Leaf Flakes
- Top coat: Essie Gel Couture Top Coat
Instructions:
- Start with a base coat to protect your nails.
- Apply two coats of nude polish and let it dry completely.
- Carefully place small pieces of gold leaf on each nail using a tweezer.
- Finish with a top coat to secure the gold leaf and add a glossy finish.
Minimalist Leaf Art
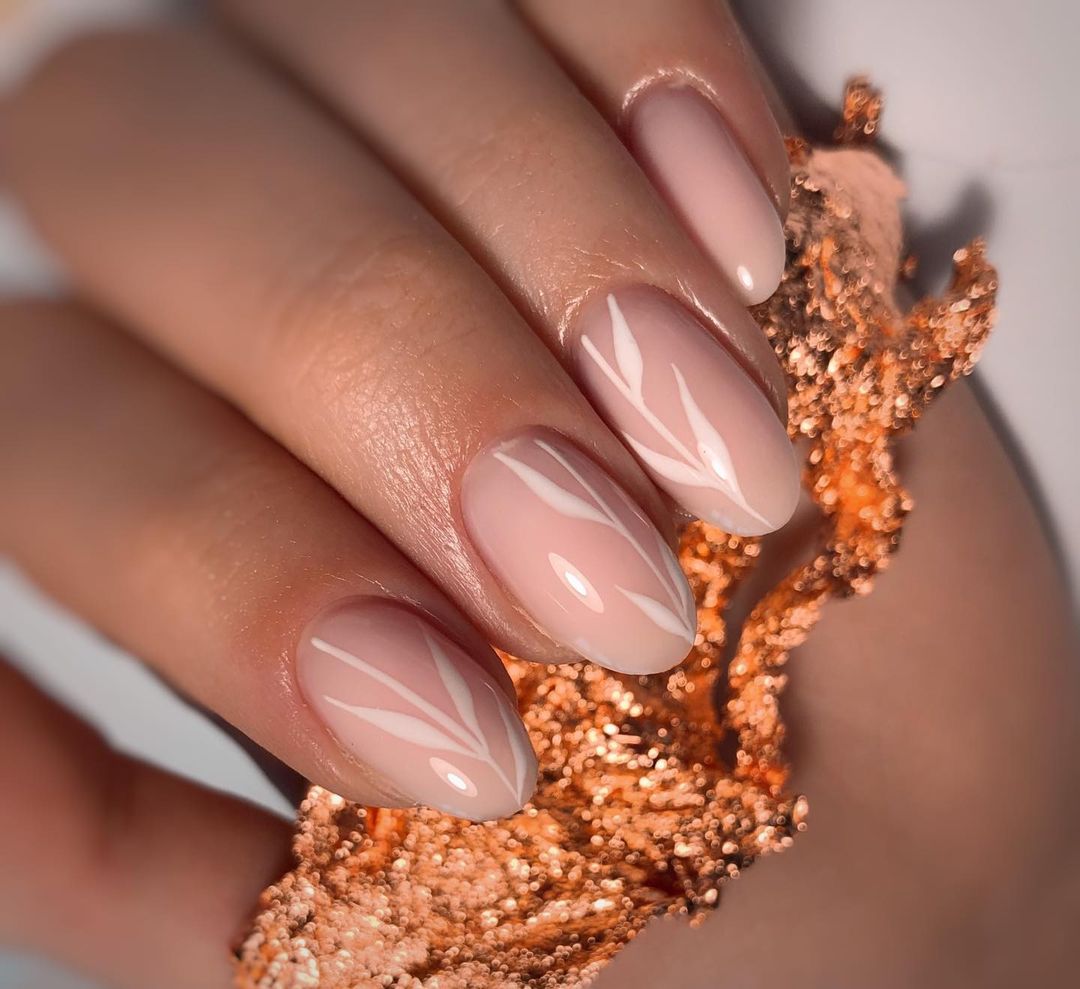
This nail design combines simplicity with elegance, featuring a nude base with delicate white leaf patterns. The almond shape is both stylish and practical, making it ideal for a bride or bridesmaid who prefers a minimalist yet artistic look. The subtle design ensures that it complements any wedding attire without overpowering it.
Consumables:
- Base coat: Zoya Anchor Base Coat
- Nude polish: Butter London “All Hail the Queen”
- White polish: Essie “Blanc”
- Nail art brush for detailing
- Top coat: Deborah Lippmann Gel Lab Top Coat
Instructions:
- Apply a base coat to all nails.
- Paint the nails with two coats of nude polish.
- Use a nail art brush to paint delicate white leaf patterns on each nail.
- Allow the design to dry completely before applying a top coat for a polished look.
Classic French Manicure
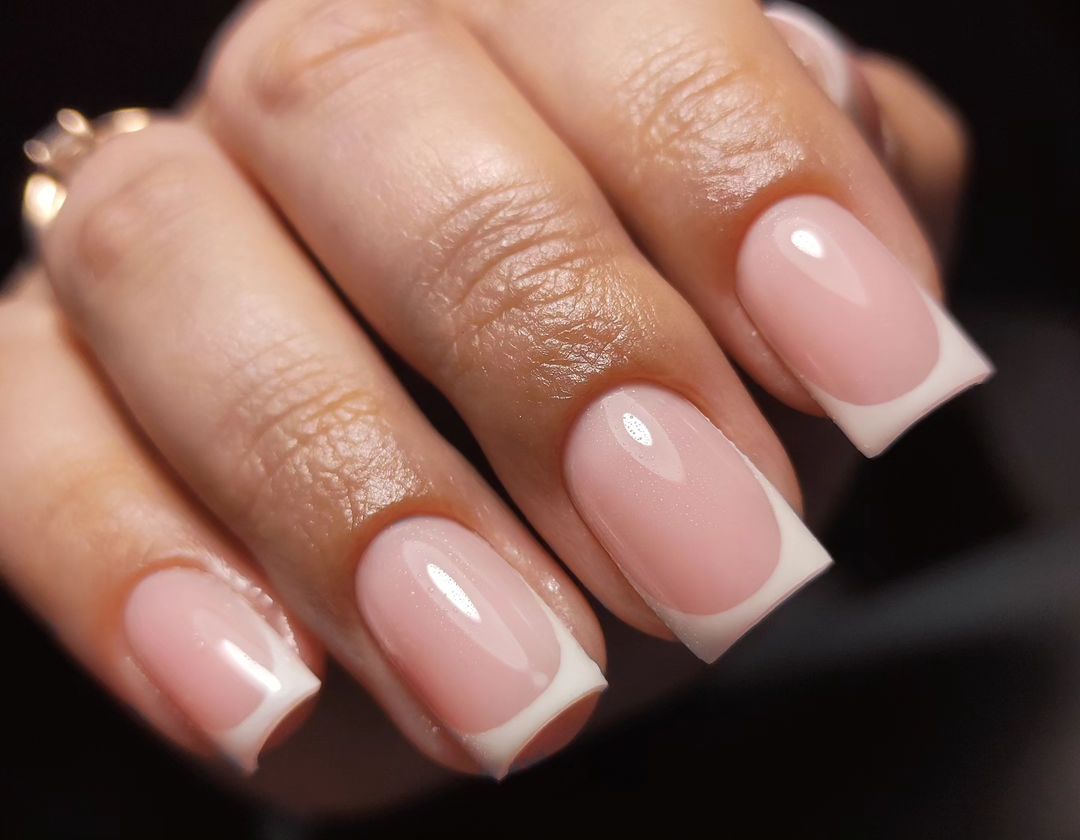
A timeless choice for any bride or bridesmaid, this classic French manicure features a pink nude base with white tips. The short, square shape is practical and elegant, making it a versatile option that complements any wedding theme or outfit. This design is perfect for those who love a classic and refined look.
Consumables:
- Base coat: OPI Nail Envy
- Pink nude polish: Essie “Ballet Slippers”
- White polish: OPI “Alpine Snow”
- Top coat: Seche Vite Dry Fast Top Coat
Instructions:
- Start with a base coat to protect your nails.
- Apply two coats of pink nude polish.
- Using a thin brush, paint white tips on each nail for a French manicure effect.
- Seal the design with a top coat to ensure a smooth and shiny finish.
Glittering Glamour
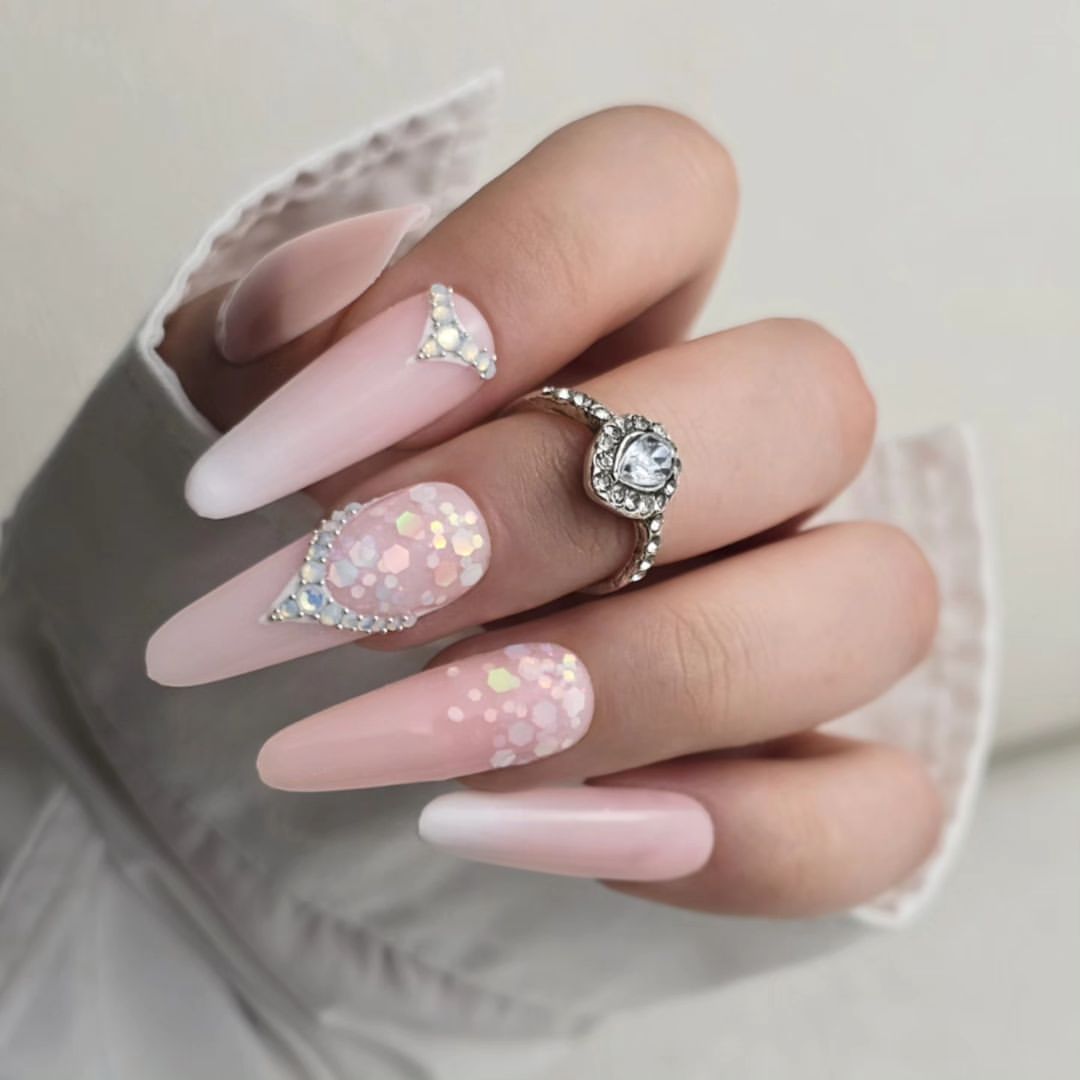
This dazzling nail design is ideal for a bride who loves sparkle and glamour. The nails feature a nude base with an overlay of iridescent glitter and rhinestones, creating a stunning and eye-catching look. The long, almond shape adds drama and sophistication, making it perfect for a wedding day showstopper.
Consumables:
- Base coat: CND Stickey Base Coat
- Nude polish: OPI “Samoan Sand”
- Iridescent glitter: China Glaze “Fairy Dust”
- Rhinestones: Swarovski Flatback Crystals
- Top coat: Essie Gel Couture Top Coat
Instructions:
- Apply a base coat to all nails.
- Paint the nails with two coats of nude polish.
- Add a layer of iridescent glitter to each nail.
- Apply rhinestones to accentuate the design.
- Seal with a top coat to ensure a long-lasting and glamorous finish.
Romantic Gold Accents
This romantic nail design features a soft pink base with white and gold accents. The almond shape is elegant and adds a touch of sophistication, making it suitable for any bride or bridesmaid. The combination of pink, white, and gold creates a harmonious and delicate look, perfect for a fall wedding.
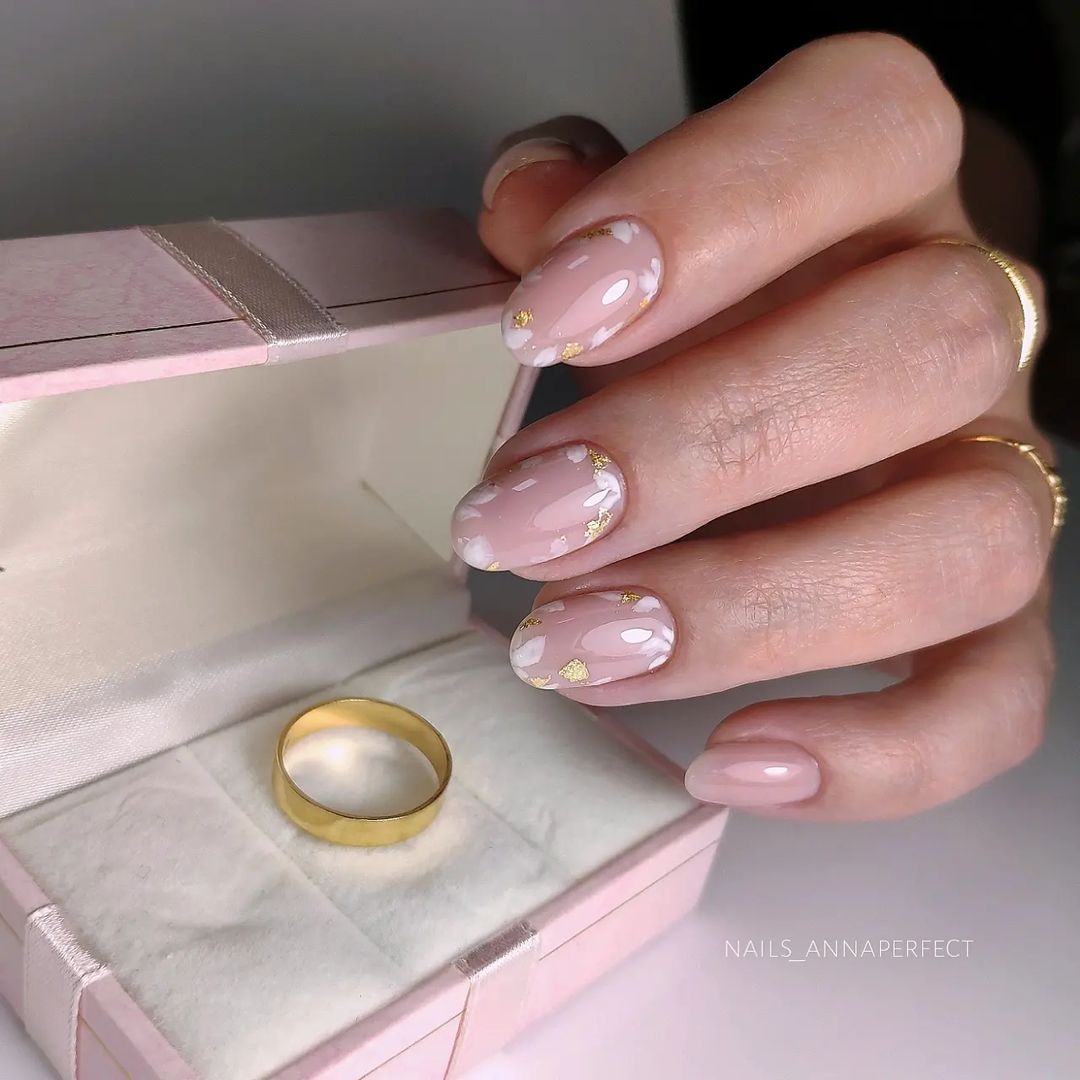
Consumables:
- Base coat: Orly Bonder Base Coat
- Pink polish: Essie “Sugar Daddy”
- White polish: OPI “Alpine Snow”
- Gold foil: Born Pretty Gold Leaf Foil
- Top coat: Seche Vite Dry Fast Top Coat
Instructions:
- Apply a base coat to all nails.
- Paint the nails with two coats of pink polish.
- Use a nail art brush to create white patterns and add gold foil accents.
- Allow the design to dry completely before applying a top coat for a polished and long-lasting finish.
Rose Gold Sparkle
This chic nail design features a blend of rose gold glitter and a nude pink base, perfect for a bride or bridesmaid looking for a touch of elegance. The nails showcase a subtle ombré effect on the ring finger, while the other nails sport glitter tips and lines. The short, square shape is both practical and stylish, adding a sophisticated sparkle to any wedding ensemble.
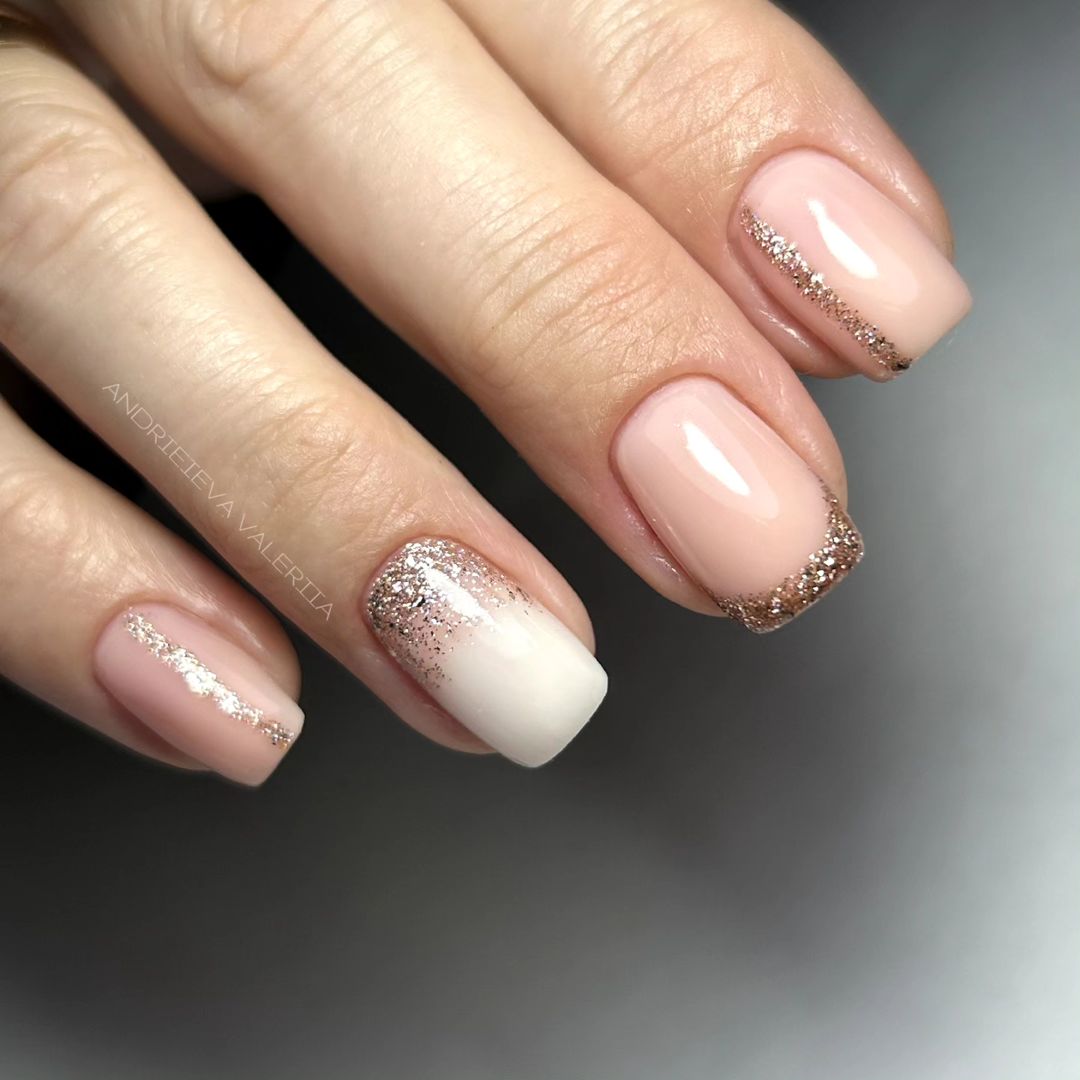
Consumables:
- Base coat: Essie First Base
- Nude pink polish: OPI “Bubble Bath”
- Rose gold glitter: Essie “Summit of Style”
- Top coat: Seche Vite Dry Fast Top Coat
Instructions:
- Apply a base coat to all nails.
- Paint the nails with two coats of nude pink polish.
- Add rose gold glitter to the tips of the nails and create lines using a thin brush.
- For the ring finger, create an ombré effect by applying glitter from the tip downwards.
- Seal the design with a top coat to ensure a long-lasting finish.
Delicate Floral Accents
This beautiful nail design features a milky white base with delicate pink floral accents, ideal for a bride who loves subtle elegance. The long, almond shape adds sophistication, making it a perfect choice for a bridal manicure. The floral details are intricate and charming, adding a touch of romance to the overall look.
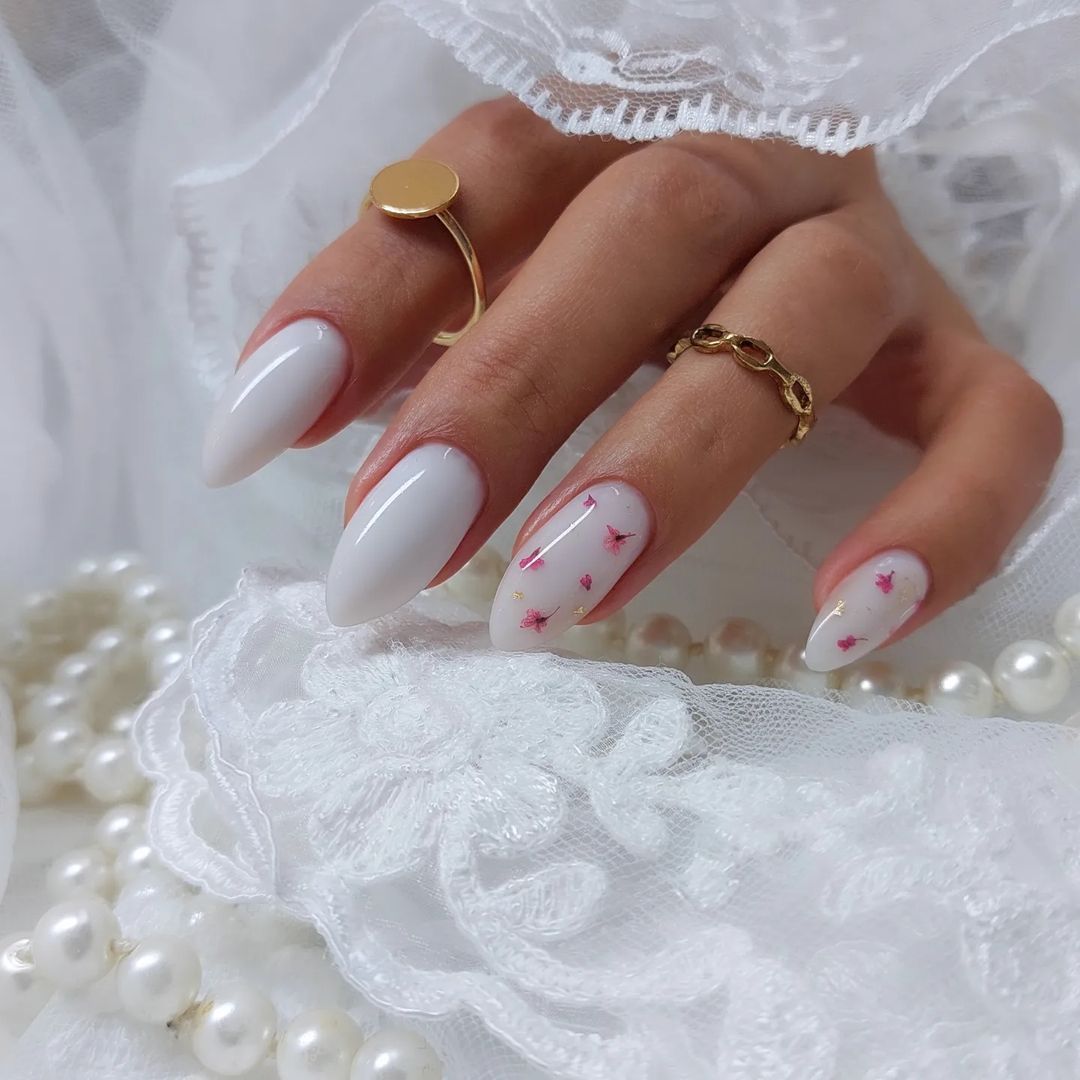
Consumables:
- Base coat: Orly Bonder Base Coat
- Milky white polish: OPI “Funny Bunny”
- Pink floral decals: Born Pretty Flower Nail Stickers
- Top coat: Essie Gel Couture Top Coat
Instructions:
- Start with a base coat to protect your nails.
- Apply two coats of milky white polish.
- Carefully place the pink floral decals on each nail.
- Finish with a top coat to secure the decals and add shine.
Modern French Waves
This modern twist on the classic French manicure features a nude base with white wavy tips. The short, square shape is elegant and practical, making it suitable for any bride or bridesmaid. The wavy tips add a contemporary flair to a timeless design, perfect for a trendy yet classic look.
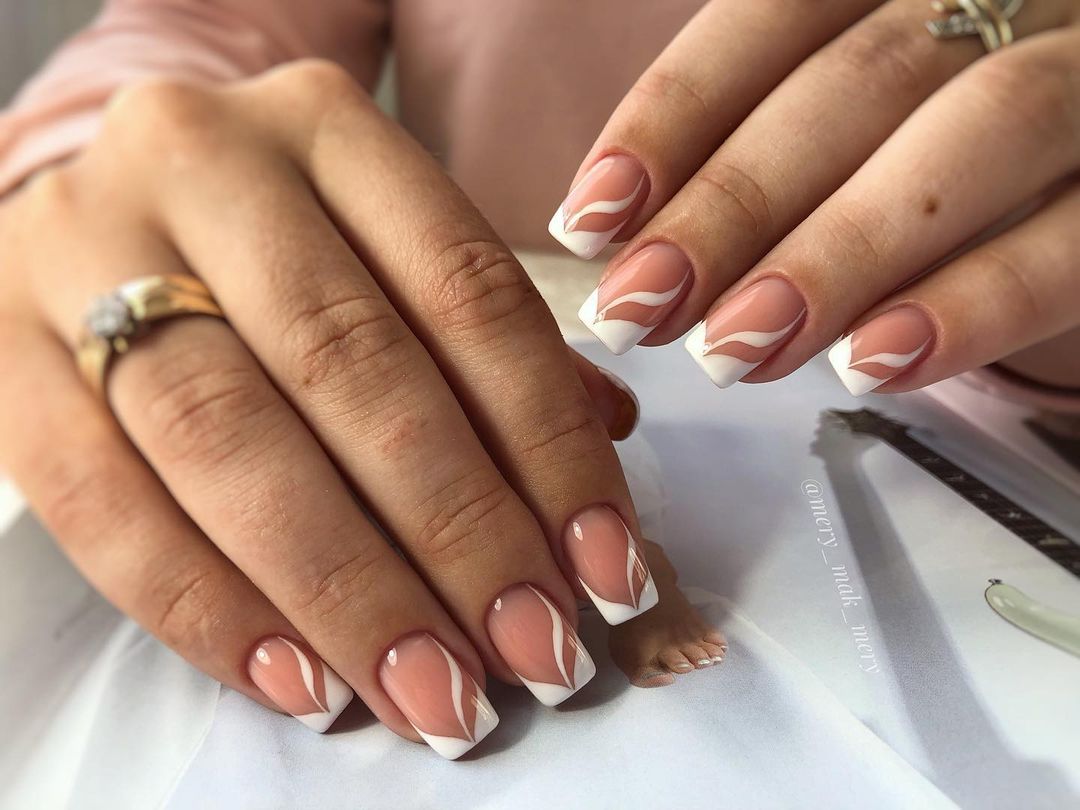
Consumables:
- Base coat: Zoya Anchor Base Coat
- Nude polish: Butter London “All Hail the Queen”
- White polish: Essie “Blanc”
- Nail art brush for creating waves
- Top coat: Seche Vite Dry Fast Top Coat
Instructions:
- Apply a base coat to all nails.
- Paint the nails with two coats of nude polish.
- Use a nail art brush to create wavy white tips on each nail.
- Allow the design to dry completely before applying a top coat for a polished finish.
Glitter Trim Elegance
This sophisticated nail design features a sheer nude base with delicate glitter trims, perfect for a bride classy bridal look. The short, square shape ensures practicality while adding a touch of glamour. The glitter trims provide just the right amount of sparkle without overpowering the elegant simplicity of the nude base.
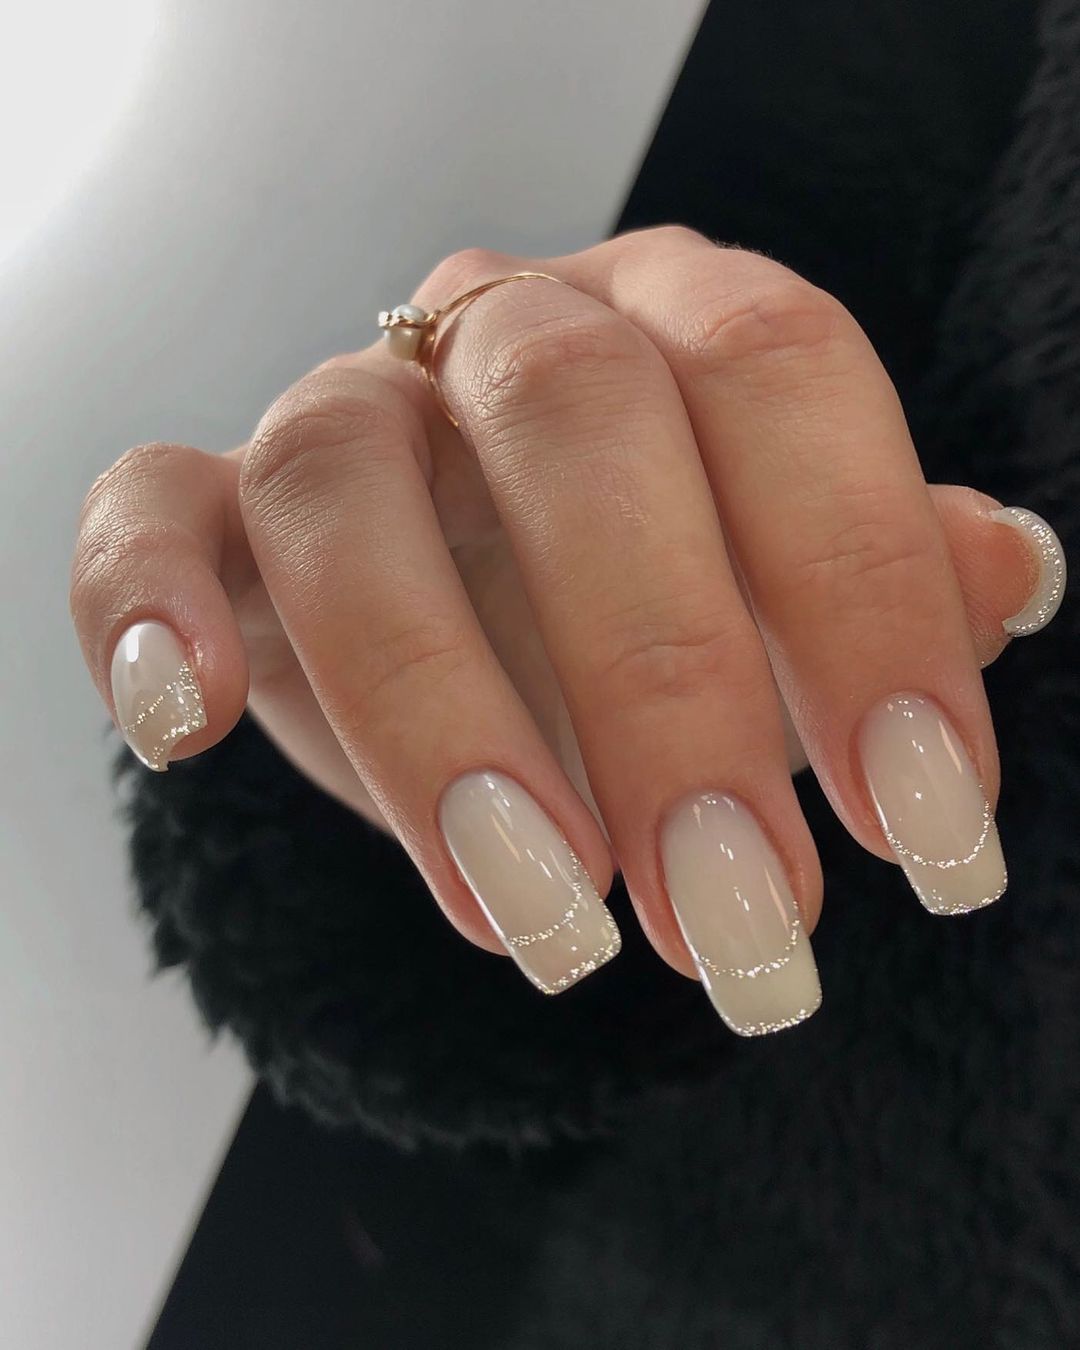
Consumables:
- Base coat: OPI Nail Envy
- Sheer nude polish: Essie “Ballet Slippers”
- Silver glitter: Sally Hansen “Strobe Light”
- Top coat: Essie Gel Couture Top Coat
Instructions:
- Apply a base coat to protect your nails.
- Paint the nails with two coats of sheer nude polish.
- Use a thin brush to apply silver glitter trims around the edges of each nail.
- Seal the design with a top coat for a smooth and shiny finish.
Subtle Silver Stripes
This elegant nail design features a milky white base with subtle silver stripes, making it perfect for a bride or bridesmaid who prefers a minimalist yet stylish look. The long, almond shape adds a touch of sophistication, while the silver stripes offer a hint of glamour without being overwhelming.
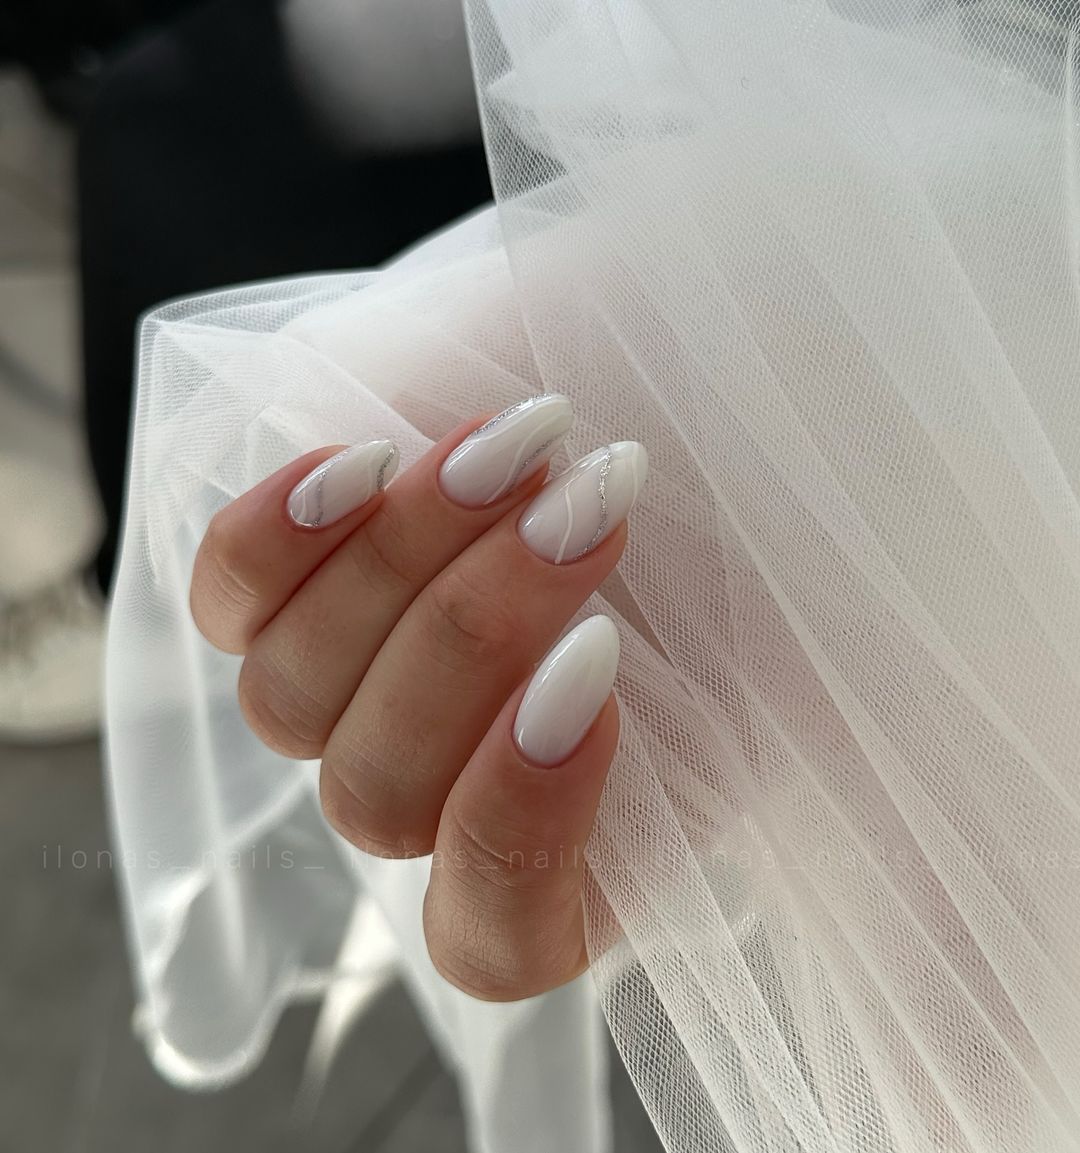
Consumables:
- Base coat: Orly Bonder Base Coat
- Milky white polish: OPI “Funny Bunny”
- Silver striping tape: Born Pretty Silver Striping Tape
- Top coat: Seche Vite Dry Fast Top Coat
Instructions:
- Start with a base coat to protect your nails.
- Apply two coats of milky white polish.
- Use silver striping tape to create subtle stripes on each nail.
- Finish with a top coat to secure the tape and add shine.
Golden Glimmer
This luxurious nail design features a sheer nude base with gold glitter accents, perfect for a bride or bridesmaid looking for a touch of opulence. The short, square shape ensures practicality while maintaining a glamorous appearance. The gold glitter adds a sparkling finish, making this design ideal for a fall wedding.
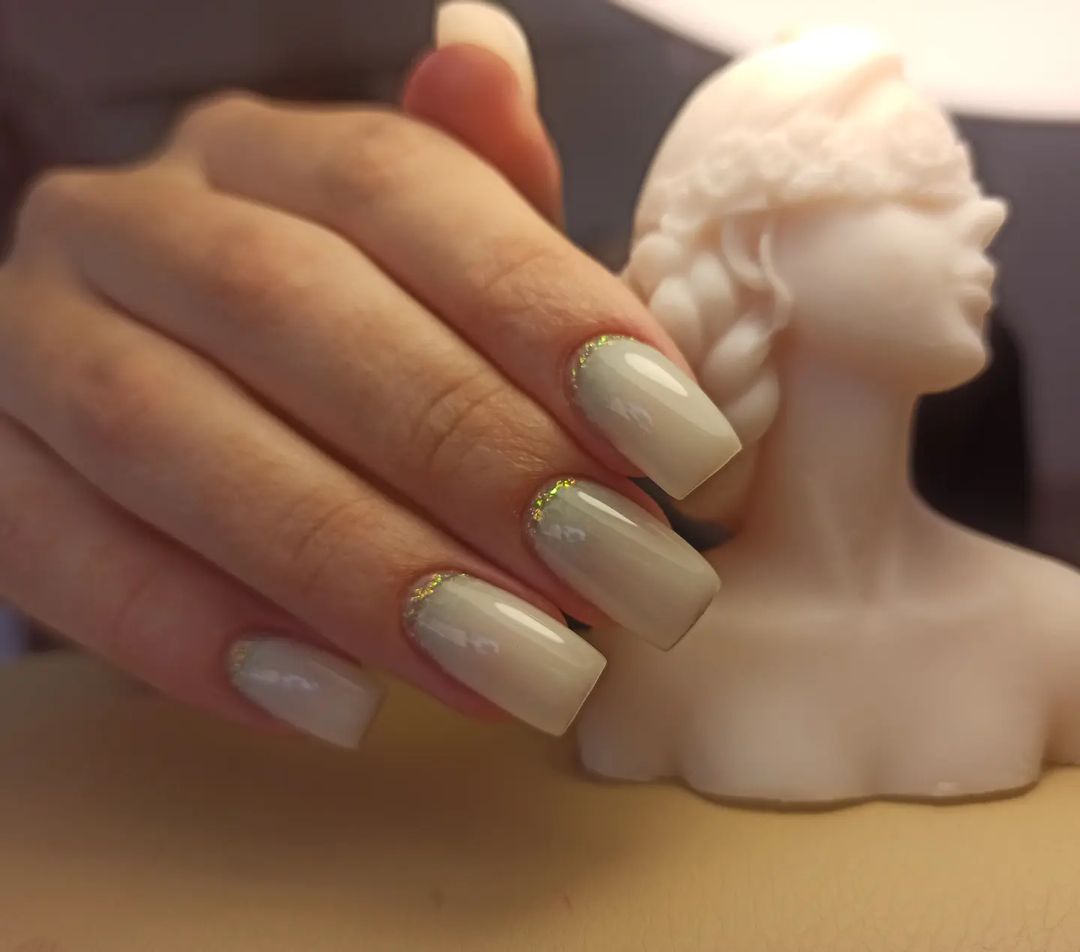
Consumables:
- Base coat: Essie First Base
- Sheer nude polish: OPI “Bubble Bath”
- Gold glitter: China Glaze “Golden Enchantment”
- Top coat: Essie Gel Couture Top Coat
Instructions:
- Apply a base coat to all nails.
- Paint the nails with two coats of sheer nude polish.
- Apply gold glitter accents to the tips and around the edges of each nail.
- Seal the design with a top coat to ensure a long-lasting and dazzling finish.
Abstract Art Nails
This minimalist nail design features a clear base with abstract black lines, creating a modern and chic look. The long, almond shape adds elegance, making it suitable for a bride or bridesmaid who appreciates contemporary art. The simplicity of the design ensures it complements any wedding dress without being overpowering.
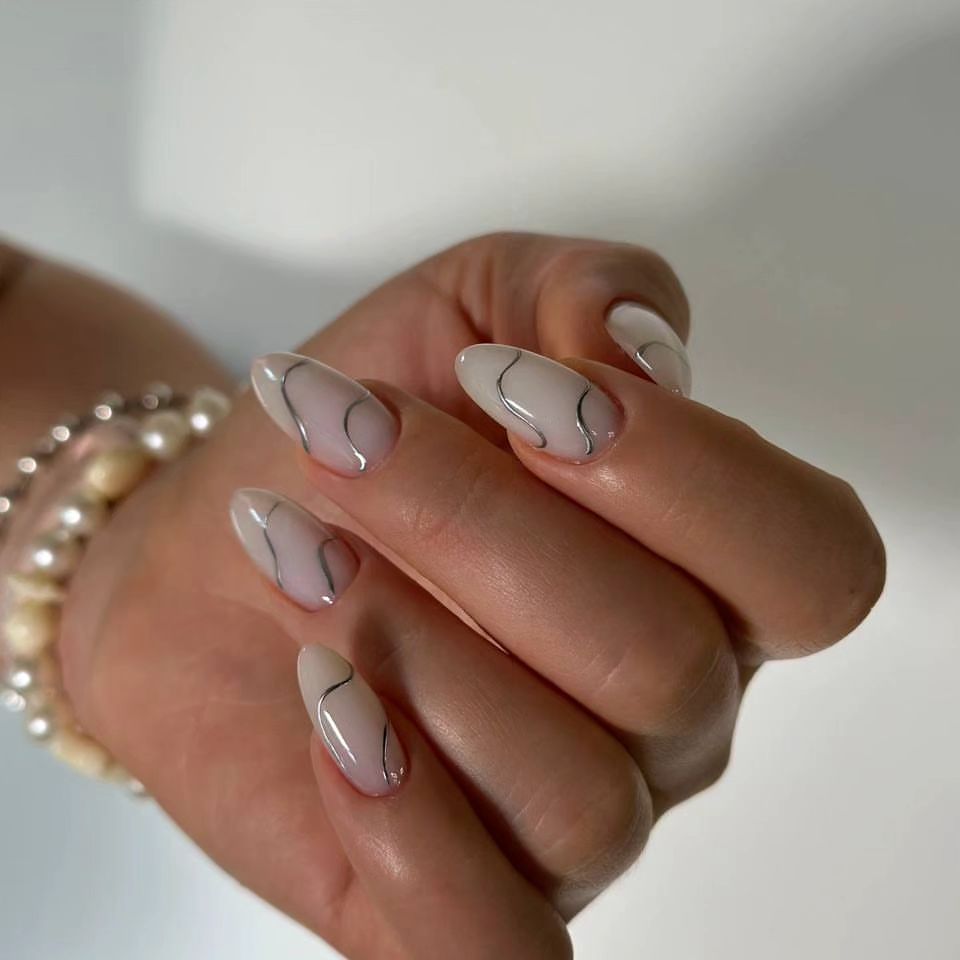
Consumables:
- Base coat: OPI Nail Envy
- Clear polish: Essie “Ballet Slippers”
- Black nail art pen: Sally Hansen I Heart Nail Art Pen in Black
- Top coat: Seche Vite Dry Fast Top Coat
Instructions:
- Apply a base coat to all nails.
- Paint the nails with two coats of clear polish.
- Use the black nail art pen to draw abstract lines on each nail.
- Seal the design with a top coat for a polished and long-lasting finish.
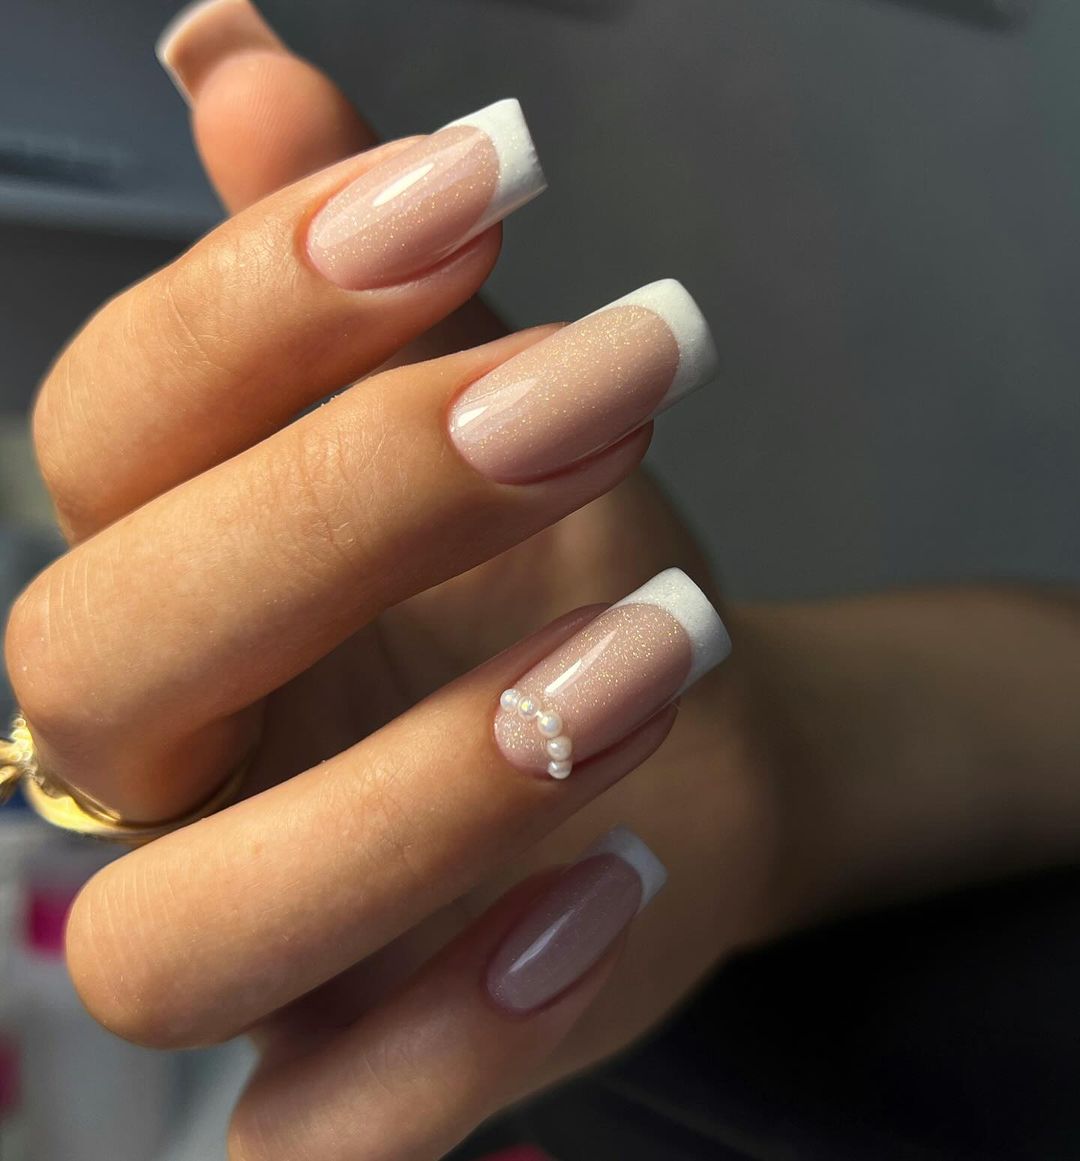
Pearl-Embellished French
This elegant take on the classic French manicure features a nude pink base with white tips and pearl embellishments. The short, square shape is both practical and sophisticated, making it perfect for a bride or mother of the bride. The pearls add a touch of luxury, making the manicure stand out without being too flashy.
Consumables:
- Base coat: Orly Bonder Base Coat
- Nude pink polish: Essie “Mademoiselle”
- White polish: OPI “Alpine Snow”
- Pearl embellishments: Born Pretty Pearl Nail Decorations
- Top coat: Essie Gel Couture Top Coat
Instructions:
- Start with a base coat to protect your nails.
- Apply two coats of nude pink polish.
- Paint white tips on each nail for a classic French manicure.
- Place pearl embellishments on the ring finger using nail glue.
- Finish with a top coat to secure the pearls and add shine.
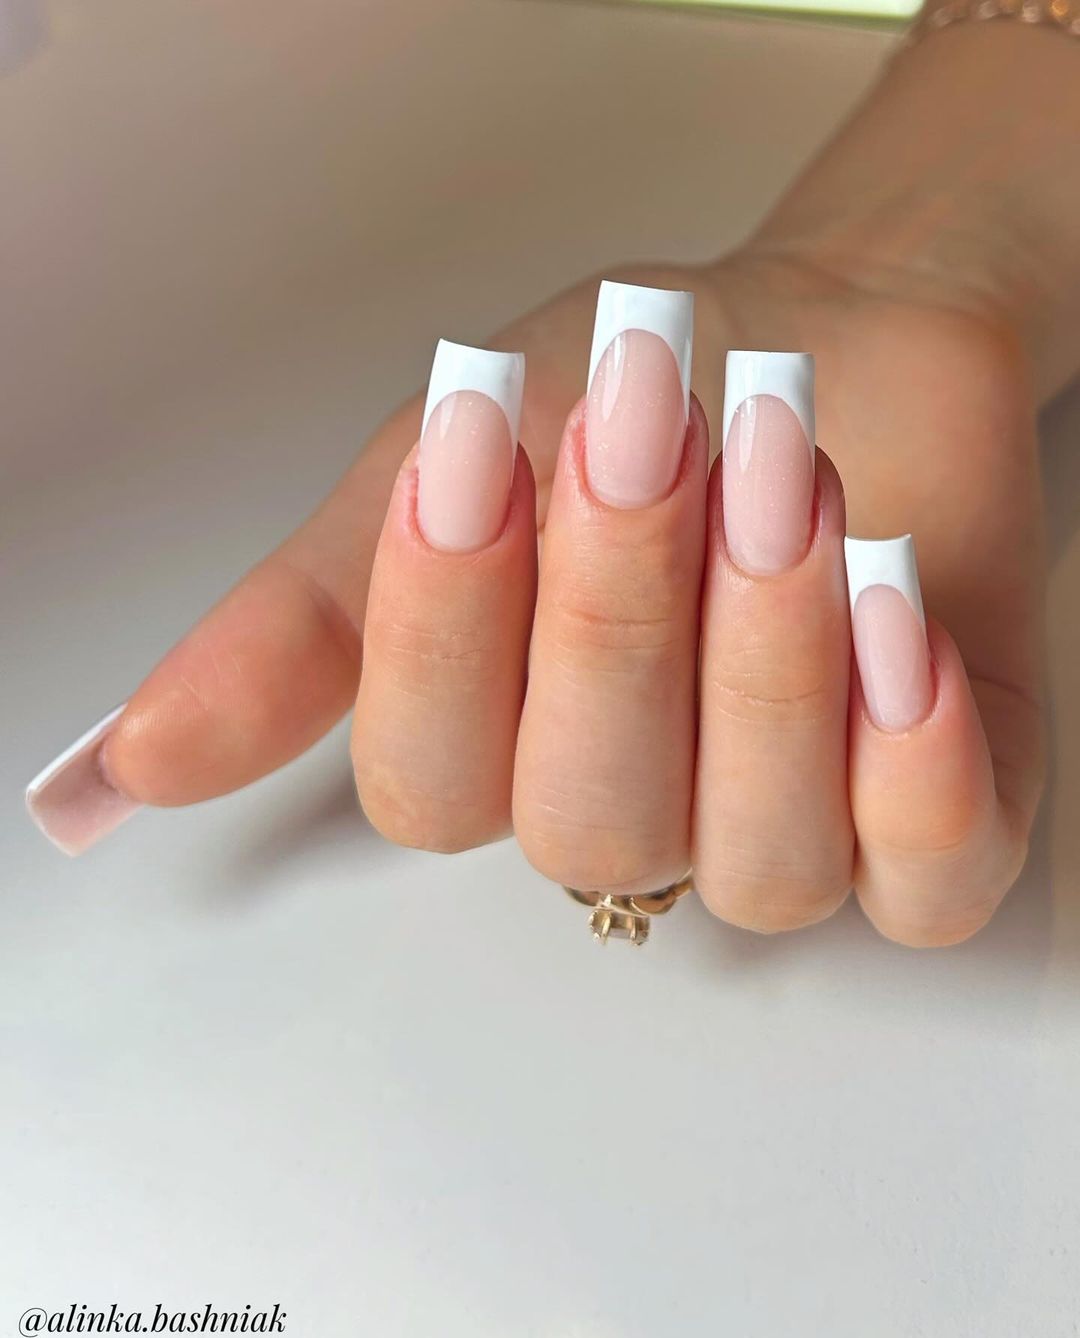
Geometric French Manicure
This modern French manicure features a nude base with white geometric tips. The long, square shape adds a touch of sophistication, making it ideal for a bride or bridesmaid who wants a stylish and contemporary look. The geometric tips provide a fresh twist on a timeless design.
Consumables:
- Base coat: Zoya Anchor Base Coat
- Nude polish: Butter London “All Hail the Queen”
- White polish: Essie “Blanc”
- Nail art brush for detailing
- Top coat: Seche Vite Dry Fast Top Coat
Instructions:
- Apply a base coat to all nails.
- Paint the nails with two coats of nude polish.
- Use a nail art brush to create white geometric tips on each nail.
- Allow the design to dry completely before applying a top coat for a polished finish.
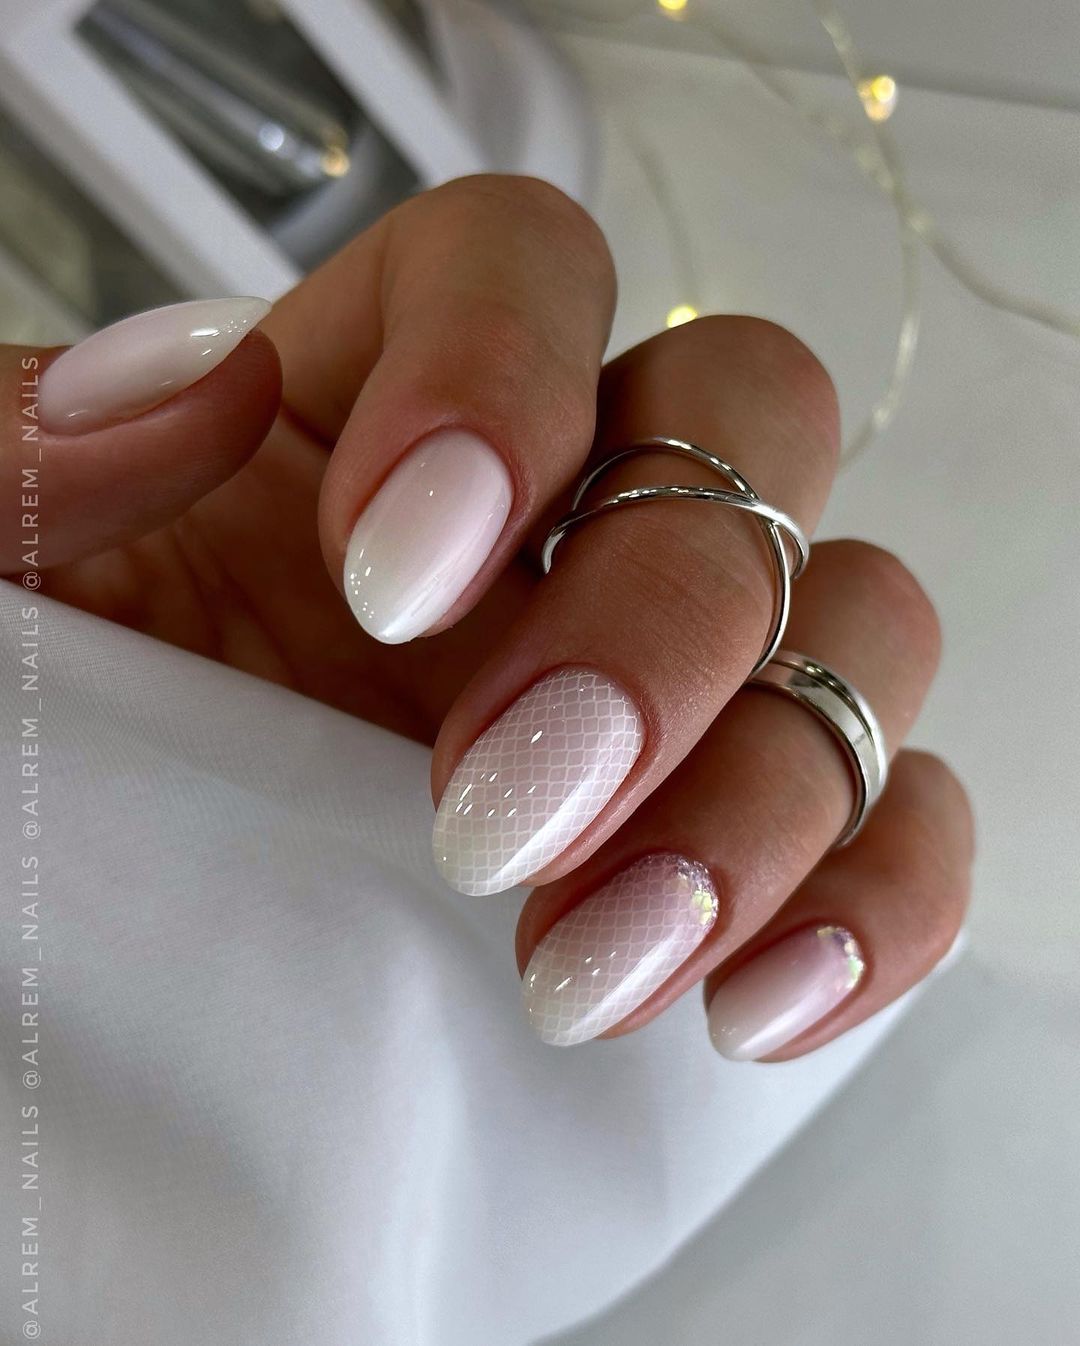
Lacy White Ombré
This romantic nail design features a white ombré base with delicate lace patterns, perfect for a bride or bridesmaid who loves intricate details. The short, oval shape adds to the elegance, making it a sophisticated choice for a wedding. The lace patterns add a touch of vintage charm, making the nails look both delicate and stunning.
Consumables:
- Base coat: OPI Nail Envy
- White polish: OPI “Funny Bunny”
- Nail art brush for lace patterns
- Top coat: Seche Vite Dry Fast Top Coat
Instructions:
- Apply a base coat to protect your nails.
- Paint the nails with two coats of white polish, creating an ombré effect.
- Use a nail art brush to draw delicate lace patterns on each nail.
- Seal the design with a top coat to ensure a long-lasting finish.
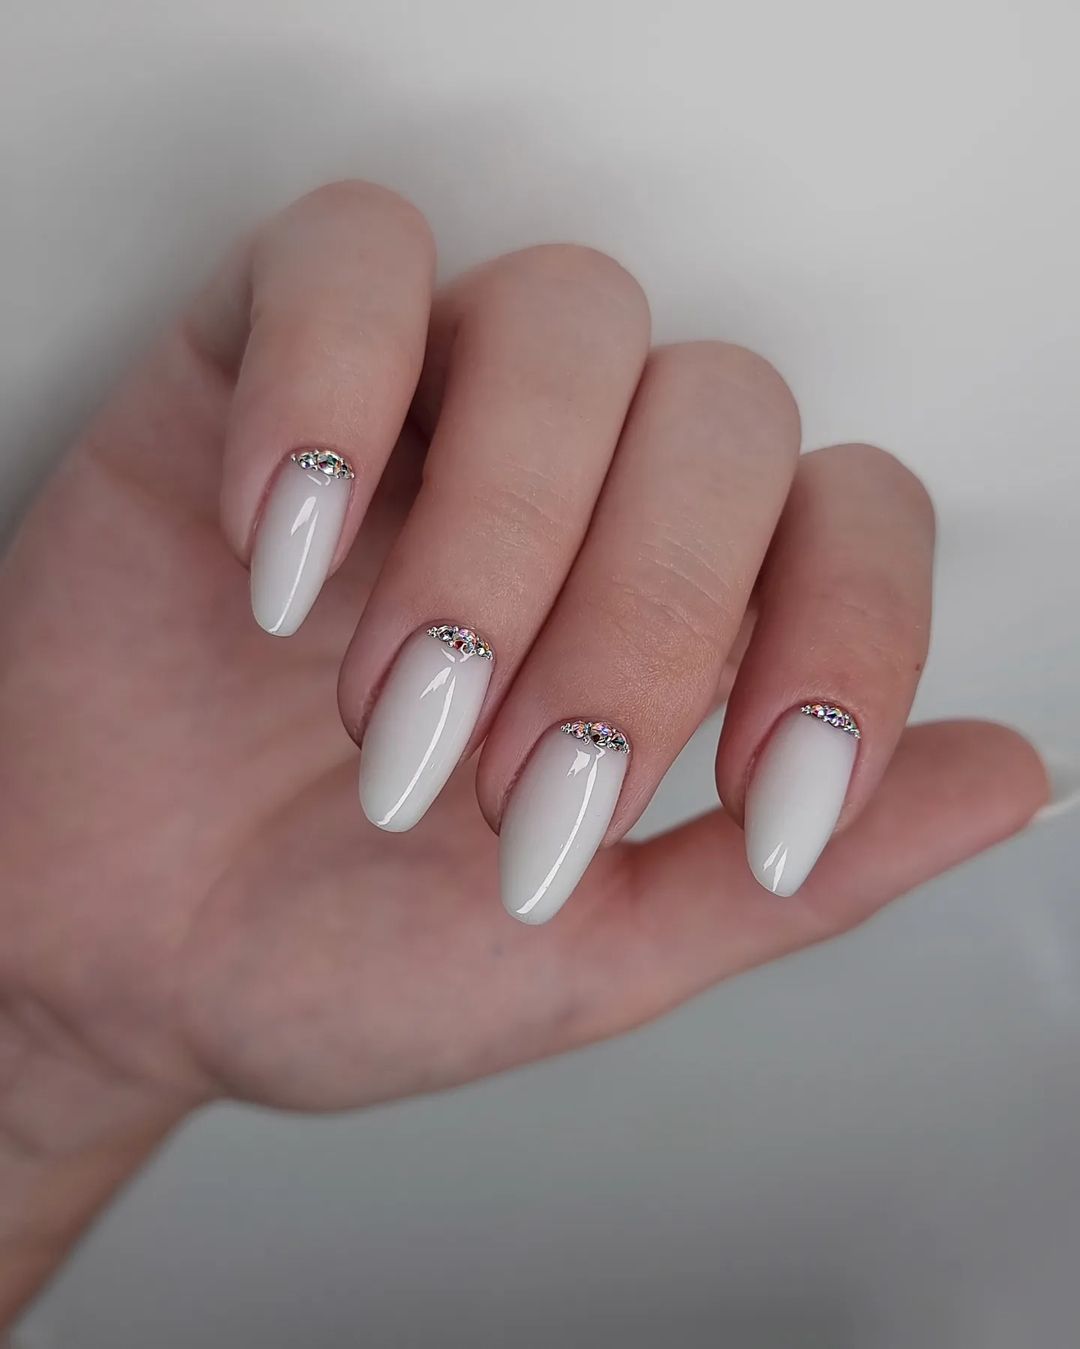
Crystal-Cuticles
This glamorous nail design features a white base with crystal accents around the cuticles. The long, almond shape adds sophistication, making it perfect for a bride who wants a bit of sparkle on her big day. The crystals catch the light beautifully, adding a dazzling touch to the manicure.
Consumables:
- Base coat: Orly Bonder Base Coat
- White polish: Essie “Blanc”
- Crystal embellishments: Swarovski Flatback Crystals
- Top coat: Essie Gel Couture Top Coat
Instructions:
- Start with a base coat to protect your nails.
- Apply two coats of white polish.
- Place crystal embellishments around the cuticles using nail glue.
- Finish with a top coat to secure the crystals and add shine.
FAQ
- What are the top fall wedding nail colors for 2024?
For fall 2024, trending wedding nail colors include burgundy, soft pinks, creamy nudes, and rich jewel tones like emerald green and sapphire blue.
- How can I make my nail polish last longer for my wedding day?
To make your nail polish last longer, always use a base coat, apply thin layers of polish, and seal with a high-quality top coat. Avoid exposing your nails to water for extended periods, and wear gloves when doing chores.
- Are gel nails better than acrylics for weddings?
Both gel and acrylic nails have their advantages. Gel nails tend to look more natural and flexible, while acrylics are more durable and can be shaped more precisely. Your choice depends on your personal preference and the nail design you choose.
- What nail shape is best for a bride?
Almond and oval shapes are very popular among brides due to their elegant and elongating appearance. However, the best shape is the one that complements your hand and personal style.
- Can I do my wedding nails at home?
Yes, with the right tools and a bit of practice, you can achieve beautiful wedding nails at home. Follow detailed instructions and use quality products to ensure a professional finish.
By carefully selecting your fall wedding nail design, you can add a beautiful finishing touch to your bridal look. Whether you opt for simple elegance or intricate art, your nails will be a stunning part of your wedding day ensemble.
Save Pin
