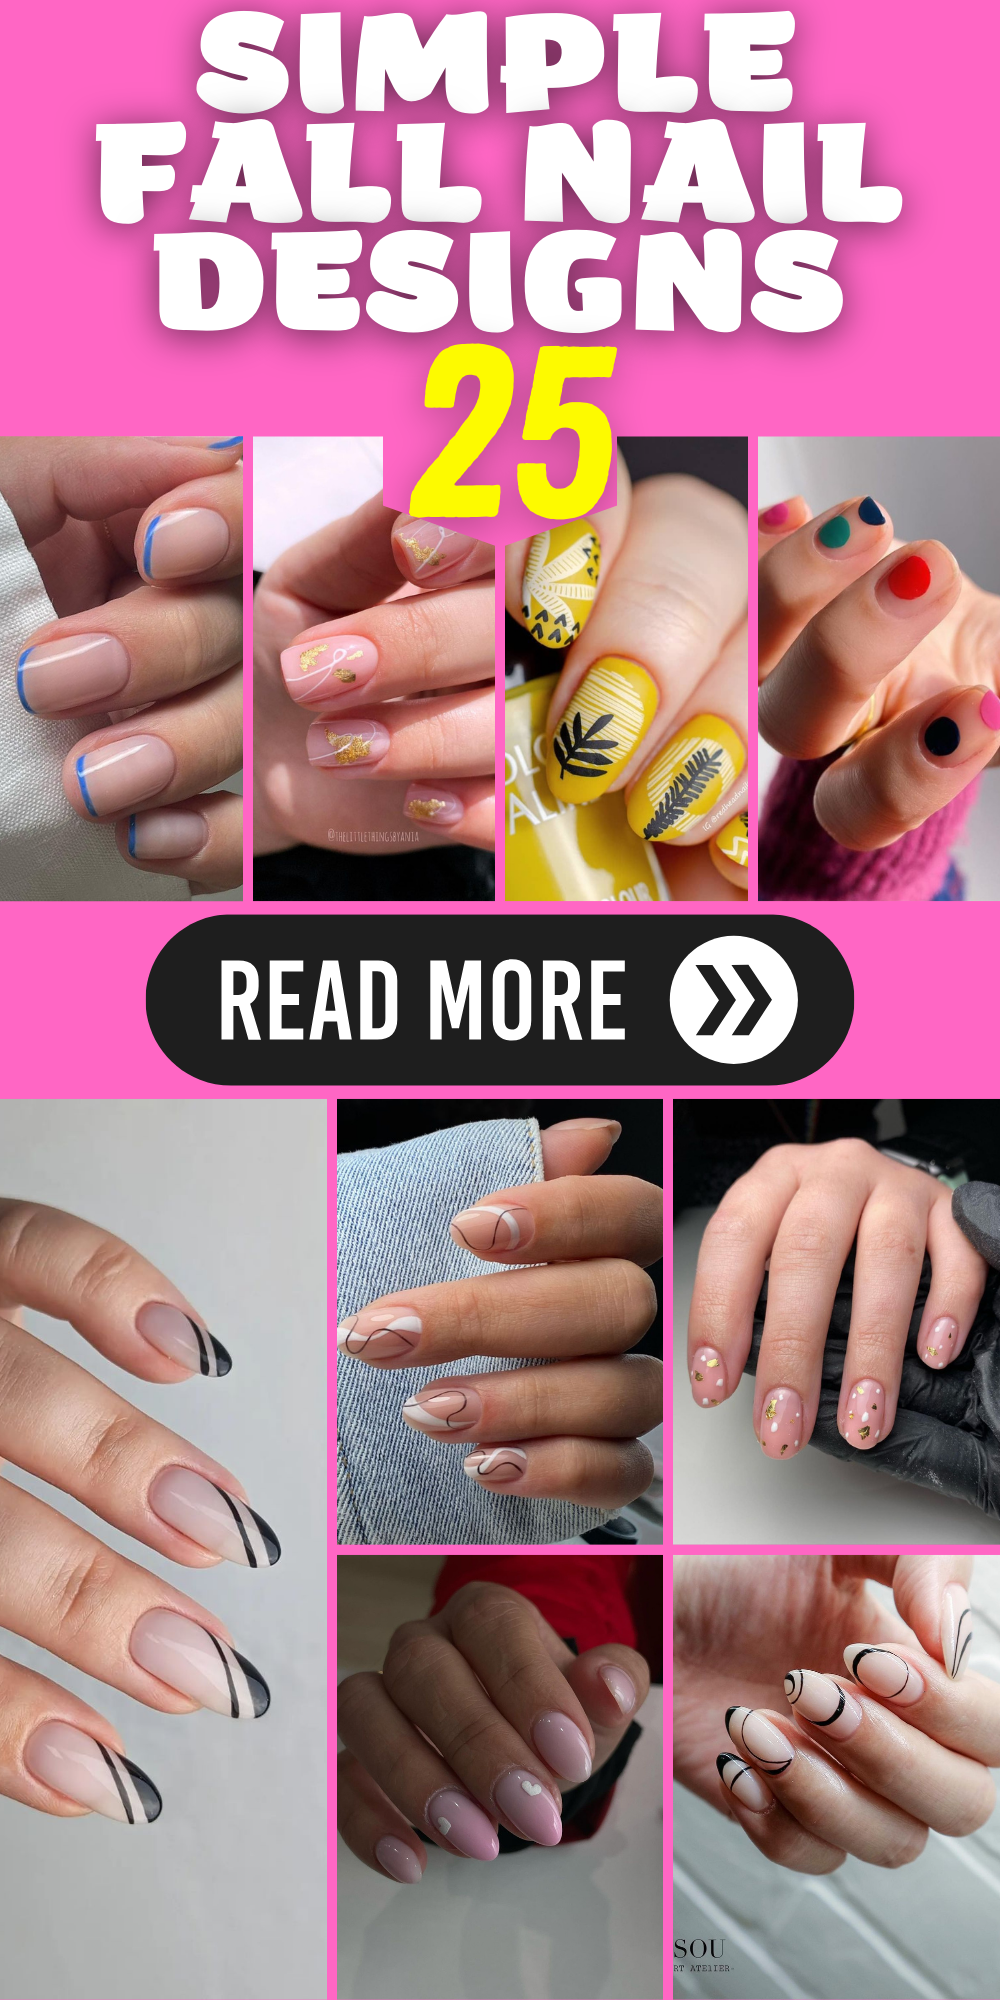
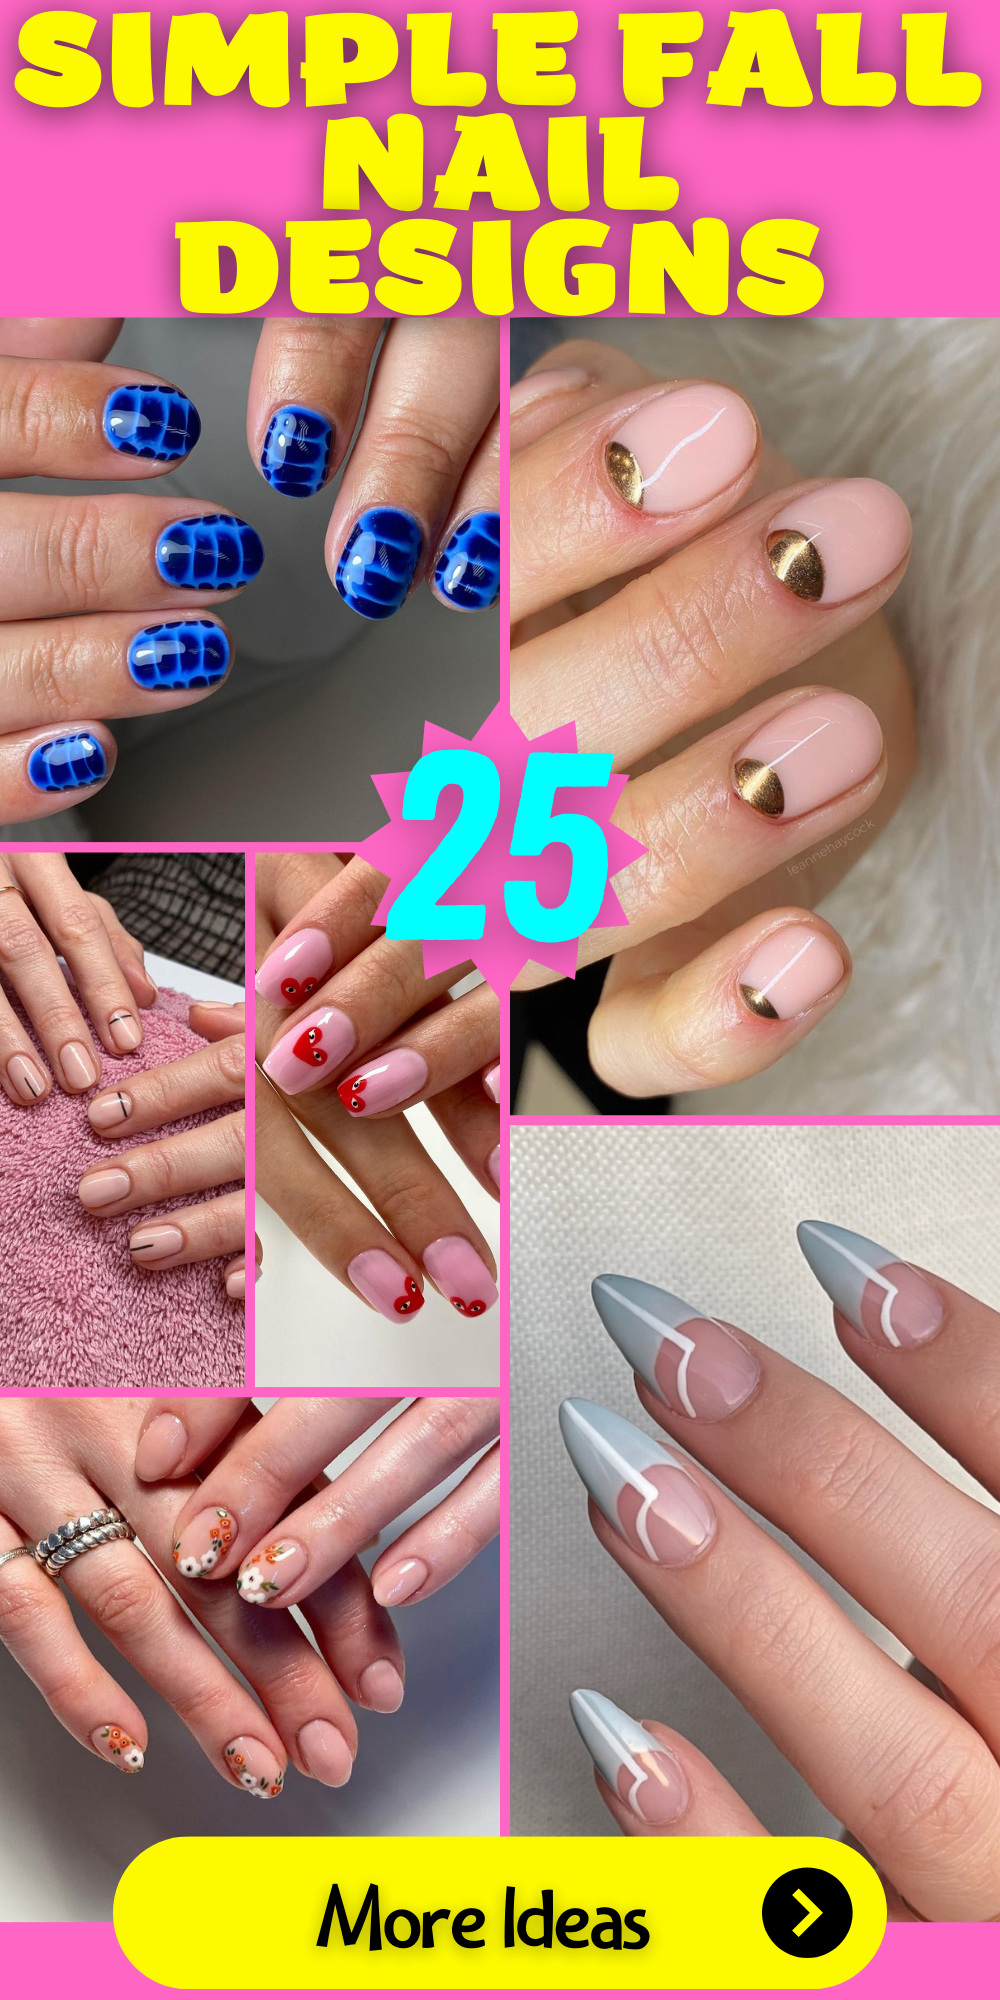
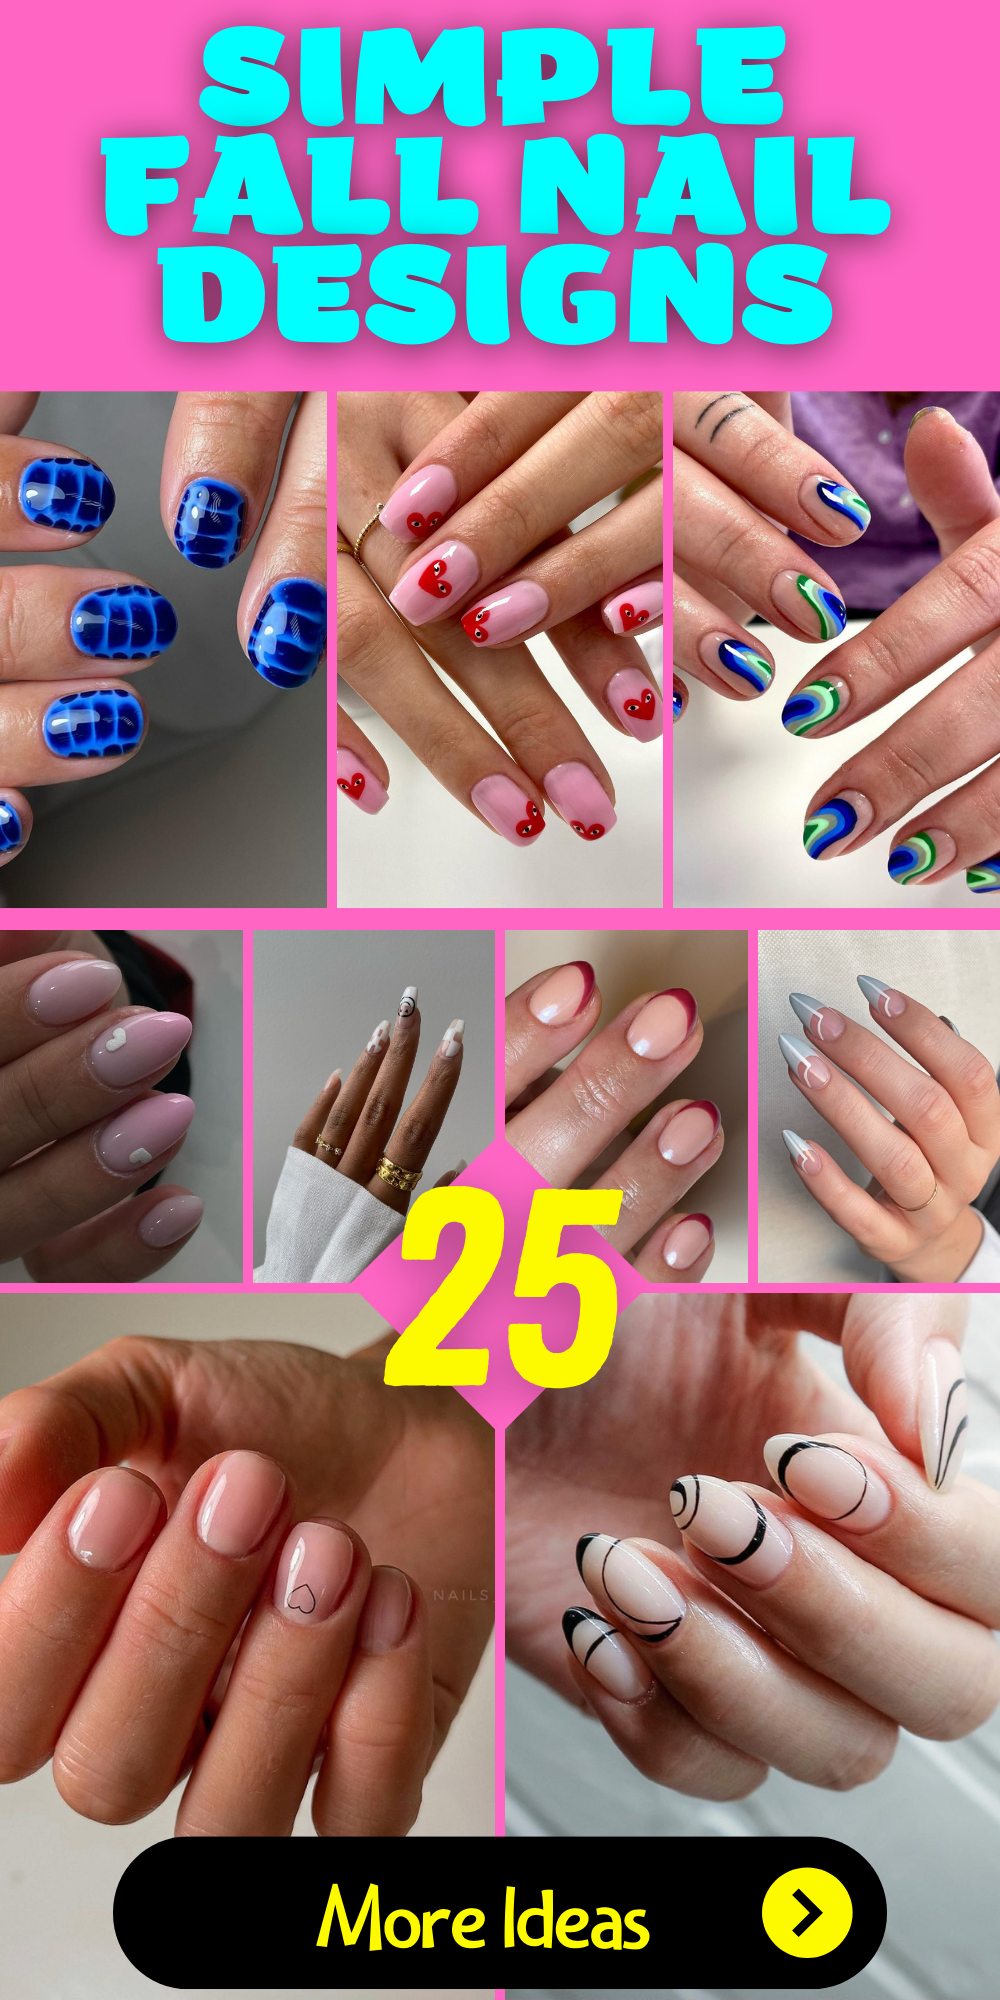
As the leaves change and the air turns crisp, our style tends to shift towards the cozy and the chic. Nails are no exception! Whether you’re looking for simple fall nail designs or something more elaborate, fall is the perfect season to experiment with your manicure. Ever wondered which designs will keep your nails looking classy and trendy this autumn? Let’s dive into some gorgeous ideas that are sure to inspire your next nail appointment or at-home manicure session.
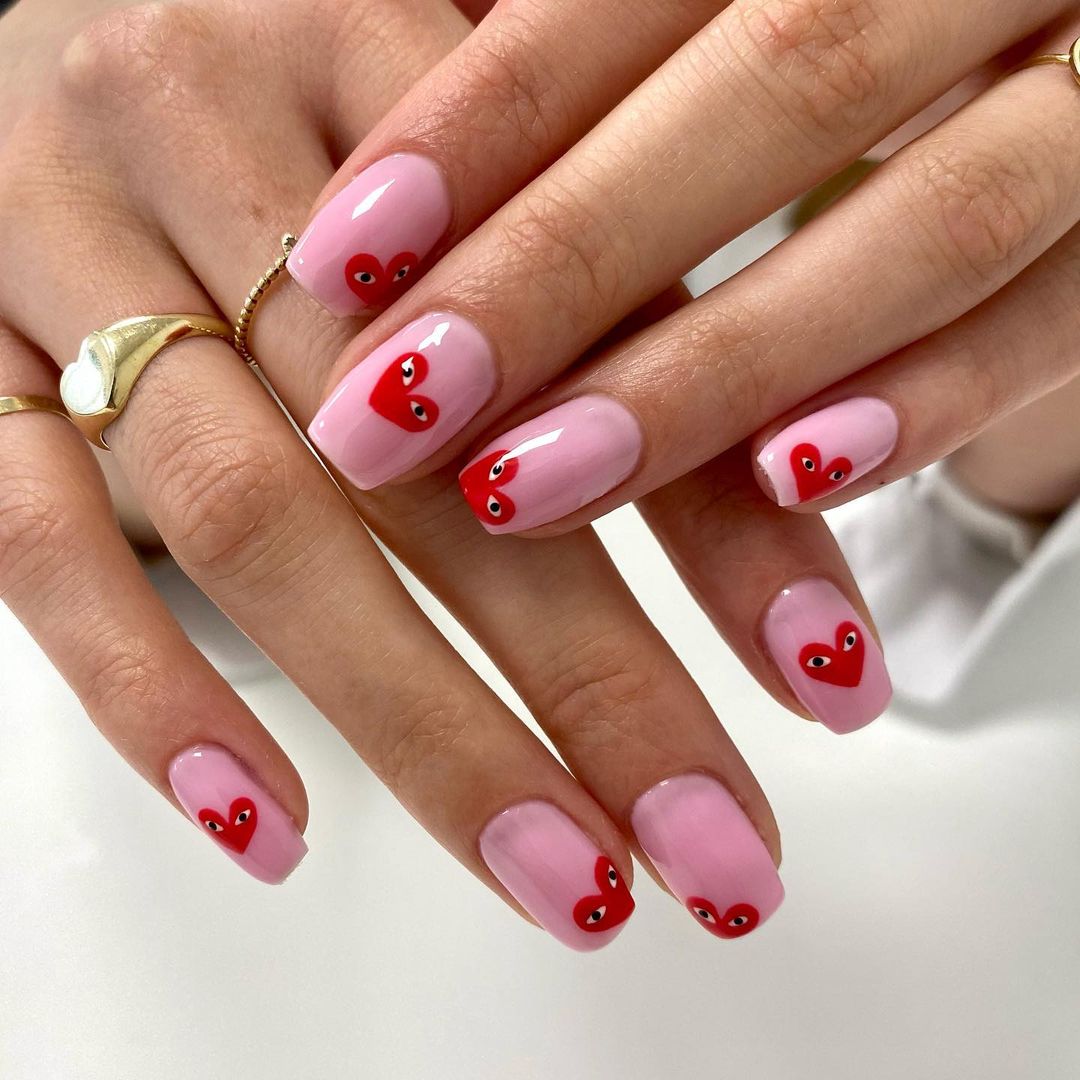
Pink Heart Eyes
This adorable design combines a cute pink base with playful red heart eyes. It’s a fun way to add a bit of whimsy to your nails while still keeping it simple.
-
- Base coat: OPI Nail Lacquer in ‘Bubble Bath’
- Pink polish: Essie ‘Ballet Slippers’
- Red polish: Sally Hansen ‘Red My Lips’
- Black polish for eyes: OPI ‘Black Onyx’
- Dotting tool for eyes
- Top coat: Seche Vite Dry Fast Top Coat
Creating the Look:
-
- Start with a base coat to protect your nails.
- Apply two coats of the pink polish and let it dry.
- Use a small brush or dotting tool to paint red hearts on each nail.
- Add black dots for eyes in the hearts.
- Finish with a top coat for shine and protection.
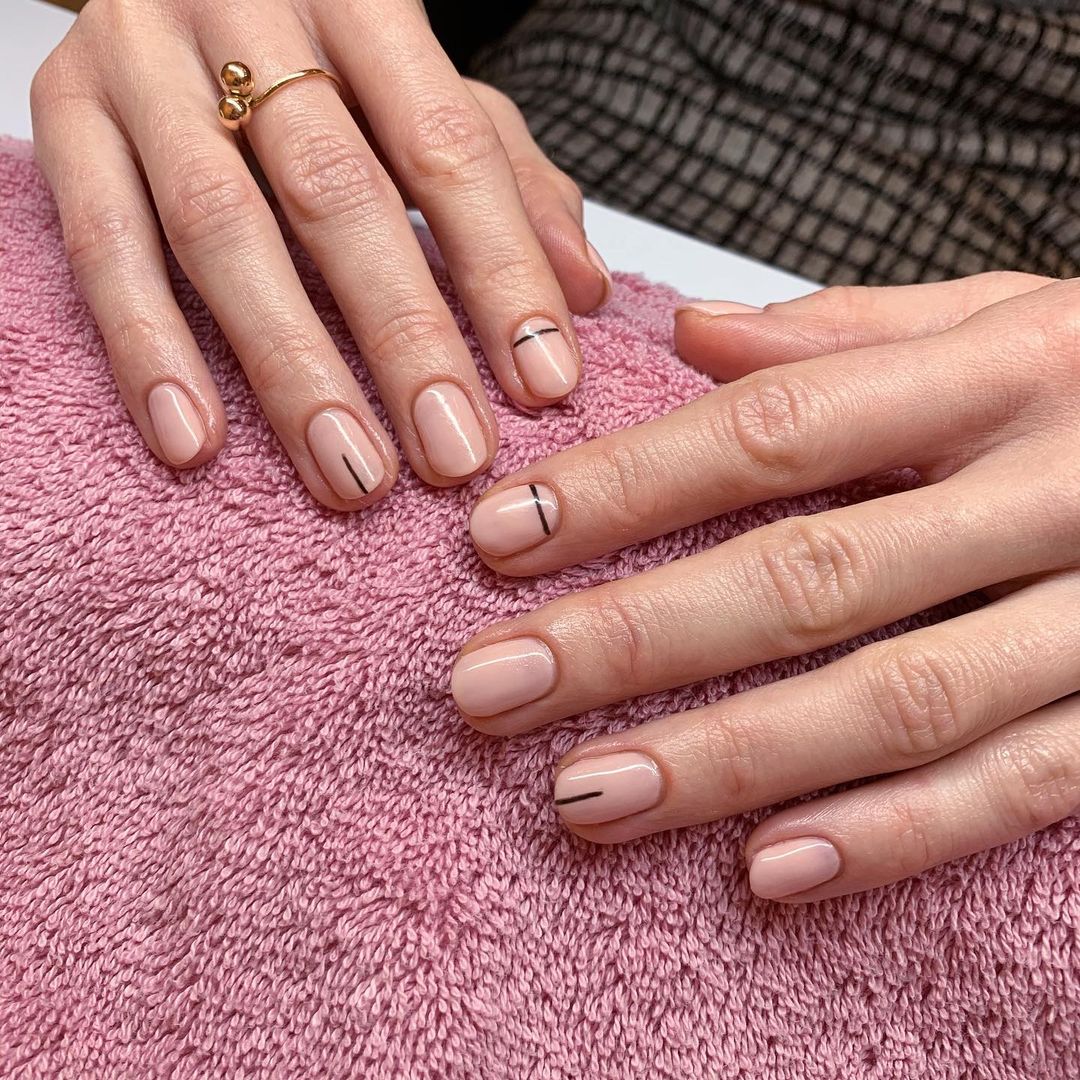
Minimalist Nude Lines
If you love the classy look, these minimalist nude nails with subtle black lines are perfect for autumn. They’re easy to achieve and ideal for any occasion.
-
- Base coat: Essie ‘First Base’
- Nude polish: OPI ‘Samoan Sand’
- Black striping polish: Orly Instant Artist ‘Jet Black’
- Thin nail art brush
- Top coat: Essie ‘Good to Go’
Creating the Look:
-
- Apply a base coat to your nails.
- Paint two coats of nude polish.
- Using a thin nail art brush, draw thin black lines horizontally or diagonally across the nails.
- Seal with a top coat to ensure longevity.
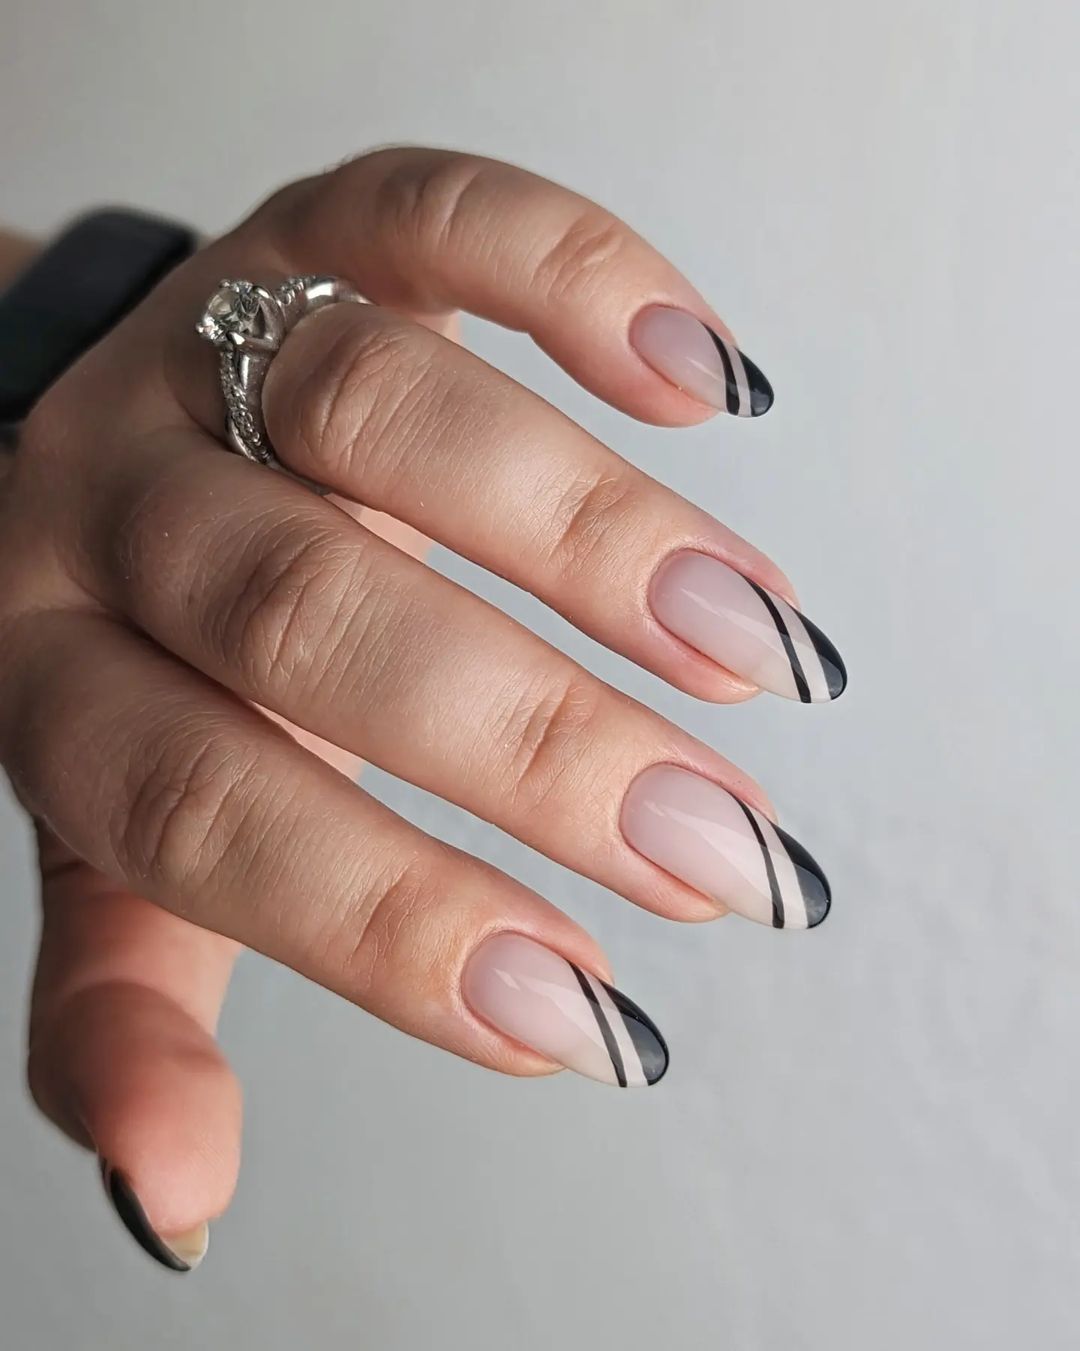
Chic Black Tips
These black-tipped nails with a matte finish are perfect for a classy yet autumn-appropriate look. The black tips add a modern twist to the classic French manicure.
-
- Base coat: Sally Hansen ‘Hard as Nails’
- Nude polish: Zoya ‘Jana’
- Black polish: Essie ‘Licorice’
- Matte top coat: OPI Matte Top Coat
- Nail striping tape
Creating the Look:
-
- Apply a base coat.
- Paint your nails with the nude polish.
- Once dry, use striping tape to create a guide for the black tips.
- Paint the tips black and let dry.
- Finish with a matte top coat.
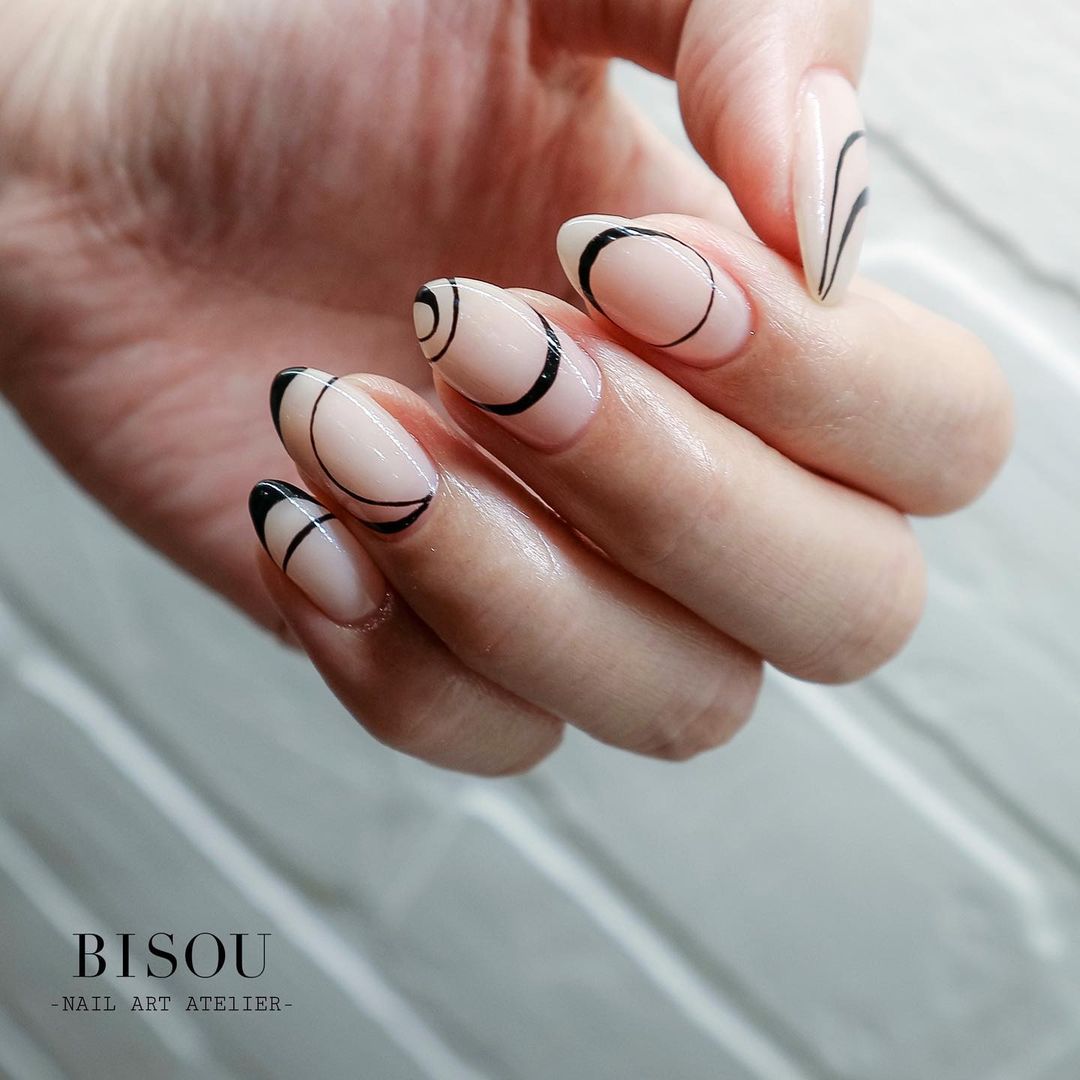
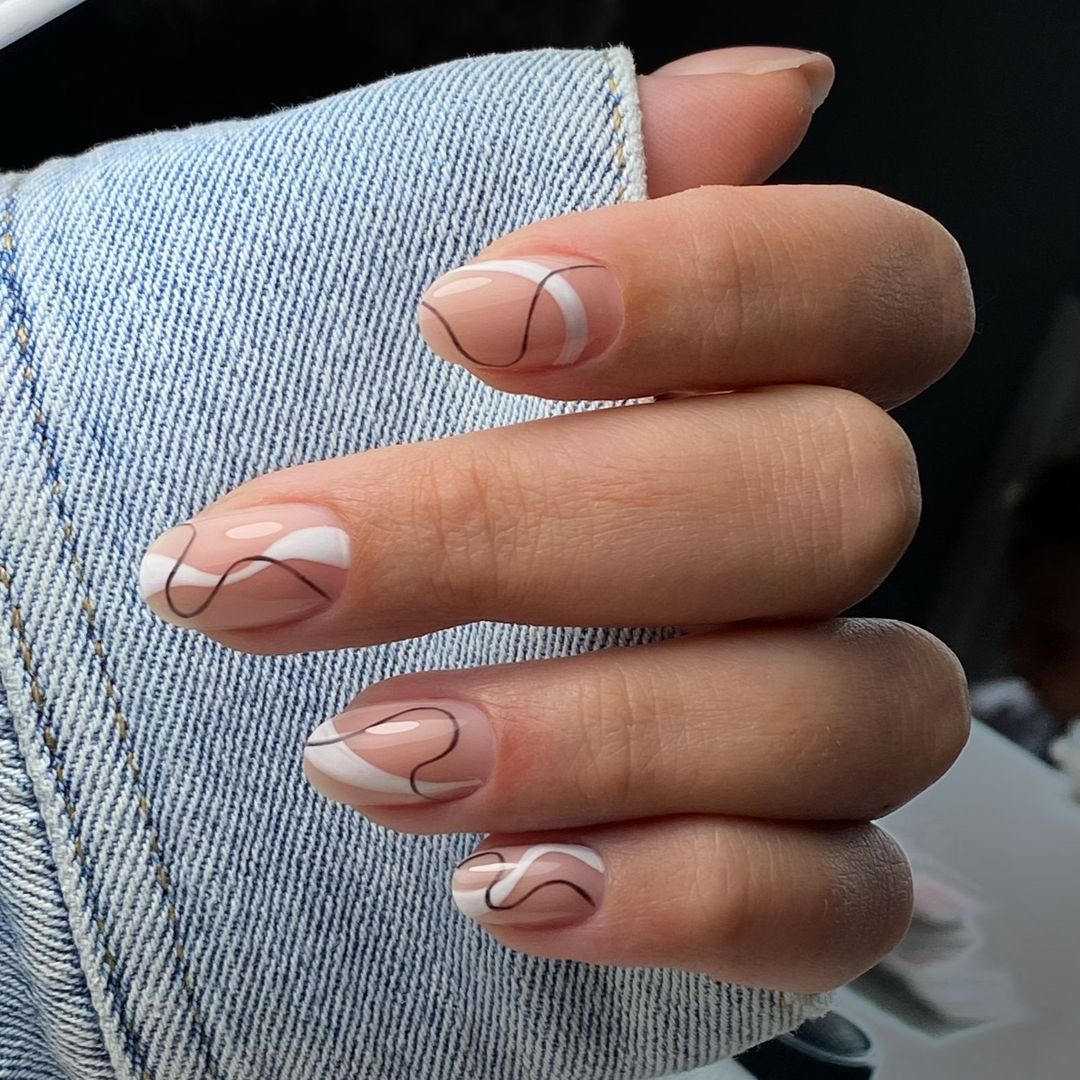
Elegant Black Line Art
This almond shape design features elegant black lines on a nude base, creating a sophisticated and modern look. Perfect for the Autumn season, this design blends simplicity with artistic flair, making your nails stand out.
-
- Base coat: OPI Nail Envy
- Nude polish: Essie ‘Mademoiselle’
- Black striping polish: Orly Instant Artist ‘Jet Black’
- Thin nail art brush
- Top coat: Seche Vite Dry Fast Top Coat
Creating the Look:
-
- Start by applying a base coat to your nails.
- Apply two coats of nude polish and let them dry completely.
- Use a thin nail art brush to draw intricate black lines in various patterns across the nails.
- Finish with a top coat to seal the design and add shine.
Save Pin
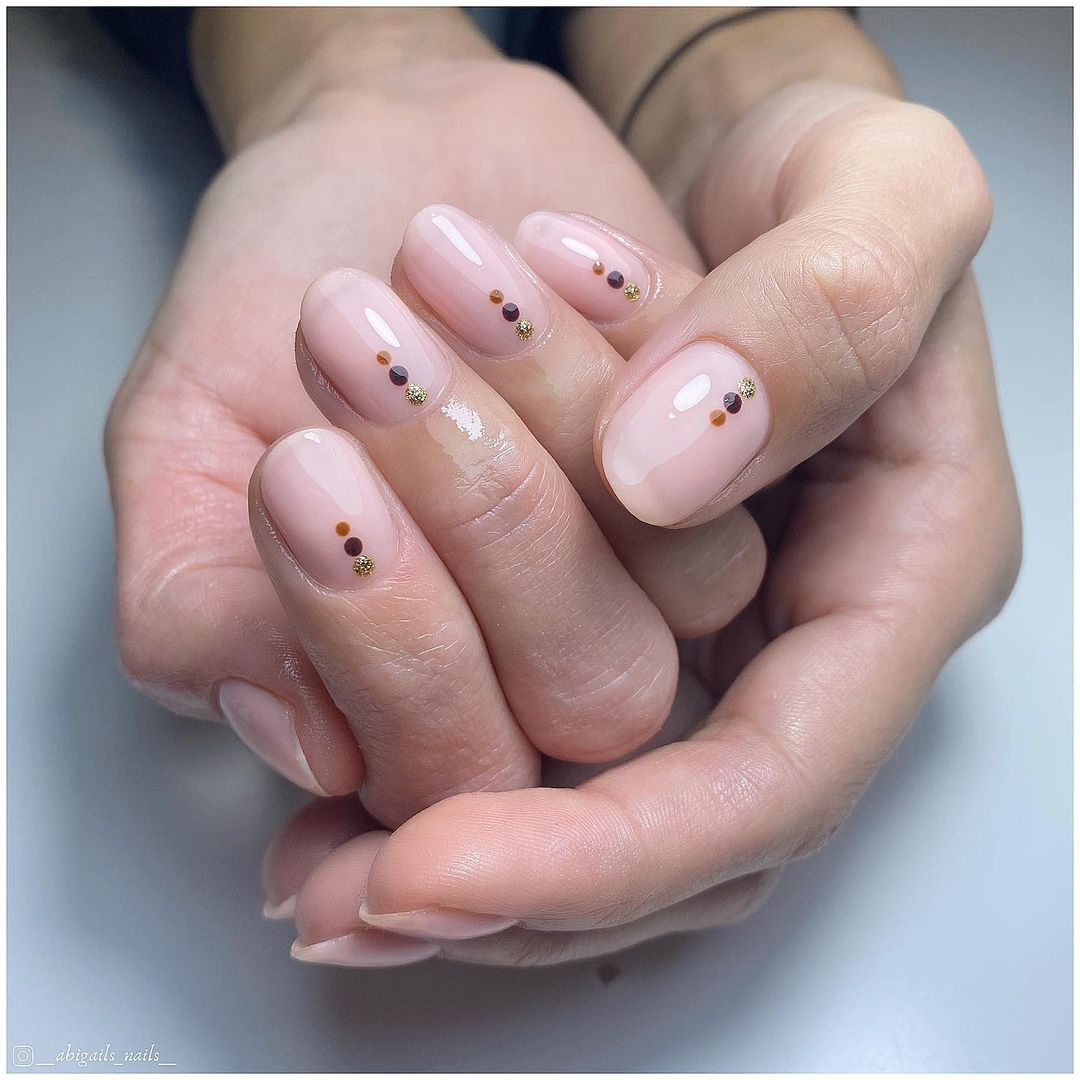
Dotted Delicacy
This cute design features a delicate nude base adorned with small colored dots, perfect for those who prefer a subtle yet playful manicure. The combination of Autumn colors like brown and orange adds a seasonal touch to this look.
-
- Base coat: Essie ‘First Base’
- Nude polish: Zoya ‘Jana’
- Dotting tools
- Polishes for dots: OPI ‘You Don’t Know Jacques!’ (brown), Sally Hansen ‘Mellow Yellow’ (orange), China Glaze ‘Kalahari Kiss’ (gold)
- Top coat: Essie ‘Good to Go’
Creating the Look:
-
- Apply a base coat to your nails.
- Paint two coats of nude polish and allow them to dry.
- Use dotting tools to apply small dots of brown, orange, and gold polish near the cuticle area.
- Seal the design with a top coat for added durability and shine.
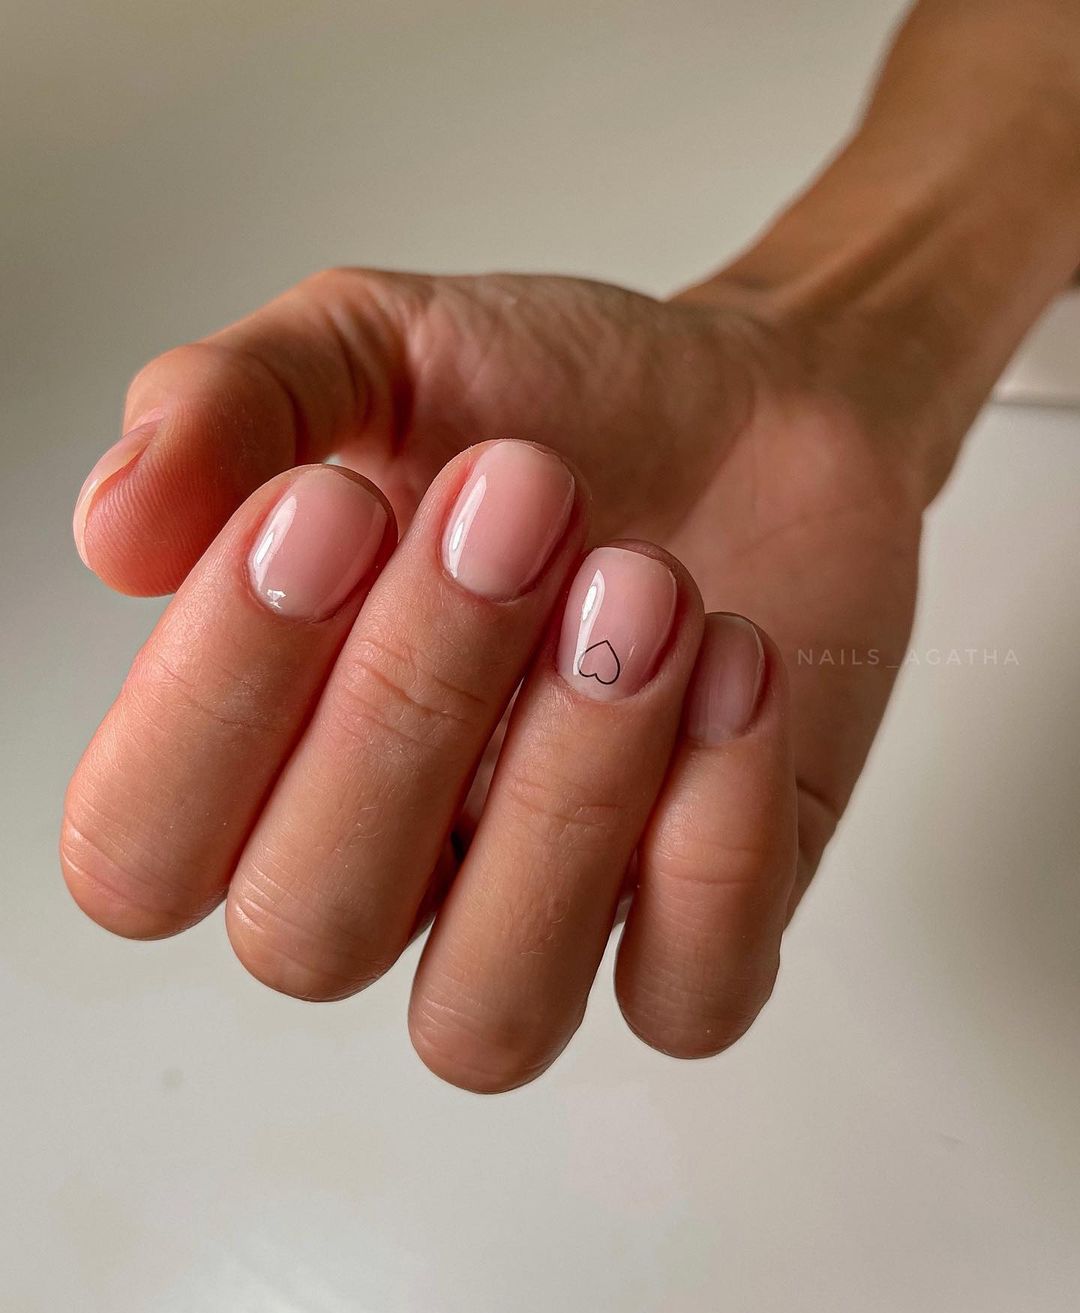
Minimalist Heart Accent
For a simple yet adorable look, this design features a minimalist heart accent on a nude base, ideal for short nails. It’s a perfect easy nail art idea for those who love a touch of romance without going overboard.
-
- Base coat: Sally Hansen ‘Hard as Nails’
- Nude polish: OPI ‘Samoan Sand’
- Black polish for heart: Essie ‘Licorice’
- Thin nail art brush
- Top coat: OPI Top Coat
Creating the Look:
-
- Apply a base coat to your nails.
- Paint your nails with two coats of nude polish.
- Using a thin nail art brush, draw a small heart on the ring finger nail.
- Apply a top coat to protect the design and add a glossy finish.
Abstract Line Art
This nail design features abstract black and white lines on a nude base, creating a modern and stylish look. The contrasting colors add an artistic touch, making it perfect for those who appreciate minimalist yet striking nail art.
-
- Base coat: Essie ‘First Base’
- Nude polish: OPI ‘Samoan Sand’
- Black striping polish: Orly Instant Artist ‘Jet Black’
- White striping polish: Orly Instant Artist ‘Arctic White’
- Thin nail art brush
- Top coat: Seche Vite Dry Fast Top Coat
Creating the Look:
-
- Apply a base coat to your nails.
- Paint your nails with two coats of nude polish.
- Using a thin nail art brush, draw abstract lines with black and white striping polishes.
- Seal the design with a top coat for added shine and protection.
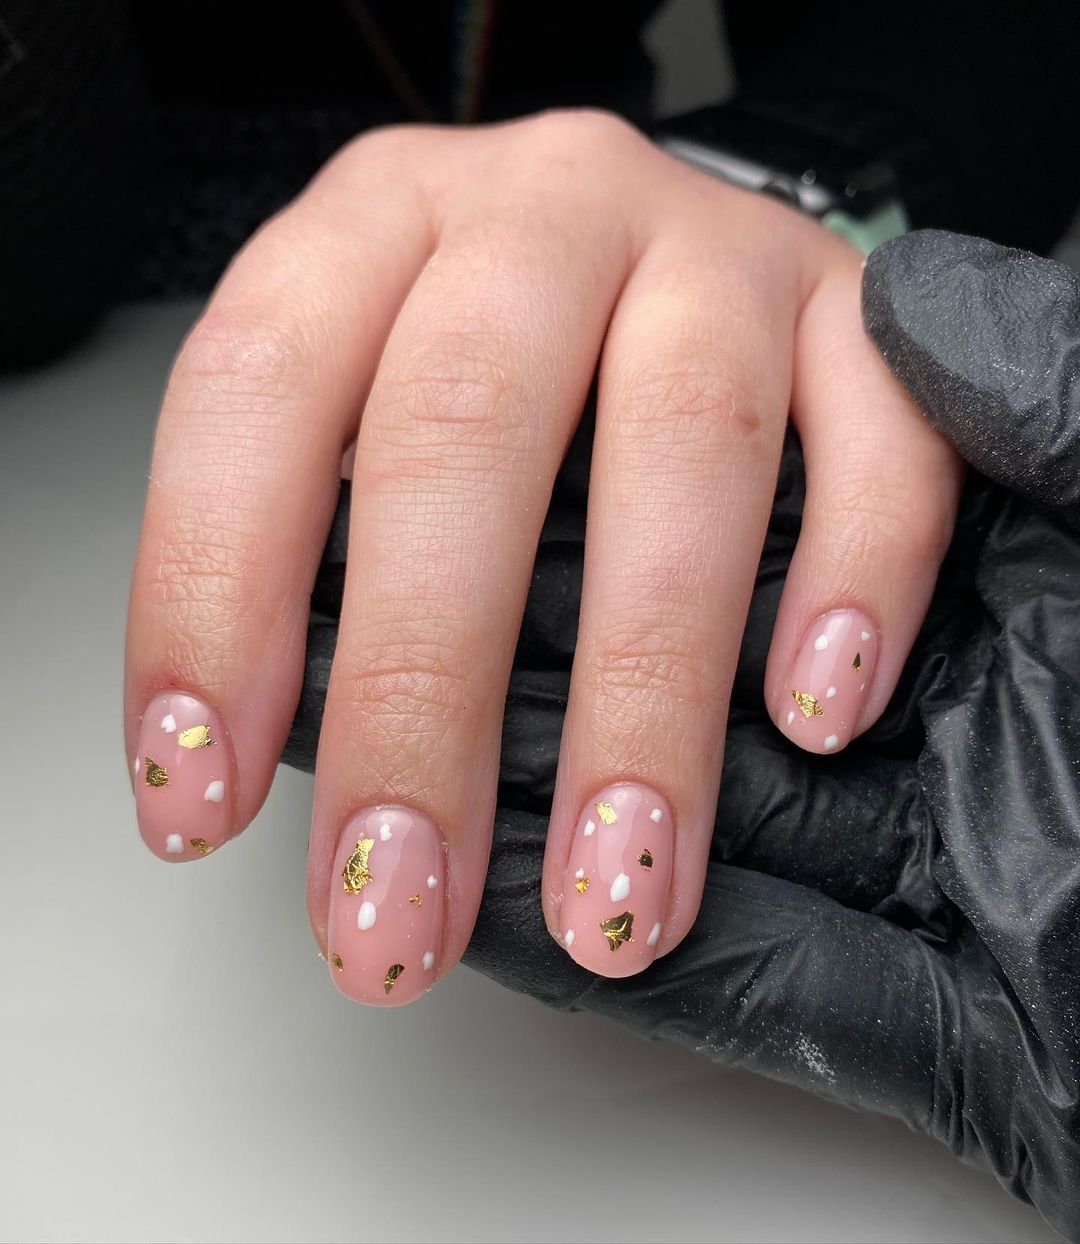
Gold Flakes and Dots
This elegant nail design features a nude base with scattered gold flakes and white dots, giving it a sophisticated and festive look. The combination of gold and white creates a chic contrast, making it perfect for any occasion.
-
- Base coat: Sally Hansen ‘Hard as Nails’
- Nude polish: Essie ‘Ballet Slippers’
- Gold foil flakes
- White polish: OPI ‘Alpine Snow’
- Dotting tool
- Top coat: OPI Top Coat
Creating the Look:
-
- Start with a base coat to protect your nails.
- Apply two coats of nude polish and let it dry completely.
- Use a dotting tool to create white dots on the nails.
- Carefully place gold foil flakes on the nails using tweezers.
- Finish with a top coat to secure the design and add shine.
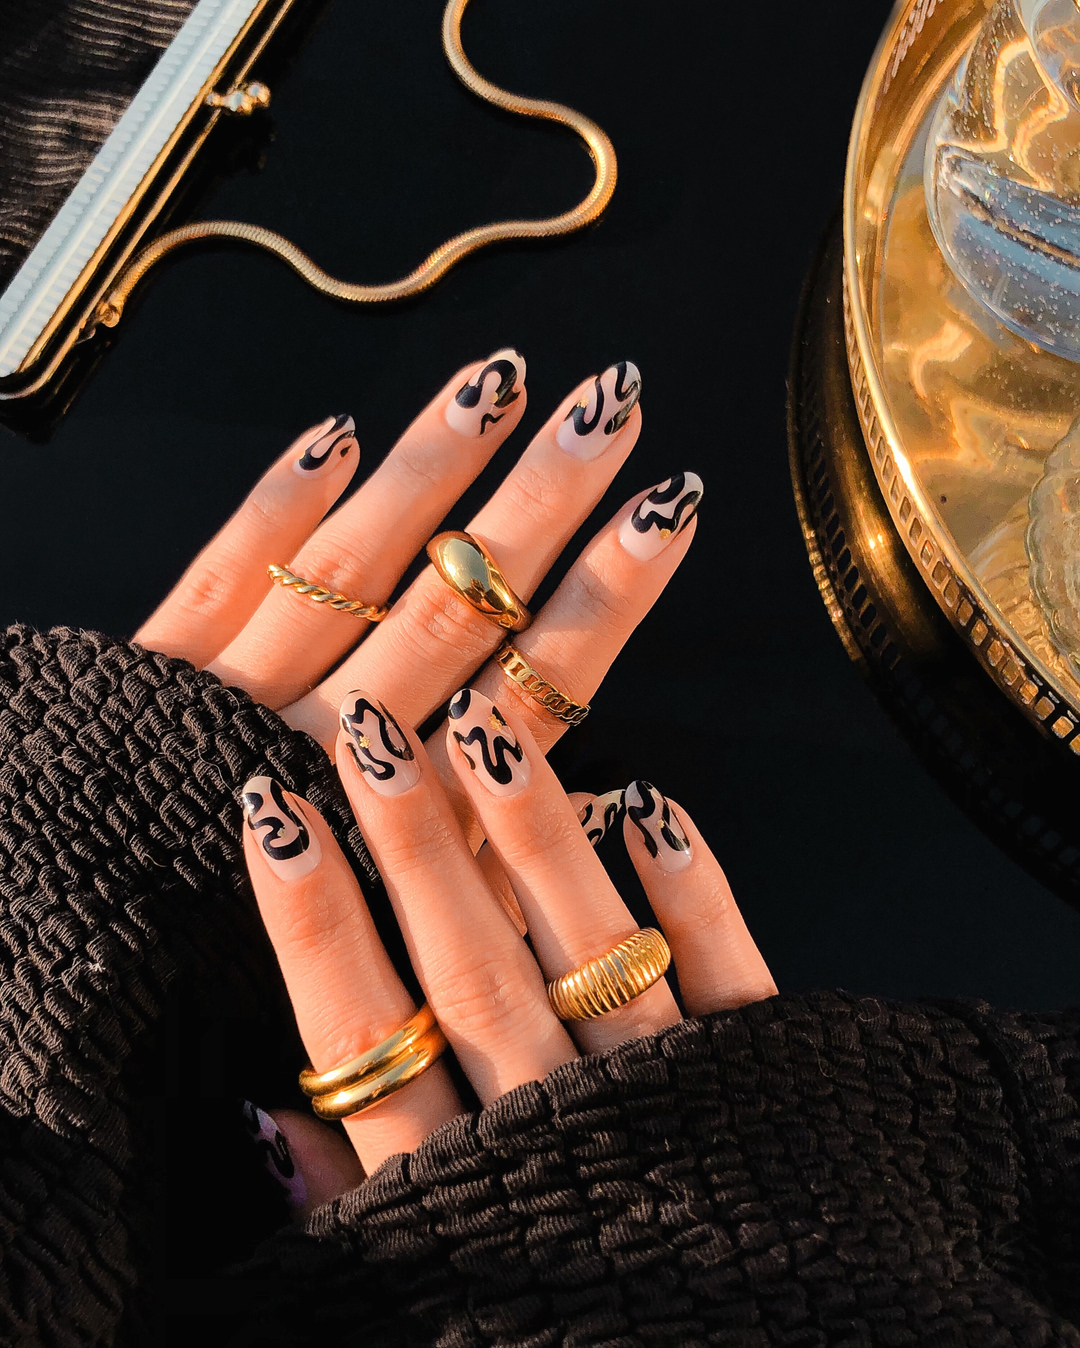
Black Flame Art
This striking design features black flame patterns on a nude base, creating a bold and edgy look. The flames add a dynamic and eye-catching element, making it perfect for those who want to make a statement with their nails.
-
- Base coat: Essie ‘First Base’
- Nude polish: Zoya ‘Jana’
- Black polish: Essie ‘Licorice’
- Thin nail art brush
- Top coat: Seche Vite Dry Fast Top Coat
Creating the Look:
-
- Apply a base coat to your nails.
- Paint your nails with two coats of nude polish.
- Using a thin nail art brush, draw black flame patterns on the nails.
- Seal the design with a top coat for added durability and shine.
Save Pin
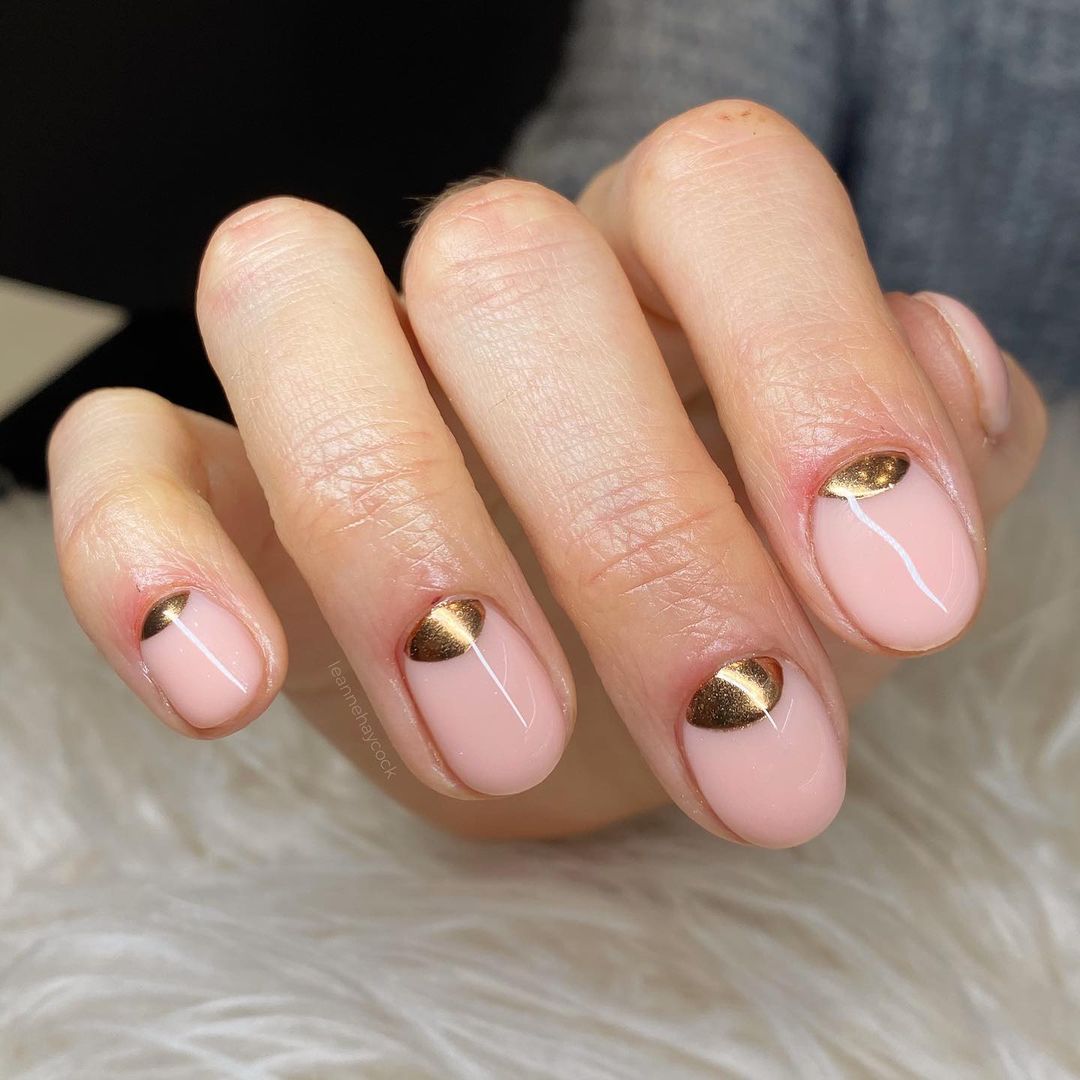
Golden Half Moons
This chic design features golden half moons on a nude base, adding a touch of luxury and sophistication to your nails. The golden accents make it a perfect choice for any formal event or special occasion.
-
- Base coat: OPI Nail Envy
- Nude polish: Essie ‘Mademoiselle’
- Gold polish: Sally Hansen ‘Golden-I’
- Thin nail art brush
- Top coat: Essie ‘Good to Go’
Creating the Look:
-
- Apply a base coat to your nails.
- Paint your nails with two coats of nude polish.
- Using a thin nail art brush, paint gold half moons at the base of each nail.
- Finish with a top coat to protect the design and add a glossy finish.
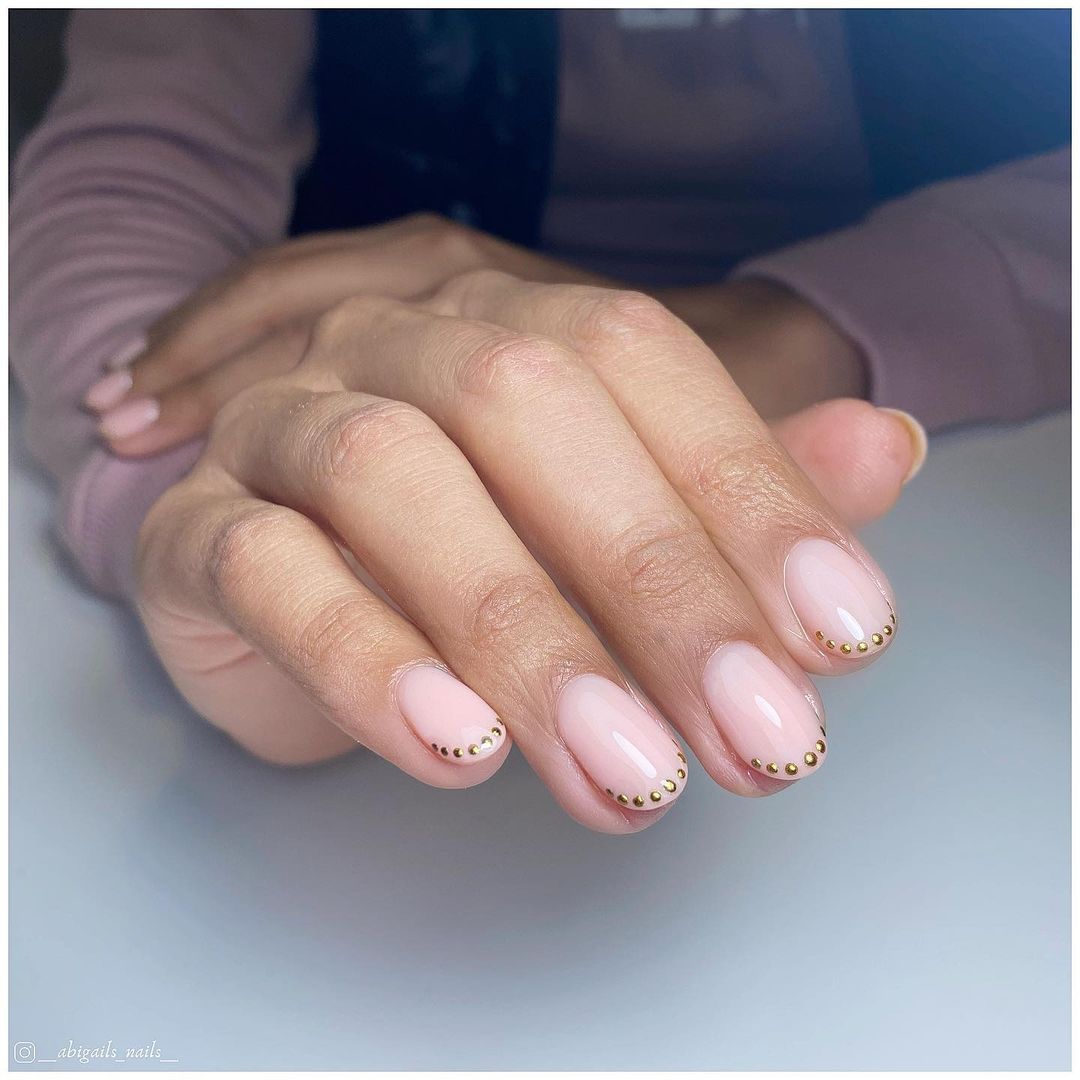
Gold Stud Accents
This design features nude nails with delicate gold stud accents along the tips, creating a subtle yet elegant look. The gold studs add a touch of glamour, making it perfect for everyday wear or special occasions.
-
- Base coat: Sally Hansen ‘Hard as Nails’
- Nude polish: OPI ‘Samoan Sand’
- Gold studs
- Nail glue
- Top coat: OPI Top Coat
Creating the Look:
-
- Apply a base coat to your nails.
- Paint your nails with two coats of nude polish.
- Use nail glue to carefully place gold studs along the tips of each nail.
- Seal the design with a top coat for added shine and protection.
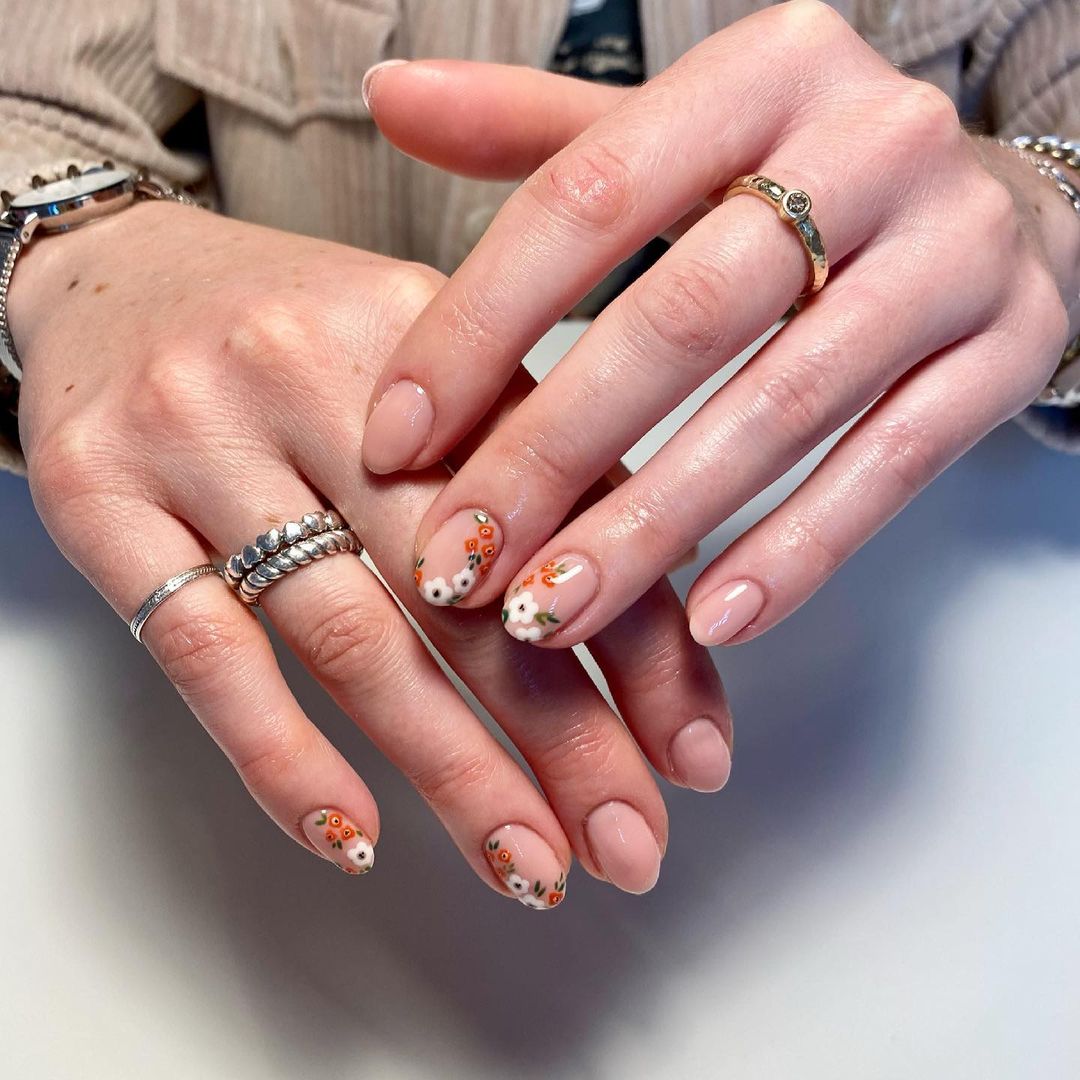
Autumn Floral Accents
This charming design features delicate floral patterns in autumn colors on a nude base, creating a sweet and seasonal look. The combination of orange, white, and green flowers adds a fresh and playful touch to your nails.
-
- Base coat: Essie ‘First Base’
- Nude polish: Zoya ‘Jana’
- Orange polish: OPI ‘Cajun Shrimp’
- White polish: OPI ‘Alpine Snow’
- Green polish: Essie ‘Mint Candy Apple’
- Thin nail art brush
- Top coat: Seche Vite Dry Fast Top Coat
Creating the Look:
-
- Apply a base coat to your nails.
- Paint your nails with two coats of nude polish.
- Using a thin nail art brush, paint small floral patterns with the orange, white, and green polishes.
- Seal the design with a top coat for added shine and protection.
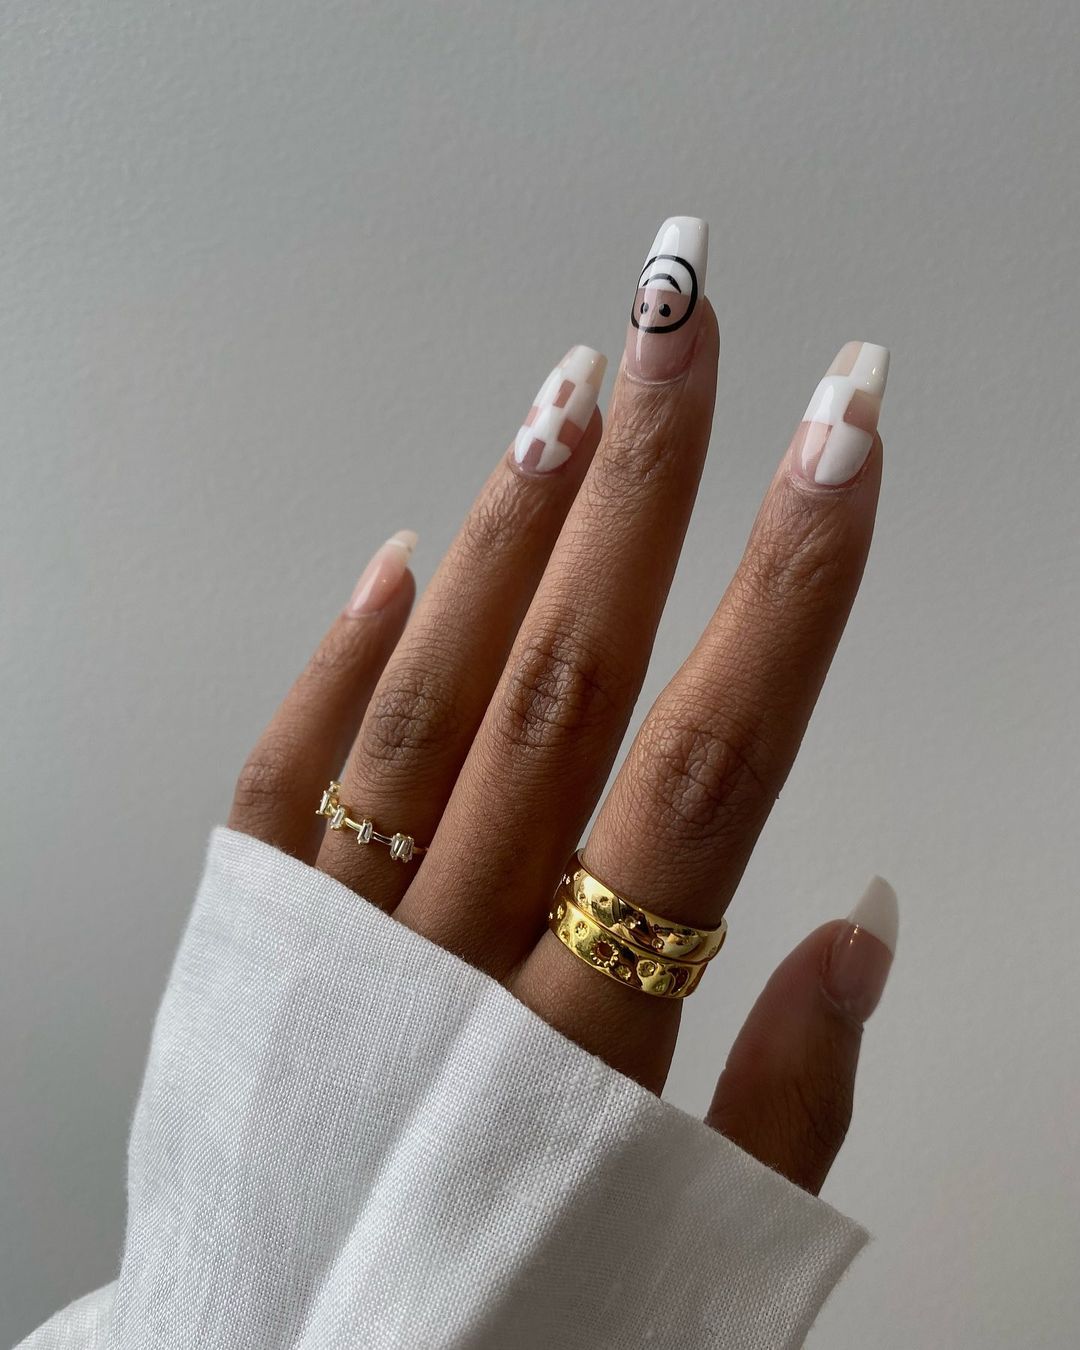
Playful Checkered and Smiley Design
This playful design combines white checkered patterns with a cute smiley face on a nude base. It’s a fun and whimsical look that brings a bit of joy to your everyday style.
-
- Base coat: Essie ‘First Base’
- Nude polish: OPI ‘Samoan Sand’
- White polish: Essie ‘Blanc’
- Black striping polish: Orly Instant Artist ‘Jet Black’
- Thin nail art brush
- Top coat: Seche Vite Dry Fast Top Coat
Creating the Look:
-
- Start by applying a base coat to your nails.
- Paint your nails with two coats of nude polish and let them dry completely.
- Use a thin nail art brush to draw white checkered patterns and a smiley face on one nail.
- Finish with a top coat to seal the design and add shine.
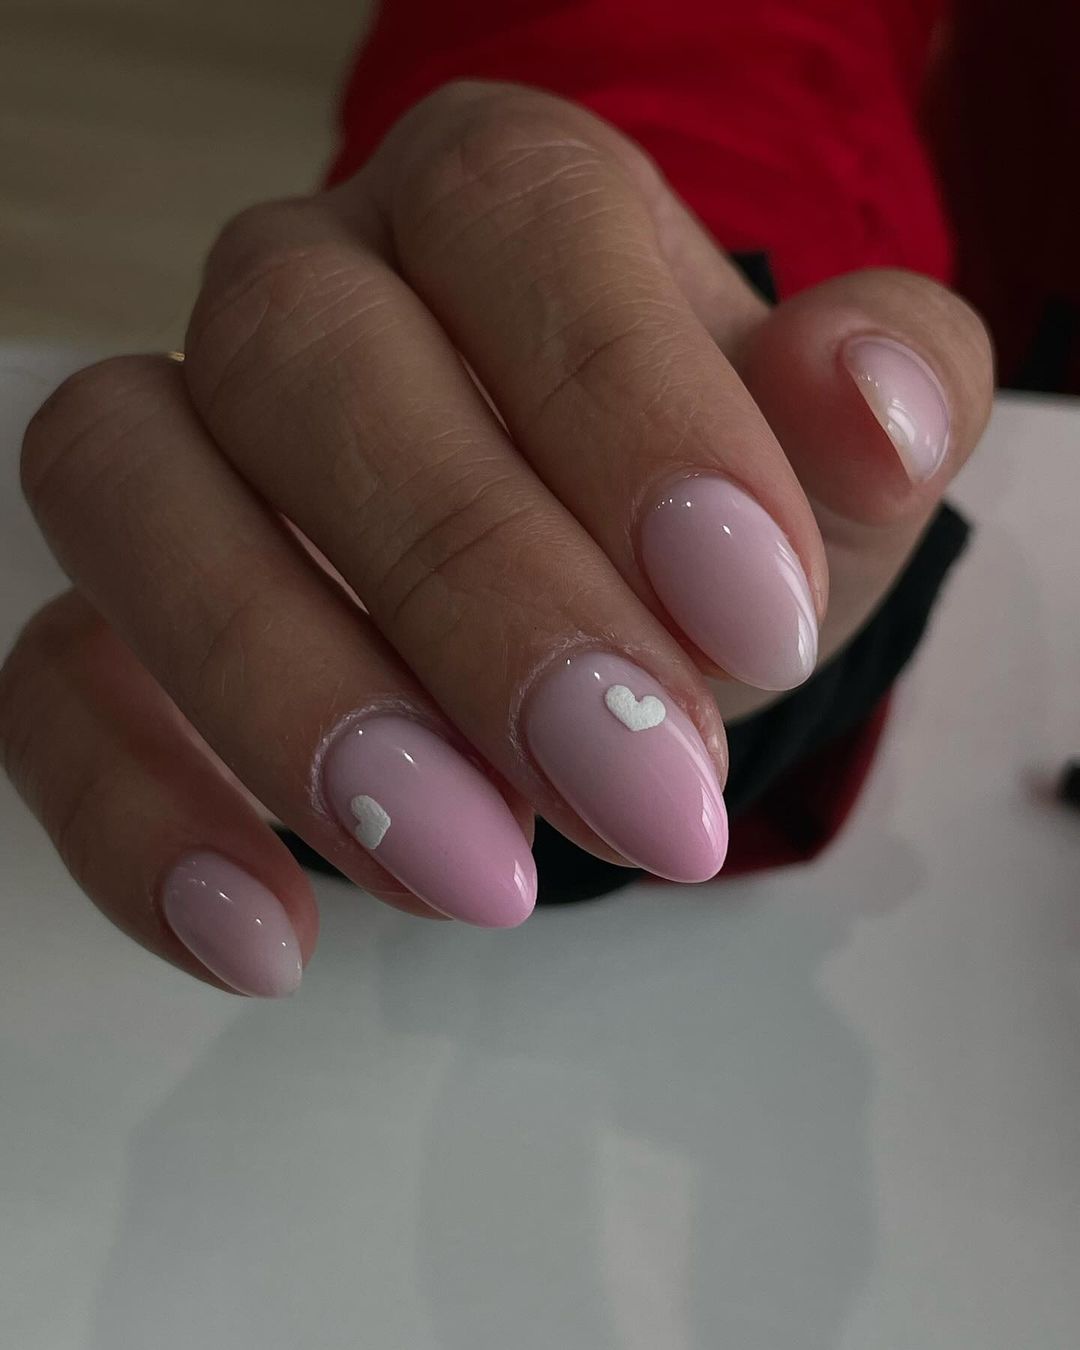
Pink Hearts
This adorable nail design features a soft pink base with small white heart accents. It’s a cute and delicate look that’s perfect for romantic occasions or everyday wear.
-
- Base coat: Sally Hansen ‘Hard as Nails’
- Pink polish: Essie ‘Ballet Slippers’
- White polish: OPI ‘Alpine Snow’
- Thin nail art brush
- Top coat: OPI Top Coat
Creating the Look:
-
- Apply a base coat to your nails.
- Paint your nails with two coats of pink polish.
- Using a thin nail art brush, draw small white hearts on each nail.
- Seal the design with a top coat for added durability and shine.
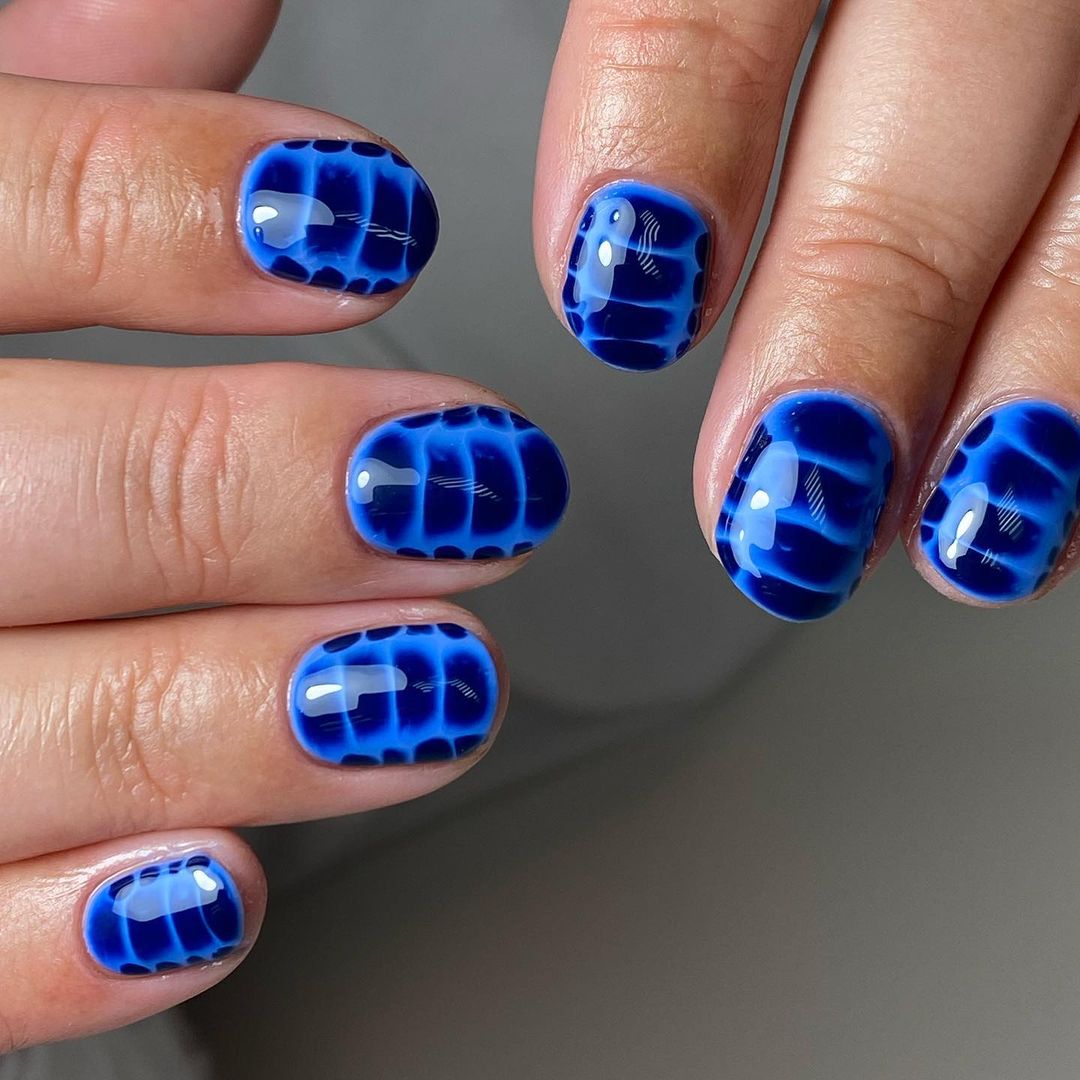
Blue Marble Effect
This striking blue marble design features rich shades of blue with a marbleized effect. It’s a bold and eye-catching look that’s perfect for those who want their nails to make a statement.
-
- Base coat: Essie ‘First Base’
- Blue polish: China Glaze ‘I Sea the Point’
- White polish: OPI ‘Alpine Snow’
- Nail art sponge
- Top coat: Seche Vite Dry Fast Top Coat
Creating the Look:
-
- Start by applying a base coat to your nails.
- Apply a base layer of blue polish.
- Use a nail art sponge to dab on the white polish, creating a marble effect.
- Finish with a top coat to protect the design and add a glossy finish.
Geometric Grey and White
This chic geometric design features grey and white patterns on a nude base. The clean lines and sharp angles create a sophisticated look that’s perfect for any occasion.
-
- Base coat: OPI Nail Envy
- Nude polish: Essie ‘Mademoiselle’
- Grey polish: Essie ‘Chinchilly’
- White striping polish: Orly Instant Artist ‘Arctic White’
- Thin nail art brush
- Top coat: Essie ‘Good to Go’
Creating the Look:
-
- Apply a base coat to your nails.
- Paint your nails with two coats of nude polish.
- Using a thin nail art brush, draw geometric patterns with grey and white polish.
- Seal the design with a top coat for added shine and protection.
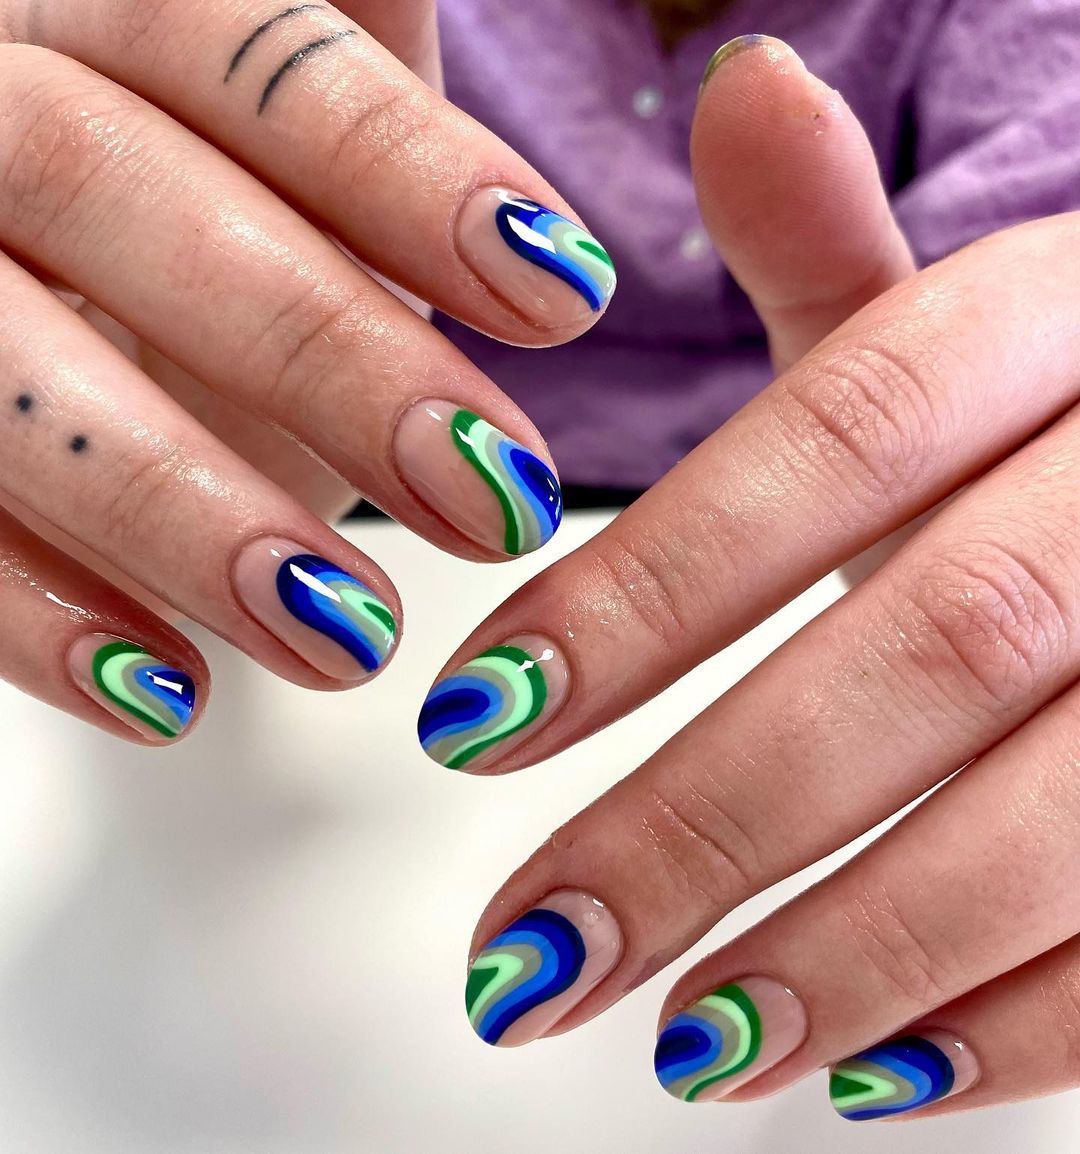
Retro Swirls
This vibrant design features retro swirls in blue and green on a nude base. The swirling patterns create a fun and dynamic look that’s perfect for those who love vintage-inspired nail art.
-
- Base coat: Sally Hansen ‘Hard as Nails’
- Nude polish: OPI ‘Samoan Sand’
- Blue polish: Essie ‘Butler Please’
- Green polish: China Glaze ‘Four Leaf Clover’
- Thin nail art brush
- Top coat: OPI Top Coat
Creating the Look:
-
- Apply a base coat to your nails.
- Paint your nails with two coats of nude polish.
- Using a thin nail art brush, create swirling patterns with blue and green polish.
- Finish with a top coat to protect the design and add a glossy finish.
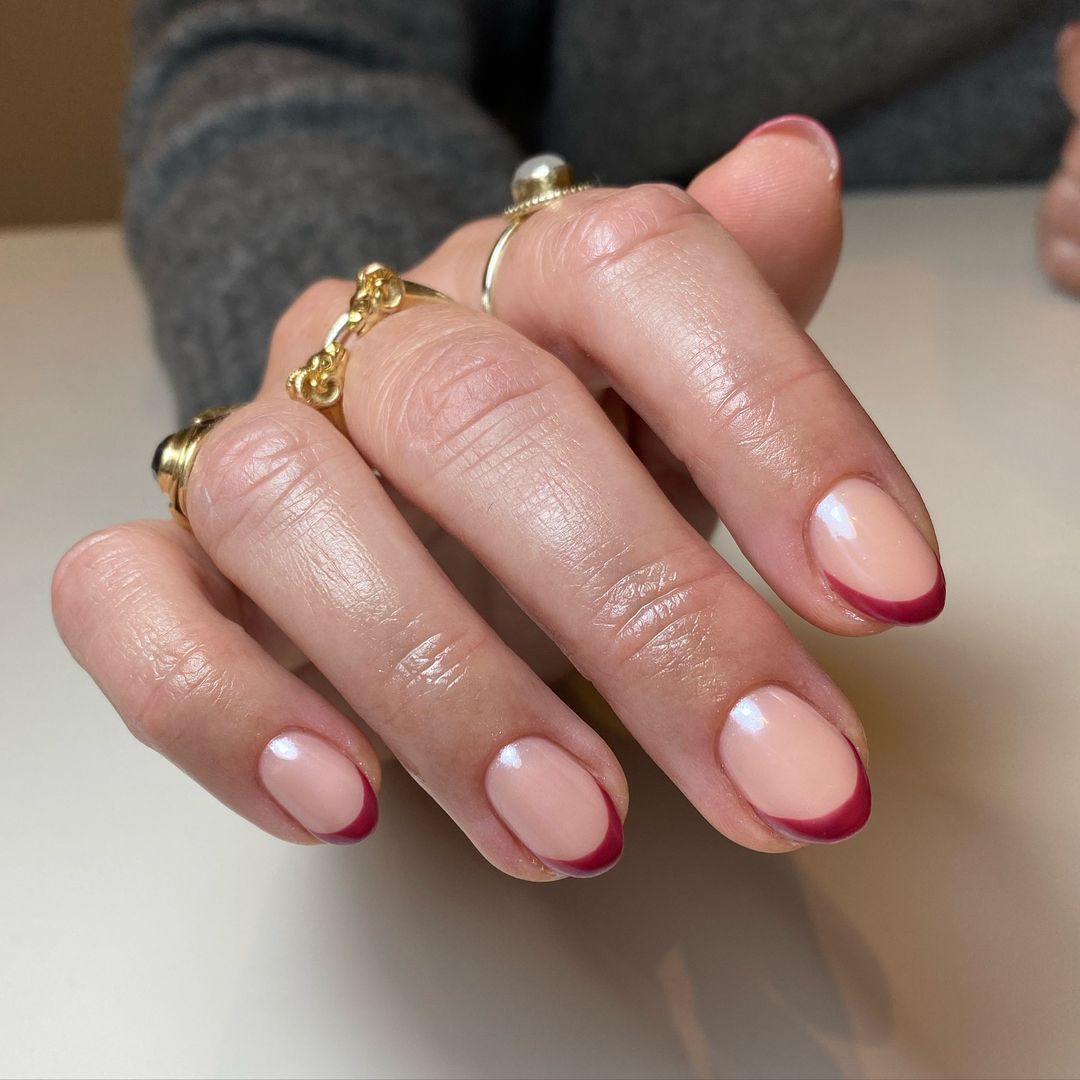
Burgundy French Tips
This sophisticated nail design features classic French tips with a modern twist, using a rich burgundy color instead of the traditional white. It’s a classy look that adds a pop of color to your nails.
-
- Base coat: Essie ‘First Base’
- Nude polish: OPI ‘Samoan Sand’
- Burgundy polish: Essie ‘Wicked’
- French tip guides
- Top coat: Seche Vite Dry Fast Top Coat
Creating the Look:
-
- Start by applying a base coat to your nails.
- Paint your nails with two coats of nude polish.
- Use French tip guides to create crisp burgundy tips.
- Finish with a top coat to seal the design and add shine.
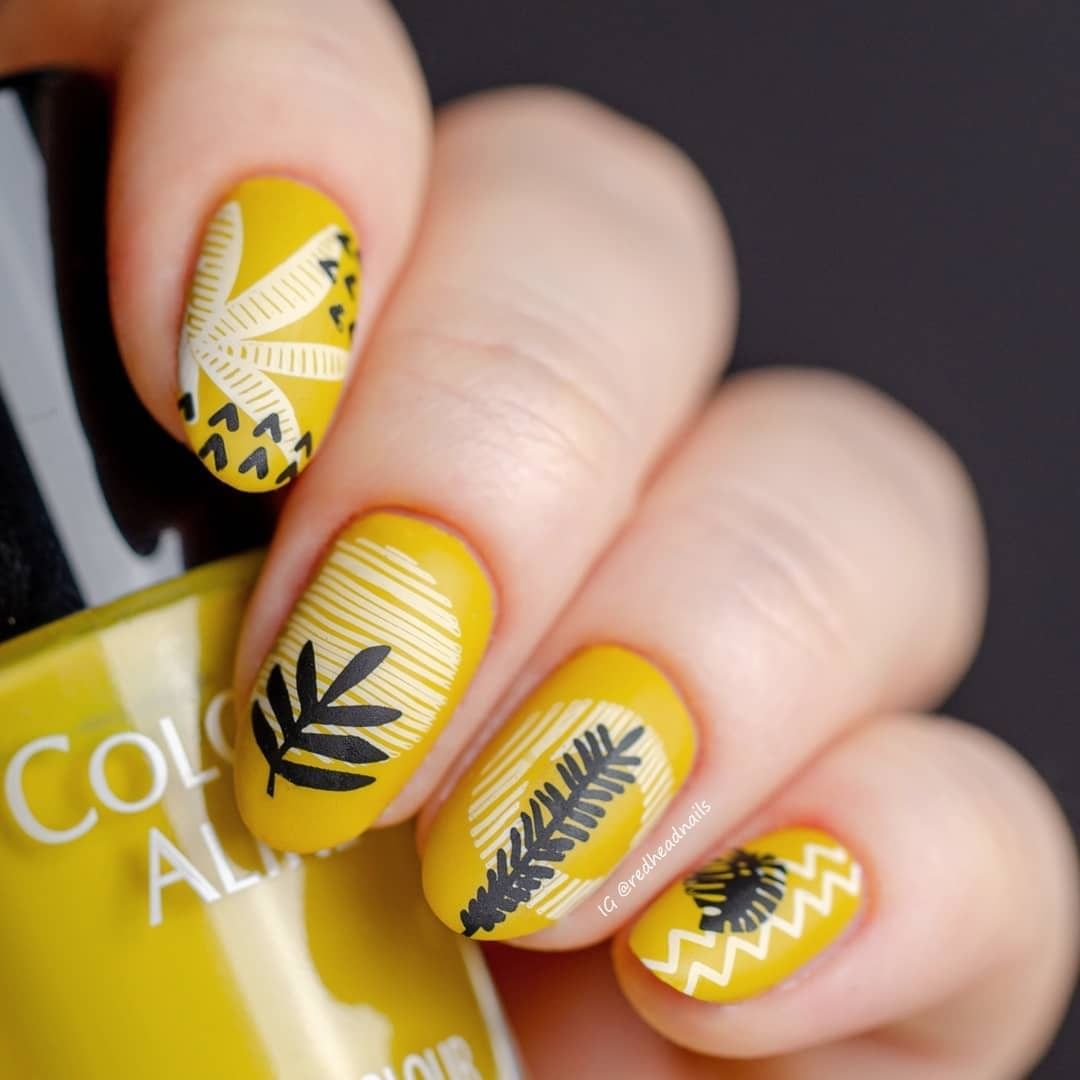
Yellow Botanical Patterns
This vibrant yellow design features intricate botanical patterns in black and white, creating a lively and eye-catching look. The contrast between the colors makes the design pop, perfect for those who love bold and cute nail art.
-
- Base coat: OPI Nail Envy
- Yellow polish: China Glaze ‘Happy Go Lucky’
- Black striping polish: Orly Instant Artist ‘Jet Black’
- White striping polish: Orly Instant Artist ‘Arctic White’
- Thin nail art brush
- Top coat: Essie ‘Good to Go’
Creating the Look:
-
- Apply a base coat to your nails.
- Paint your nails with two coats of yellow polish.
- Using a thin nail art brush, draw botanical patterns with black and white striping polishes.
- Seal the design with a top coat for added shine and protection.
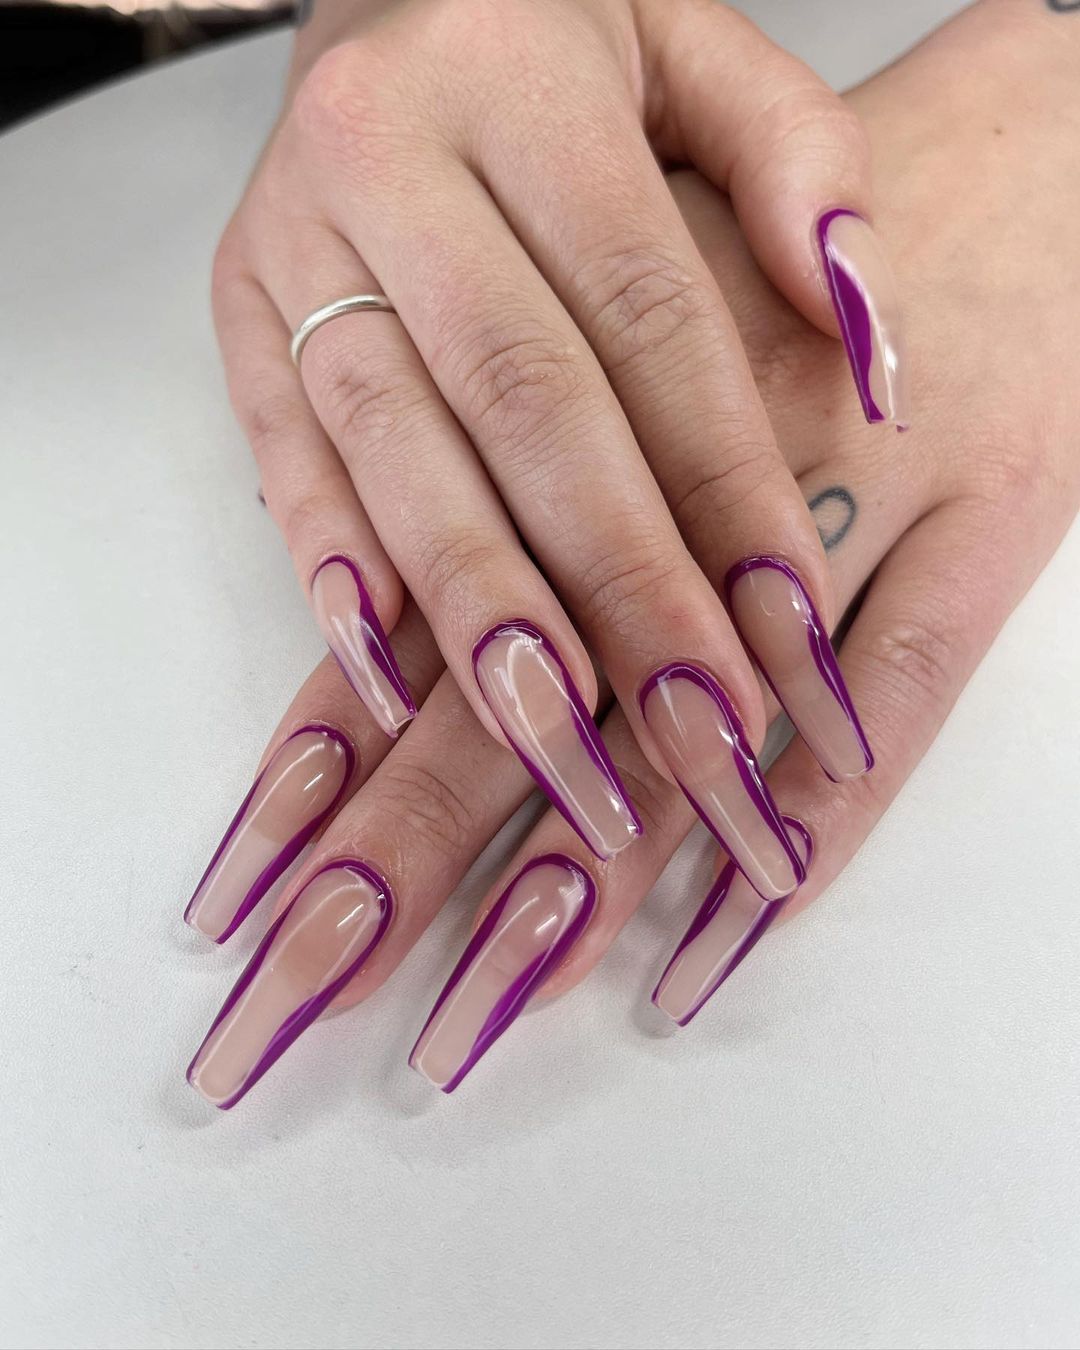
Purple Edged Coffin Nails
This modern design features coffin shaped nails with a nude base and bold purple edges. The sleek lines create a chic and contemporary look, ideal for those who love gel nail designs.
-
- Base coat: Sally Hansen ‘Hard as Nails’
- Nude polish: Essie ‘Ballet Slippers’
- Purple polish: OPI ‘Do You Lilac It?’
- Thin nail art brush
- Top coat: Seche Vite Dry Fast Top Coat
Creating the Look:
-
- Start by applying a base coat to your nails.
- Paint your nails with two coats of nude polish.
- Use a thin nail art brush to create clean purple edges along the sides of the nails.
- Finish with a top coat to protect the design and add shine.
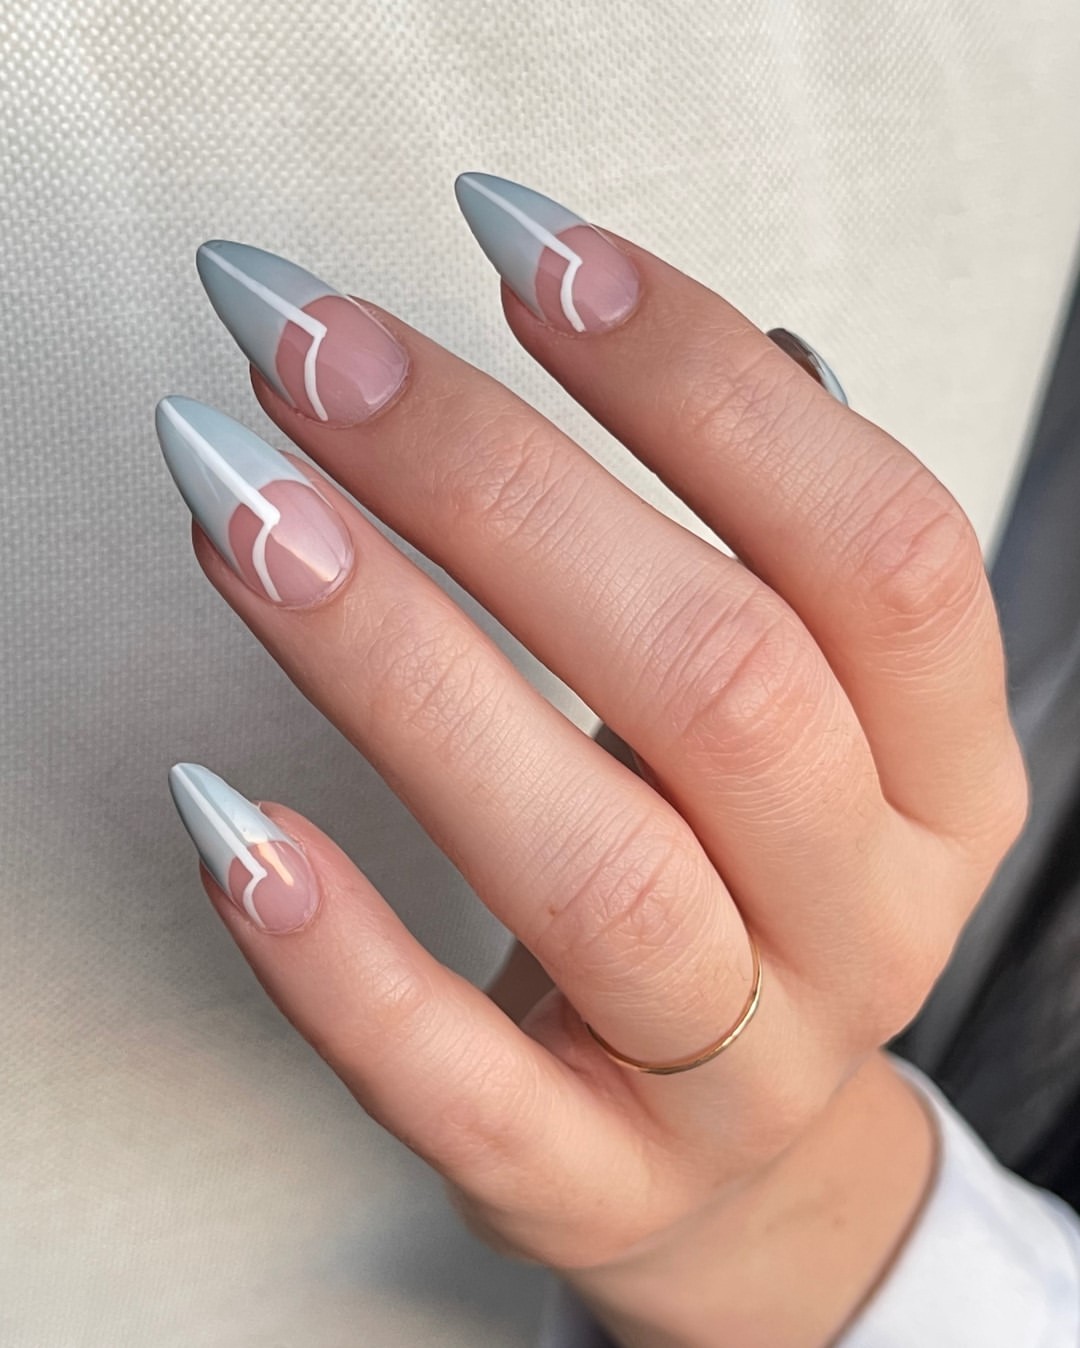
Minimalist Blue French Tips
This minimalist design features subtle blue French tips on a nude base, offering a classy and sophisticated look. Perfect for short nails, this design is easy to achieve and maintain.

-
- Base coat: Essie ‘First Base’
- Nude polish: OPI ‘Samoan Sand’
- Blue polish: Essie ‘Butler Please’
- French tip guides
- Top coat: Essie ‘Good to Go’
Creating the Look:
-
- Apply a base coat to your nails.
- Paint your nails with two coats of nude polish.
- Use French tip guides to create crisp blue tips.
- Seal the design with a top coat for added durability and shine.
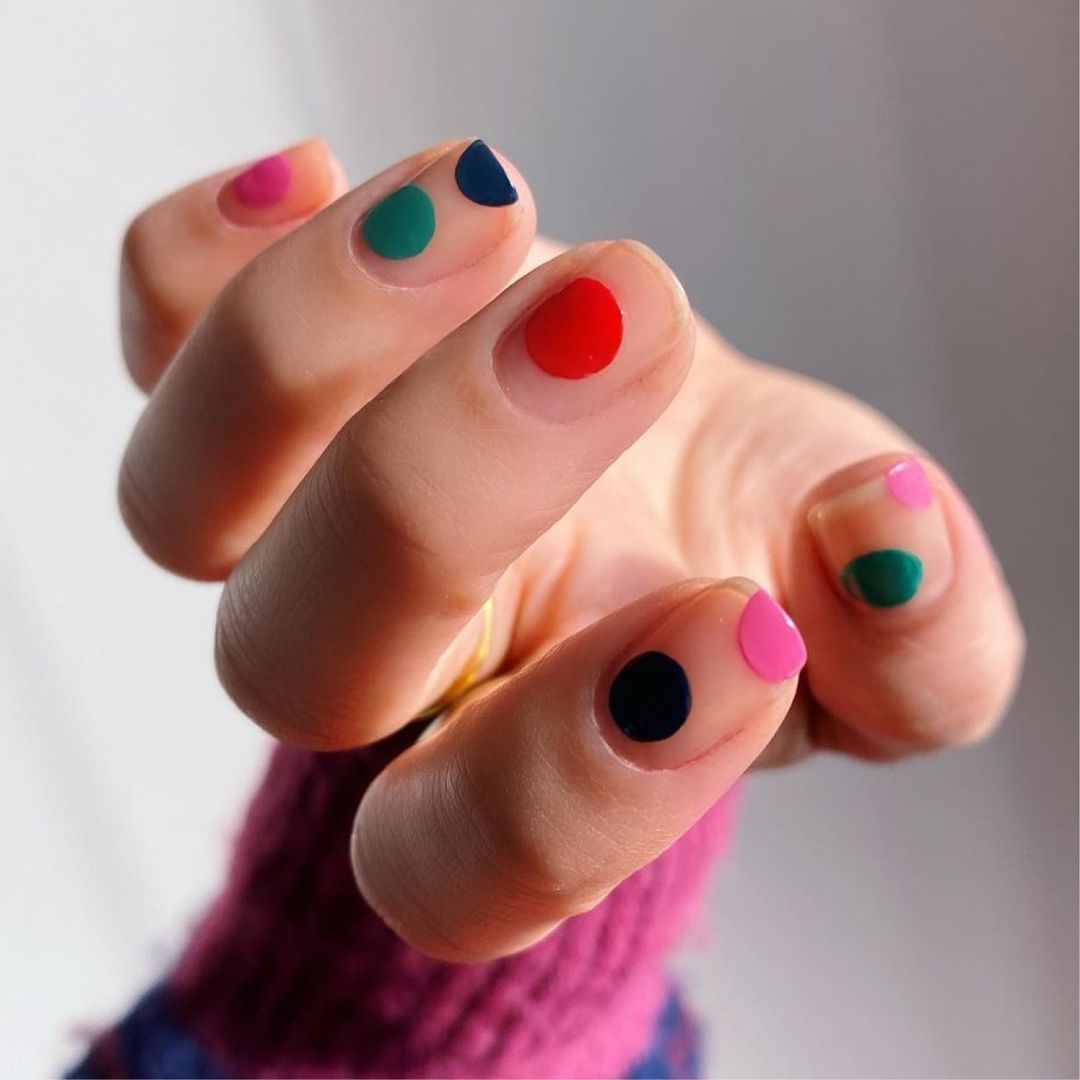
Colorful Polka Dots
This playful design features colorful polka dots on a nude base, adding a fun and vibrant touch to your nails. The mix of colors makes this design versatile and cute.
-
- Base coat: Sally Hansen ‘Hard as Nails’
- Nude polish: Essie ‘Ballet Slippers’
- Polishes for dots: OPI ‘Red My Fortune Cookie’ (red), Essie ‘Butler Please’ (blue), China Glaze ‘Four Leaf Clover’ (green), OPI ‘Alpine Snow’ (white), Essie ‘Play Date’ (purple)
- Dotting tools
- Top coat: OPI Top Coat
Creating the Look:
-
- Apply a base coat to your nails.
- Paint your nails with two coats of nude polish.
- Use dotting tools to apply colorful polka dots on each nail.
- Finish with a top coat to protect the design and add shine.
Gold Leaf Accents
This elegant design features delicate gold leaf accents on a nude base, creating a luxurious and sophisticated look. The gold accents add a touch of glamour to your nails, perfect for any special occasion.

-
- Base coat: Essie ‘First Base’
- Nude polish: Zoya ‘Jana’
- Gold leaf flakes
- Nail glue
- Top coat: Seche Vite Dry Fast Top Coat
Creating the Look:
-
- Start by applying a base coat to your nails.
- Paint your nails with two coats of nude polish.
- Use nail glue to carefully place gold leaf flakes on each nail.
- Seal the design with a top coat for added durability and shine.
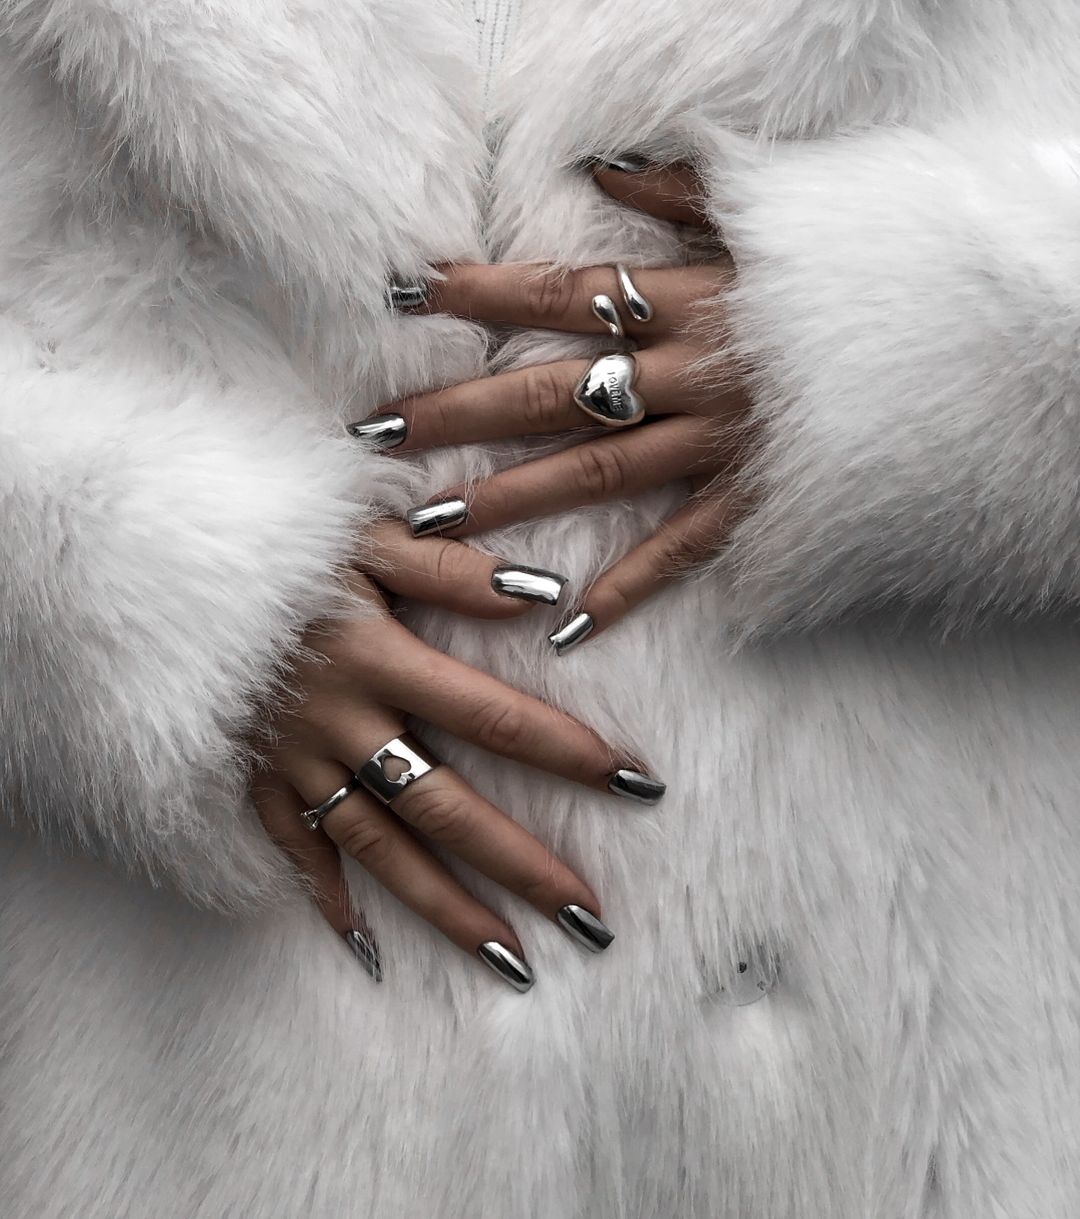
Chrome Mirror Nails
This bold and futuristic design features mirror-like chrome nails, creating a striking and edgy look. The reflective surface makes a statement, perfect for those who love to stand out.
-
- Base coat: OPI Nail Envy
- Chrome powder
- No-wipe top coat: Gelish Top It Off
- UV/LED lamp
- Top coat: Essie ‘Good to Go’
Creating the Look:
-
- Apply a base coat to your nails.
- Cure a no-wipe top coat under a UV/LED lamp.
- Rub chrome powder onto the nails using an applicator.
- Seal the design with another layer of no-wipe top coat and cure again.
- Finish with a regular top coat for added shine and protection.
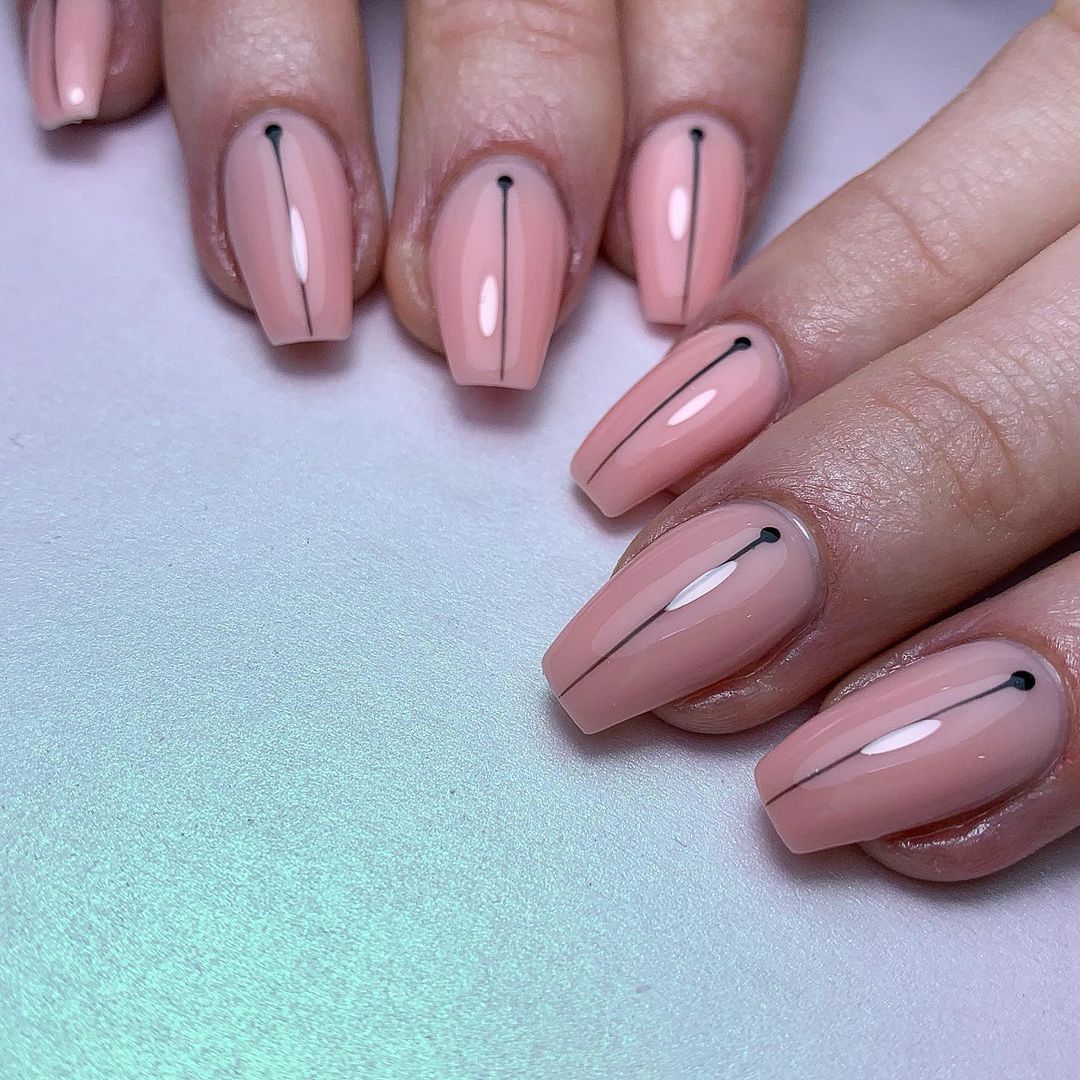
Black Line Accent
This sleek design features a single black line down the center of a nude base, creating a minimalist and classy look. It’s an easy yet striking design that’s perfect for everyday wear.
-
- Base coat: Sally Hansen ‘Hard as Nails’
- Nude polish: OPI ‘Samoan Sand’
- Black striping polish: Orly Instant Artist ‘Jet Black’
- Thin nail art brush
- Top coat: OPI Top Coat
Creating the Look:
-
- Apply a base coat to your nails.
- Paint your nails with two coats of nude polish.
- Using a thin nail art brush, draw a single black line down the center of each nail.
- Seal the design with a top coat for added durability and shine.
FAQ
Q: How long should I wait between coats of polish? A: It’s best to wait about 2-3 minutes between coats to allow the polish to set properly and avoid smudging.
Q: How can I make my manicure last longer? A: Use a high-quality base and top coat, and make sure to reapply the top coat every few days to extend the life of your manicure.
Q: What are some trendy colors for fall nails? A: This fall, look for autumn colors like deep greens, warm browns, burnt oranges, and even rich blues.
With these simple fall nail designs, you’ll be ready to embrace the season with style. Whether you opt for a cute heart design, a classy minimalist look, or chic black tips, your nails will be the perfect accessory for any autumn outfit. So, grab your polishes and get creative!
Save Pin