

This winter, I kept seeing one thing in my feed: glitter that didn’t try so hard. Silver dusted over a sheer base, gold melting into a gradient, a single snowflake on almond. Not the chunky, aggressive glitter I remember from 2016. Something quieter. And I say that as someone who usually rolls her eyes at seasonal nail content.
So I rounded up Winter Glitter Nails that actually work — 32 designs from barely-there sparkle to full-on metallic. Short squares, long stilettos, salon bookings and Sunday night DIYs. I tested a few myself, watched others chip, and kept notes on what flatters warm undertones versus cool. No filler, no brand names, just what held up through a real week of typing and dish duty.
Sparkling Silver Glitter French Tip Nails
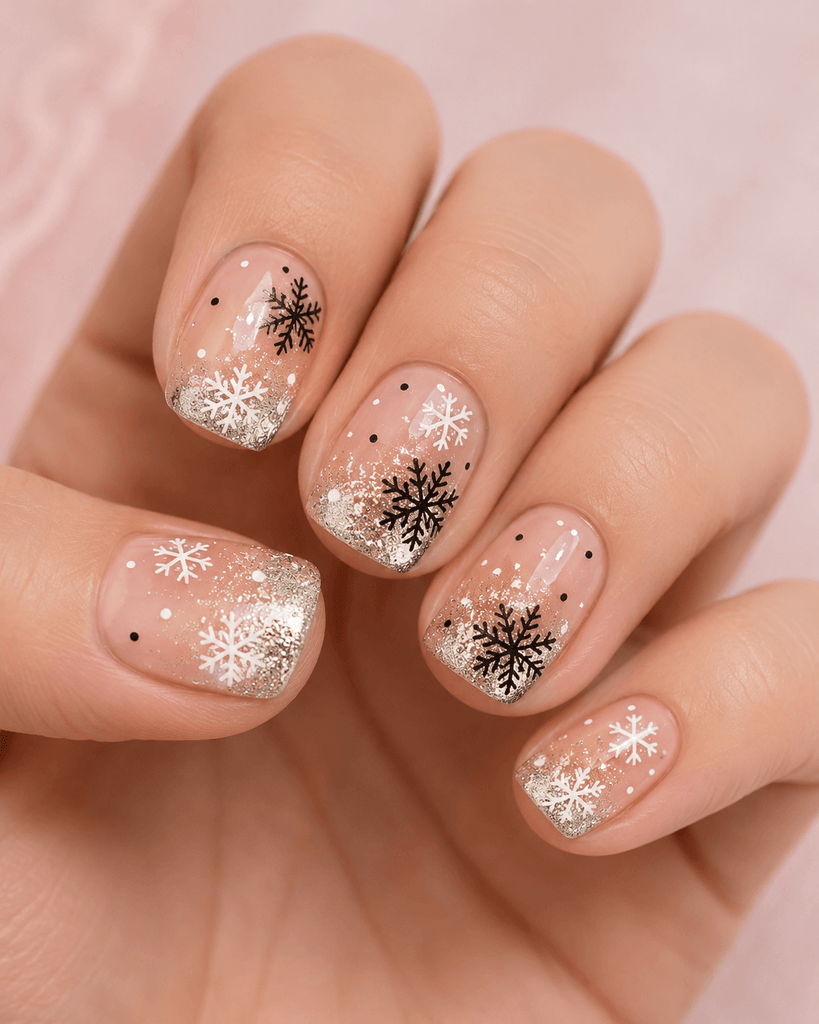
That clear base with a concentrated silver glitter french tip reads like frost on a windowpane, and the snowflake decals on the accent nails land precisely because the short square shape gives each motif room to breathe. No crowding, no awkward cut-off at the sidewall. The black and white detailing keeps it graphic rather than saccharine, which matters when you are wearing winter motifs through actual holiday dinners and not just a photoshoot.
Subtle Gold Glitter Gradient Nails
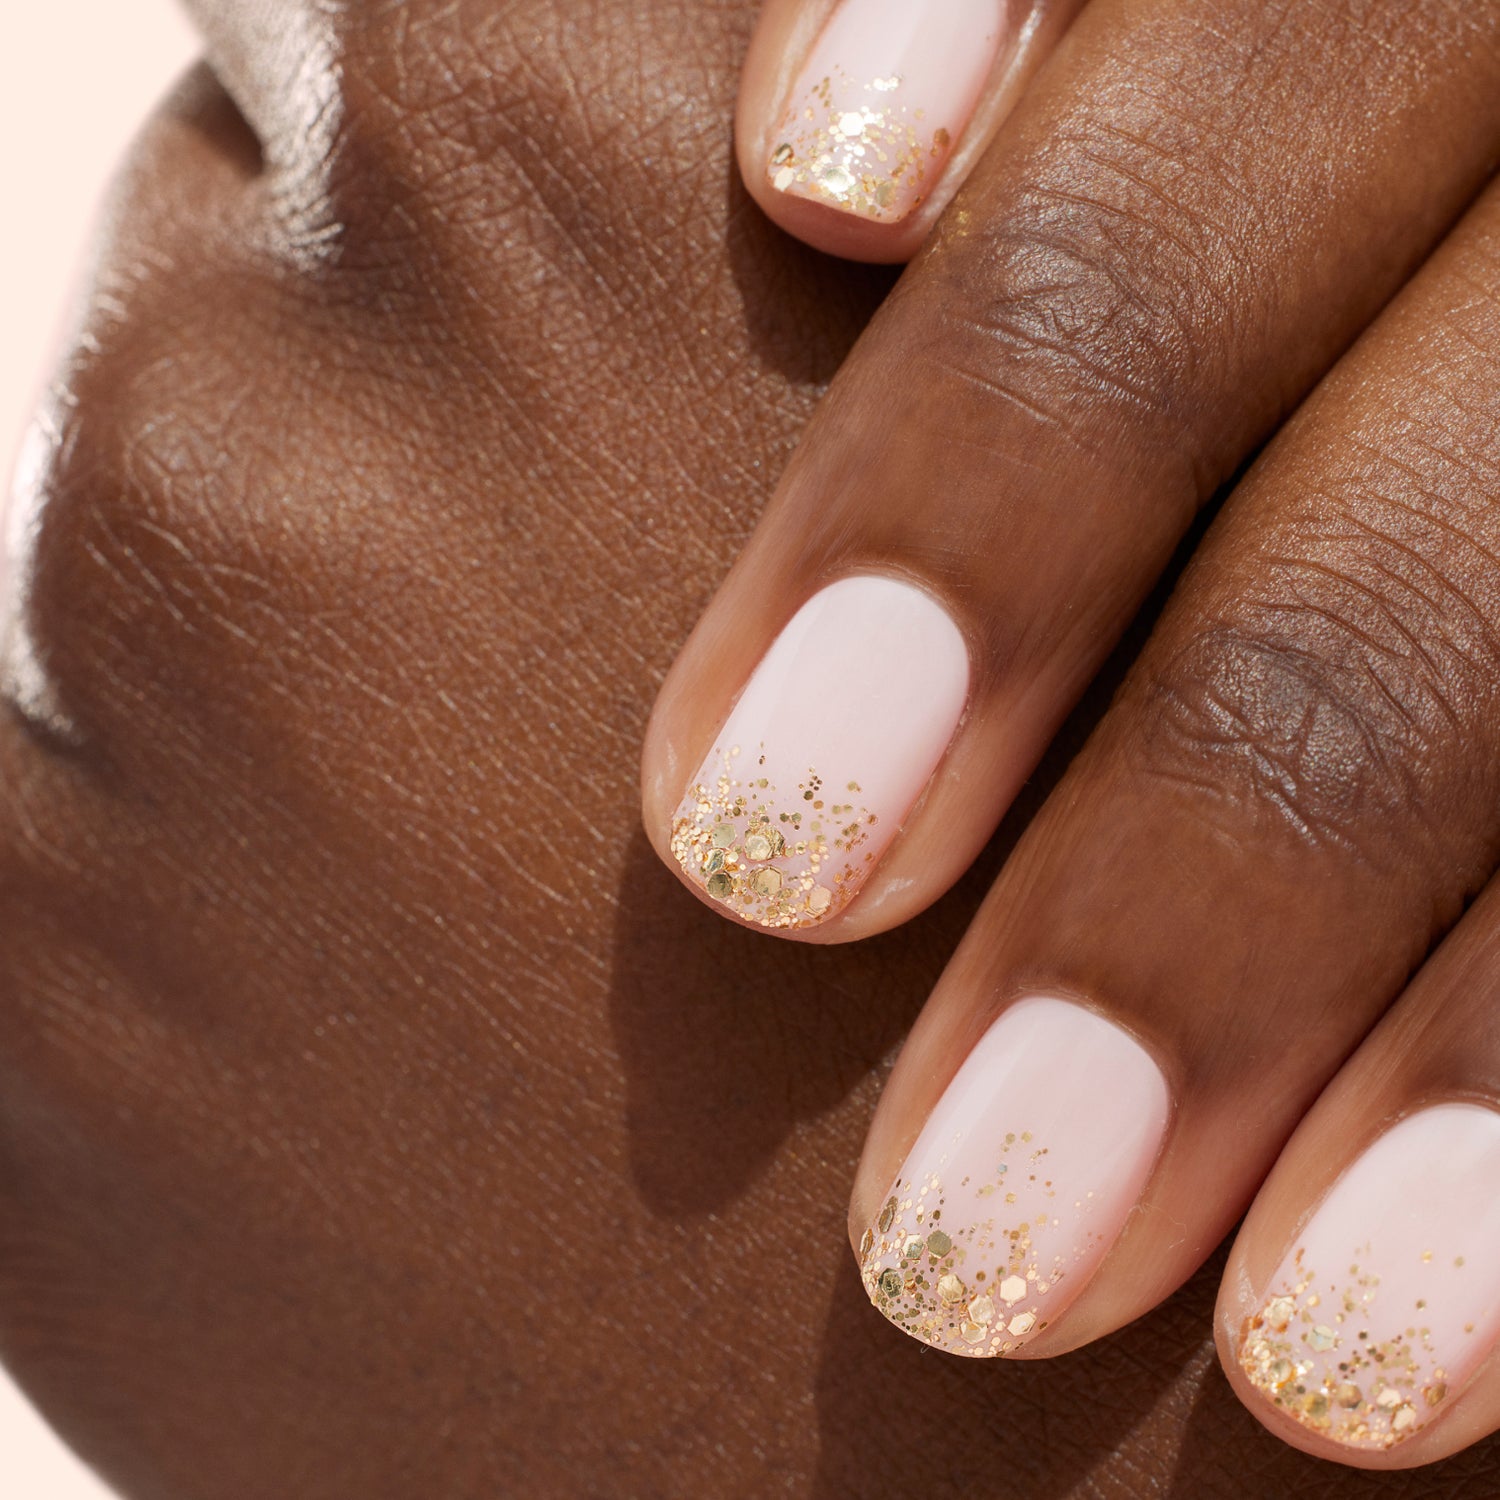
Can a gold glitter gradient over a pale pink base survive a week of typing and screen taps? Yes, if the technician packed the glitter dense enough at the tip and let it fade gradually toward the cuticle. I have worn gradients that looked sparse by day three, and the difference was always application pressure, not product quality. The even fade here hides regrowth better than a solid metallic, which means you gain three extra days before the fill feels urgent. A gel top coat seals the glitter edges, and that is non-negotiable for this finish.
Delicate Glitter Snowflake Almond Nails
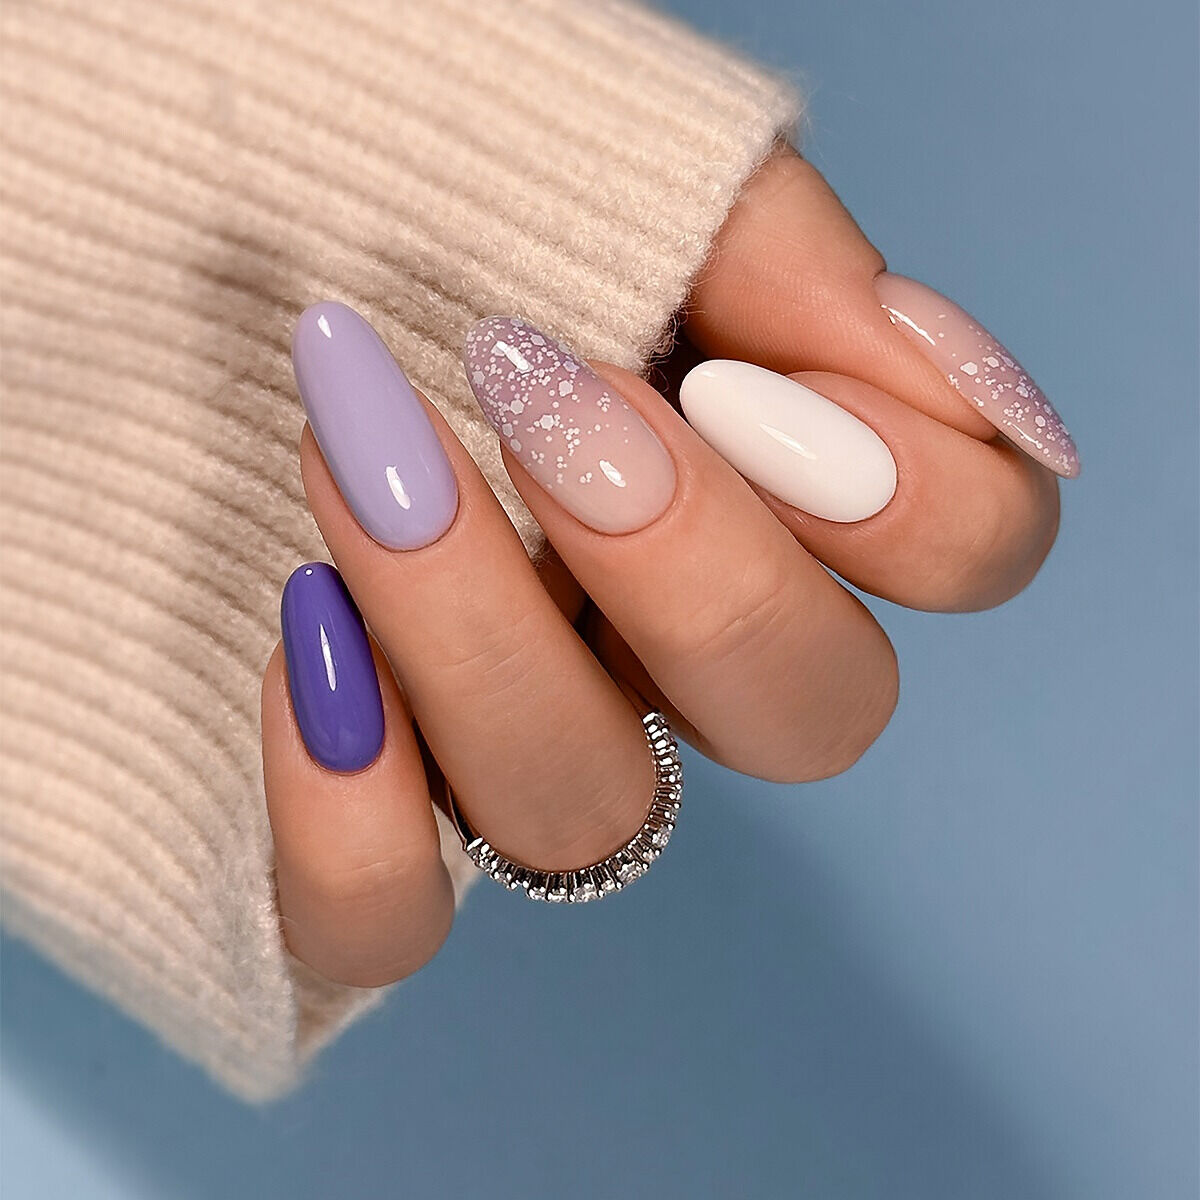
These glitter snowflake nails on medium almond are not a Sunday afternoon project. The snowflake pattern demands symmetry on a curved nail bed, and one misplaced line throws the whole hand off. I have watched salon artists spend ten minutes per nail placing the glitter and sealing the decal, and the result is worth the chair time. At home, the odds of matching that precision on your dominant hand are low. Book the appointment, bring a reference photo, and let someone with a steady arm handle the fine work.
Iridescent Star Glitter Oval Nails
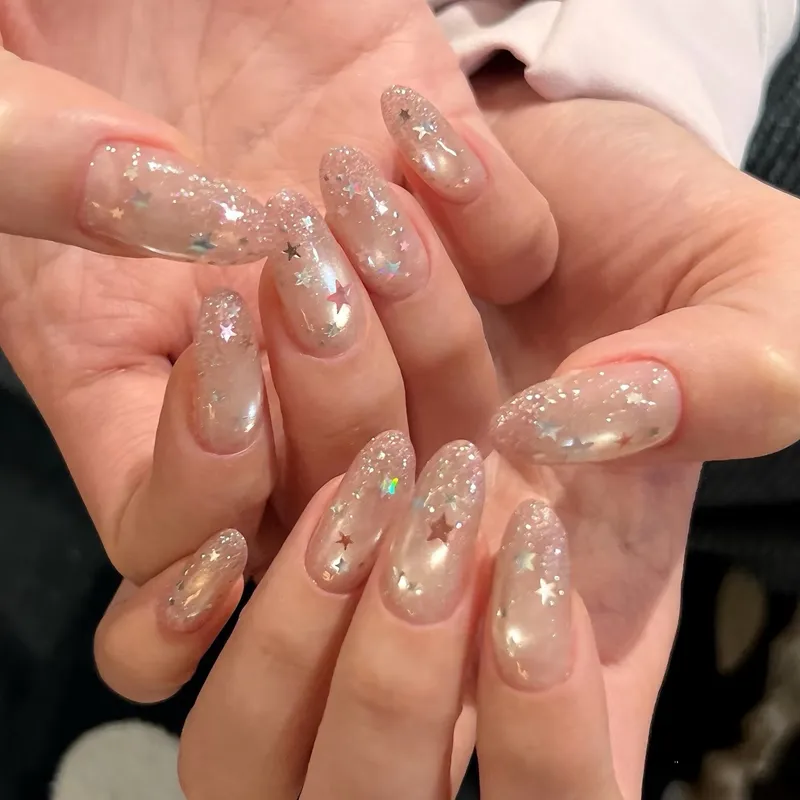
You reach for your keys and the star glitter nails catch on the zipper pull. That is the trade-off with chunky confetti glitter on long ovals.
The iridescent polish underneath shifts from silver to pale blue depending on the light, and the star shapes float in it like something suspended in resin. Fine dust glitter would lie flat and snag nothing, but it also would not give you that dimensional, almost toy-like sparkle. The stars are the whole point. Just know that every textured edge is a potential catch point, and removal requires soaking rather than filing if you want to keep the nail plate smooth.
Reindeer & Rose Gold Glitter Almond
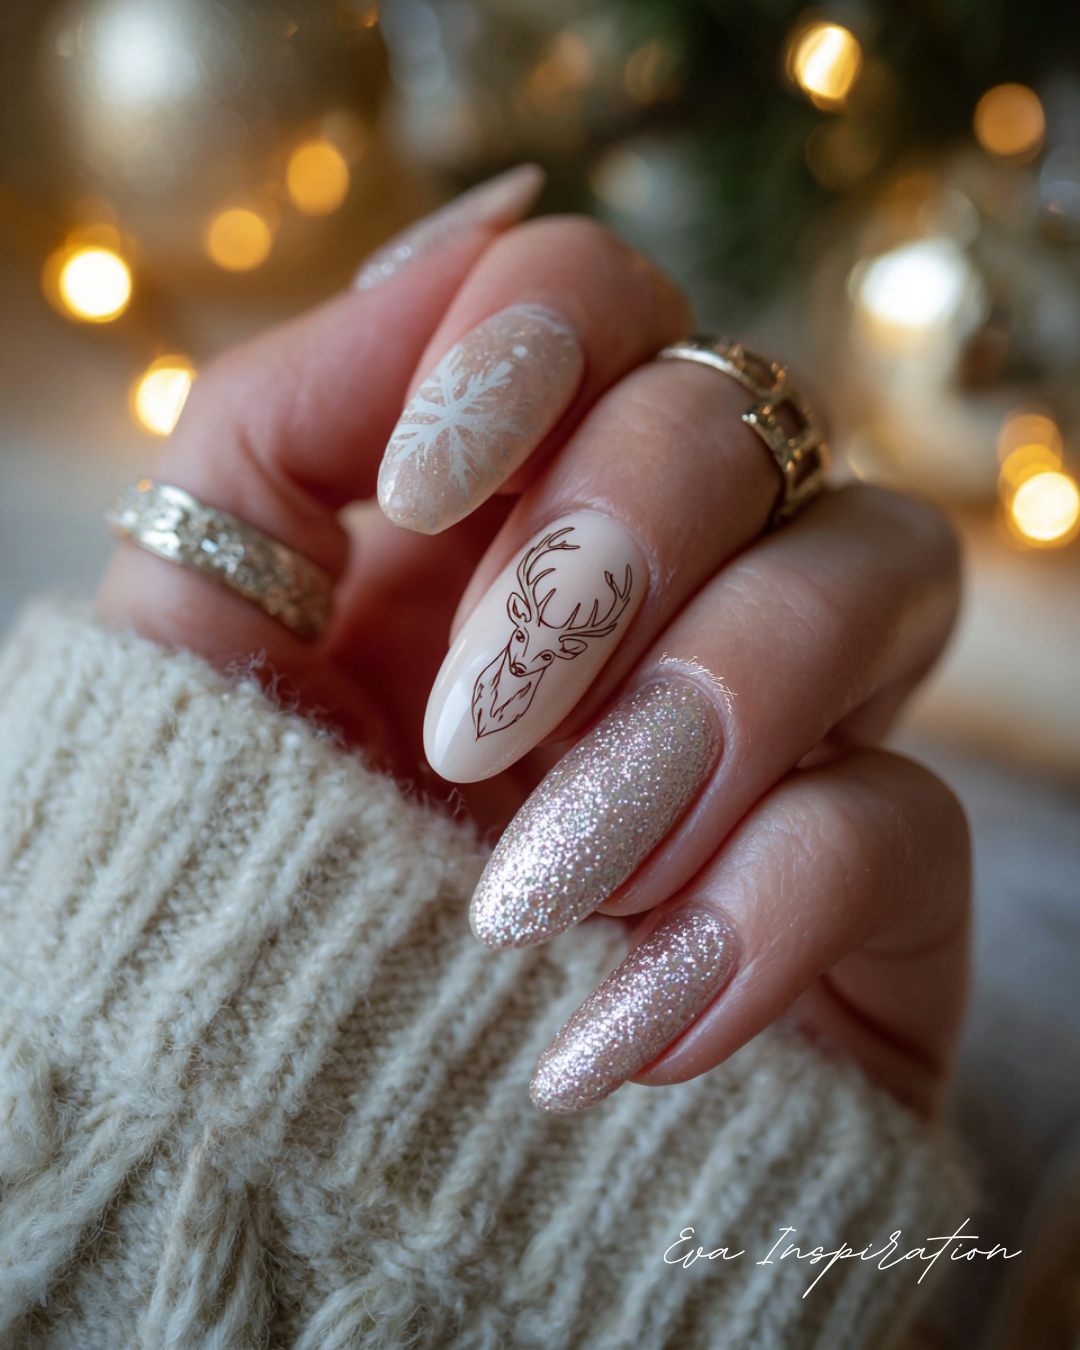
The reindeer nail art on the accent nail is the kind of detail that makes you stop scrolling and zoom in. Paired with rose gold glitter on the other nails over a pale beige base, the whole set reads like a knitted sweater sleeve brought to life on the nail bed. The matte finish on the reindeer nail contrasts the glitter, which keeps the novelty from feeling juvenile. This is festive without the cartoon edge, and that is a hard balance to strike with character art.
Silver Glitter Gradient Black French
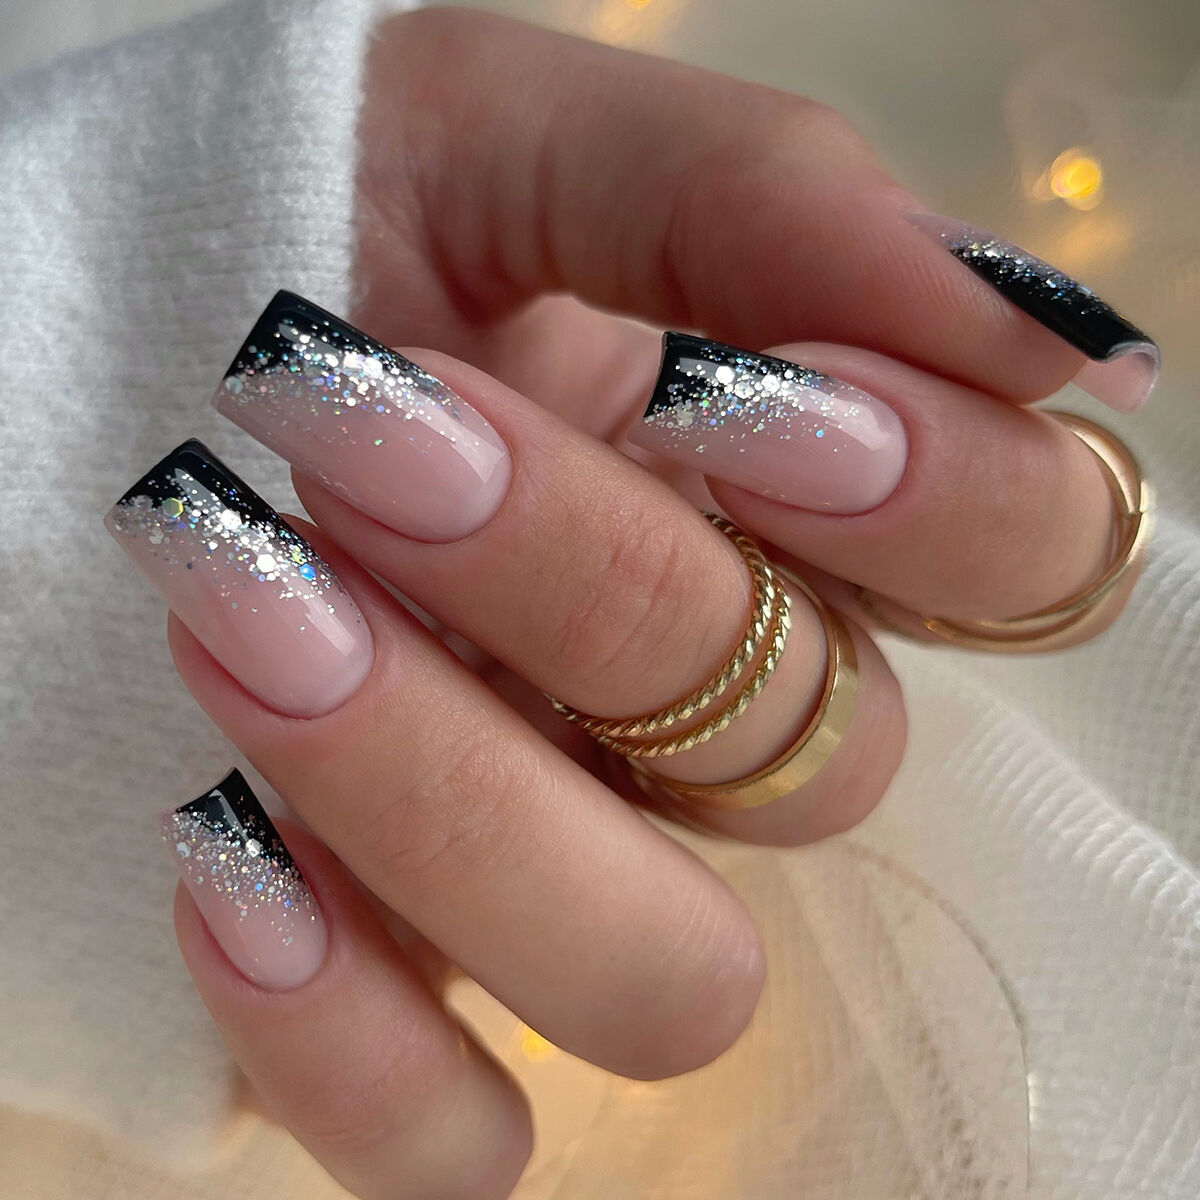
I have to confess: I ruined this look the first time. Sponged silver glitter over black polish and got a gray, muddy mess that looked like wet asphalt. The trick is a dry sponge, barely any pressure, and a thin layer of black base that’s fully cured before you touch it. Start the gradient at the tip, not the middle, and let the silver fade into nothing by the nail bed. That’s how you keep the glitter french tip gradient crisp against the black tips. Too much glitter and you lose the contrast entirely.
Champagne & Rose Gold Glitter Mix
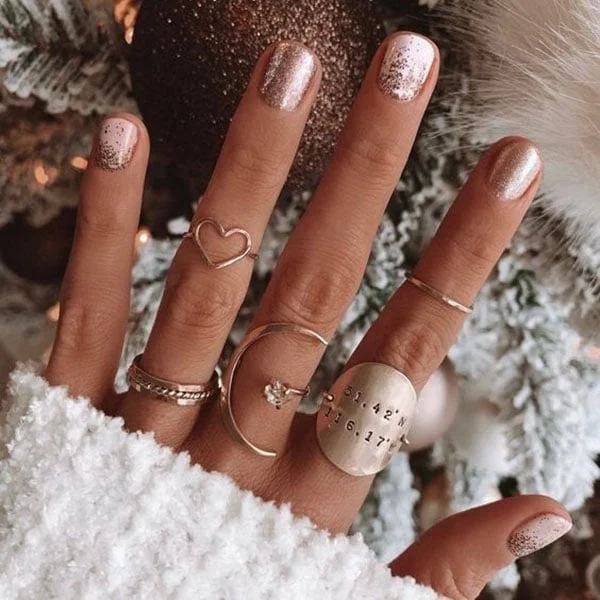
Is there a glitter that doesn’t scream “I’m going to a club at 11 PM”? These champagne glitter nails with rose gold glitter accents are the answer. The mix reads warm and soft, like a candlelit dinner, not a dance floor. It flatters olive and warm undertones best, where silver can look icy and harsh. For fair, cool skin, the champagne might wash you out, so ask your tech to deepen the base with a sheer peach layer first.
Deep Red with Silver Glitter Accents
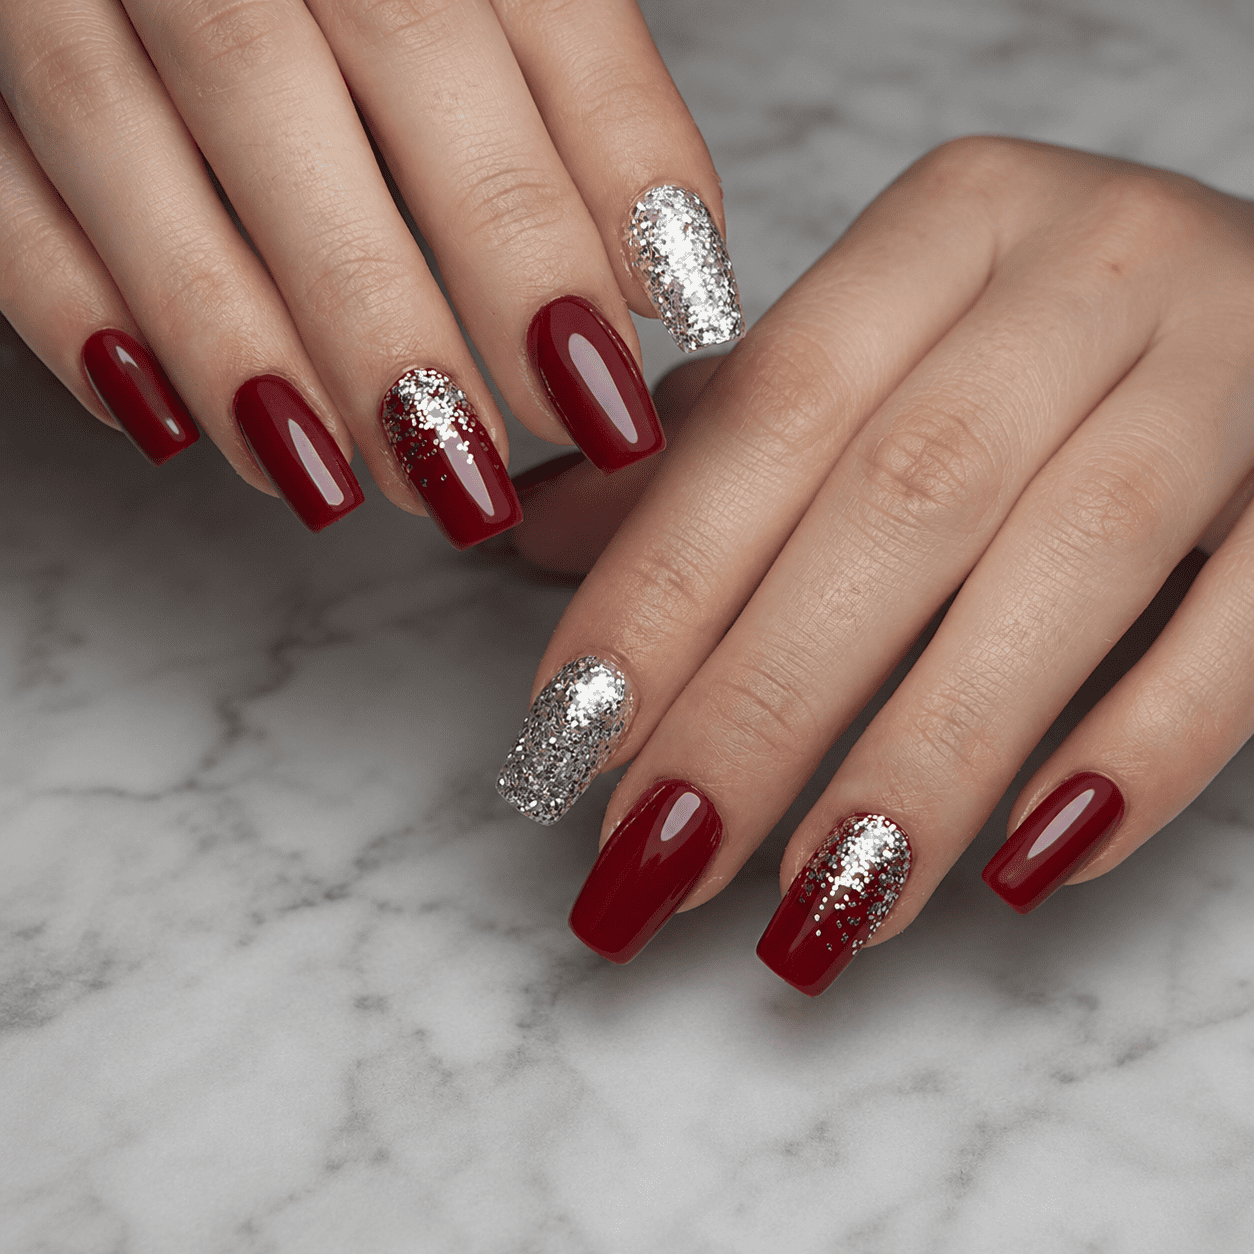
Long coffin nails in deep red catch the light like polished glass, but it is the full silver glitter accent nails that demand a second look. The contrast is sharp, almost aggressive, and the glitter is packed dense enough to read as metallic foil rather than loose sparkle.
Here is the reality: those glitter nails have texture. They will snag on sweater cuffs and knit gloves by day two. And the length means every door handle becomes a negotiation. But the payoff is three weeks of wear if you baby them, and removal requires a patient soak rather than a quick file. Skip these if you type for a living or change your toddler’s diaper. Otherwise, they are worth the careful handling.
Scattered Iridescent Glitter Gradient
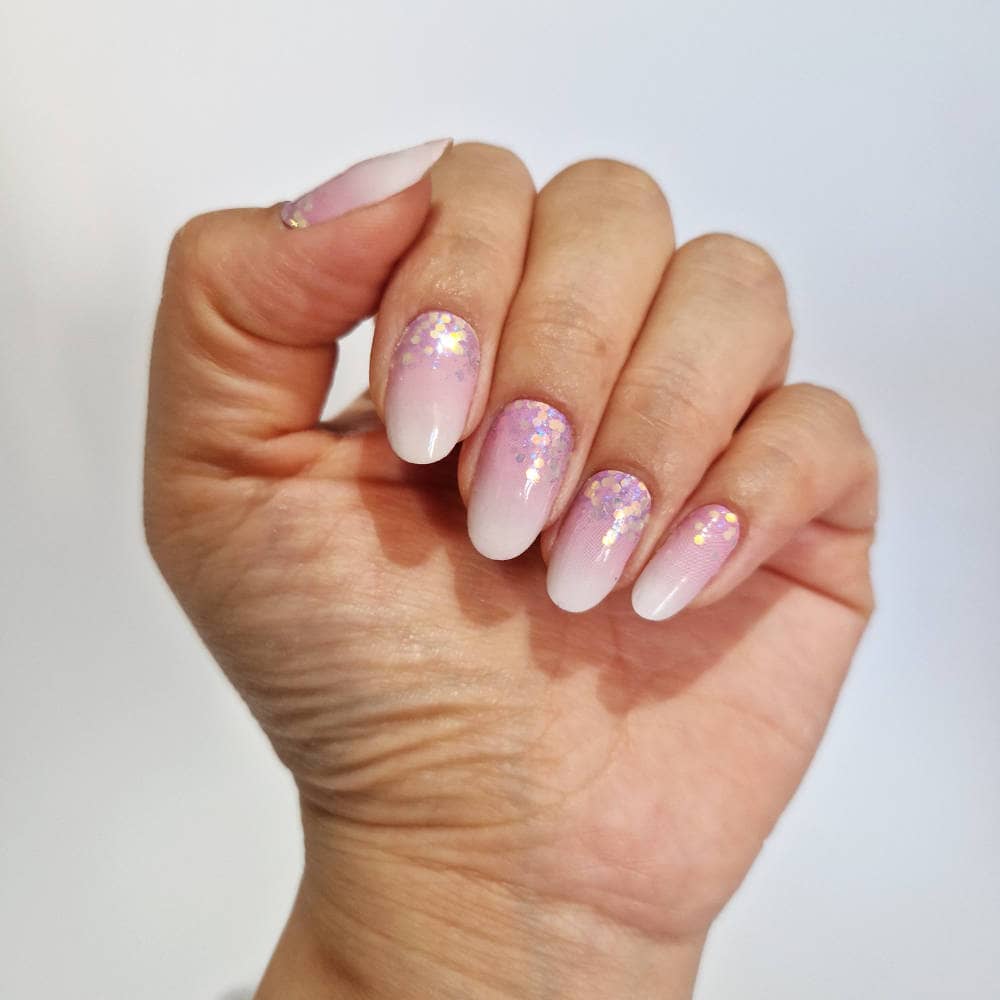
This is the design that made me buy a fan brush. The iridescent glitter nails look random, but that randomness is a technique: you flick the brush, you don’t pat it. A sponge gives dense, packed glitter. A fan brush gives scattered glitter, sparse and airy, like frost on a window. It’s doable at home if you have patience and a no-wipe top coat. The gradient hides grow-out better than any solid glitter I’ve tried.
Glitter French Tips & Black Glitter Stiletto
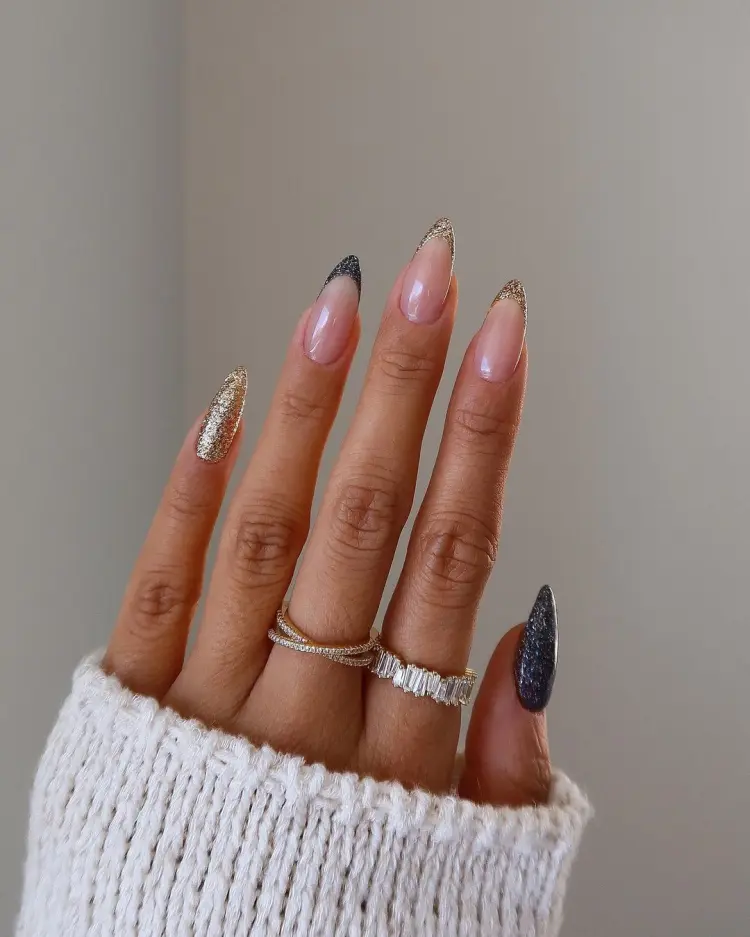
My gut says this should not work. A classic French tip on a stiletto shape feels like wearing a ball gown to a punk show. But the glitter French tips soften the aggression of the stiletto, and the full black glitter nails on the accent bring the edge back. It’s a conversation, not a clash. The French tips are more delicate, so they chip sooner than the solid glitter accent. If you want durability, go full black glitter on all ten. If you want the illusion of length, keep the French.
Christmas Tree Glitter Gradient Nails
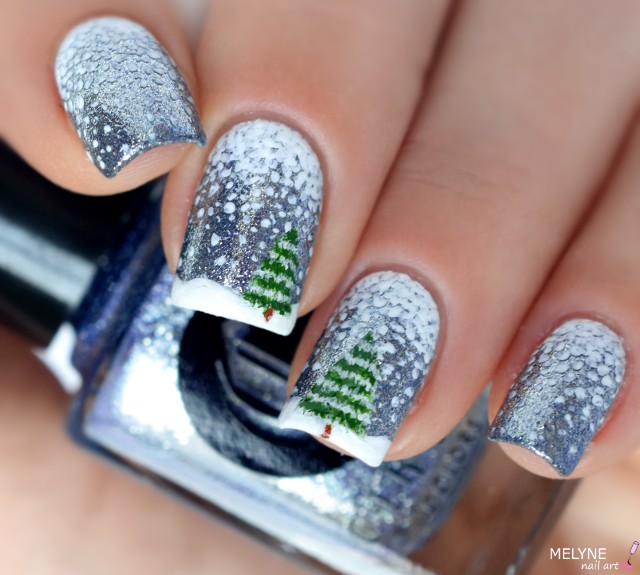
It is the week before Christmas and your nail tech is drawing tiny evergreens on your short rounded squares. A silver glitter gradient runs from the cuticle to the tip, then green trees and white snow land on the middle and ring fingers. The christmas tree nails motif reads festive without turning into a full nativity scene. Just keep that top coat thick over the painted art, because freehand lines chip before glitter does.
Glossy Black with Silver Glitter Accents
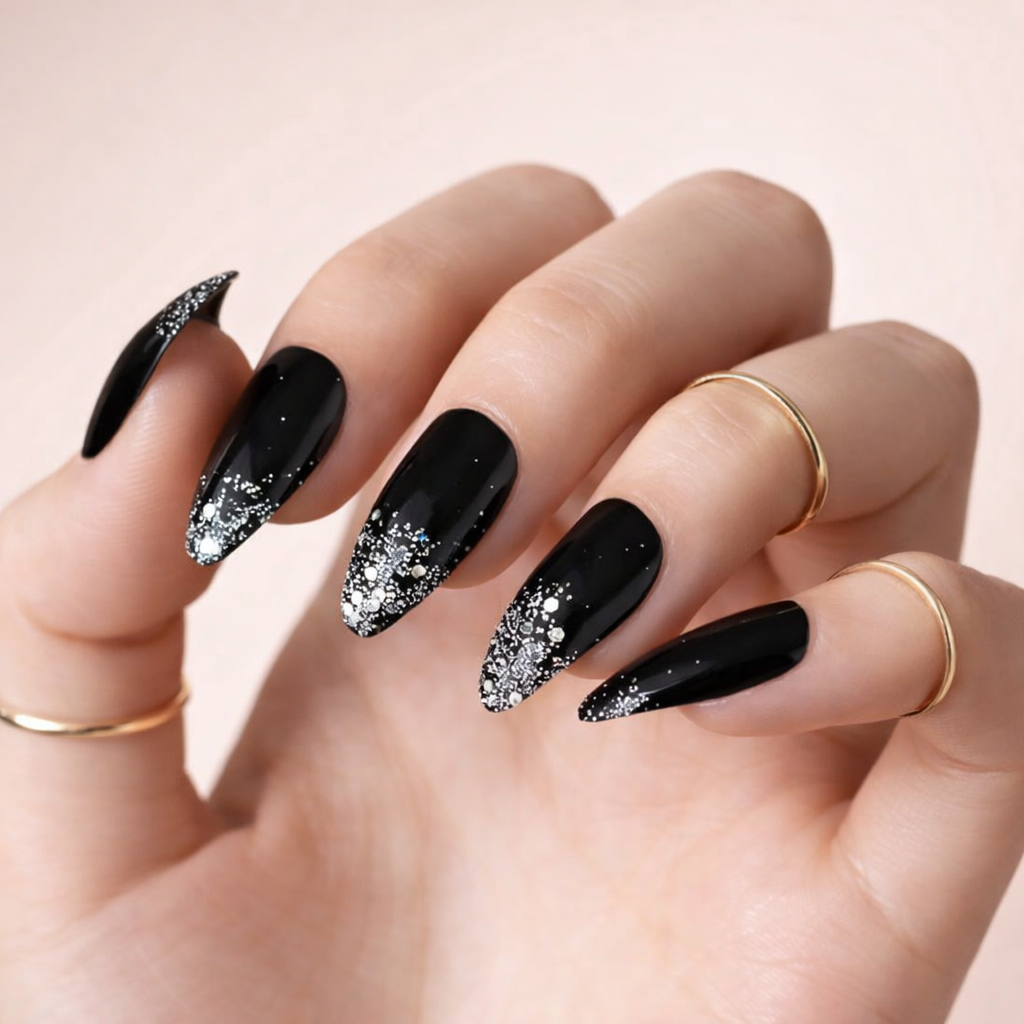
I will admit I flooded my cuticles the first time I tried black glitter stiletto nails. The glossy black base shows every millimeter of glitter gel that strayed past the edge. Long stilettos demand precision: pack the silver glitter accents at the tip and cuticle area in thin layers, cure each one, and keep a cleanup brush soaked in alcohol nearby. One thick flood and you are filing glitter out of your proximal fold for twenty minutes.
The payoff is worth the steady hand. That sharp contrast between matte black and sparkling silver catches light from across the room. Just know this is a salon appointment, not a Sunday experiment.
Holographic Butterfly Glitter Nails
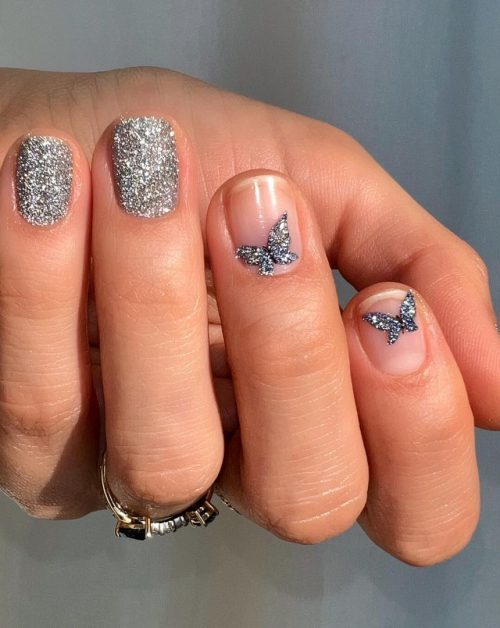
Can you wear holographic glitter nails in January without looking like you are heading to a summer festival? Yes, if the base stays sheer and the shimmer stays silver. Short squares with full glitter coverage and butterfly details on the accent nails read whimsical, not beachy. The holographic finish hides minor tip wear better than any solid creme. Skip this if your daily involves typing raw meat or digging in a garden bag, because those butterfly decals lift at the edges when wet.
Vibrant Glitter Gradient Stilettos

Day one: the rainbow glitter nails catch every overhead light and you cannot stop staring. Day four: the vibrant glitter gradient still holds, but the stiletto tips have started tapping against everything — keyboards, steering wheels, the inside of your jacket zipper. Dense glitter packed from cuticle to tip on long stilettos wears like armor for two to three weeks, but removal is the real project. Each layer of encapsulated glitter requires soaking and gentle scraping; rushing it pulls off natural nail layers.
Intricate Glitter Pattern Nails
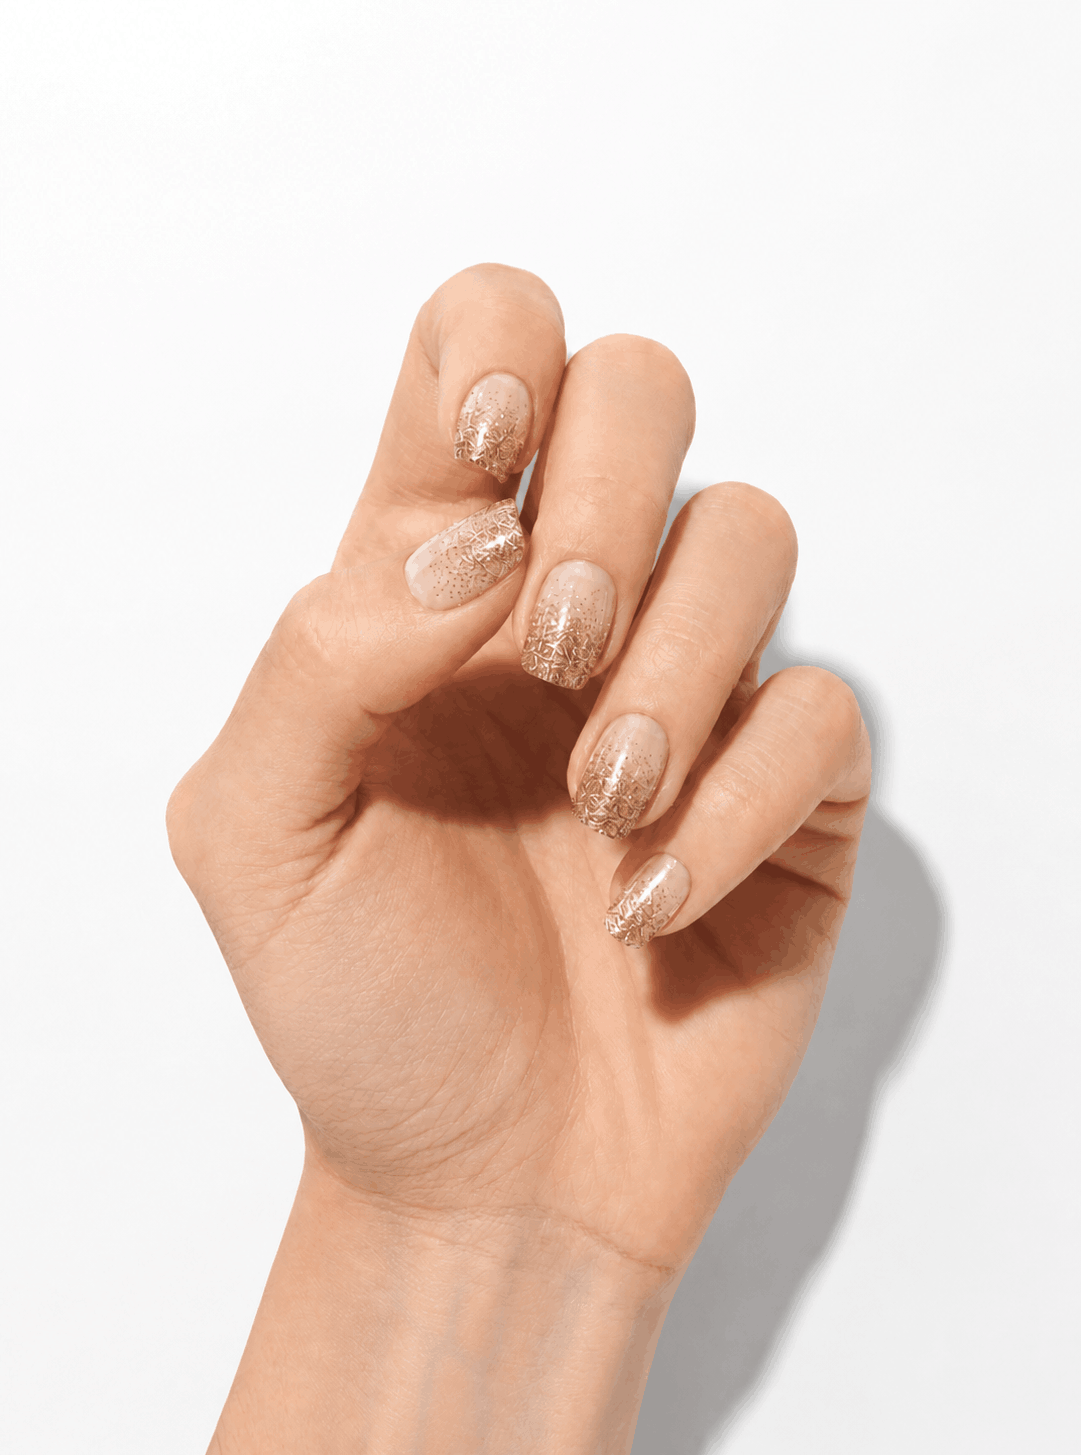
Verdict: these intricate glitter nails are a salon-only design. The champagne gold glitter gradient over a sheer nude base is achievable at home, but the precise pattern on the accent nails requires an artist-grade liner brush and a steady hand that only comes from daily practice. Short squares keep the pattern contained so the lines do not warp around a curved apex. Book a tech who posts close-ups of their line work, not just full-hand shots.
Gold Line Glitter French Tip Nails
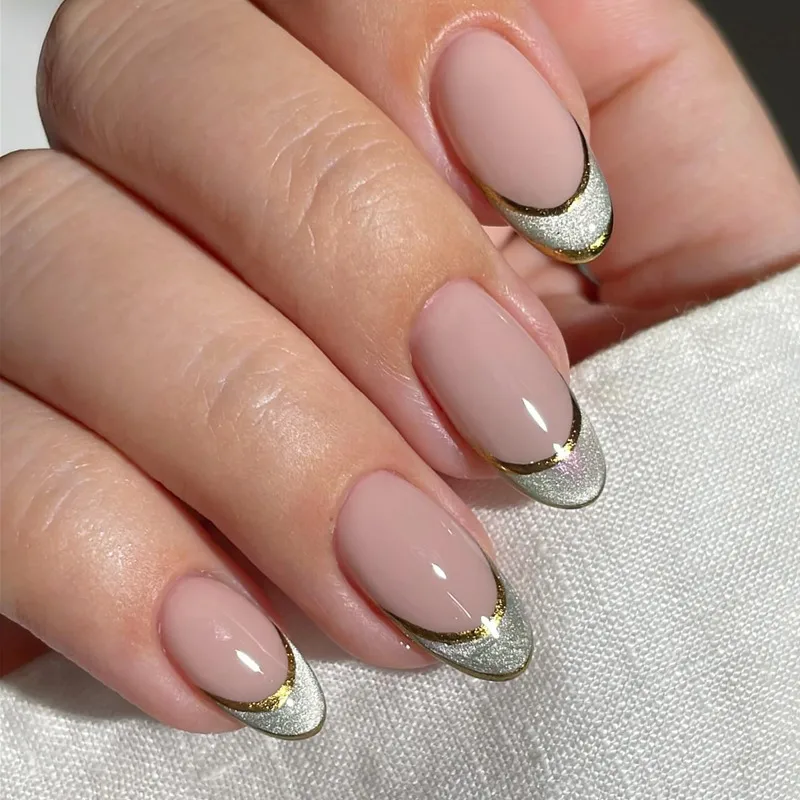
You walk into the salon, pull up a photo of a gold line french tip with a thin silver glitter band right below it, and the nail tech asks, “How precise do you want this?” The answer matters because this design lives or dies on line placement. If the gold line is too thick, it reads as a stripe, not an accent. If the silver glitter band is too close to the smile line, the whole tip looks crowded. Medium oval nails, nude pink base, and a glossy finish — this works best on shorter nail beds where the double line has room to breathe. Skip it if your natural smile line is very curved or very flat; the contrast will fight your anatomy.
Deep Red Glitter French Tip Nails
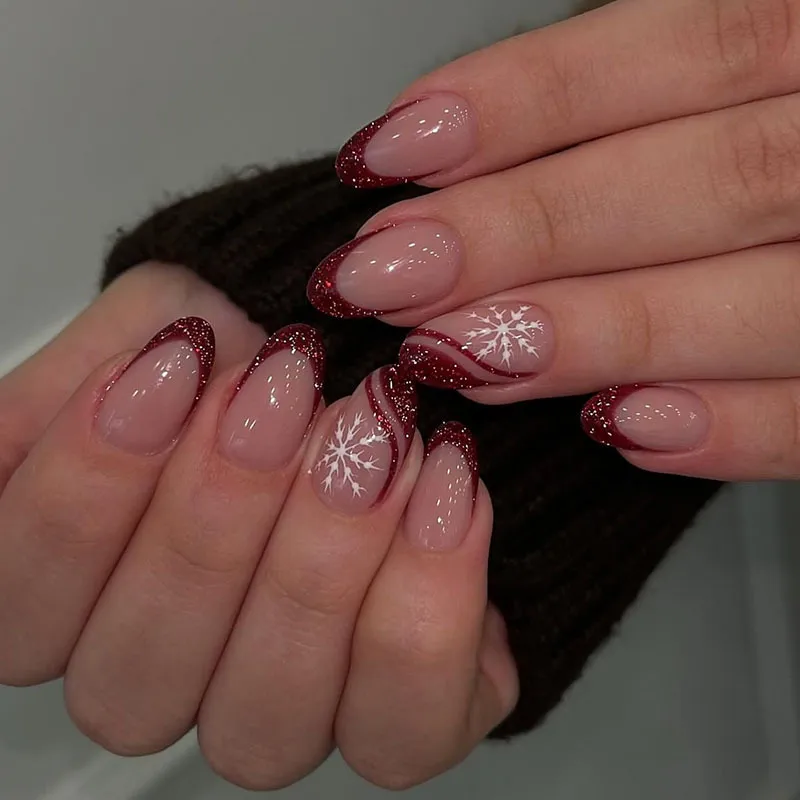
The deep red glitter tip sits on a clear base, and the contrast is sharp enough that the white snowflake decals read as negative space, not an afterthought. Medium oval nails, glossy finish, and the glitter is fine enough to catch light without looking chunky. The wear here is decent — the glitter French tip is durable because the glitter is packed into the tip, not spread across the whole nail, so daily typing and contact lens removal do not chip it. The decals are the weak point; they can lift at the edges around day 10 if not sealed properly. Ask your tech to cap the free edge with a thin layer of topcoat, and you will get closer to three weeks than two. Deep red glitter nails with snowflake decals — festive, yes, but also just a well-executed design.
Visual Idea
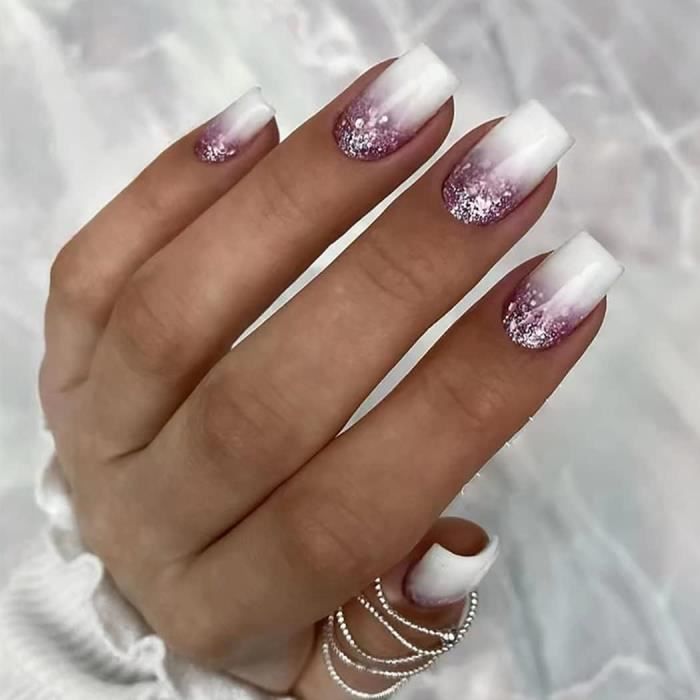
A smooth pink-to-white ombre base is the whole trick here, and it takes a sponge, not a brush. You dab the color on in thin layers, building the fade until the cuticle area melts into a soft white, then you press the glitter over the gradient while the base is still tacky. It’s a salon move, honestly, because getting that blend even on a medium square without streaks takes patience and a steady hand. The glitter ombre effect lands best when the sparkle concentrates at the cuticle and fades out toward the tip, which reads as deliberate instead of accidental.
Glitter Visual Idea
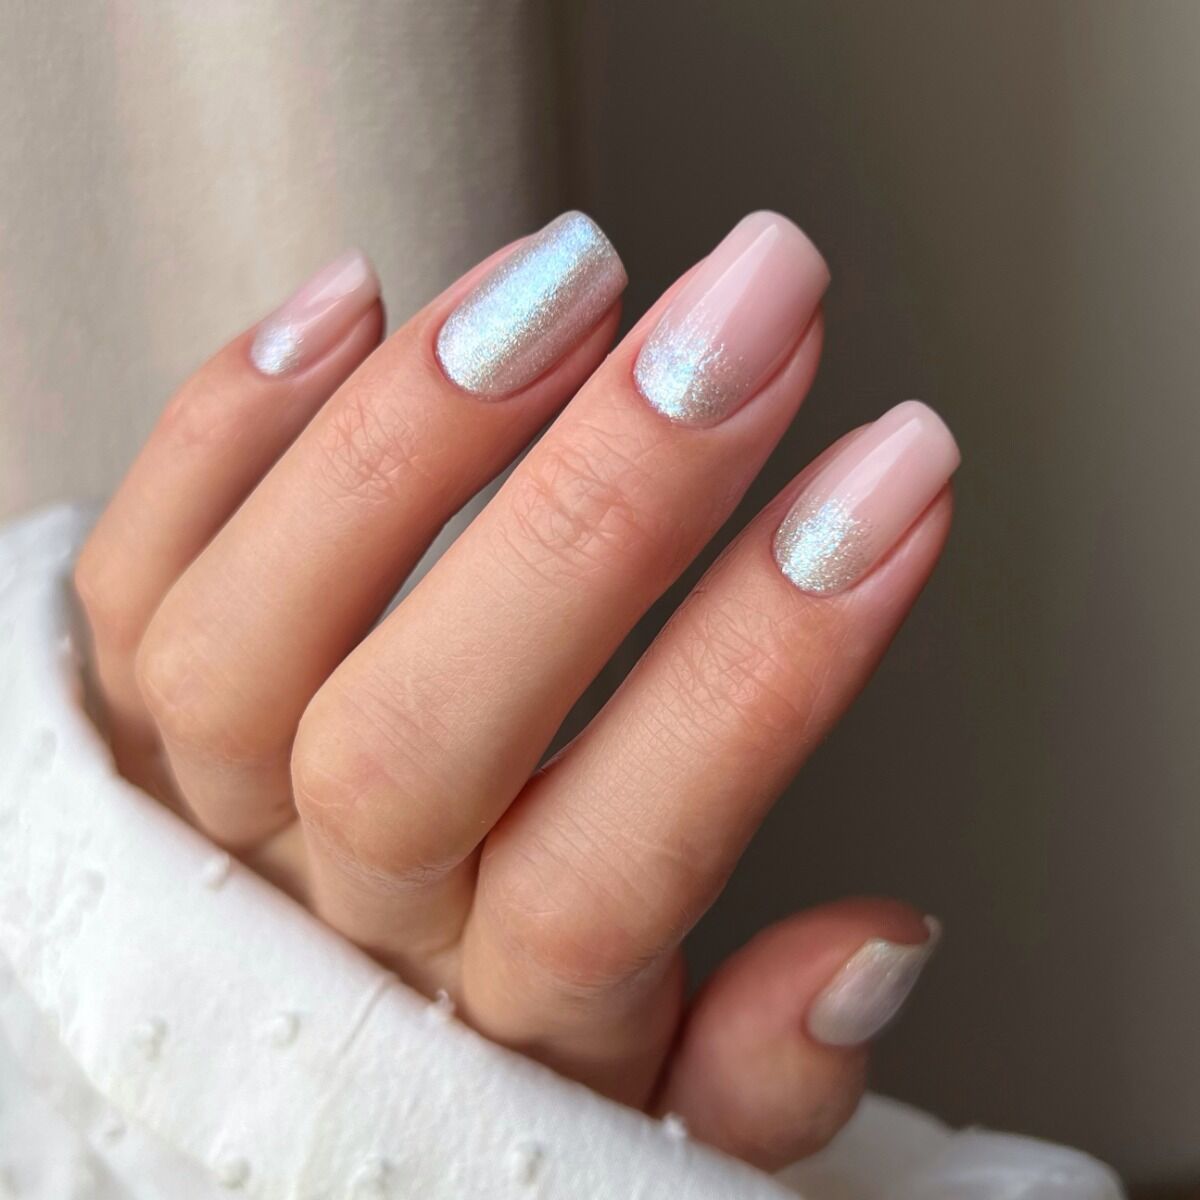
Have you noticed how a pale pink base shows every millimeter of regrowth by day five? I have, and it’s the reason I book this one for a short week, not a long one. The silver glitter gradient on the accent nails sparkles beautifully at first, but the pale pink underneath turns into a grow-out map faster than any dark shade I’ve worn. You’ll be looking at a fill by day seven, and if you push it, the line at the cuticle gets obvious. Keep the glitter dense at the base and it buys you a couple of days, but plan the timing around your schedule, not the other way around.
Glitter On Accent Nail Visual Idea
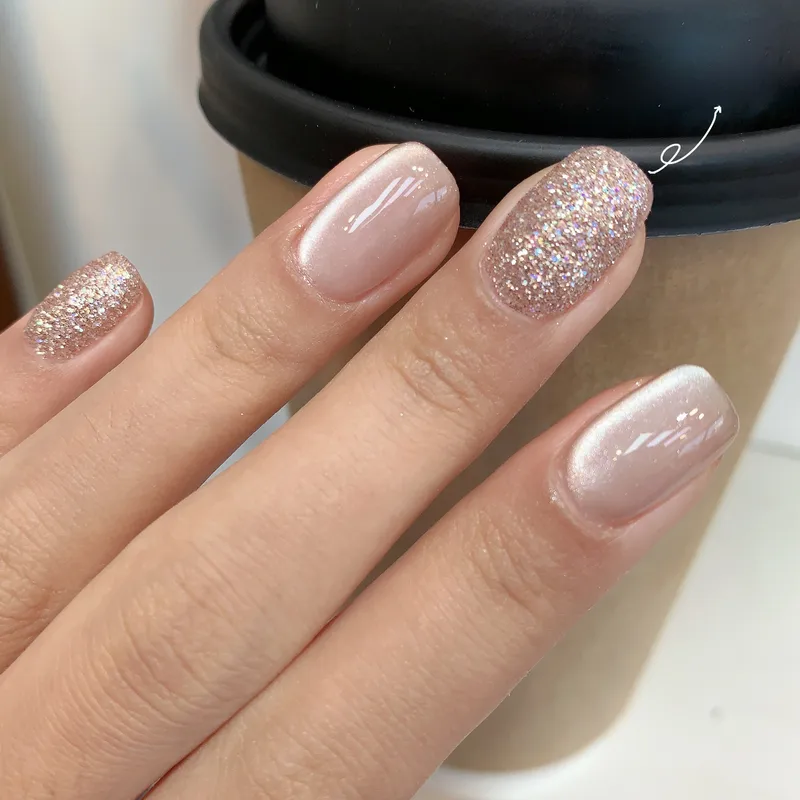
One nail walks into the room, and the rest of the set just nods along. That’s the appeal of a single statement glitter nail against a nude base, and it’s a smarter move than a fully coordinated set when you want the sparkle to actually land. The rose gold glitter on that short oval accent catches light at every angle, while the other nails stay quiet, so your eye goes straight to the one that’s dressed up. It’s the difference between a shout and a whisper, and I’ll take the whisper every time.
The Single Detail A Reader Notices First Visual Idea
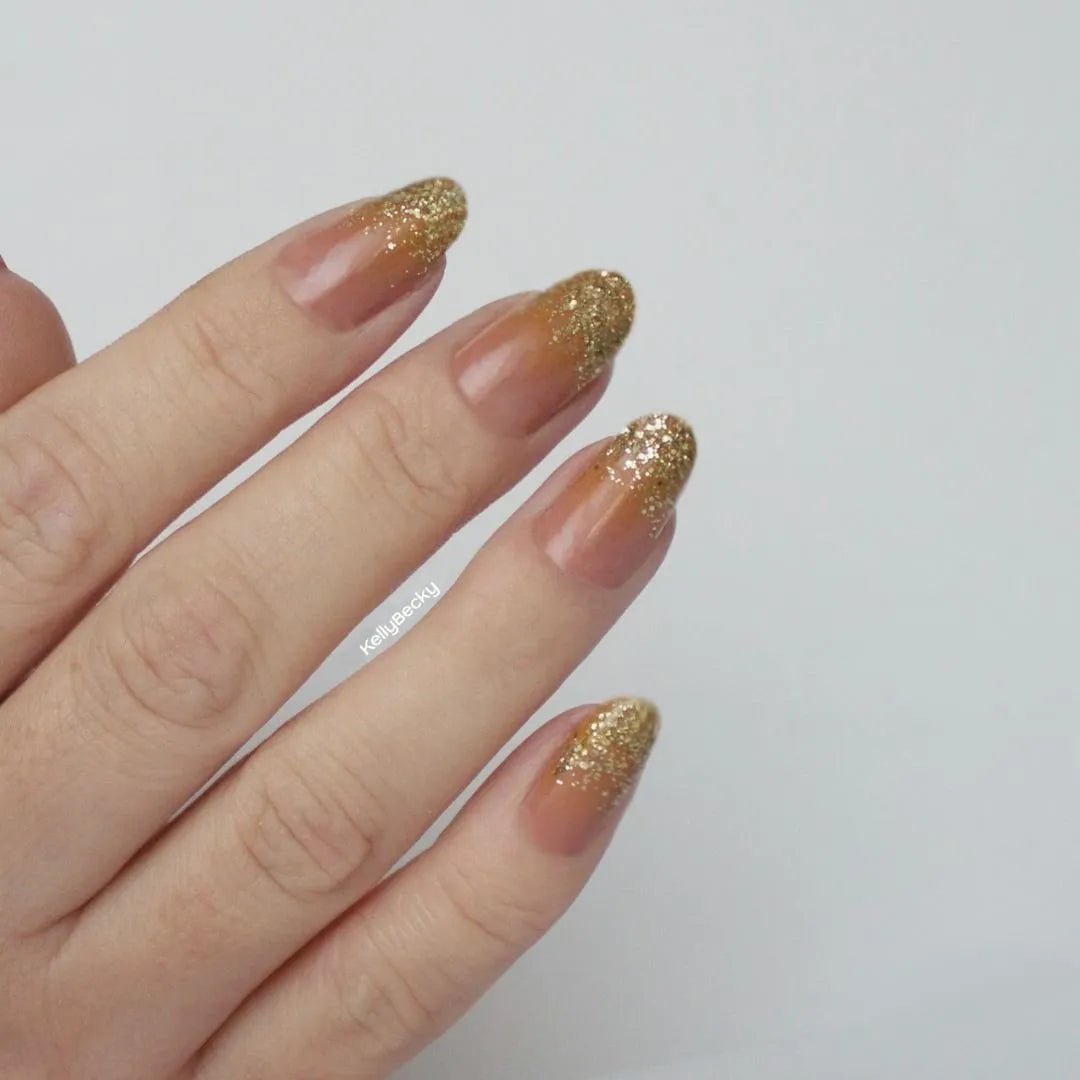
My gut says the line work is what pulls you in, and I’m not wrong. The french tips are crisp, the dots and foil are placed with intention, and the cuticle work is clean enough that the whole set reads as expensive. That’s the focal point, the precision of the execution, and it’s what separates this from a quick at-home attempt.
It appeals to someone who notices the details, the person who checks the evenness of a line before she checks the color. If you’re that person, this is your design. If you’re more of a slap-it-on-and-go type, you’ll be frustrated by the upkeep of perfection.
Winter Visual Idea
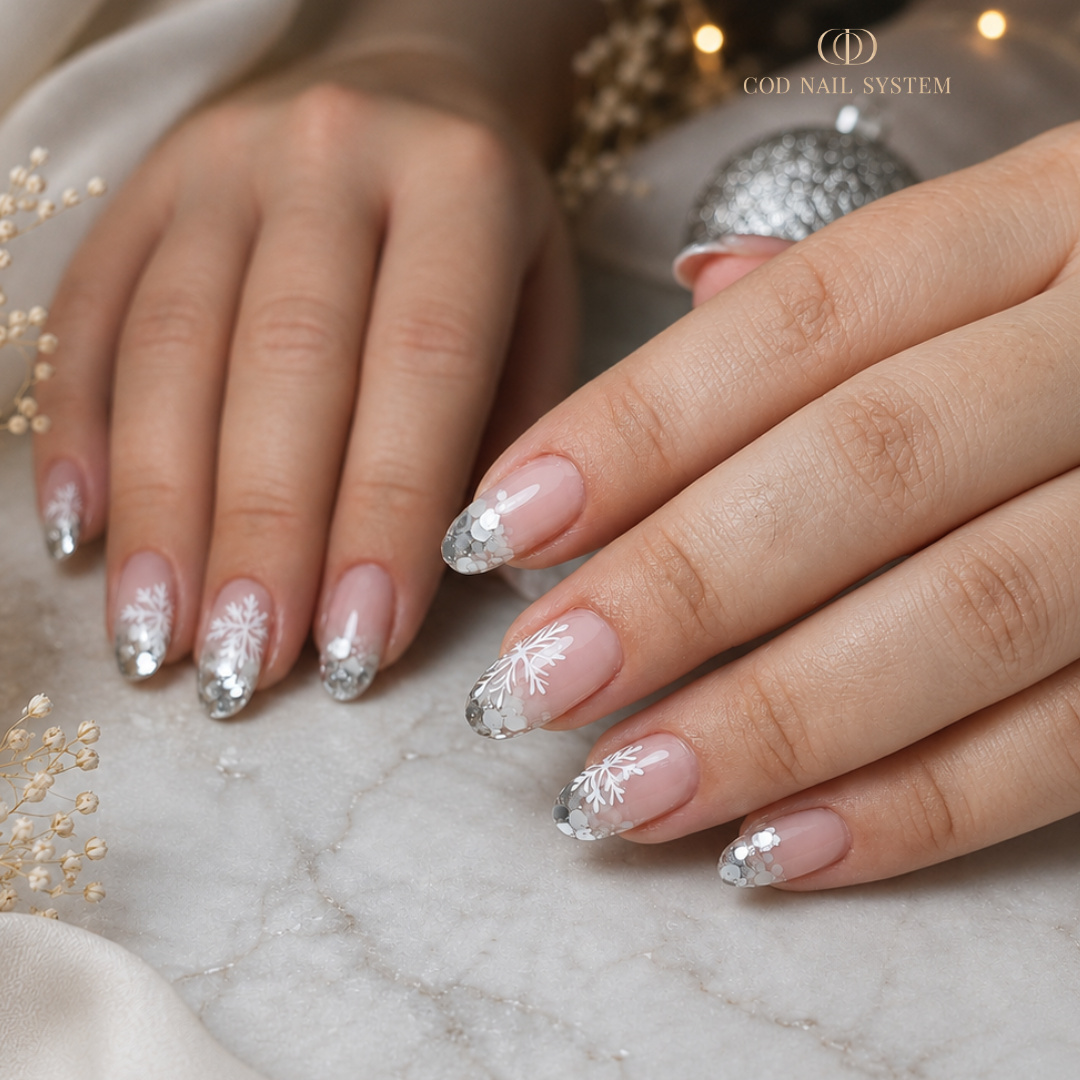
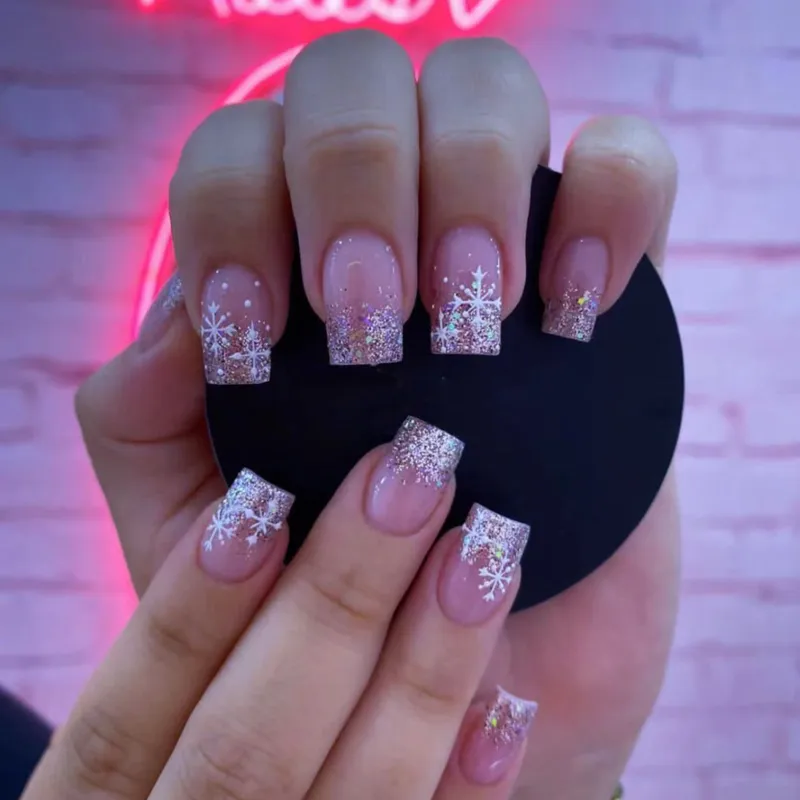
The symmetry of both hands showing matching snowflake decals is what makes this work, and it’s rare to see it done this evenly. The sheer pink base keeps it light, while the silver glitter french tips add just enough sparkle for a winter event without tipping into costume territory. It’s a design that says holiday party, but it also works for a casual dinner if you skip the decals on a couple of nails. The snowflakes are the anchor, the glitter is the support, and together they frame the season without shouting.
Winter Christmas Visual Idea
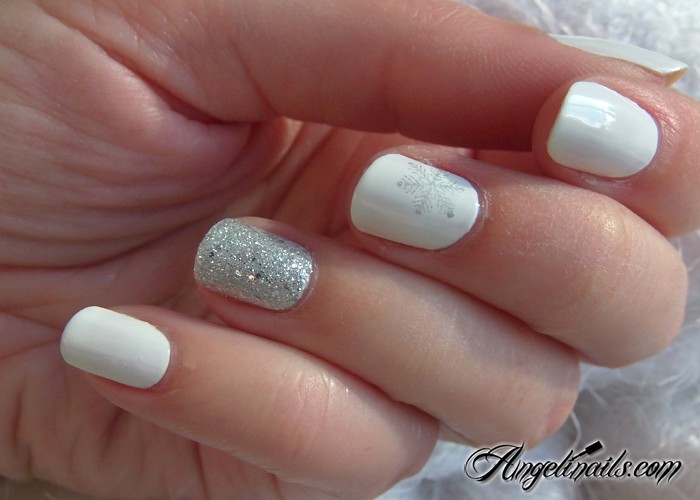
I will admit I have ruined more snowflake decals than I care to count. The classic mistake is pressing a sticker onto uncured tacky layers, which traps air and peels by morning. A base coat smoothing layer first, then decal placement with tweezers so the edges lie flat, then a double topcoat seal. That third step is non-negotiable. I have worn this short square set through cookie baking and gift wrapping and every snowflake stayed put, which is more than I can say for my earlier attempts.
Glitter On Tips And Full Nail Visual Idea
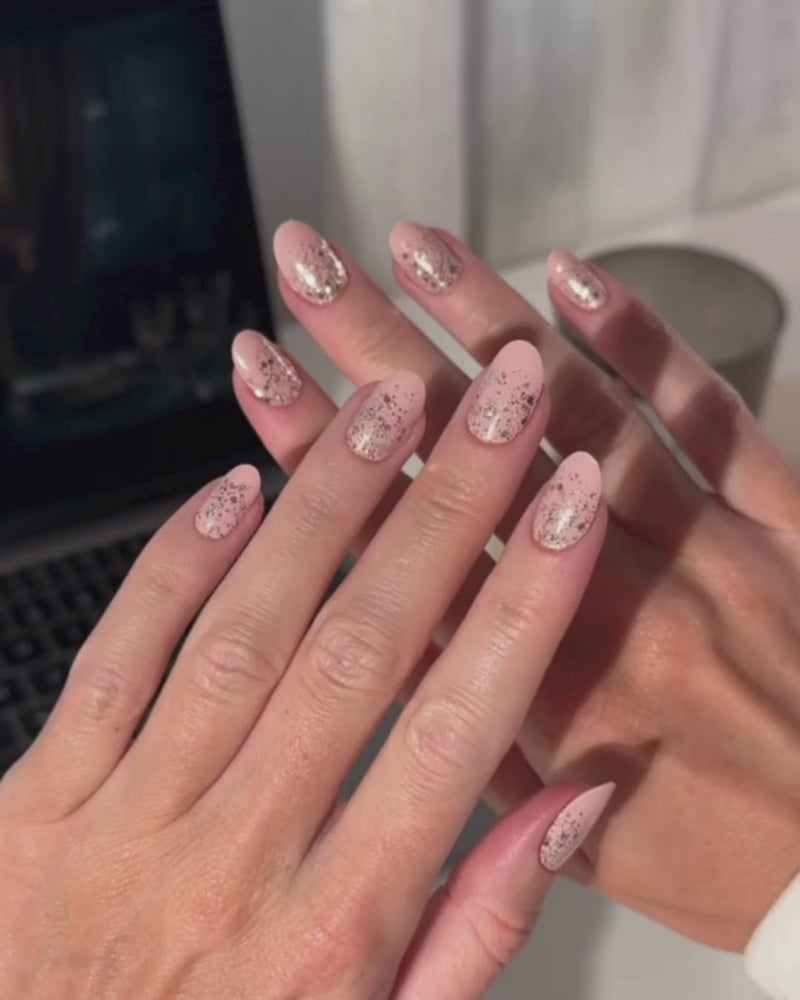
This is the design that finally convinced me gold glitter belongs on oval nails. The trick is mixing loose glitter into a clear base at the salon, not relying on a pre-made polish that reads sparse. You want a dense, custom density on the tips and a lighter wash across the full nail. I would not attempt this at home unless you have a patient hand and a no-wipe top coat ready. The salon does it faster and the glitter stays even.
Glitter And Glossy Visual Idea
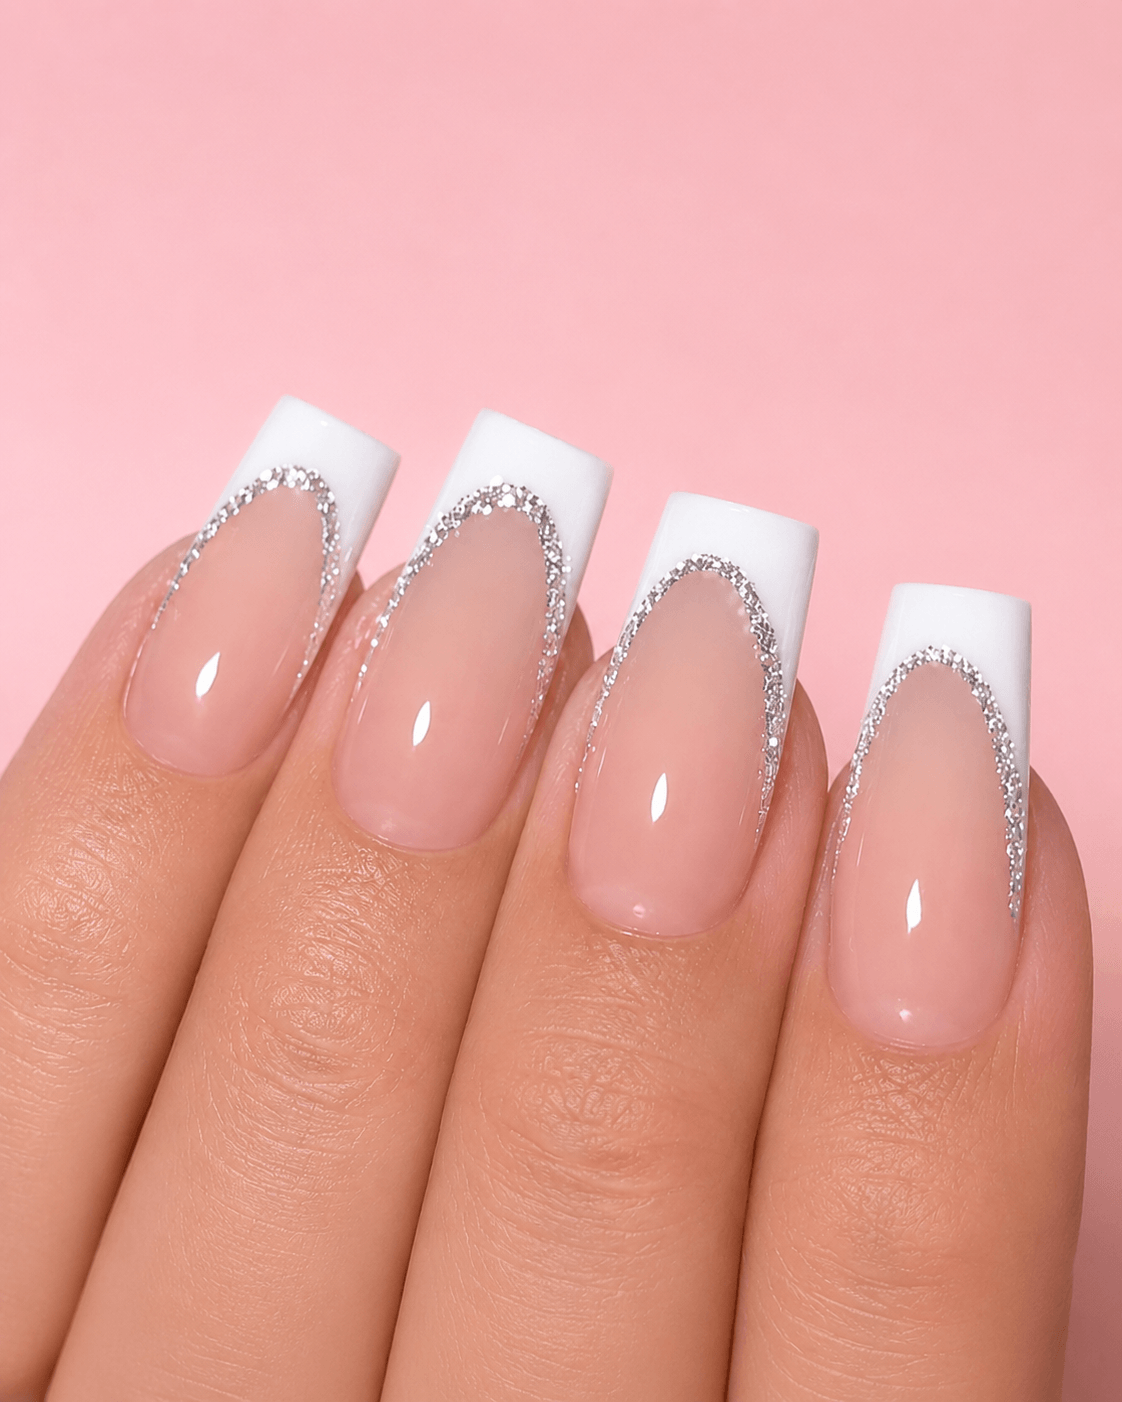
Have you ever had a hairline glitter strip chip off three days into a set and wondered what you did wrong? The answer is usually cleaning chemicals. That thin silver line on a sheer pink base with white tips is delicate, and dish soap or hand sanitizer lifts the edge faster than you expect. I wore this medium square set through a week of holiday prep and lost one tip by day five. The glossy finish stayed intact, but the glitter line needed a careful top coat reapplication on day three.
The honest downside is that this is not a low-maintenance pick. It looks elegant, yes, but the upkeep is real. If you work with your hands or clean without gloves, expect to touch up the glitter strip by midweek. The season is worth it, but know what you are signing up for.
Glitter Sheer Visual Idea
Any Visual Idea
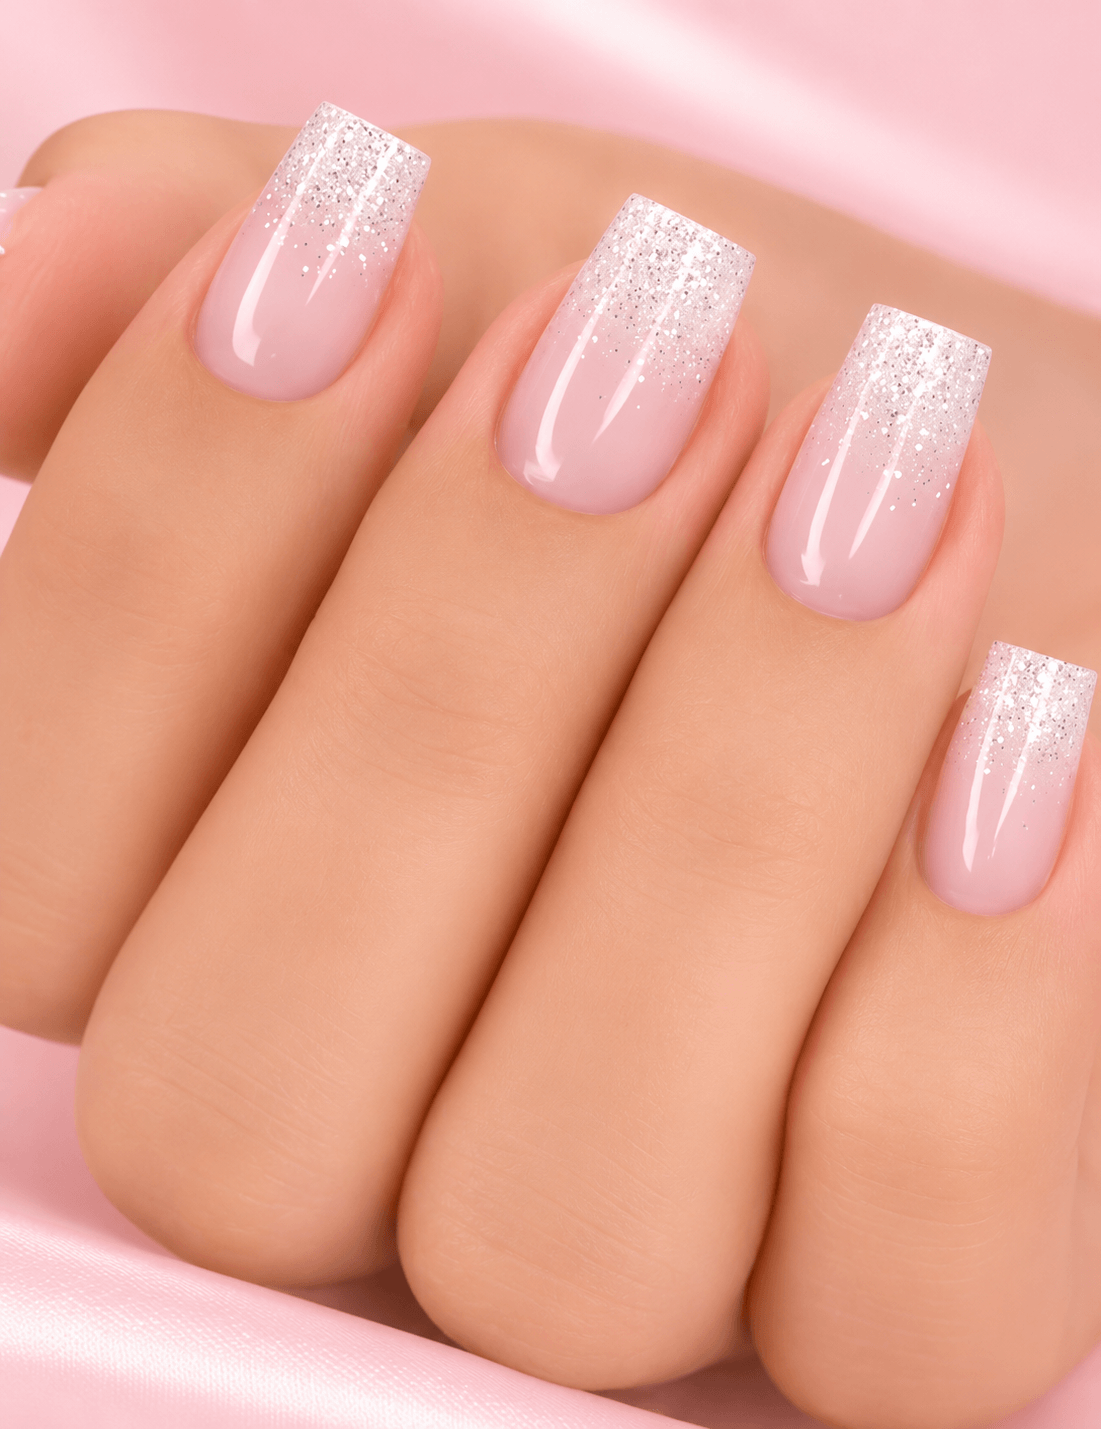
Glitter French tips on a medium square nail are the low-maintenance staple that people underestimate. The pale pink base grows out gracefully, and the white glitter tip hides chips better than a solid color. This is the set for someone who wants one look that works for work, dinner, and a weekend event without a touch-up. The salon does it best because the glitter line needs a clean edge, but the grow-out is forgiving enough to stretch two and a half weeks. If you hate frequent fills, this is your pick.
Christmas Visual Idea
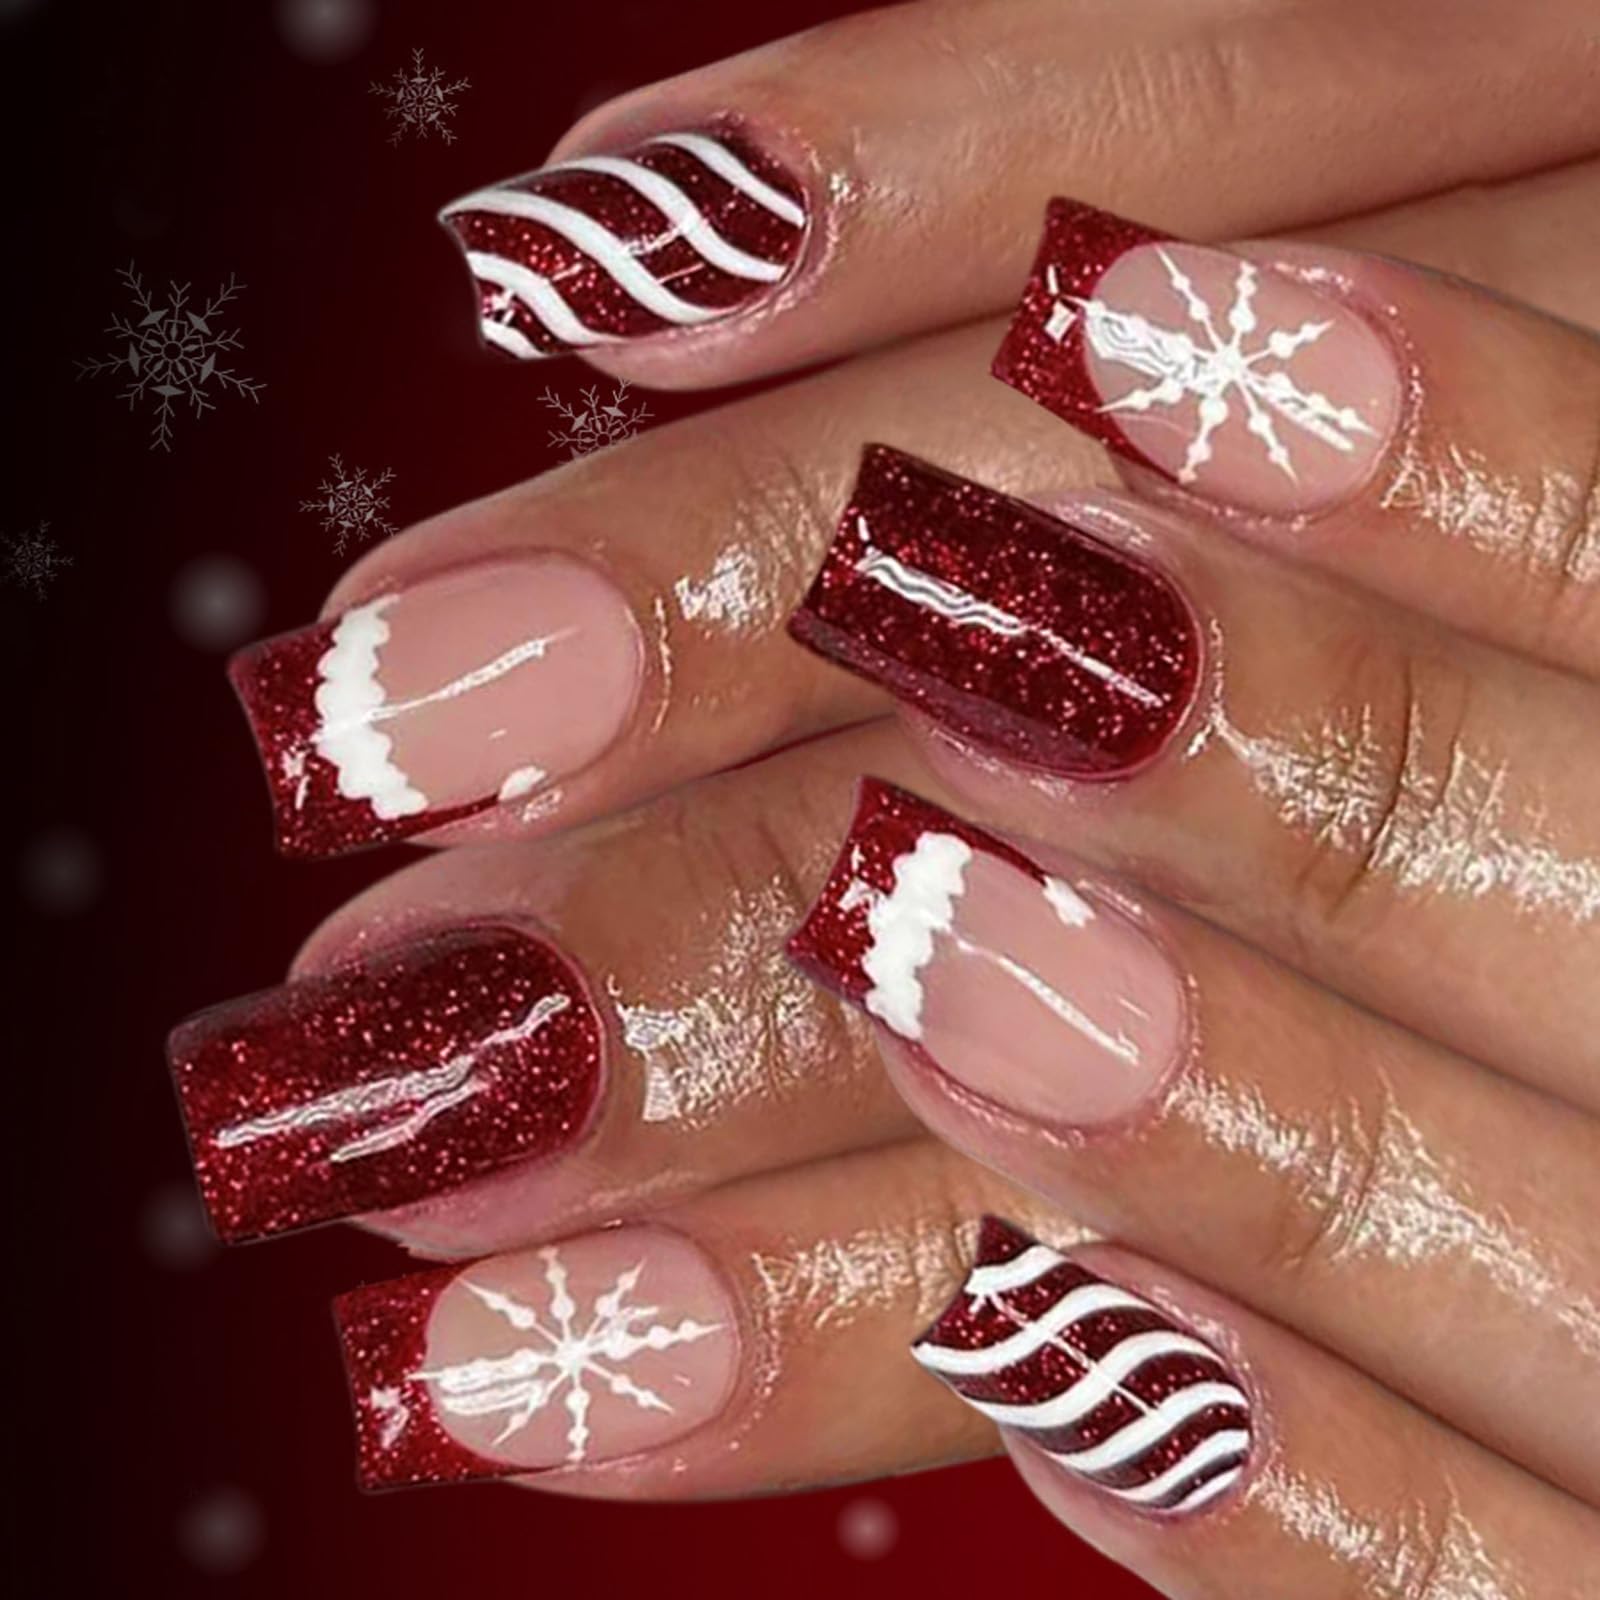
That deep red glitter French tip is doing all the heavy lifting here, but the real magic is in the mix: candy cane stripes on one accent nail, a snowflake decal on another, all grounded by a sheer pink base. It reads maximalist without chaos because the red glitter ties every finger together. Medium square keeps the stripes from feeling cramped, and the white lines pop against the nude pink. This is the set you wear to the office holiday party and still get asked about at the New Year brunch.
Glitter On Accent Nails Stripes On One Visual Idea
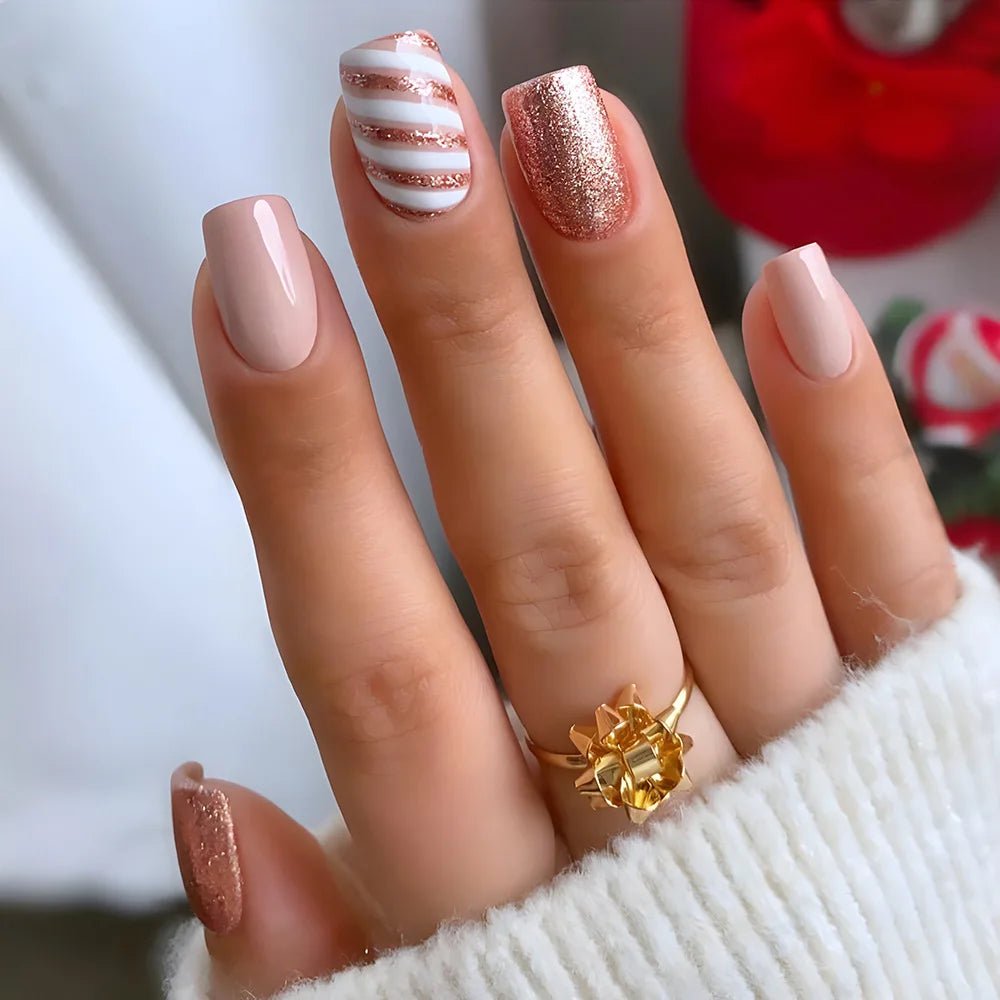
I will admit it: my first attempt at striping tape over rose gold glitter ended with a crooked line that looked like a toddler drew it. The problem is the glitter surface — it creates micro-peaks that lift the tape edge, and the polish bleeds under before you can seal it.
The fix is a thin layer of no-wipe top coat over the glitter, cured fully, then buffed smooth with a fine grit. Now the striping tape lays flat, the white paint stays crisp, and the rose gold reads as intentional backdrop instead of a fight. Short square helps too, less curve to navigate.
Nail Shape And Length E G Medium Almond Visual Idea
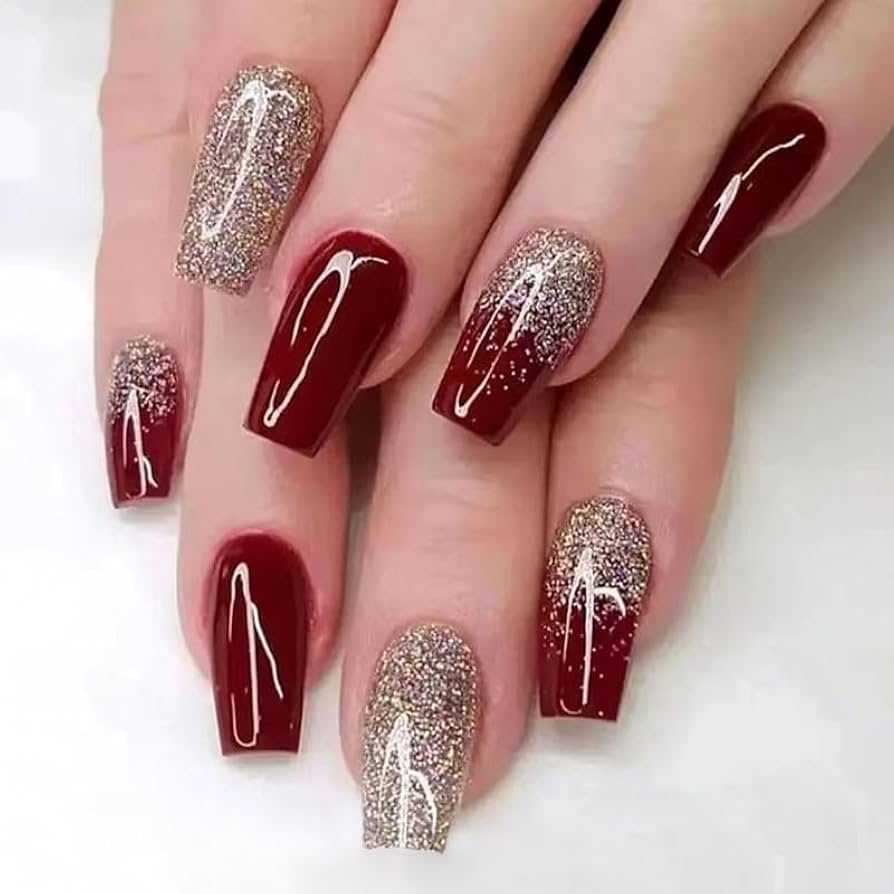
Square loses here. I have worn both, and for intricate winter art — think fine lines, tiny dots, foil accents — medium almond gives the nail bed more real estate without the clunky corners that make stripes look off-kilter. The taper draws the eye to the center design, while square tends to cut the pattern short at the sides. Almond also handles the glossy top coat better, fewer bubbles collecting in the corners. If you are booking a salon appointment for snowflake decals or geometric foil, ask for medium almond first.
Geometric Lines Over Glitter Visual Idea
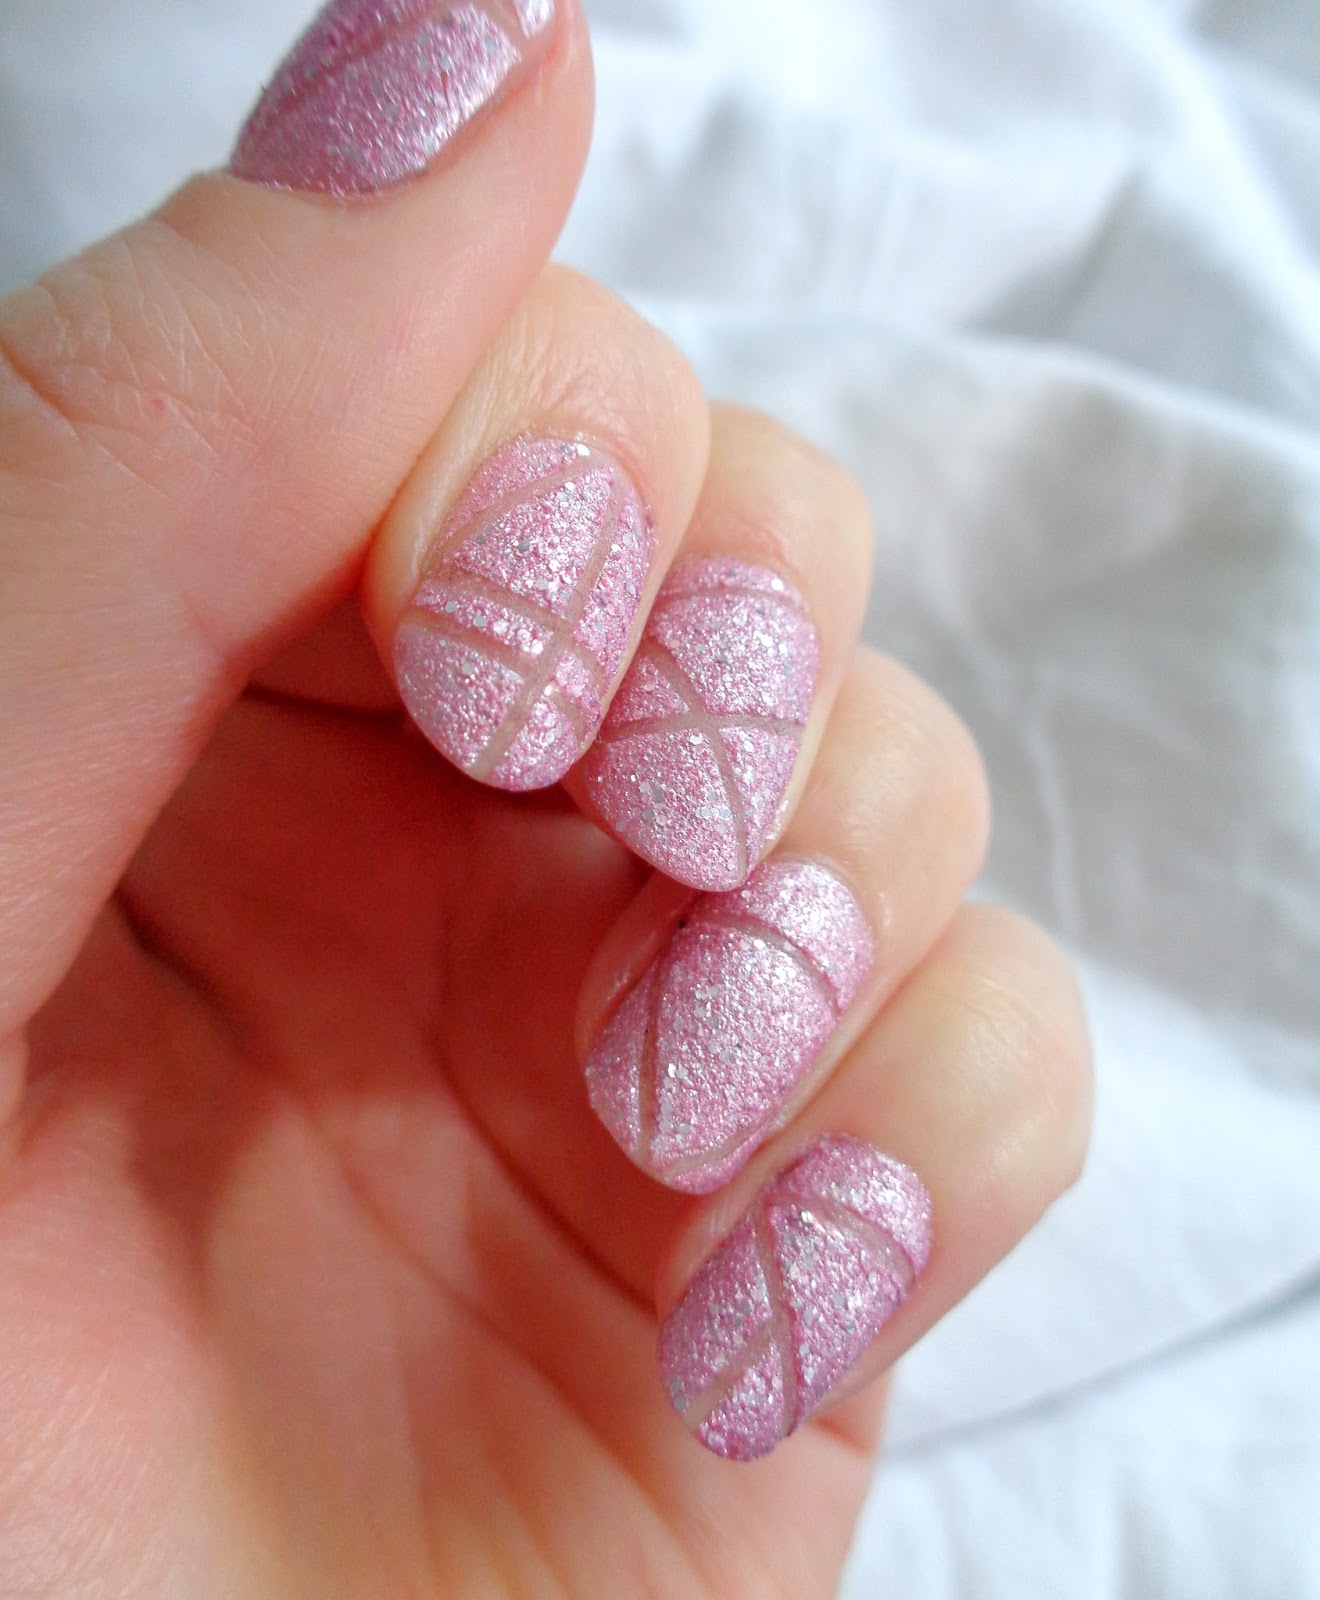
How do you draw a razor-thin line over a surface that feels like sandpaper? The trick is not fighting the texture but using it. Start with a pale pink base, then pack on a dense silver glitter — the chunkier the better, it grips the polish. Cure, then apply a thin layer of clear builder gel to level the surface, cure again, wipe the tacky layer. Now the geometric lines glide on without bleeding into the glitter valleys. This is not a Sunday DIY, the builder gel step requires a lamp and a steady hand, but the result is a clean, architectural look that reads as expensive winter minimalism.
Visual Idea — A Single
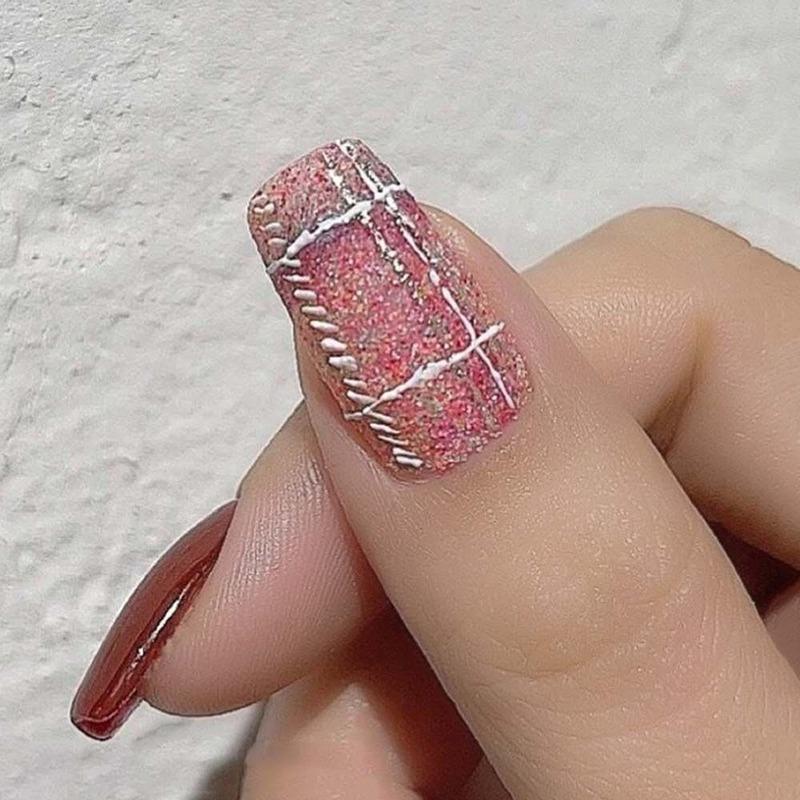
The first thing that catches is the single glitter accent nail, usually the ring finger, and how it holds up through a week of typing and hand-washing is the real test. By day five, the non-glitter nails start showing micro-chips at the free edge, but that one glitter nail looks exactly as it did on day one. The dense glitter layer acts as armor, and the glossy top coat over it resists yellowing better than a sheer base. For winter, this is the set that outlasts the holiday parties and still looks intentional through January.
Final Thoughts
After staring at these for a week, I realized something: the best winter glitter nails don’t scream for attention. They catch the light when you move your hand, then go back to being quiet. That’s the trick. I’m booking the scattered iridescent gradient for New Year’s, the one I almost skipped. It doesn’t photograph like the others, but in person it’s the one that made me stop typing to look at my own nails.
- Cuticle oil twice a day, especially with glitter removal ahead
- Thin layers only — thick glitter lifts by day 3
- No-wipe top coat seals loose glitter edges
- Soak-off removal, never peel, or you lose a layer
The silver French tip is the one I’m still wearing into January.