Step into a world where creativity meets color and style screams without words. At the forefront of these trends are vibrant pink summer nails. These aren’t merely decorations, but statements of taste and artistic fashion. From minimal grace to attention grabbing patterns, we will explore how every stroke can transform not only the nail, but everyone in its presence. Take this journey with us as we showcase the seduction that is pink — every nail whispering its own tale.
Playful Pink Swirls and Stars
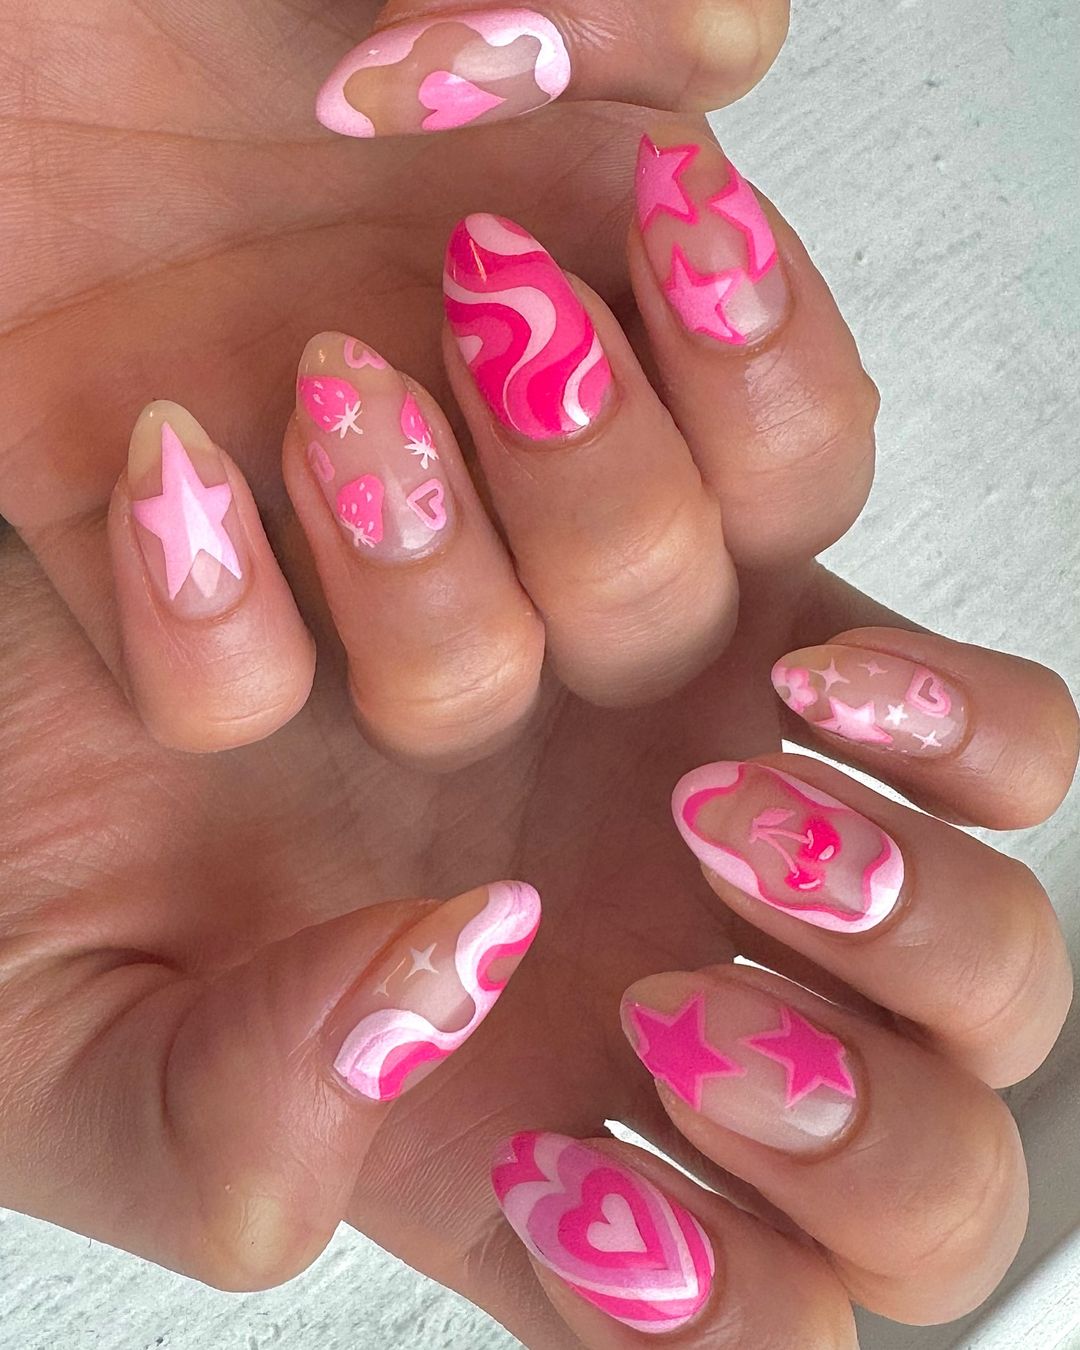
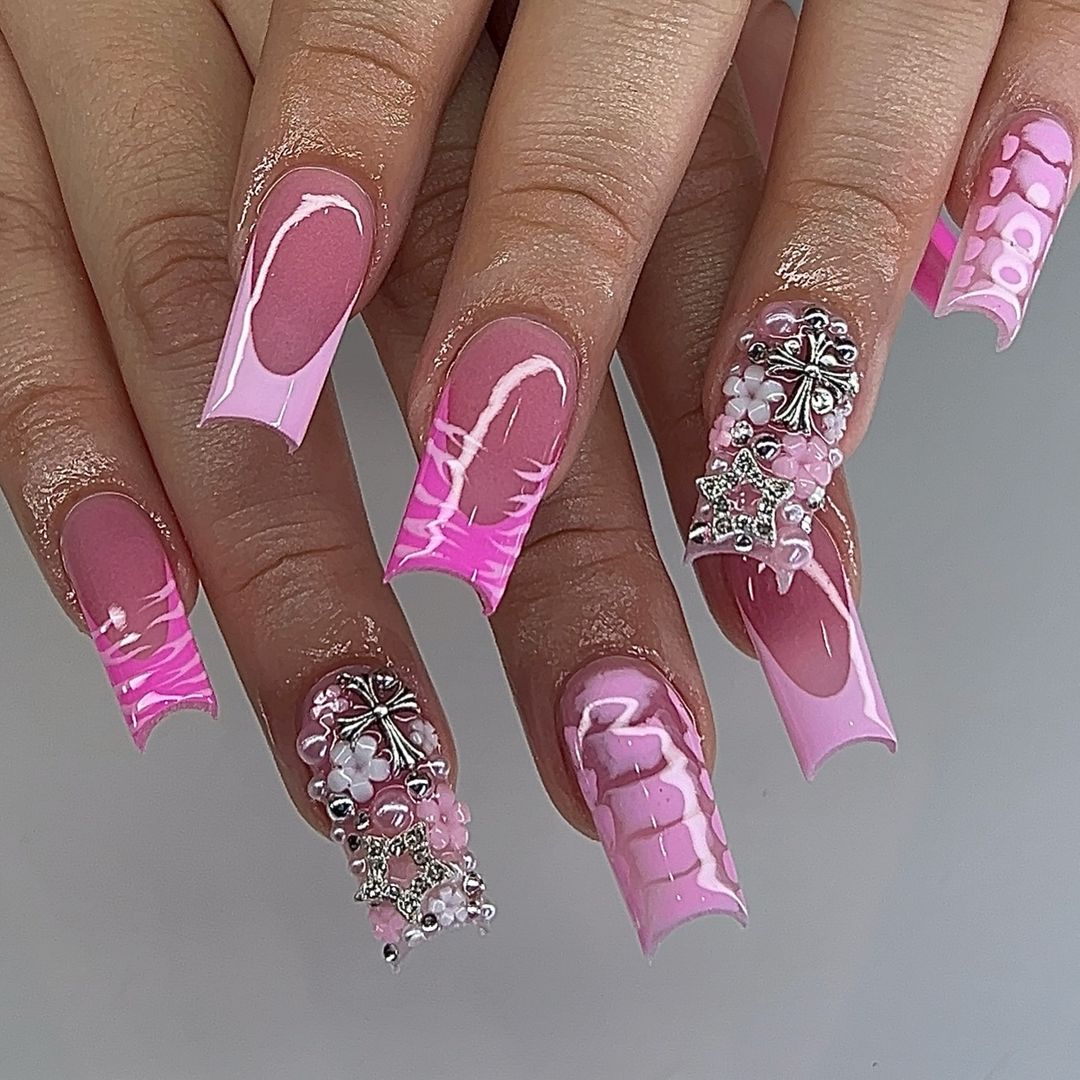
In the flurry of summer, pink nails aren’t just about making a statement, they’re a playful way to rebel against the everyday. Check out picture — where nails become a canvas for all things whimsical. The swirls and celestial bodies make it feel like you’re staring at the night sky on some happy planet. The nails themselves are an ode to shades of pink; embracing simplicity with their short length that prove less really can be more. It’s an artform that you’d imagine being done by hand in a field of grass or laying down on your stomach at a sleepover, struggling to keep quiet so you don’t wake up the parents upstairs. So it’s fitting that these designs include swirls, hearts and stars.
The professional part:
From an expert perspective, the person who did this was very smart about how they used color — light base ensures magenta pops. Glossy top coat makes colors look deeper (like how good lighting will make anything look prettier).
You’ll need:
- Base coat (OPI)
- Baby pink polish (Essie: Muchi, Muchi)
- Magenta polish (OPI Red)
- White polish for details (Sally Hansen: White On)
- Top coat (Seche Vite Dry Fast)
- Nail guide stickers
DIY Guide:
- Start with clean buffed nail.
- Apply base coat. Wait for that to dry.
- Apply baby pink polish as background when base coat is dry.
- For magenta details use thin brush and start from center working your way out with shapes/lines
- Finish with top coat for glossy finish
This took forever because I wanted each layer to dry before moving onto next move to avoid smudges!
Glossy Pink Elegance
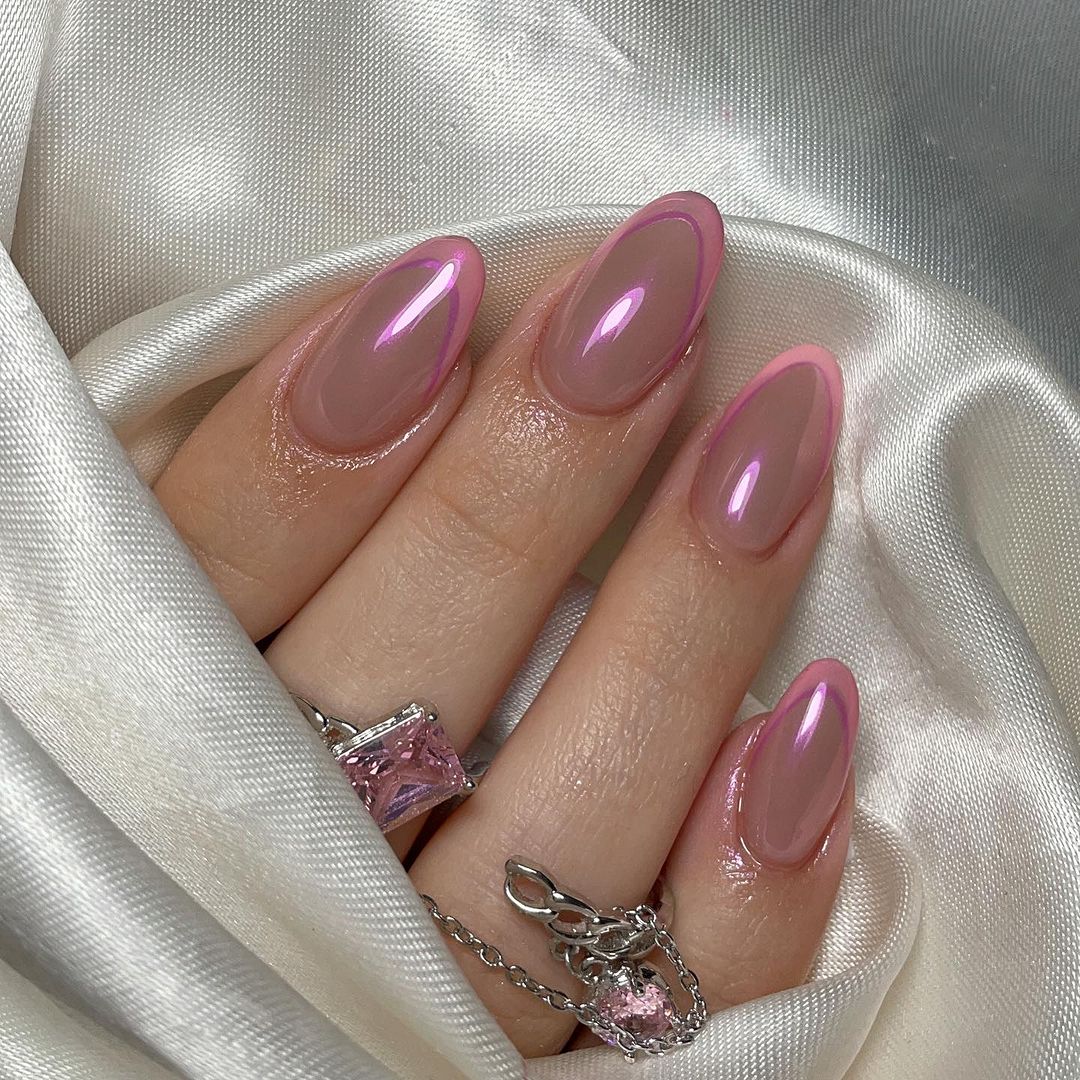
Meet a confusing yet captivating name. It showcases glossy pink summer nails at their finest. The nails are the embodiment of a sophisticated look, declaring simple elegance with their smooth and luscious pink color. The almond shape pays tribute to inspo almond while the sleek finish is inspired by the latest trends in gel manicures.
Supplies used:
- Base coat (CND Stickey)
- Pink gel polish (Gelish: Pink Smoothie)
- No-wipe top gel coat (Gelish: Top It Off)
As someone who’s been around mani-pedis for quite some time, I can’t help but notice how seamlessly these were done. A testament to the skill behind the brush. This look would be great for a holiday or just as an on-trend everyday option.
DIY Guide:
Get your filing hands ready because we need to give those nails some work so they can achieve an almond shape. Apply a base coat so that this gel mani lasts you a good amount of time—nothing worse than chipping right away! Two coats of Pink Smoothie will create depth and, remember, curing under a LED lamp between layers is super important, don’t forget it! Finish with a no-wipe gel top coat to ensure that shine doesn’t get ruined by any lint or dust particles; you wouldn’t want people mistaking your shiny pink nails for something dull!
Pink Outline Chic
The nails are a canvas where bright pink meets nude in a bold, graphic edge that spells trendy and neon. The striking outline is a celebration of short square nails, a style that’s all the rage this season. It’s a simple yet eye-catching design that dances on the edge of minimalist and statement-making.

Consumables:
- Base (Orly Bonder)
- Nude (Essie: Ballet Slippers)
- Neon tape or polish (China Glaze: Shocking Pink)
- Top (OPI: Rapidry)
The contrast between the soft nude and the electric pink outline is a manicurist’s dream. It speaks of bright designs without overwhelming, a perfect blend of subtlety and boldness.
DIY Guide:
After your base, apply the tan polish. Once it’s dry, grab your neon tape or thin brush dipped in pink to make your outline. A steady hand and good vision are your best friends now. Finish with top coat to seal everything up!
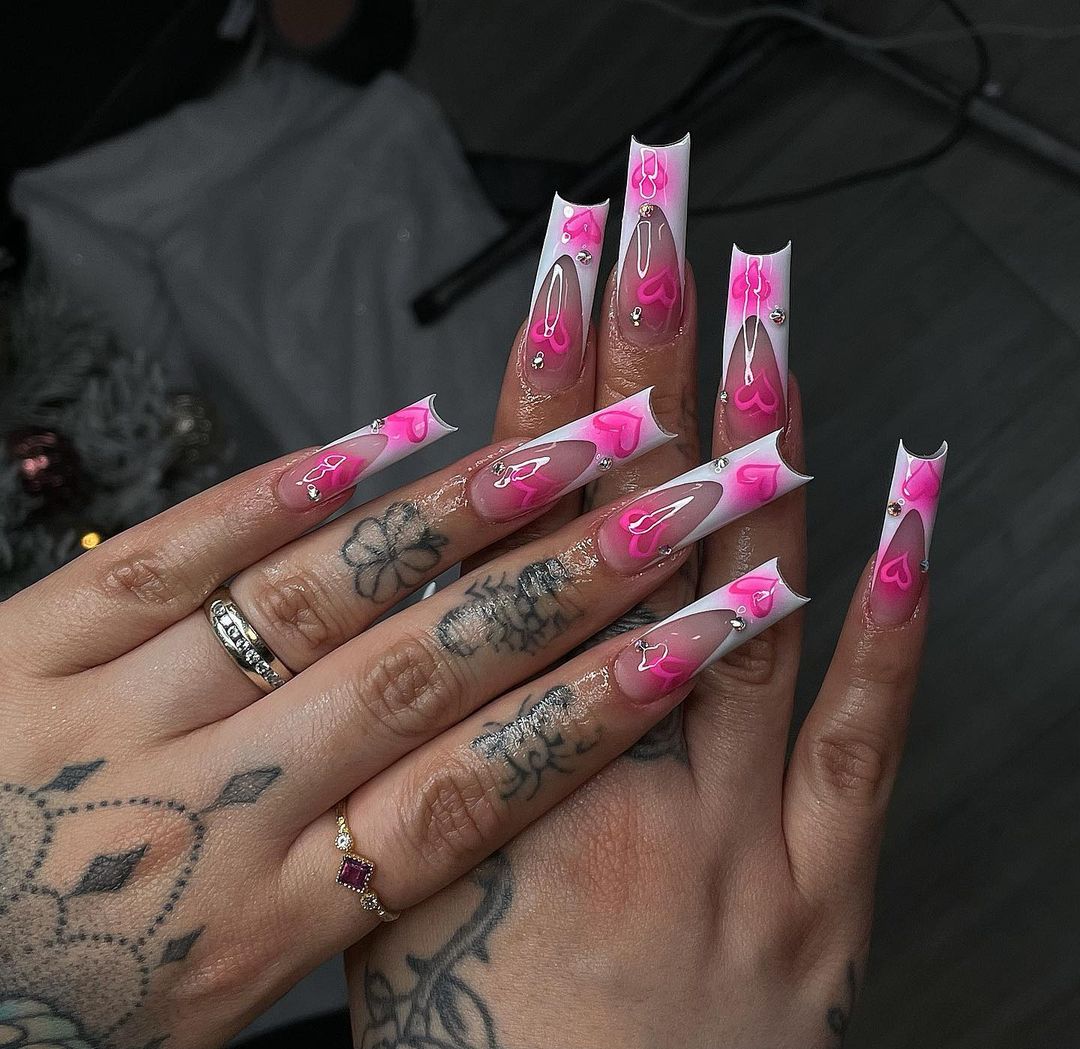
Flaming Hearts and Chic French Tips
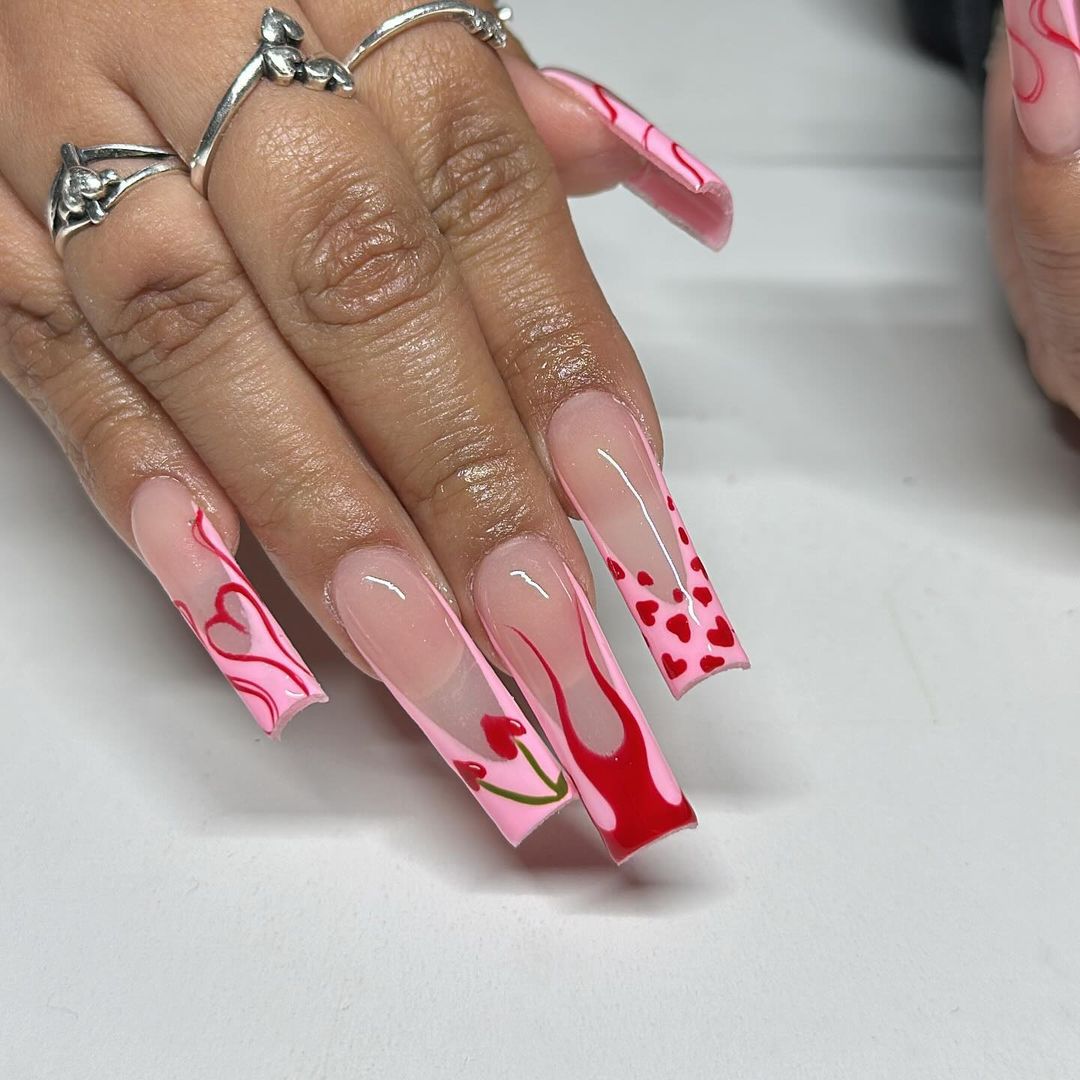
It’s a masterpiece that combines pink summer nails and the art of flirtation. Essentially, we’ve given classic French tips a sizzling redesign with a neon pink border. On top of that, hand-painted hearts and fluid strokes make these even more alluring. If you think about it, this design isn’t about following trends; it’s about starting them. Each nail tells its own story of romance and drama, which is perfectly captured by the bright and dark shades.
Supplies:
- Base coat (Essie: Here to Stay)
- Pink neon polish (China Glaze: Pool Party)
- Red acrylic paint (for the hearts and strokes)
- Top coat (OPI: Rapidry Top Coat)
The simple short nails keep the design grounded, ensuring it’s wearable day-to-day while still providing that special holiday sparkle. A gel overlay gives these acrylics a glass-like finish, ensuring they catch the eye at every summer soirée.
DIY guide:
Just lay down your base coat and follow with some nude polish. For crisp edges on your French tip design, use tape as a guide for your neon polish application. Next up is drawing your precise hearts and stroke designs with red acrylic paint using a fine brush. Finally, seal everything in place with some topcoat!
Save Pin

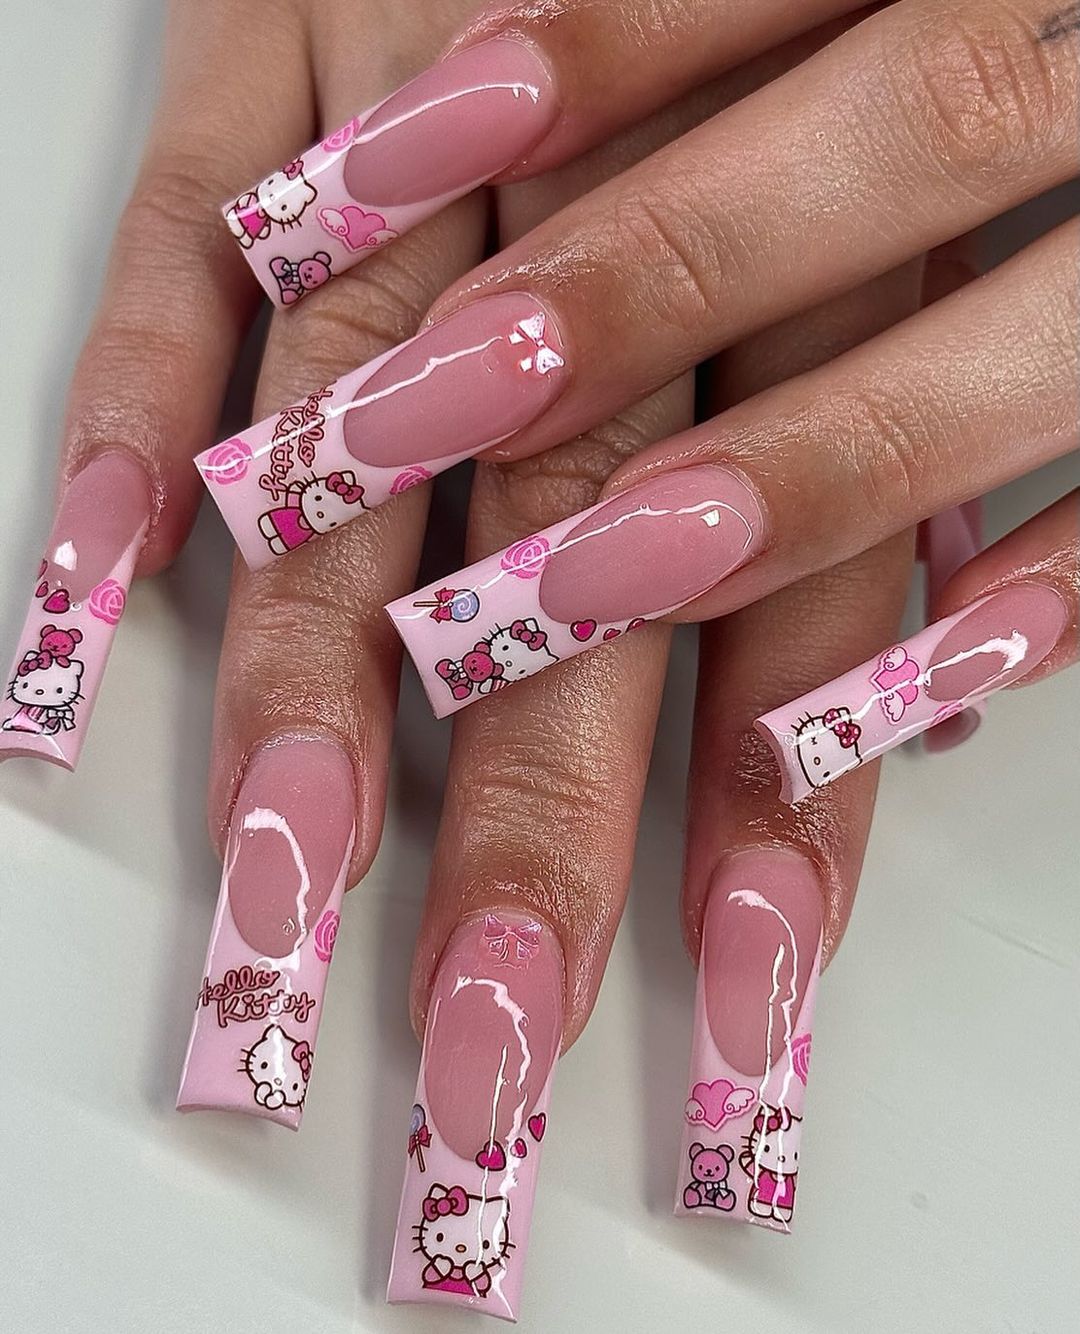
Hello Kitty Couture
The iconic Hello Kitty goes extra trendy and gets decked out on your fingertips. This cute summer nail inspo features pink coffin nails and a full serving of Hello Kitty’s world, with her bow, roses and even her pals making an appearance. The shine from the gel polish is just as radiant as the cuteness factor here, so it’s a perfect combination for those who want to bring back their childhood in a modern style.
Consumables:
- Base coat (CND: Sticky Base Coat)
- Pale pink gel polish (Gelish: Light Elegant)
- Nail decals or hand-painted Hello Kitty details
- Top coat (IBD: Just Gel Polish Top Coat)
From a professional standpoint, these nails are all about balance with light and soft tones. It’s pretty but still playful. Applying the decals with precision—or if you’re skilled you can do the hand-painted art—shows off not just your steady hand but also your keen eye for design.
DIY Guide:
Start with your base, then layer on the pale pink polish. Apply your decals or paint on your Hello Kitty details with a fine brush. Each nail should showcase a unique aspect of the design. A gel top coat gives that enviable shine and longevity. For DIY-ers especially, patience is key when dealing with detailed decal placements—so don’t rush!
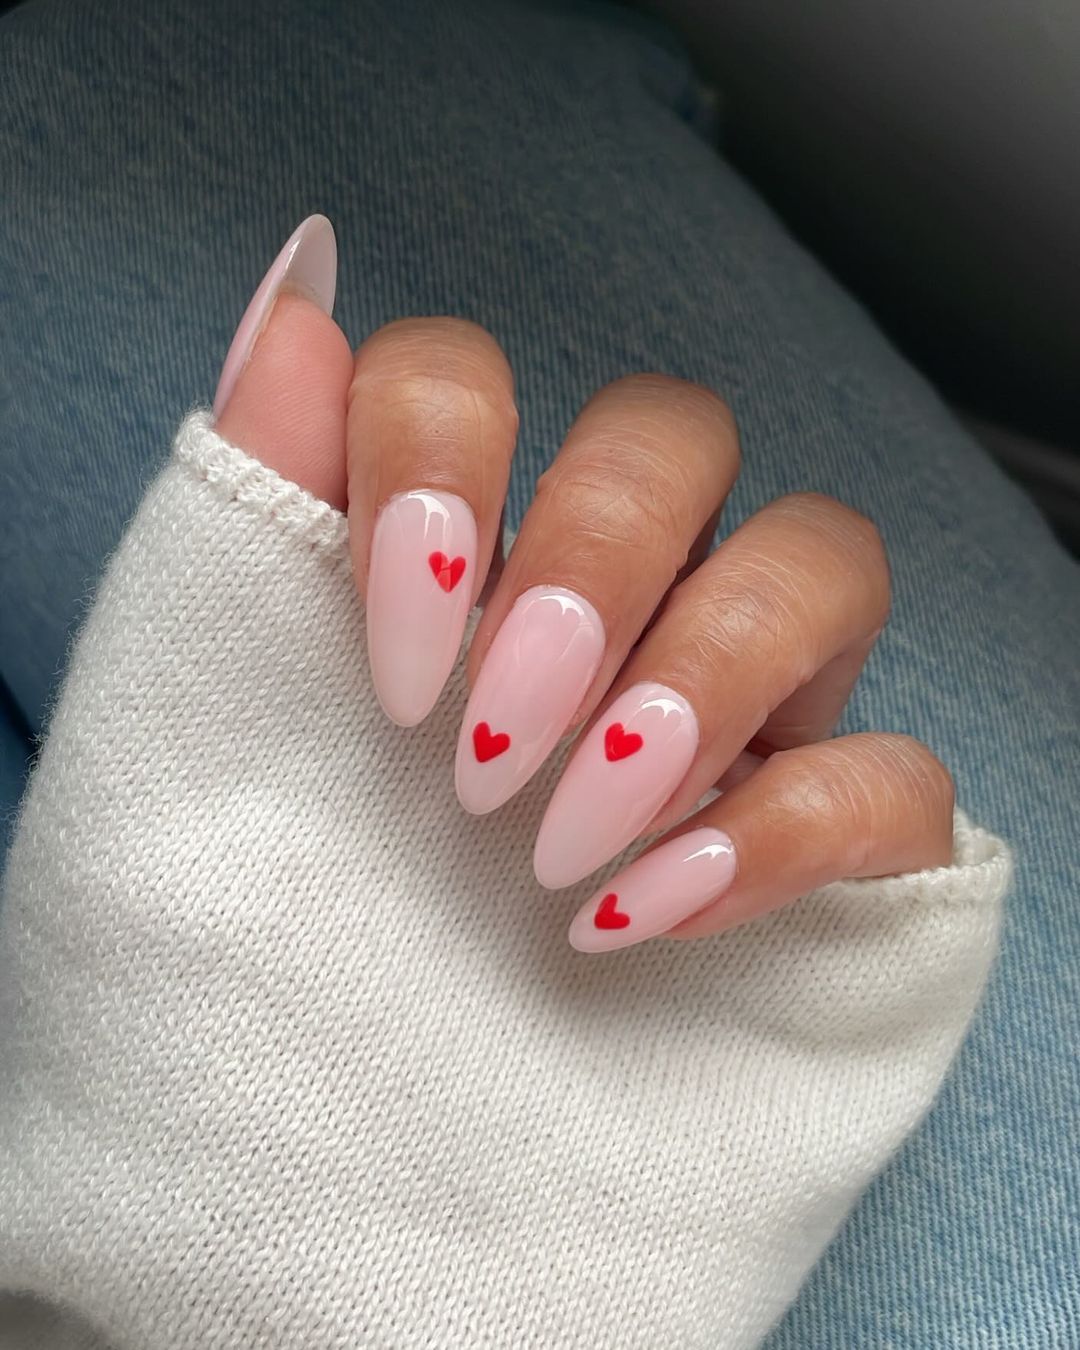
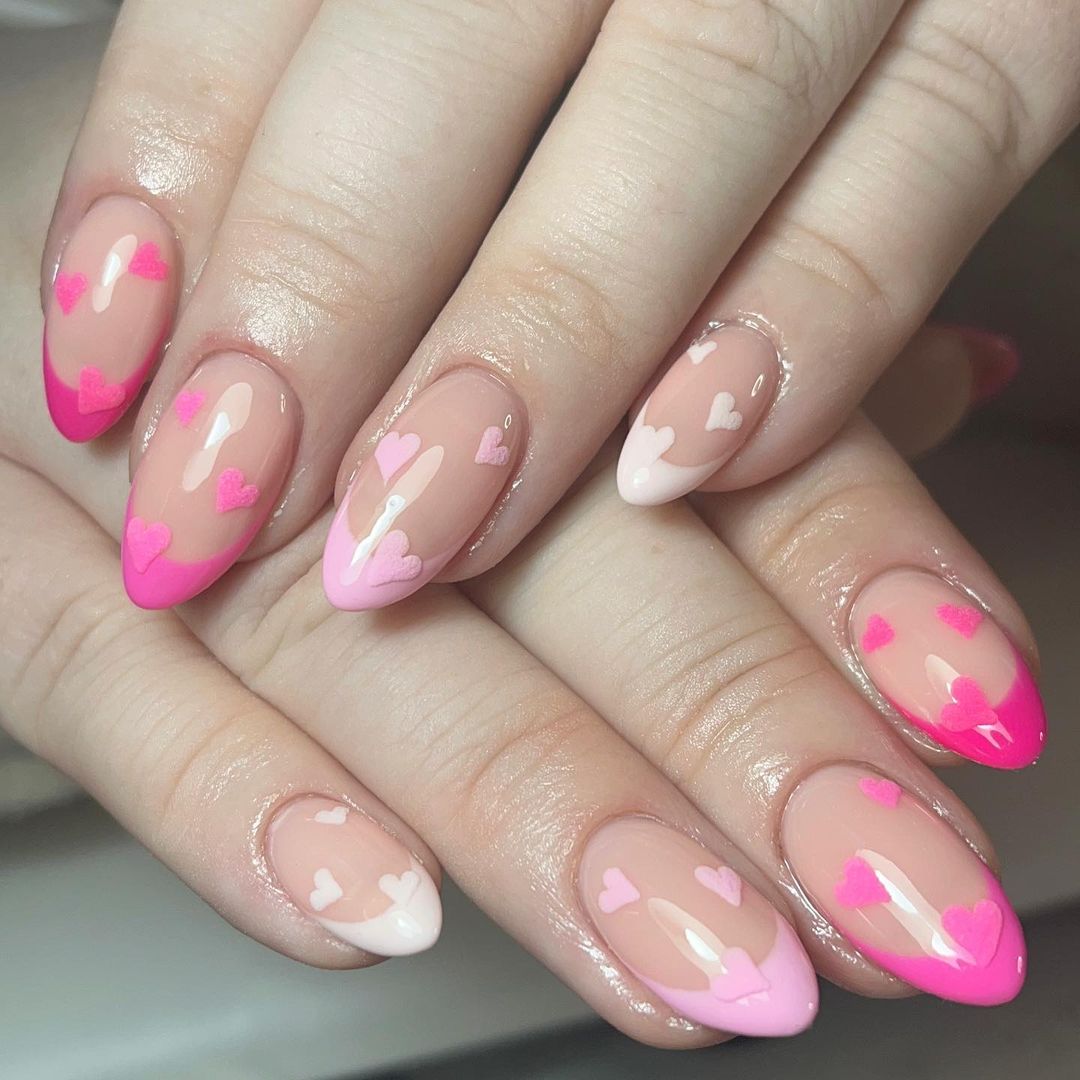
Simple Love
Simple, but with a twist. The soft color lays an easy base, and the singular red heart on each nail gives it just enough flair to make it special. Simple nails often speak louder than those that are loud and overexaggerated. That’s what this design is all about. It’s a nod to summer colors while reminding us that sometimes less really is more. This would be a cute pedicure for toes as well.
What you’ll need:
- Base coat (OPI: Natural Nail Base Coat)
- Pale pink polish (Essie: Ballet Slippers)
- Red polish for hearts (Essie: Really Red)
- Top coat (Sally Hansen: Insta-Dri Anti-Chip)
It’s a minimalist design that falls right in line with current trends, and looks great on gel too! Get creative with some fun art over the top layer when you’re ready to change up your look. It can also be done on short gels or your natural nails!
Matte and Shine Duo
Is there anything better than versatility on your nails? It is all about the pink nails that’s for sure. They have a bold matte fuchsia that’s perfect for any summer get together. But not only do they give us one statement nail color, but also a delicately speckled glossy nude! It’s like getting two sets of fabulous in one!
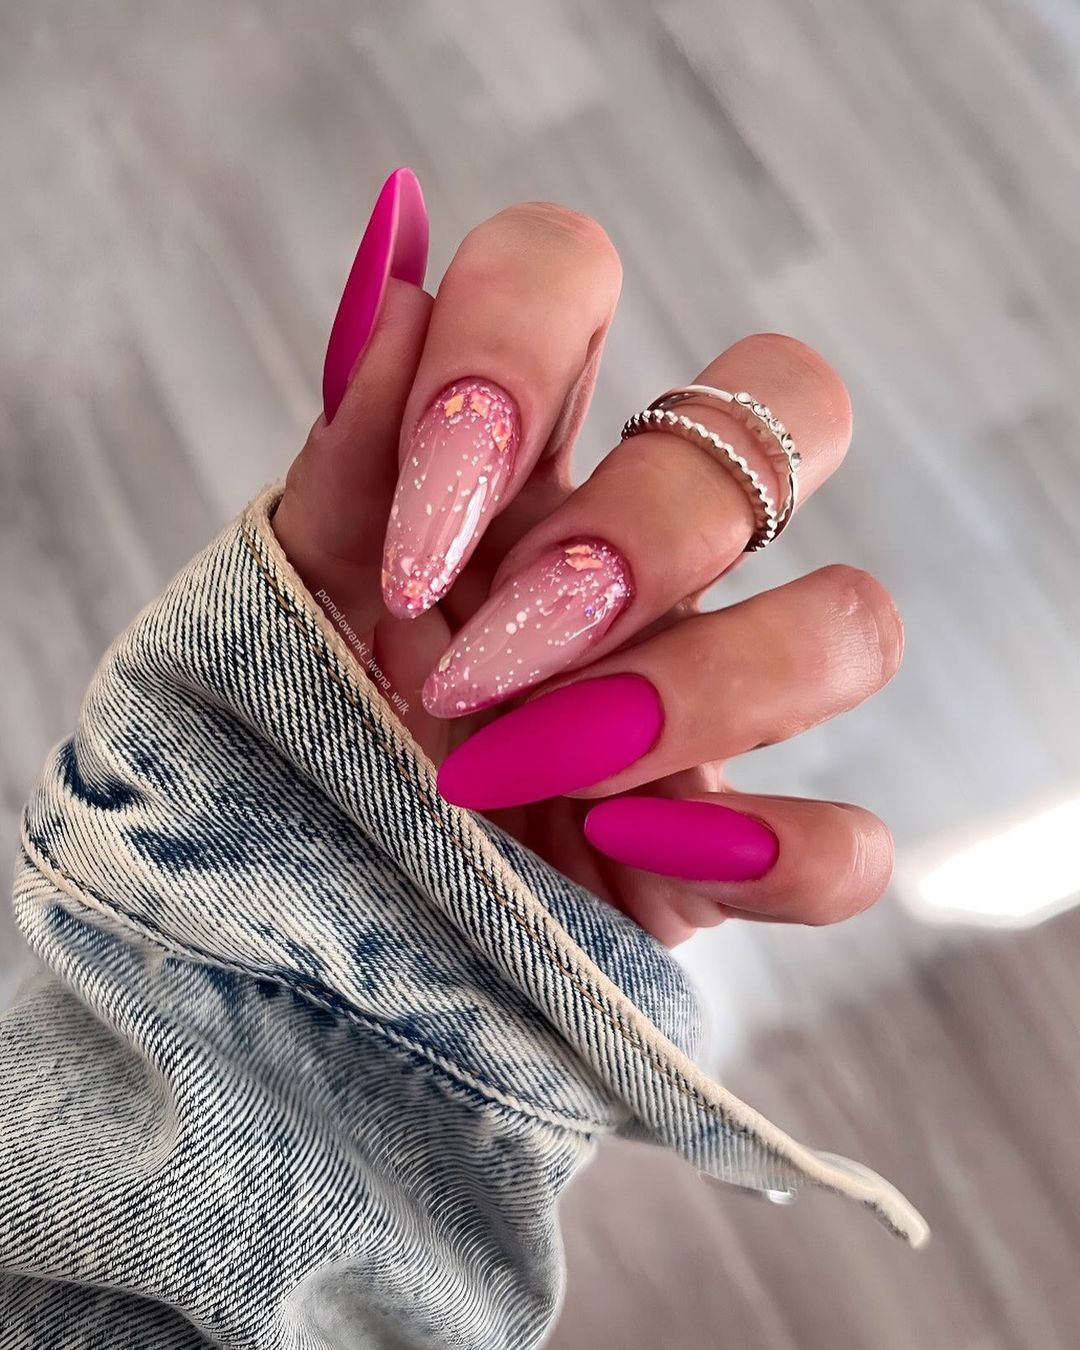
They went with long almond shaped nails to show off just how diverse and gorgeous this inspo can be when you let things run wild!
Here are the consumables:
- Base coat (Essie: Here to Stay)
- Matte pink polish (Essie: Matte About You)
- Nude polish (OPI: Bubble Bath)
- Glitter top coat (OPI: Princesses Rule!)
- Matte top coat (for the pink nails)
As a professional I must say, the matte on bright nails beautifully offsets the sparkle on the nude, creating an unexpected chic contrast that will work perfectly at both holiday events and beach hot spots.
Ready for these simple yet elegant designs? Here’s your guide to DIY:
Prep with base coats. Apply fuchsia. Matte top coat these ones. Sprinkle glitter while tacky for nudes, then seal with glossy top coat. Ta-da!
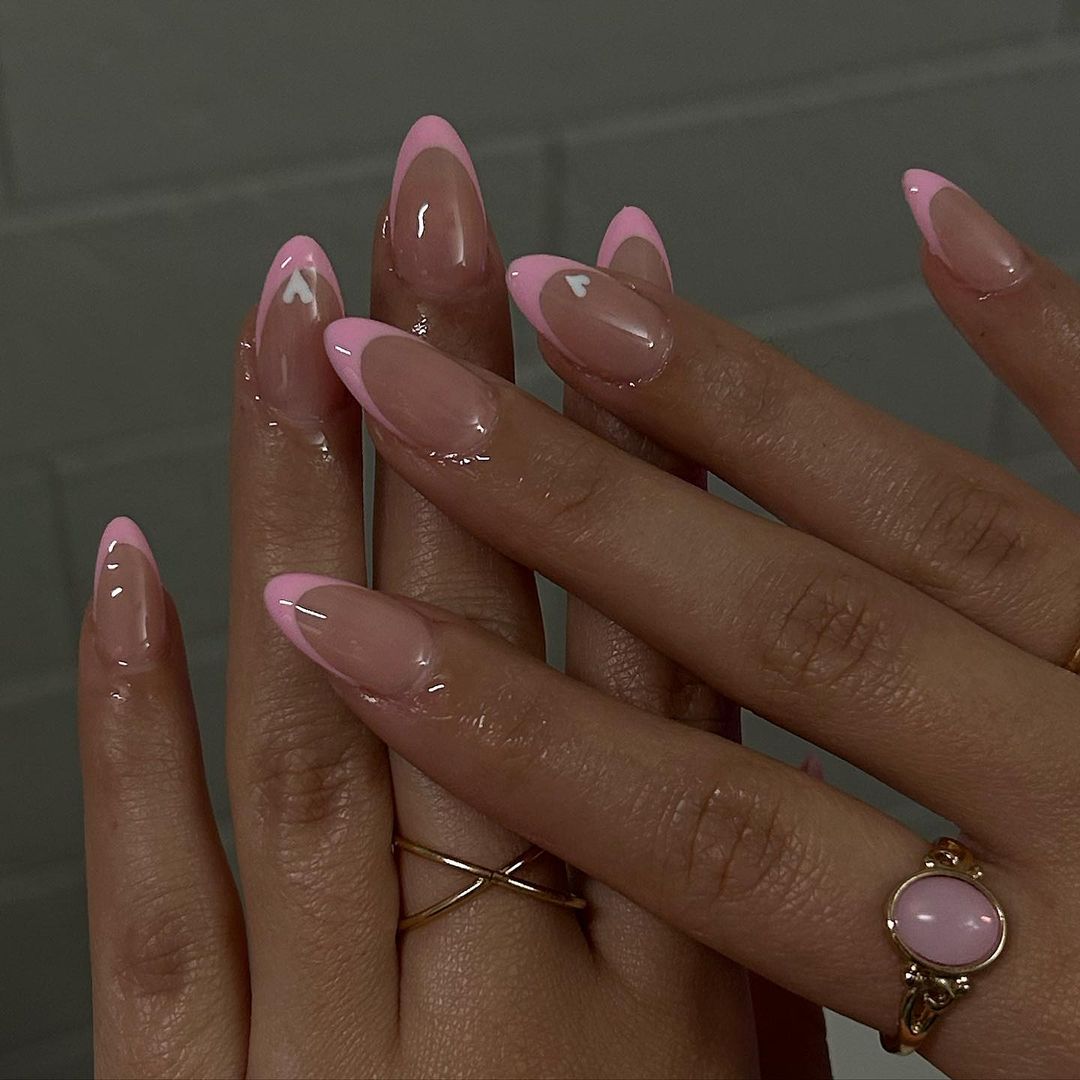
Subtle Pink Ombre
Look at a short nail design. It’s a gentle pink ombre, and it fades into a transparent tip which has a dainty little heart detail. This gel look is perfect if you want simple, minimalist nails with just some romantic flair. It’s the exact kind of minimalist cute that works well with summer’s pastel theme.
Supplies:
- Base coat (OPI: Natural Nail Base Coat)
- Light pink gel polish (Gelish: Pink Smoothie)
- Clear gel polish (for blending ombre)
- White polish (for the heart detail)
- No-wipe gel top coat
As an expert in the field, I can confidently say that this gradient requires a very skilled hand to make it blend perfectly. That’s the sign of an elegant quality manicure.
How to guide:
Start off with your base coat. Then quickly blend your light pink gel with your clear tip from the bed of your nail to the tip to create the ombre. Make sure you cure between each layer. After that add a small white heart for a playful touch and finish it off with a no-wipe top coat for its glassy look.
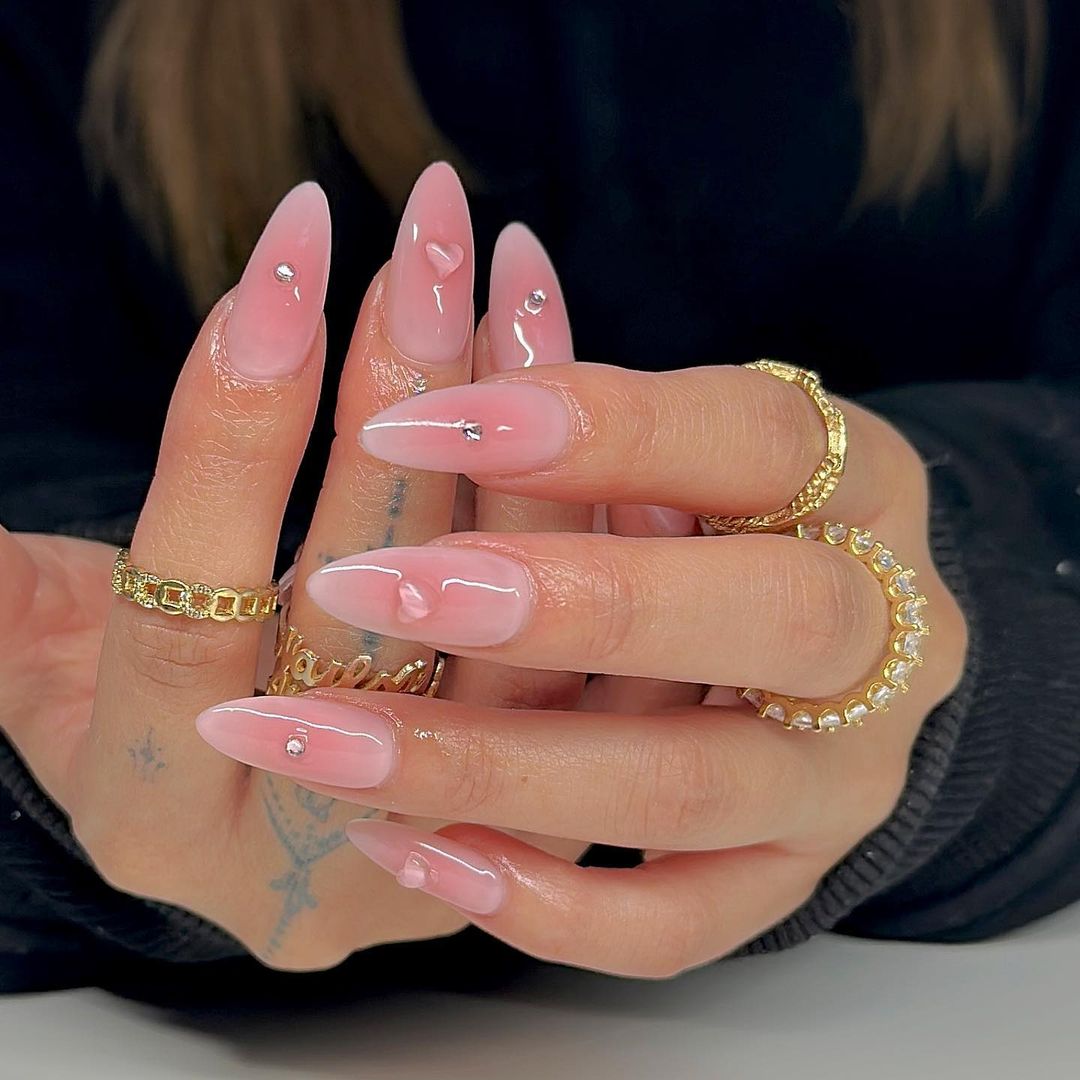
Elegant Minimalism
This design is a simple elegant look. The translucent pink base design pairs well with the single gel crystal. It really makes a statement without being overly complicated. However, it still stays in line with the latest short square nails design trends. You can use this soft pink color for your toe nails to give them a serene pedicure look. Or you can wear it on your hands as a pretty but subtle accessory to any summer outfit.
Base:
- Hard as Nails (Sally Hansen)
- Polish:
- Sugar Daddy (Essie)
- Crystal Adhesive
- Gel Setter top coat (Essie)
The placement of the crystal was everything for this look it catches hits the light perfectly so that it adds just enough sparkle to the simple design without taking anything away from its beauty.
DIY Guide:
After you apply your base, put on a thin layer of sheer pink gel polish and cure it. Then put a small dot of adhesive on where you want the crystal and position it using tweezers or a wax pencil and then cure that too! Lastly, add a layer of the gel setter top coat to ensure that your new shiny stone is secured in place and maintain that glossy finish!
Save Pin
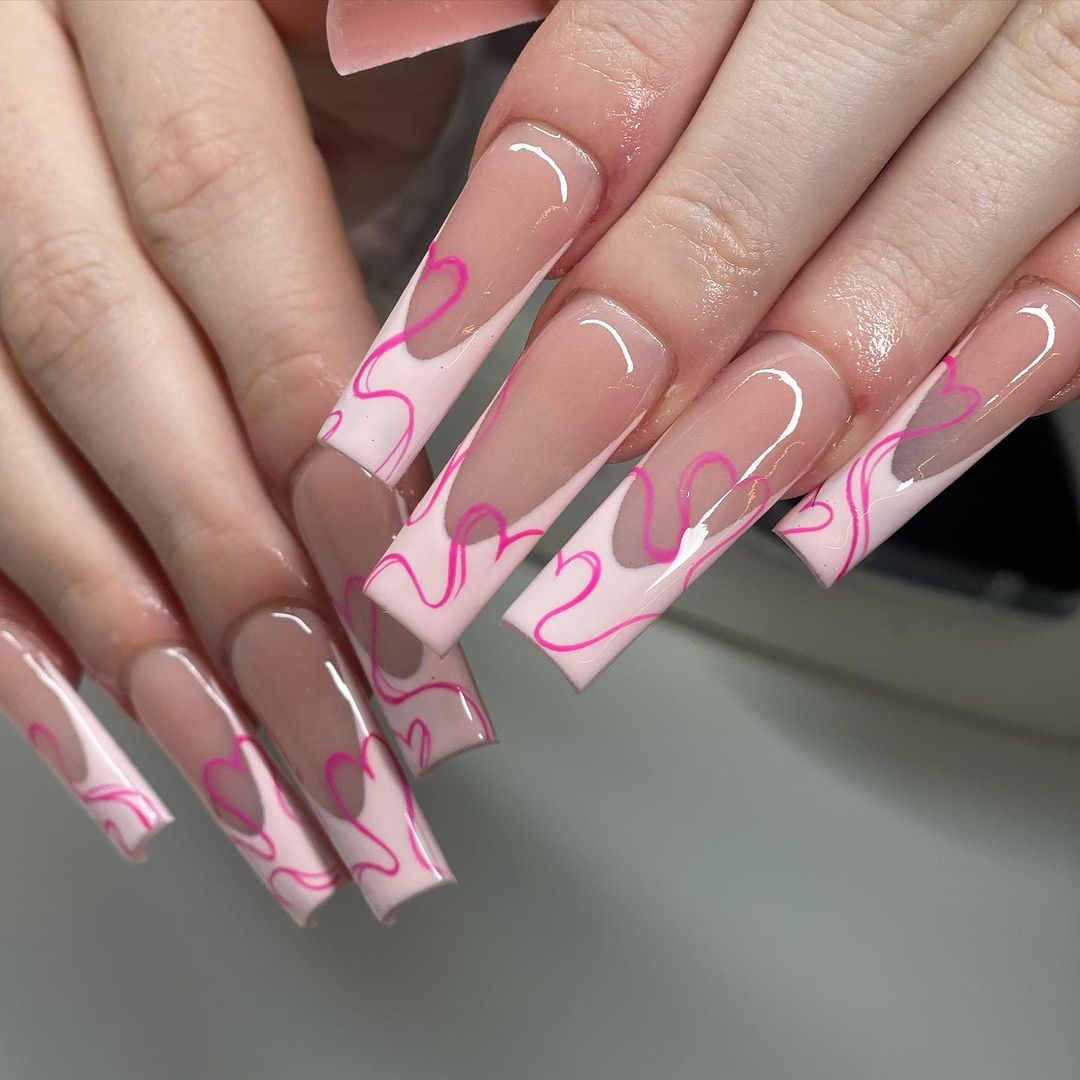
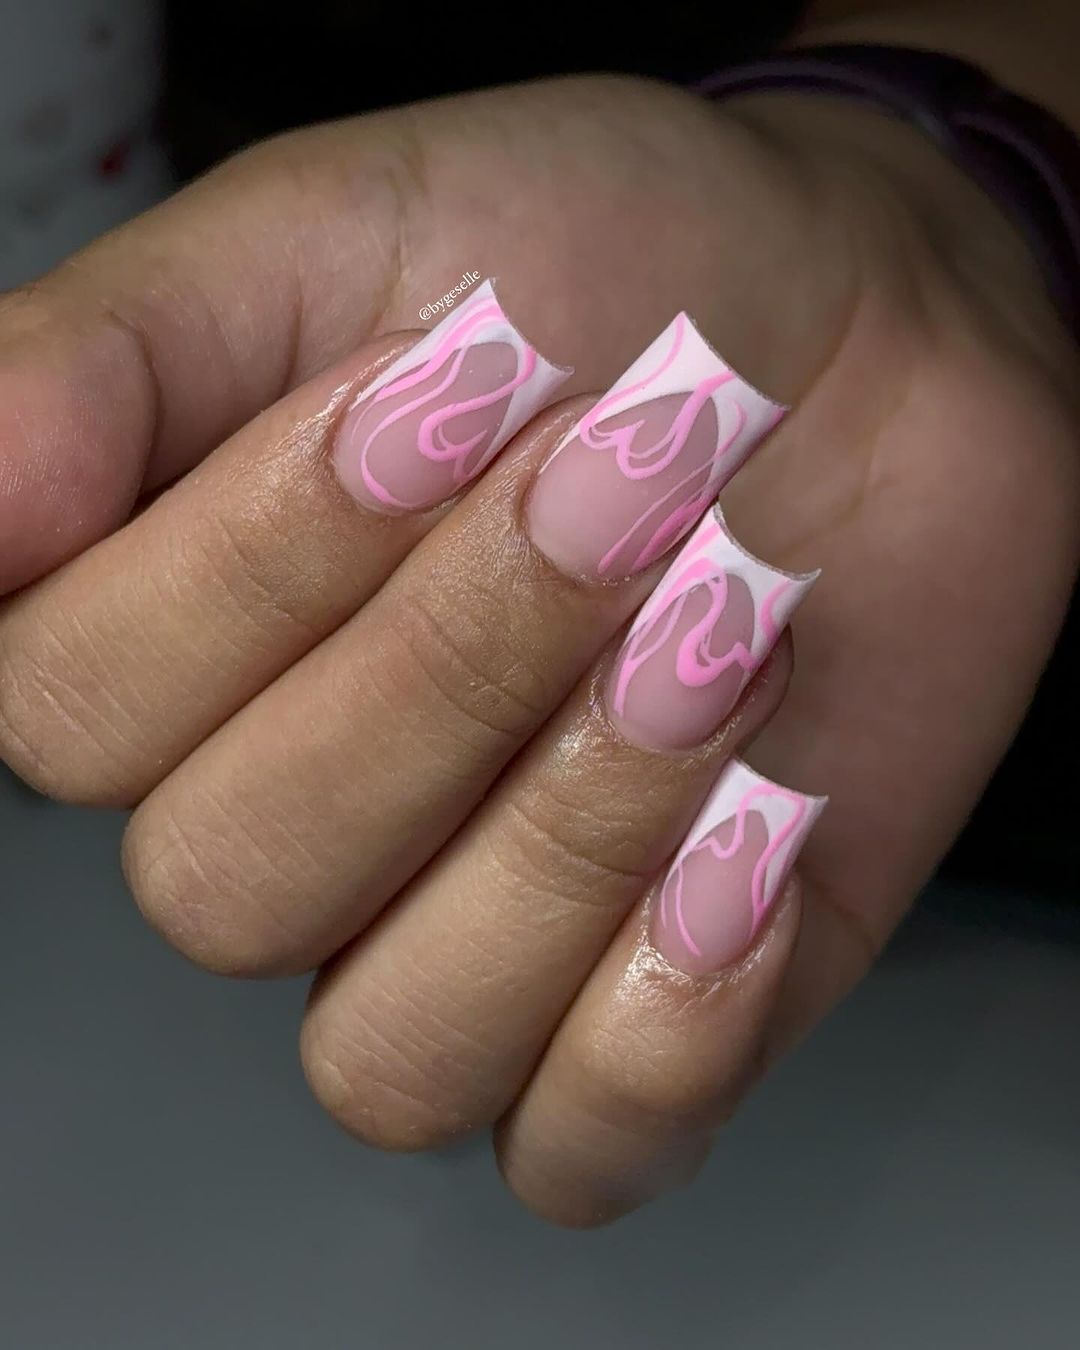
Swirling Hearts Fantasy
The art of the photo is so magical with its transparent tips and soft swirls and hearts in bright pink. This design embodies pink summer nails Shades & designs, where the transparency of the tips gives length without overpowering the neon and bright pink details that cascade down each nail.
You will need:
- Base coat (CND Stickey)
- Sheer pink gel polish (Gelish: Pink Smoothie)
- Neon pink polish (China Glaze: Pool Party)
- Detailing brush
- Top coat (Essie: Gel Setter)
As a manicurist, I love how the sheer base allows the gel color to pop without taking away from my intricate designs. It’s a fun blend of art and style that creates an easy summer mani.
Here’s how you do it:
Apply your favorite base coat then a sheer pink gel for color. Use a detailing brush to paint on your neon pink swirls and hearts making sure to keep them fluid and clean. Top it off with your favorite top coat for that glossy look that will catch everyone’s eyes to all of your cute details!
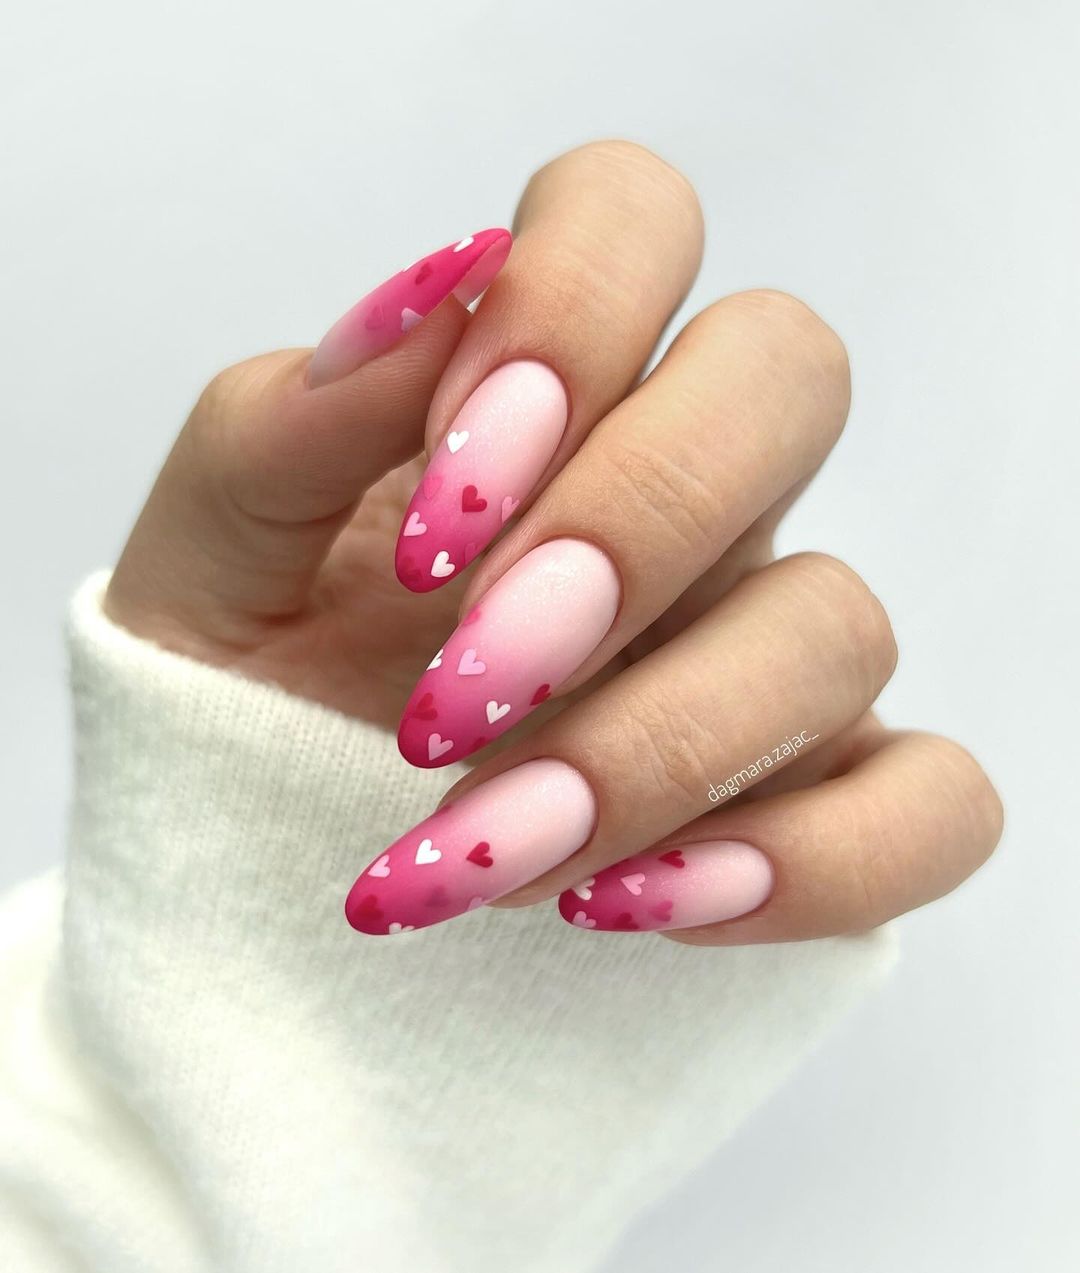
Ombre Hearts Delight
This photo is a romantic and cute take on the pink summer nails theme. It features an ombre effect with a bright to pale pink gradient, sprinkled with tiny white hearts. This simple yet elegant design is perfect for short gel nails or a simple short look.
The gradient effect was achieved by sponging on the pink gel polish, blending as you move up the nail. The small white hearts were created using a dotting tool. Finish off the design with a top coat for some added sparkle.
Here are the supplies you’ll need:
- Base coat (Orly Bonder)
- Light pink gel polish (Gelish: Light Elegant)
- White polish for hearts (Essie: Blanc)
- Sponge (for ombre effect)
- Top coat (Seche Vite Dry Fast)
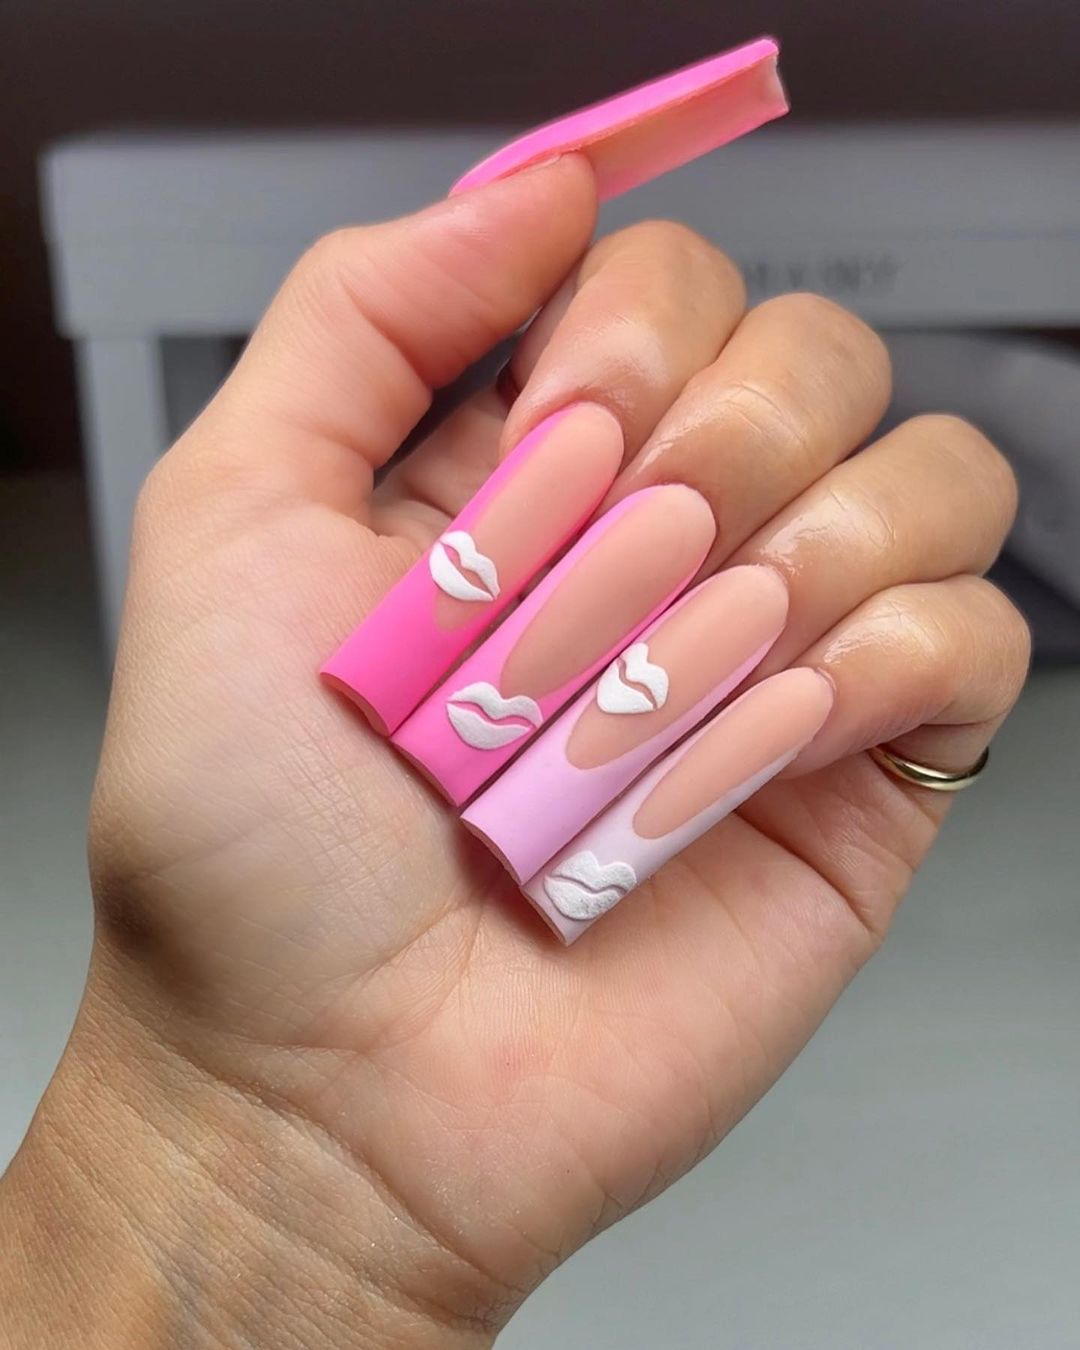
Abstract Love
The creativity in these photos is mind-blowing. We’ve got vibrant pink and soft white coming together to create this abstract look of love on a canvas of fake nails; heart outlines make for a simple, yet incredibly artistic design that’s perfect for Valentine’s Day or just everyday trendy flair.
You’ll need:
- Base coat. (Sally Hansen Hard as Nails)
- Pink acrylic powder. (Young Nails Cover Pink)
- White acrylic paint. (For the hearts)
- Nail forms. (For the acrylic application.)
- Top coat. (IBD Just Gel Polish Top Coat)
This design is a clear favorite, because it “takes all the latest trends and combines them with classic gel technique” to give you both neon and nuanced vibes.
Here’s how you do it:
Apply base coat, then place nail form. Mix pink acrylic powder with monomer and apply onto form, sculpting as necessary. Once set, use white acrylic paint to draw heart outlines. Apply top coat for shine and long-lasting short square or inspo coffin shaped nails.
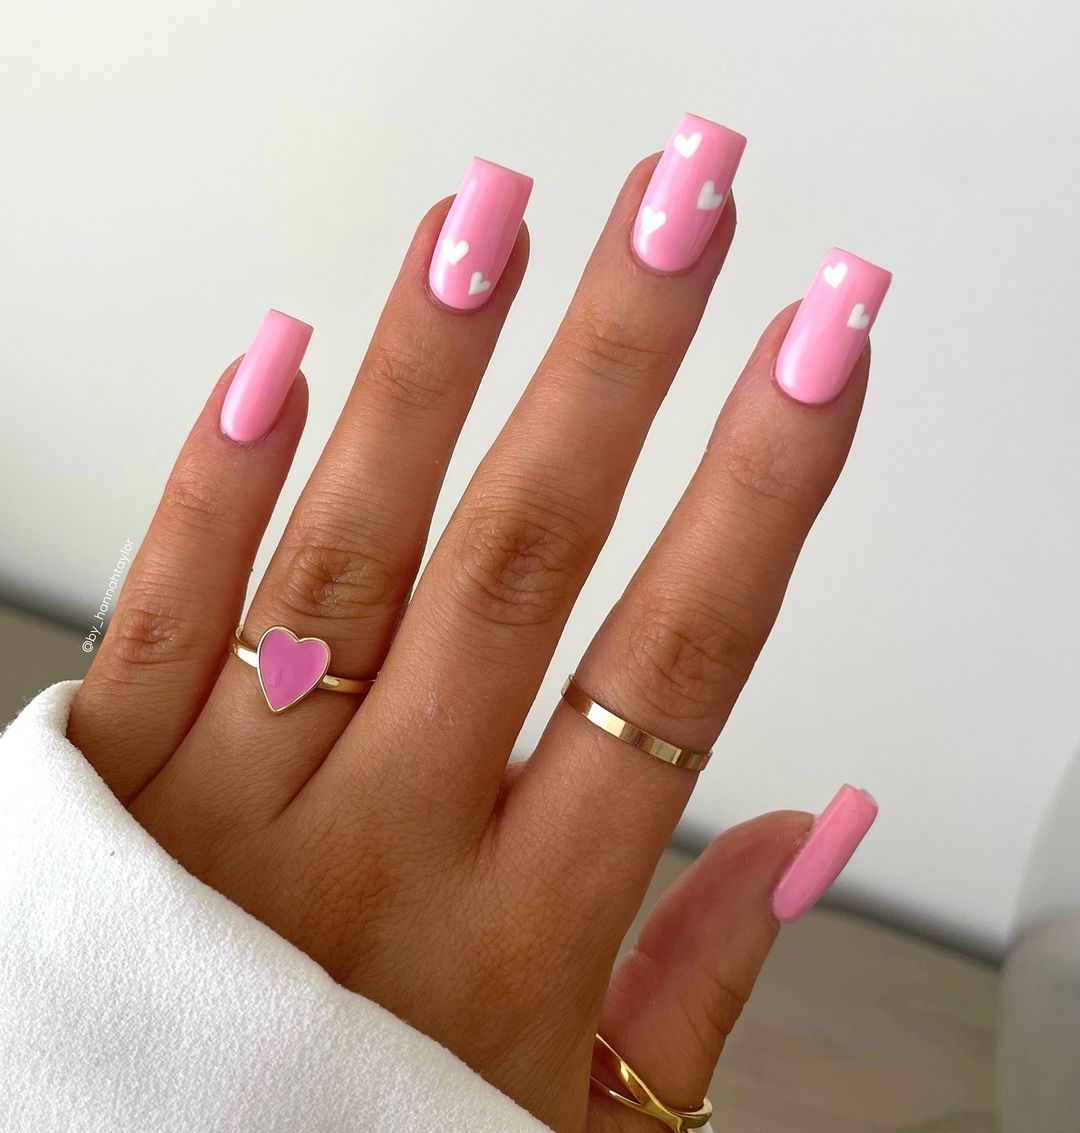
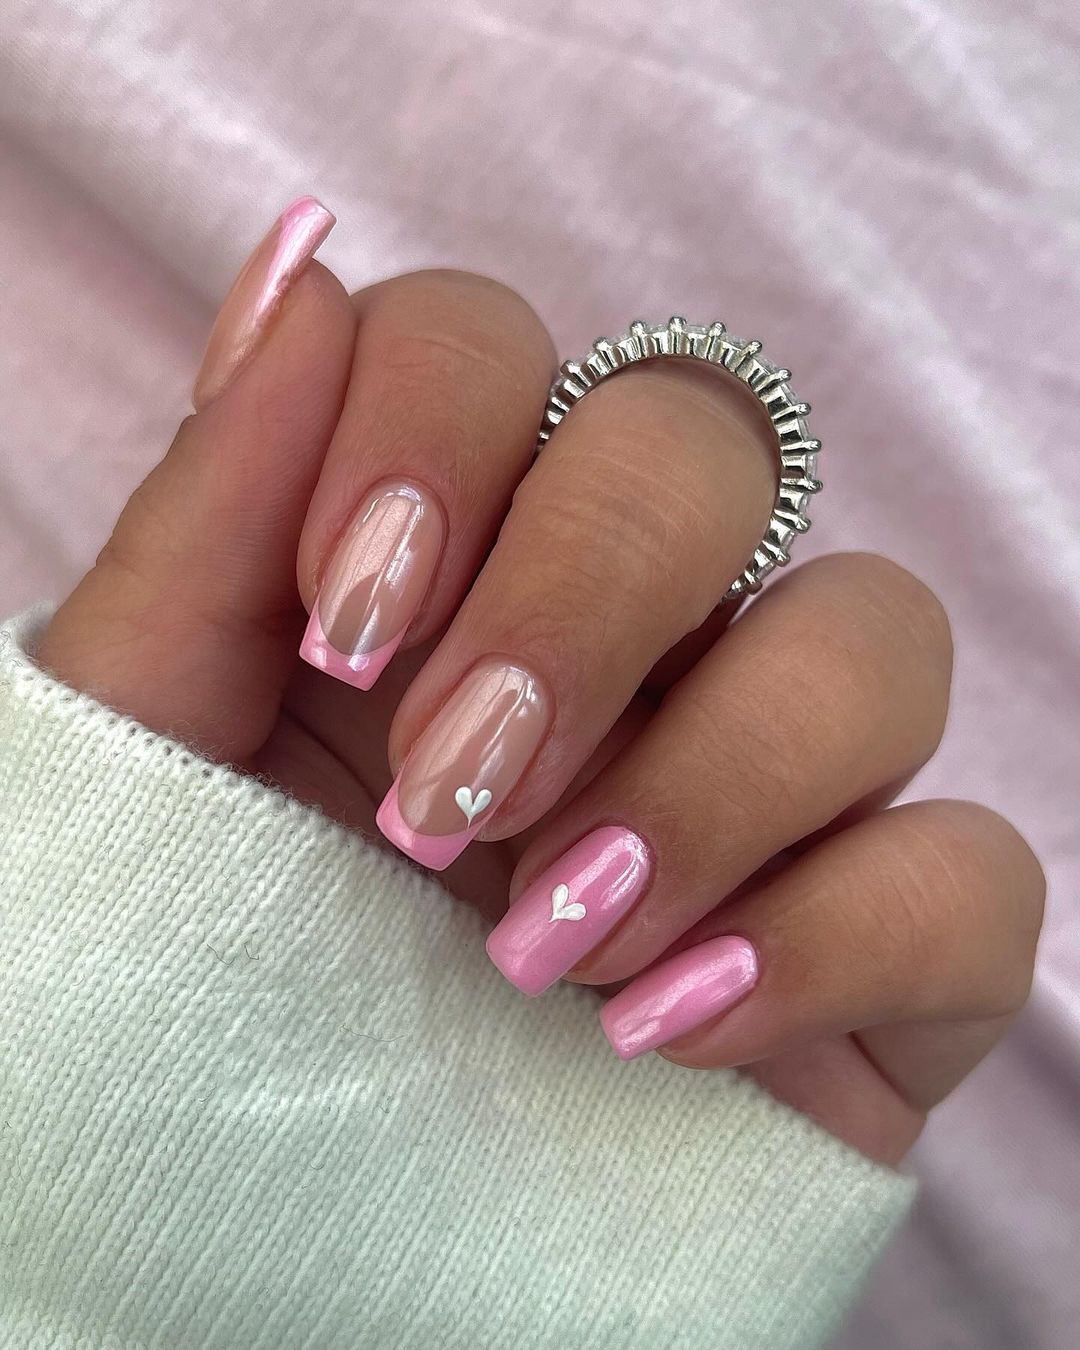
Sweetheart Pink
Think of this design as a love letter in the form of nail art. One finger is a full pink coverage, while charming white hearts on a pink base decorate the others. It’s simple, it’s cute, and it’s pretty. Plus, it screams summer pink nails.
Here’s what you’ll need to get started:
- Base coat (OPI: Natural Nail Base Coat)
- Pink polish (Essie: Mod Square)
- White polish for hearts (Sally Hansen: White On)
- Top coat (Essie: Good To Go)
As a professional manicurist myself, I’m enchanted by the simplicity and elegance of this design. The hearts are spaced perfectly and look like they were done with precision and care on purpose—which would be ideal for a toenails pedicure idea or gel mani.
Step-By-Step:
Apply your base coat first, then paint the index finger with two coats of pink polish. Use the dotting tool to create small white hearts on the other nails. Finish everything off with a fast-drying top coat to add some shine + protect your masterpiece!
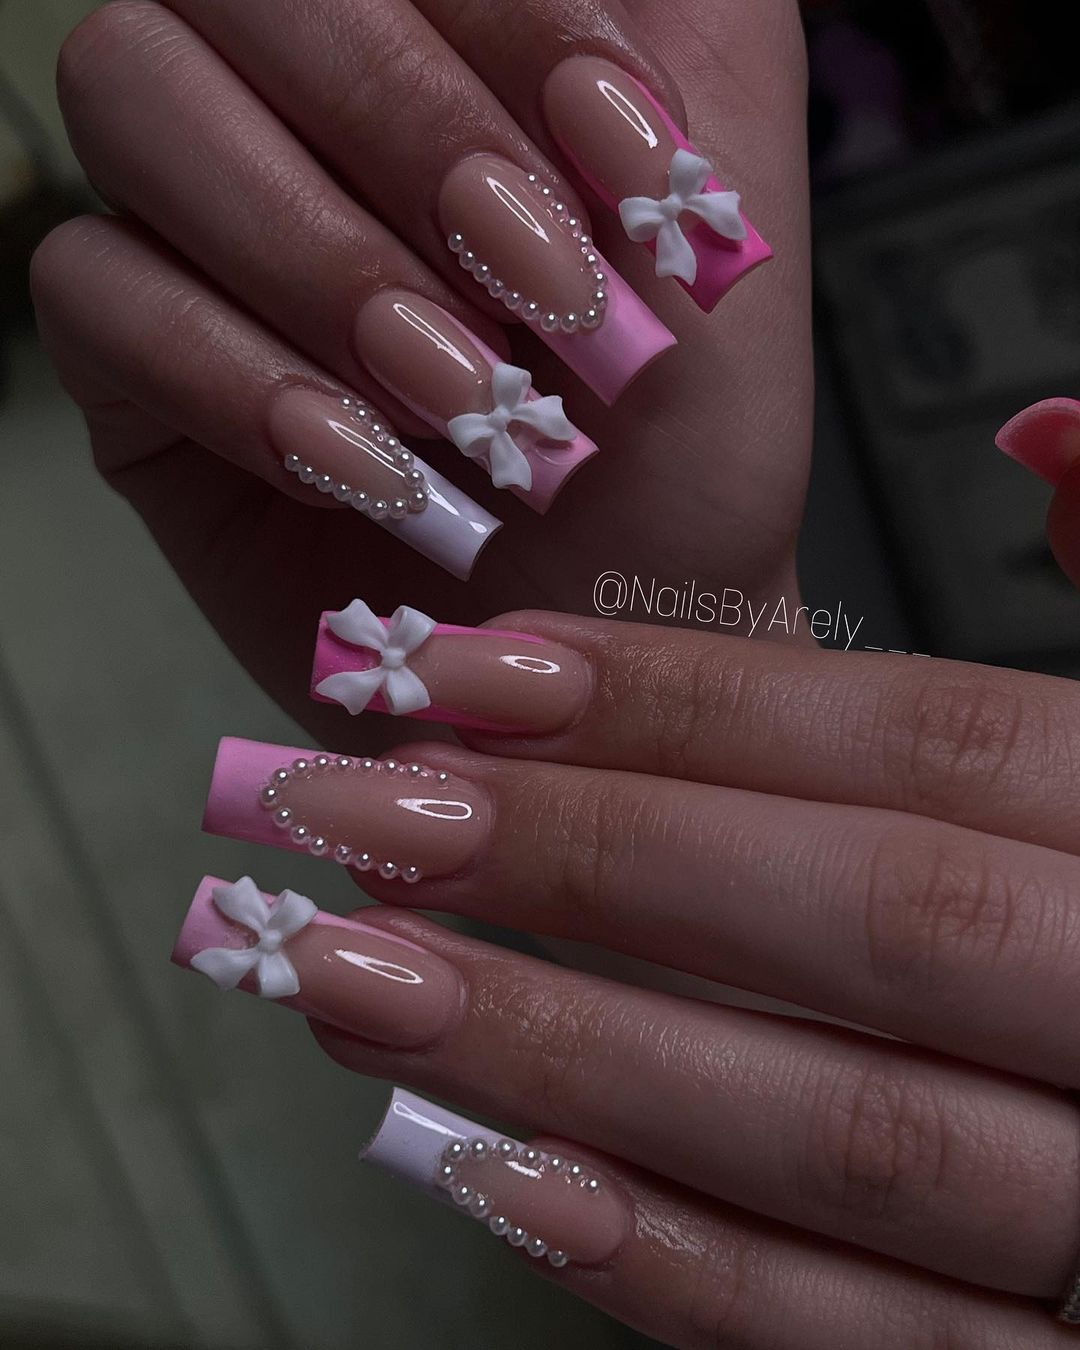
Pink French Charm
The classic French manicure will be reimagined with a twist of pink summer nails charm in the photo. The design adds a touch of trendy vibe to the simple elegance with white bows and pearl accents on pink tips. This is a gel design that would look great as inspo coffin nails or on a short square shape.
Consumables:
- Base coat (CND: Sticky Base Coat)
- Pink polish for the tips (Gelish: Pink Smoothie)
- White acrylic paint for bows
- Pearls or rhinestones
- Top coat (Seche Vite Dry Fast)
It’s easy to add a bright, fun contrast to the nude base by using three-dimensional embellishments. You can easily upgrade this traditional design by adding some neon edge.
DIY Guide:
Start with the base coat. Then apply the pink polish in a clean line to create the French tip. With acrylic paint, draw the bows and adhere the pearls with a dot of top coat. Seal everything with a clear top coat for lasting designs sparkle.
Gradient of Hearts
Using a gradient effect, this photo moves from a solid pink to clear base with adorable hearts trickling down the nail. It’s an excellent example of ombre gel nails that could be used for holiday inspiration or just adding some fun to your everyday look.
Ingredients involved:
- Base coat (OPI: Natural Nail Base Coat)
- Pink gel polish (Gelish: Hot Rod Red)
- White gel polish (for the hearts)
- Sponge (to create the gradient effect)
- Top coat (IBD: Just Gel Polish Top Coat)
The design starts with vivid colors but fades into a nice, soft pink. It’s perfect if you’re someone who wants neon glamour but is also into simplicity.
DIY Guide:
Begin by applying your base coat, then use the sponge to create a gradient effect with pink gel polish. Blend towards the tip. With a fine brush, add white gel hearts, cure under lamp and finish with top coat for glossy , designs sparkle finish.
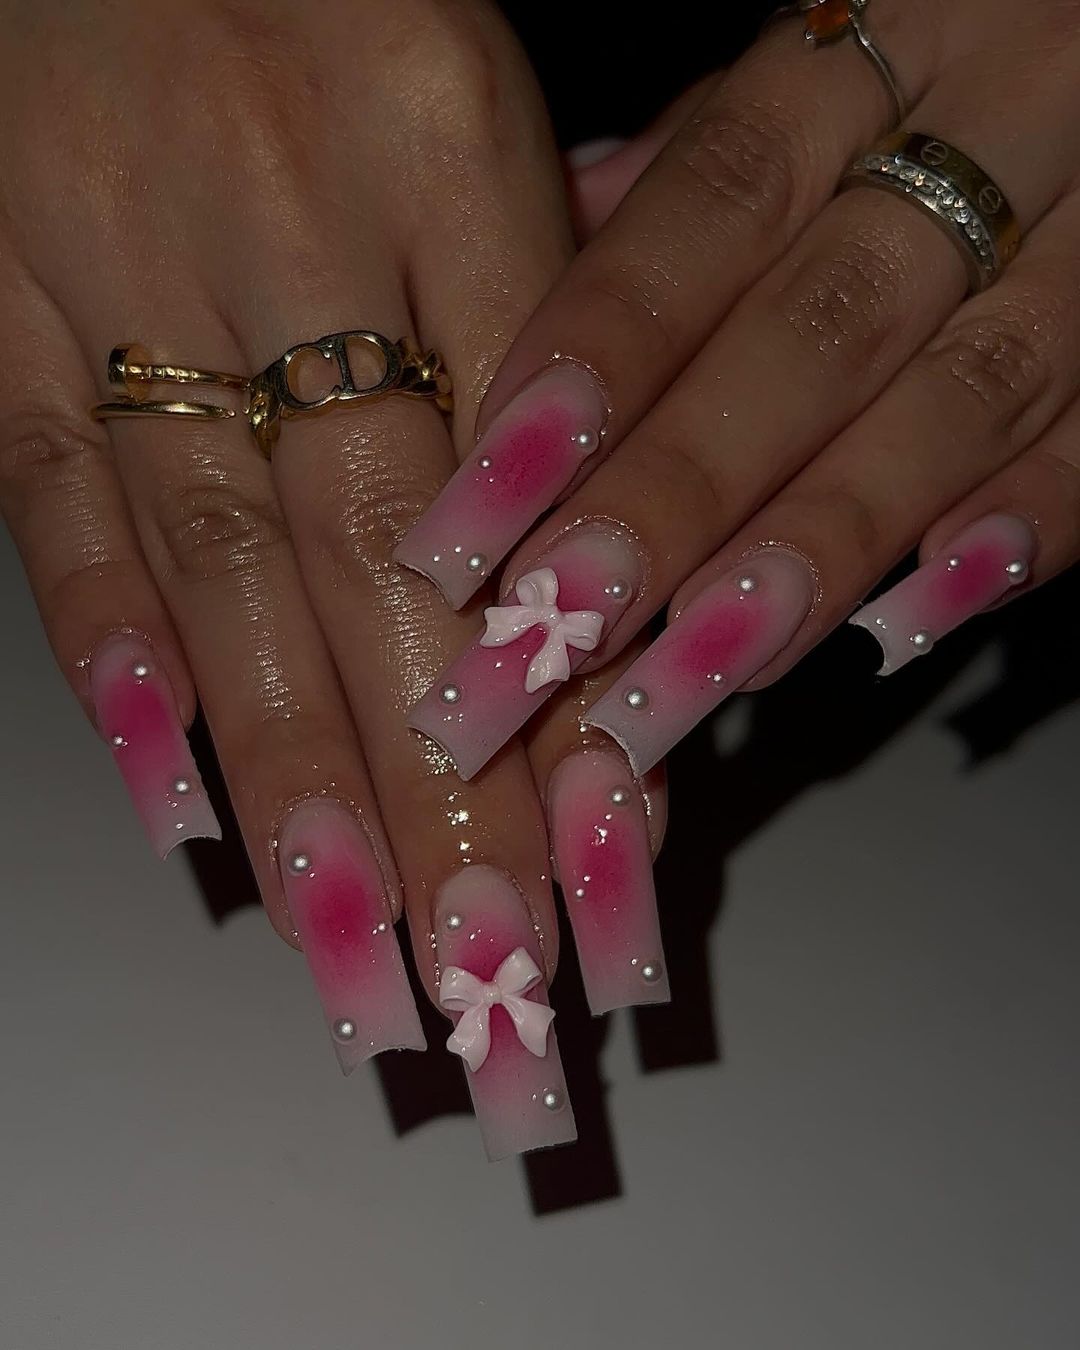
Pink Elegance with a Bow
Divine jazzy pink summer nails, a perfect mix between elegant and cool. Nude base with pink gradient at the bottom, little heart shapes and one big bow on the thumb with a rhinestone in the middle. Perfect for coffin or short square nails going for a cute but simple look.
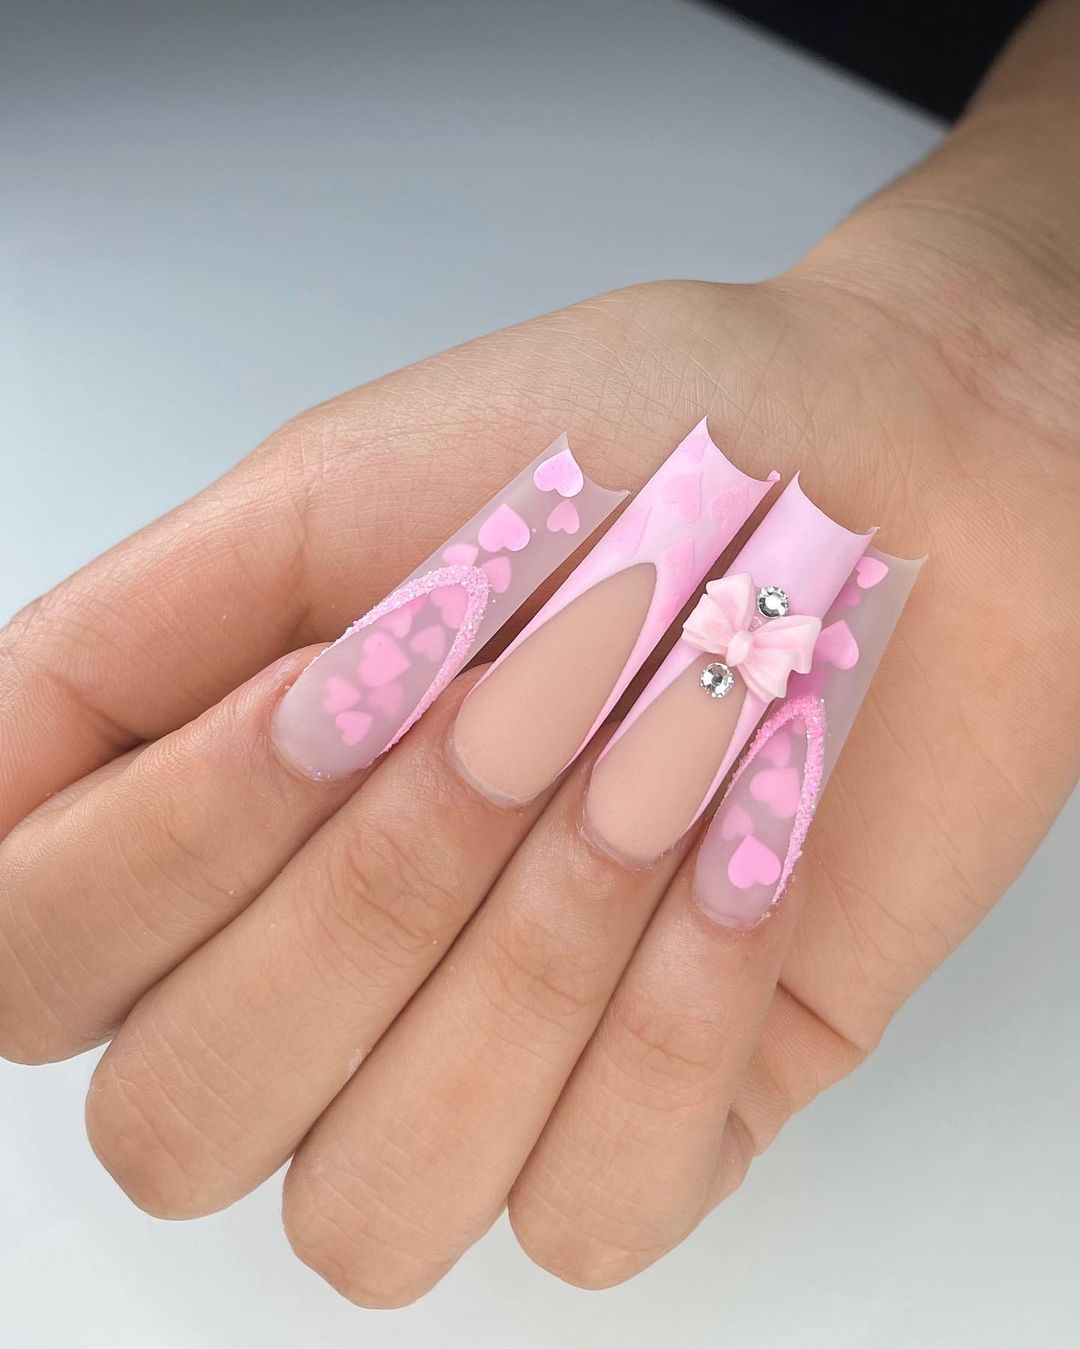
Items:
- Essie: First Base
- Essie: Ballet Slippers
- OPI: Pink Flamenco
- Sally Hansen: White On
- Pink ribbon that matches well with your chosen shades and rhinestone to bring it all together.
- OPI: Rapidry Top Coat
Gel here is effortlessly beautiful, giving you something fun yet professional for whatever summer occasions come your way.
Guide:
Put on the base coat then apply the nude polish. Do a gradient effect from pink polish, then delicately paint hearts. Attach bow with top coat dab and put rhinestone in its place. Finish everything off with another top coat to give your design some sparkle.
Starry Pink Gradient
The photo shows a stunning ombre look on nails that are done to perfection. The gradient starts with a vibrant pink and fades into a sheer base, which is topped with delicate white starburst designs. This look shows how gel nails can be both bright and elegant, making it perfect for the holiday season or just for everyday wear.
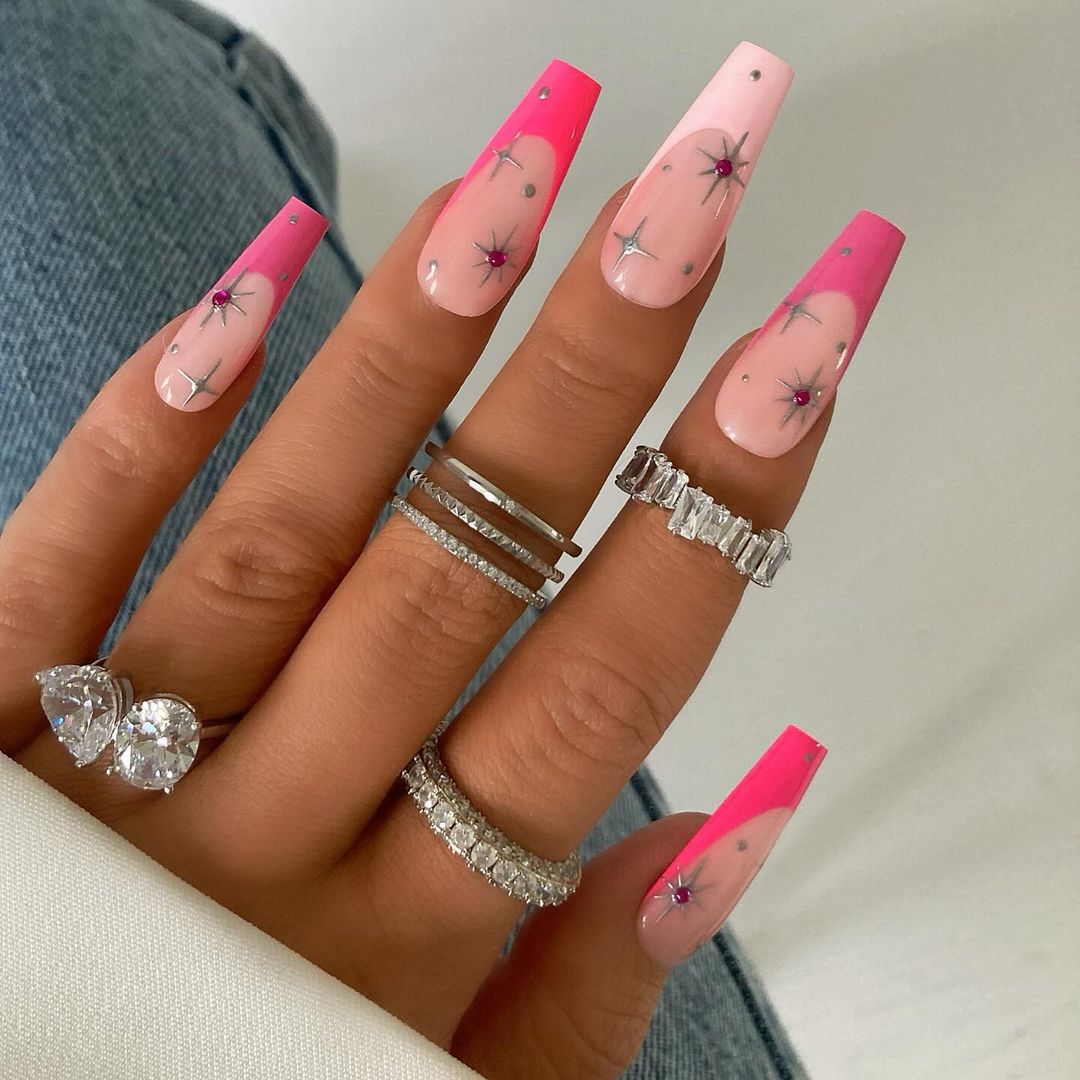
What you’ll need:
- Orly Bonder (or other base coat)
- Gelish: Shocking Pink (or another neon pink gel polish)
- Sally Hansen: White On (or another white polish)
- Gelish: Top It Off (or another top coat)
As someone who does this for a living, I appreciate the simplicity of this design. It pairs bright neons with simple artistry to create a chic nail idea that absolutely anyone can recreate.
How to get the look:
Apply your base coat, then sponge on your pink gel polish in order to achieve the ombré effect. Use a fine brush along with the white polish to make your starburst designs. Cure everything under a lamp before finishing off your nails with a top coat.
Gradient Hearts Charm
Imagine a romantic spin about the French tip that’s as pink as a strawberry. The touch of glitter in this one is right on point with those cute, little hearts. It can be easy to go overboard when incorporating pink into your summer nails, but this design manages to do it in moderation. Sometimes less is more.
What you need:
- Base coat (CND Stickey)
- Pink polish for gradient (Essie: Fiesta)
- Nude polish (Essie: Sand Tropez)
- White polish for hearts (Sally Hansen: White On)
- Top coat (Seche Vite Dry Fast)
The key to making these nails pop is finding the right balance between soft and loud colors. This guide will walk you through every step you need to take in order to achieve this beautiful style.
Let’s get started:
Start with a base coat, apply the nude polish, then work the pink polish from the tip to create the gradient effect. Use a dotting tool for the heart accents. Finish with a quick-dry top coat for durability and shine.
Marble Pink Fusion
Photo presents a luxurious twist on pink summer nails with an exquisite marble design. The seamless blend of translucent and pink hues, combined with abstract red patterns, offers a chic, sophisticated look. This is a trendy choice for anyone who loves gel nails with a creative edge, perfect for making a statement at holiday or beach gatherings.
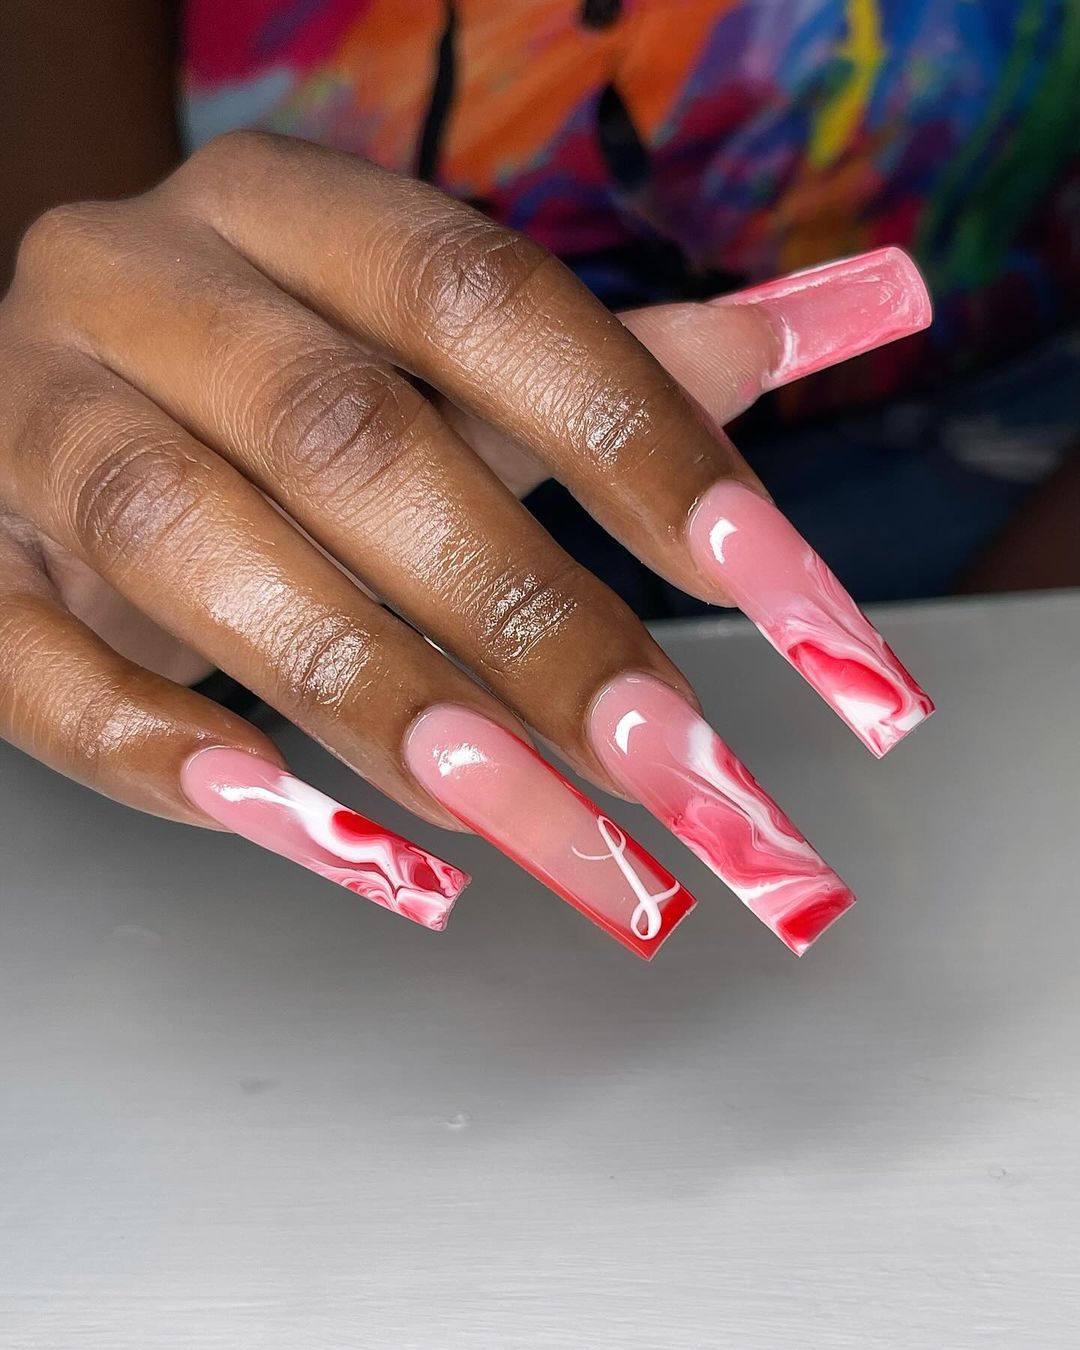
Supplies:
- Base coat (OPI: Natural Nail Base Coat)
- Pink gel polish (Gelish: It’s a Lily)
- Red gel polish (Gelish: Red Roses)
- Marbleizing tool
- Top coat (Gelish: Top It Off)
From an expert perspective, this manicure’s depth and intricacy are stunning—think nail art that belongs in the MoMA. But the super-fine details also make it ideal for those seeking more wearable acrylics.
DIY Guide:
Apply base coat; paint two coats of pink gel polish; while still wet, add dots of red gel polish and use a marbleizing tool to drag the colors together; cure under lamp; then seal everything in with top coat.
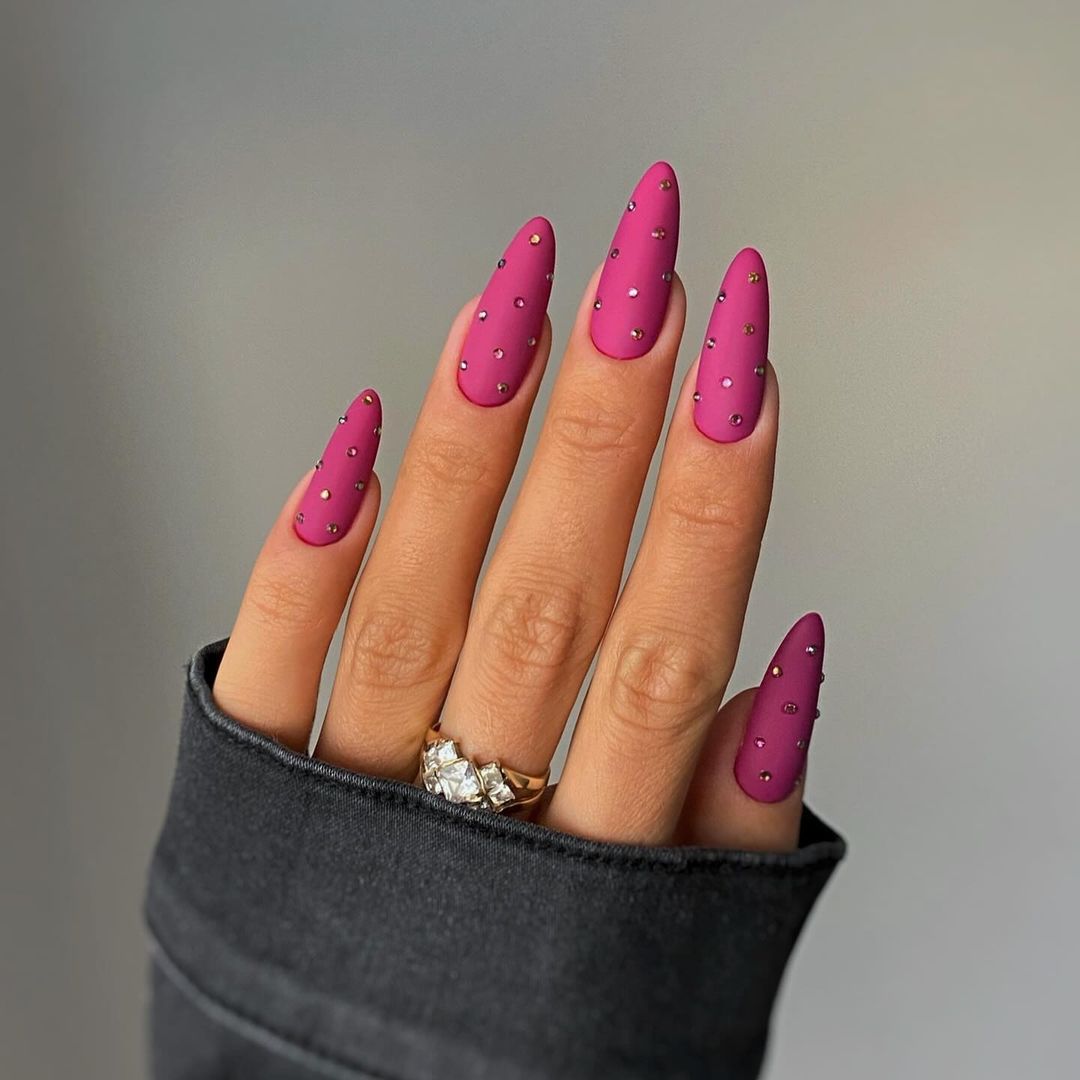
Studded Matte Elegance
Imagine a picture-perfect matte nail design. The one you’ve got in your head is this: a deep pink base with gold stud accents. That’s exactly what we’re giving you today.
For the do-it-yourselfers, it’s quite easy to achieve this look on your own. You’ll need a few consumables:
- Base coat (CND: Sticky Base Coat)
- Matte pink polish (Essie: Matte About You)
- Gold studs
- Nail glue
- Matte top coat (OPI: Matte Top Coat)
Nail art enthusiasts will appreciate how bright and elegant this gel nail design is. It’s perfect for an almond or short square shape, and is sure to give off some serious inspo vibes.
If pink summer nails are your thing, then you know that they can come in many different styles. This design show that the matte finish is all it takes to get trendy with it.
Here’s how you can make it happen:
Begin with the base coat and follow with a coat of pink polish. Once dry, apply a matte top coat. Use nail glue to adhere gold studs in your desired pattern, and skip the top coat to maintain the matte finish.
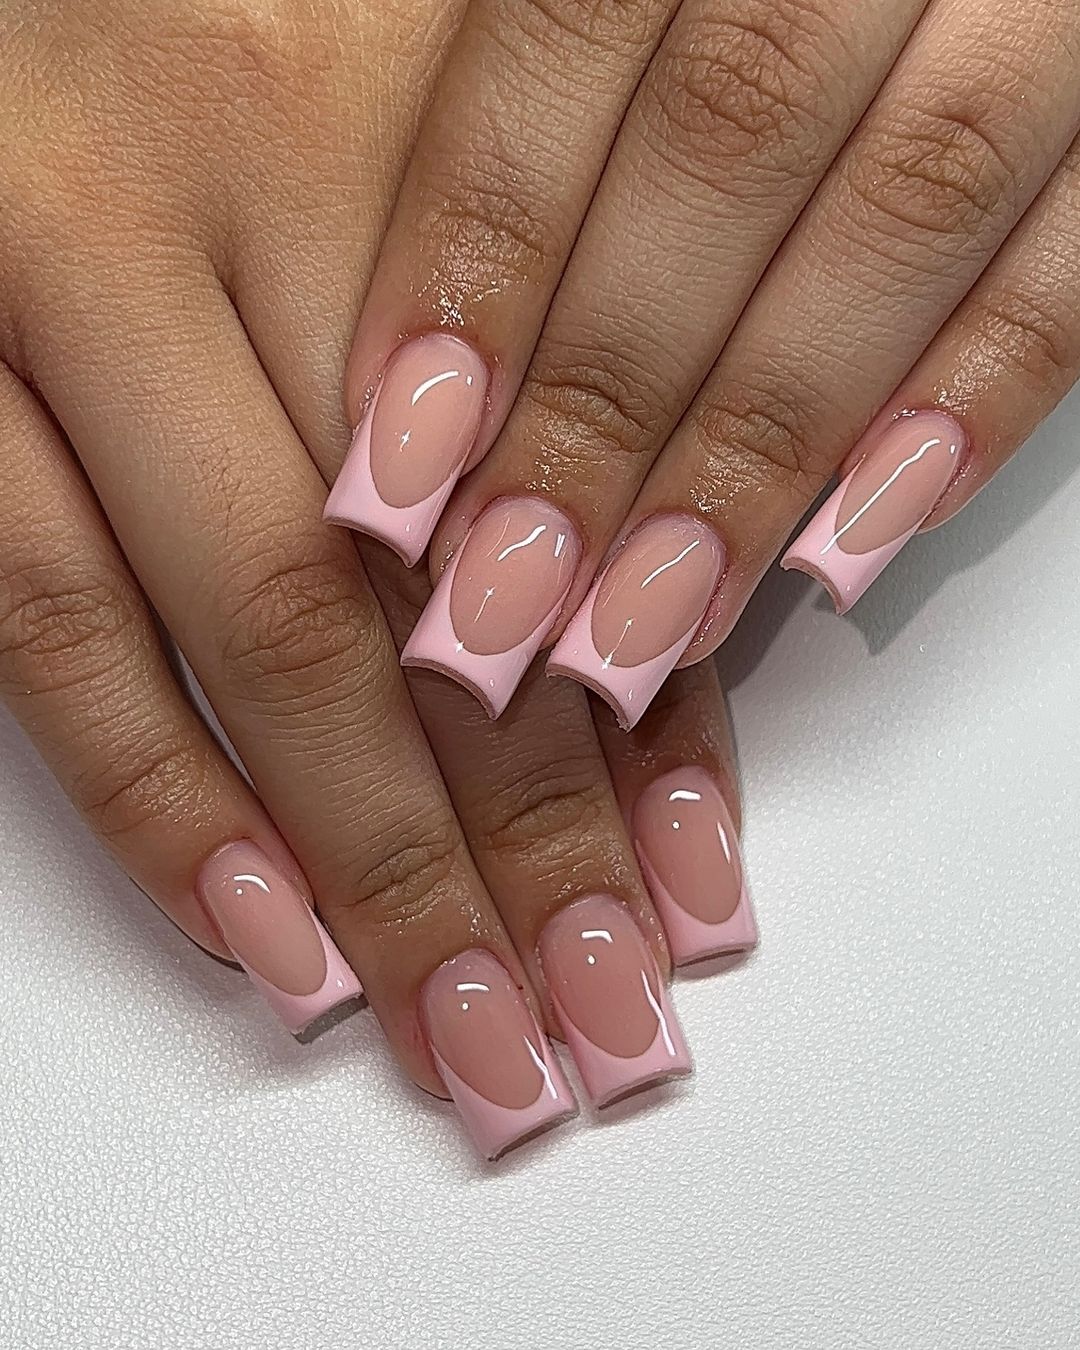
Pink French Perfection
Photo breathes life into a classic style with a modern twist. This look brings the spotlight to its perfectly pink French tip that’s vivid, cute, and simply beautiful. The lines are neat and consistent in order to show off the professional technique used on this short gel look or simple short manicure.
Materials:
- Base coat (Essie: Here to Stay)
- Pink polish for tips (OPI: Short Stop)
- Nude polish for base (Essie: Mademoiselle)
- Top coat (Sally Hansen: Insta-Dri Anti-Chip)
The French manicure will never go out of style, and the addition of this bold color will be perfect for your summer fits no matter how casual or dressed up they are.
Guide:
Start by applying your base coat, and then paint two coats of nude polish onto each nail. After allowing time for the nails to dry, carefully apply the pink polish to each tip before sealing it all together with a shiny top coat.
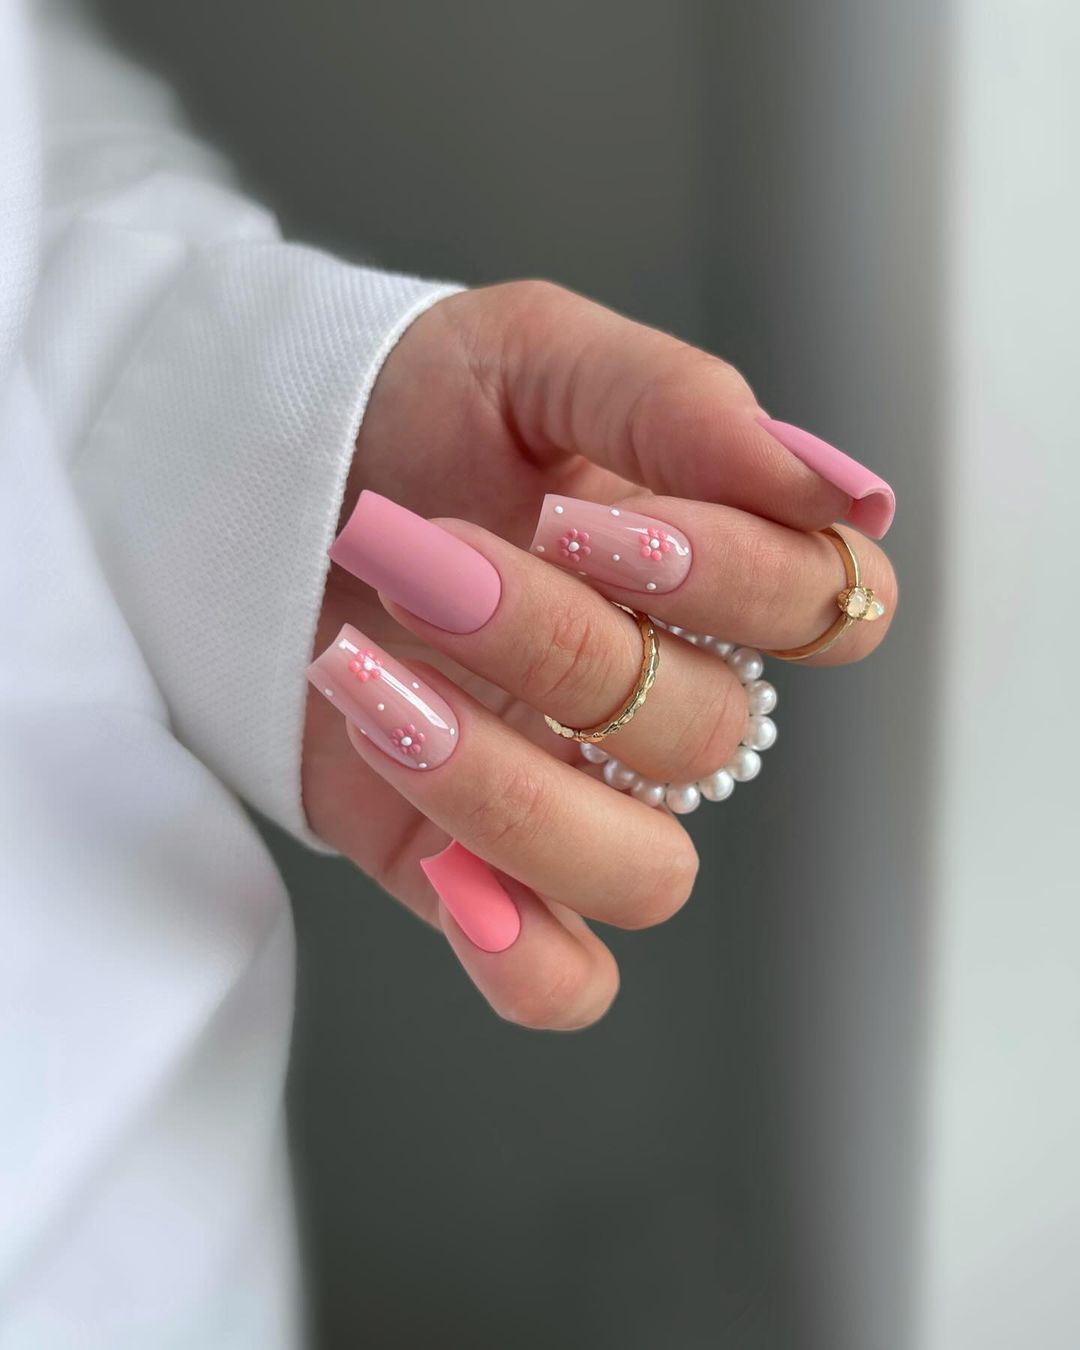
Pink Blossom Chic
A spectrum of soft pinks with a matte finish on some nails and delicate flower art on others, this mani is pretty, trendy and ready to make a statement. With a white floral print outlined in subtle sparkles on the accent nail, you’ve got a pink summer nails look that’s perfect for any occasion, holiday or not.
What You’ll Need:
- Base coat (Essie: Strong Start)
- Matte pink polish (Essie: Comfy in Cashmere)
- White polish for floral details (OPI: Alpine Snow)
- Fine detailing brush
- Rhinestones
- Matte top coat (OPI: Matte Top Coat)
The combination of matte polish and detailed art makes this mani feel simple, bright and fun — perfect for summer!
DIY Guide:
After your base coat, apply two coats of the pink matte polish. On the detailed nails, use a fine brush to paint white flowers and add rhinestones while the polish is still tacky. Avoid using top coat if you want to maintain the matte finish on some nails! For the other ones though — apply a clear top coat to keep everything secure.
Sleek Pink Simplicity
Photo is the epitome of minimalism with a fresh, clean pink that’s just perfect. And in case you didn’t know, simple short nails are very “in” right now. These nails are trendy, pretty and cute all at the same time. If you want your nails to make a statement but not be over the top, this is the way to go.

In order:
- Base coat (CND: Sticky Base Coat)
- Pink polish (Gelish: Pink Smoothie)
- Top coat (Gelish: Top It Off)
Simple short nails can be dressed up or down and they’ll look fabulous either way. Whether you’re going for casual or formal these gel or acrylic nails will take your outfit to a whole new level.
Here’s how it’s done:
Start with the base coat then move onto two coats of pink polish. Make sure each coat dries completely before moving on to avoid smudges! Finish everything off with a top coat for extra shine because who doesn’t love sparkle and shine?
Pink Ombre Dreams
Imagine a whimsical ombre effect, playing with pink and white. White polka dots sparkle at the end of translucent tips. A cute bow accompanies this art piece on your beautiful nails to make it stand out during day and night.
These items are required:
- Base coat (OPI: Natural Nail Base Coat)
- Pink gel polish (Gelish: Kiss Me, I’m a Prince)
- Polish for white dots (Sally Hansen: White On)
- Pink ribbon for bow
- Top coat (IBD: Just Gel Polish Top Coat)
- This manicure balances elegance and fun with its simple but artistic design.
DIY Guide:
After applying the base coat, apply the pink polish. Blend towards the tips to create the ombre effect. Add white dots and apply a pink ribbon bow on the accent nail. Cure under a lamp and seal with a top coat for durability and a glossy finish.
Swirls and Sparkles
Transparent nail tips that have been designed with a hot pink swirl and are embellished with sparkling stones and bows. The look is very luxurious and captivating. The trendy transparency paired with the boldness of the bright pink color help give the nails depth, which makes them perfect for anyone who likes to stand out when it comes to their nails.
Materials:
- A base coat (Essie: Strong Start)
- Pink builder gel
- Pink acrylic paint
- Stones and charms
- A top coat (Gelish: Top It Off)
As an expert in nail design, I can appreciate how much effort goes into making these pretty designs. You must have a steady hand as well as an eye for design. But in the end they make your hands look amazing on special holidays!
Guide:
Application process of how to do it yourself. Begin by prepping your nails with a strong start base coat. Then apply a thin layer of pink builder gel to build structure onto your clear nails. After you’ve let that cure, begin creating the swirls using pink acrylic paint. Finally attach all stones and bows using nail glue so they don’t fall off, then seal everything together using a top coat!
Pink Marble Elegance
This is a beautiful take on marble nail art, with white veins over a soft pink base. The design is elegant and minimalist, so it’s perfect for someone who wants a sophisticated short manicure that looks simple. It can also work as a trendy option for toenails pedicure ideas if you want to try that.
You’ll need these items:
- Base coat (CND: Sticky Base Coat)
- Soft pink polish (OPI: Put it in Neutral)
- White polish for marbling (OPI: Alpine Snow)
- A detailing brush
- Top coat (Seche Vite Dry Fast)
The bright base and white marbling makes this look fun and professional at the same time. This is what pink summer nails look like to me!
Here’s how to do it yourself:
Start with the base coat. Then, apply your soft pink polish on top. Use the detailing brush to lightly drag white polish across the nails to create the marble effect. Finish up with a top coat and get ready to show off your new sparkle!
Pink Flare French Tips
The picture shows something pretty out of the ordinary: a French tip design that’s been given a not so average neon pink flare! The base is just an innocent nude color, but when paired with this bright and bold pop, it makes it one trendy choice. Good for those who want to give classic looks a little twist.
Consumables:
- A Sally Hansen base coat named “hard as nails”
- Essie nude polish called “ballet slippers”
- China Glaze neon pink polish named “shocking pink”
- OPI top coat called “rapidry top coat”
Simple yet vibrant enough to turn heads. It won’t take you long to create this look, making it perfect for some quick summer fun!
DIY guide:
Start off applying the base coat first. Then move on to the nude polish, once the first layer has dried thoroughly. Once dry apply your neon tip color using either a brush or tape to create a clean line. Finish everything off with a final top coat and watch your shiny new design sparkle!
FAQ
Q: Can I achieve these nail designs without professional tools?
A: Absolutely! With a steady hand, some patience, and a bit of practice, you can recreate these designs at home. The key is to let each layer dry completely before moving on to the next.
Q: How long will a gel manicure last?
A: A properly applied gel manicure can last up to three weeks, depending on nail growth and how well you care for your nails.
Q: What’s the best way to remove gel polish?
A: The safest way is to soak your nails in acetone and gently scrape the polish off with a wooden stick, taking care not to damage the nail bed.
With these styles, your nails will not only embrace the latest trends of the season but also echo the playful, carefree spirit of summer itself!
Save Pin